


Easy Outdoor Plastic Playhouse Makeover!

Recently, I scooped up a secondhand Step2 plastic playhouse for FREE from a neighbor whose children had outgrown. It was faded, but it still had a lot of life left in it. And with a little elbow grease and spray paint, and for around $50 we were able to makeover this plastic playhouse into a backyard oasis for our 3 little girls.
Note that this post will be short and sweet to give you a high-level view on this DIY project. So if you have a tired-looking playhouse that needs an upgrade, remember to click over to my blog for the full tutorial (link at the end of this post!)
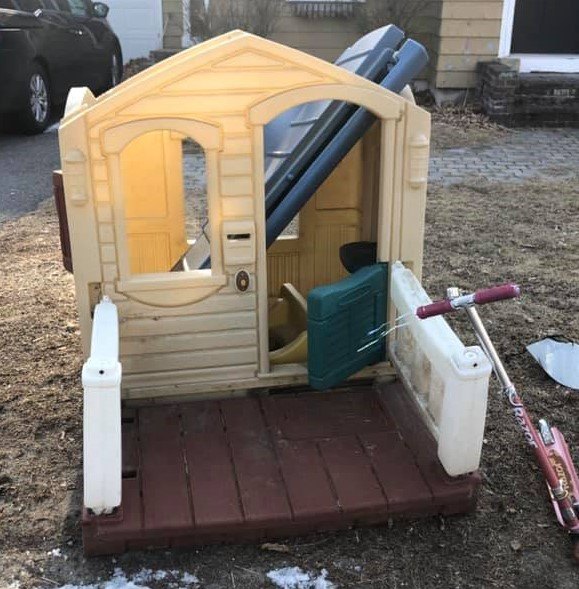
Maybe you already have a playhouse that's a bit faded or tired in your backyard or stored in the garage. But if you don't, there are lots of ways to get a secondhand plastic playhouse ether free or at low cost, especially on-line.
Check out Facebook Recycling or Yard Sale Groups in your geographic area. Or Craigslist, LetGo, Freecycle. Or just keep an eye out around your neighborhood. One evidently will pop up on the sidewalk on waste and recycling collection days.
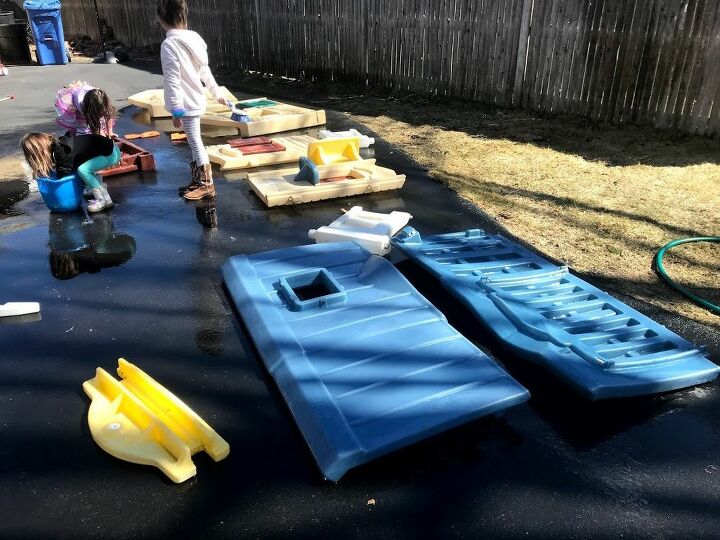
Before any painting can occur, disassemble and clean. DON'T try to do spray paint while assembled - you will make a mess. DON'T try to tape sections and paint - tape pulls paint off of the plastic. Take the time to disassemble the playhouse.
And, yes I speak from experience. For tricks to help disassemble the playhouse, check out the full post with the link to my blog below.
Next is a good cleaning. Ideally, a pressure washer would be key. But we don't have one, so we recruited our children and gave them buckets of soapy water and a hose. It was a nice sunny day and they actually ended up having a lot of fun playing in the water.
One thing that I've noticed about these plastic playhouses is that water tends to accumulate inside. To drain the water out of the playhouse, drill small holes in the bottom parts.
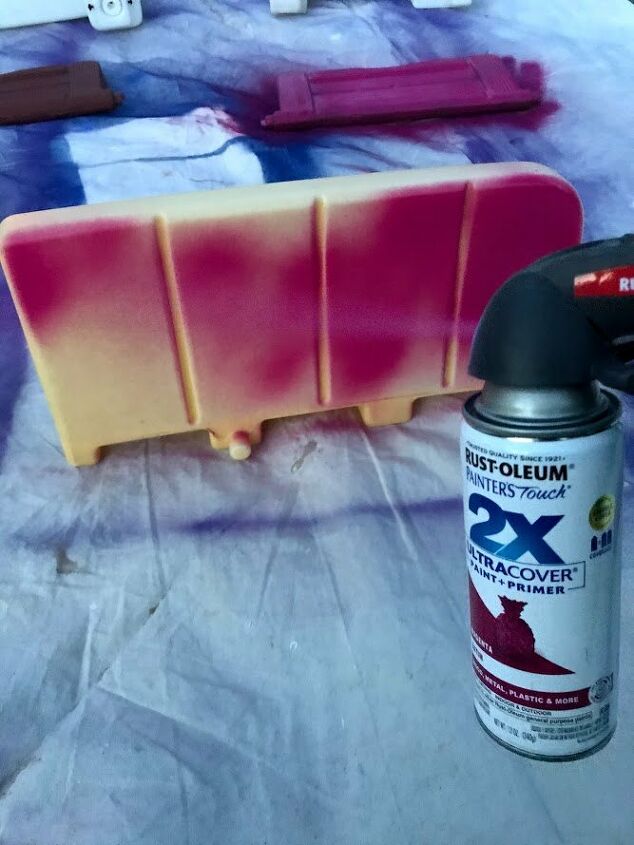
Here's the fun part - seeing the instant transformation. Once dry, place the disassembled playhouse pieces out on a series of canvas drop cloths. Put on gloves and safety goggles, strap a spray can into its holder, shake it up and get spraying!
Make sure you shake the spray paint can for at least one minute, listening to the mixing ball rattle. Please don’t skimp on this step. Otherwise the paint won’t be sufficiently mixed, resulting in splotches. (oops, guilty as charged)
According to the can's instructions, hold it about 10-16 inches from the playhouse and spray in a steady back-and-forth motion, slightly overlapping each stroke. Honestly, I struggled keeping the can 10-16 inches away and sprayed closer. Sigh…. oh well. Still turned out OK!
For more details on our color combination, number of coats needed, type of spray paint used, and does it matter which sheen or paint to use, etc.... be sure to click the link to the full tutorial below.
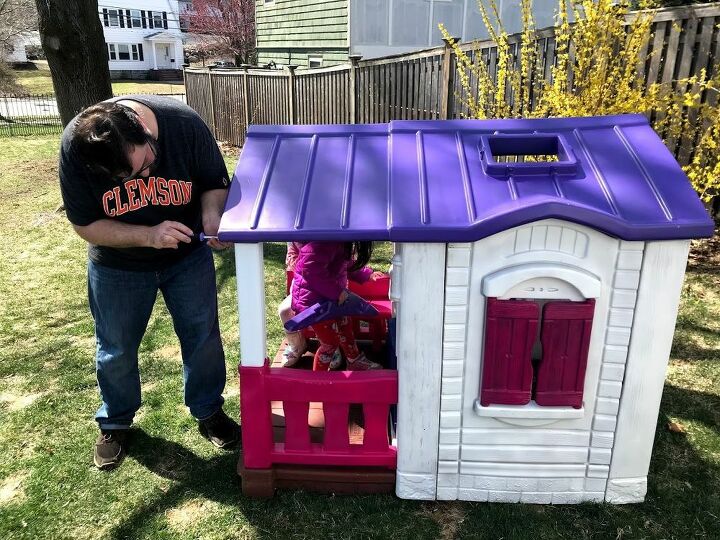
After the playhouse has COMPLETELY dried, reassemble and enjoy! My girls just couldn't wait until the house was completely reassembled to start so they tried to "help" daddy put it back together.
Once reassembled, seal the whole house for added durability with a clear matte spray Adding this clear coat supposedly protects your paint job, and keeps an updated playhouse looking new a bit longer.
Ideally, I would have sealed before reassembling, but I didn't get to it in time. (My husband thought I was done and started reassembling while I was inside making lunch for the crew).

Now that the plastic playhouse is reassembled, it’s time to add little details to make it a cozy and welcoming playhouse for your kids!
There is a ton of unique finishes you could add to tailor a plastic playhouse, including a window box, lanterns, door knob, doormat.
I've decided to wait a few weeks before I add any touches to the girls's playhouse. Why? Two reasons:
- These poor girls were waiting so patiently for this house, I couldn’t deprive them any longer!
- There are SO many creative ideas to improve this house. Almost too many to choose from. I love them all. But, realistically I can’t add them all.
I’ll post updated pics once the house is completely done! Be sure to check out the full tutorial on my blog (and see updated pics!).


Frequently asked questions
Have a question about this project?