


Fireplace Makeover

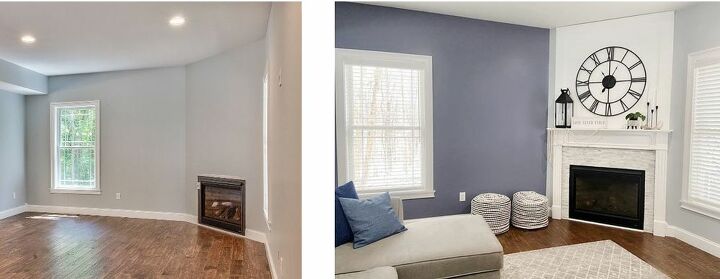
Were officially in fireplace season, so I thought it would be a good time to recap our fireplace makeover. This project was one of the first DIYs we tackled in our new home. We did it in baby steps over a few months, but if we knew what we wanted, we definitely could have done it all in one shot.
What You’ll Need:
Fireplace surround
Faux stone/tile
Mastic adhesive
Molding/MDF board
Caulk
Liquid nails
Paint
Step 1: Attach fireplace surround
First we hung the fireplace surround. We removed our baseboards first so that it would lay flush to the wall. Hang your surround according to the instructions that come with the product.
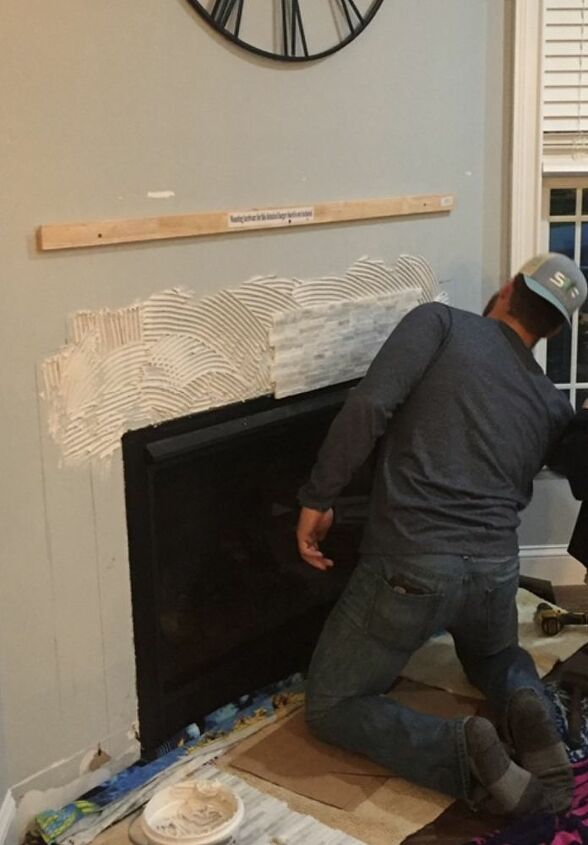
Step 2: Attach tile
Remove mantle surround, and attach tile. You can probably do the tile step first if you want to, but it was helpful to see exactly where the surround was going to lay (note our pencil marks), so we knew exactly where we would have to tile. We attached our tile with mastic, pressing firmly into the wall.
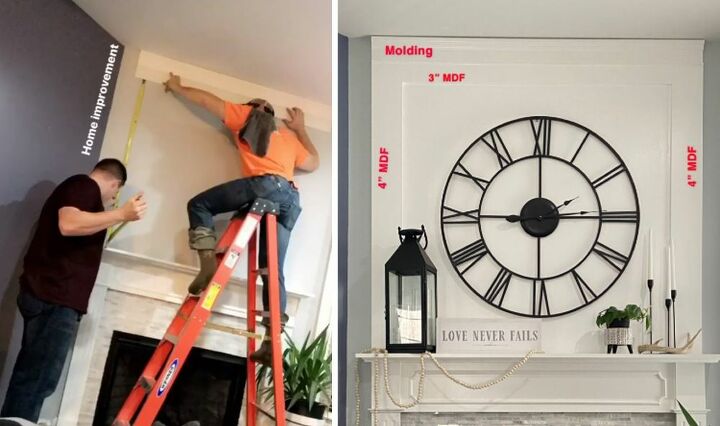
Step 3: Add molding and MDF
Once our stone was set, we added back on the mantle surround and attached the molding and MDF. First, we attached a molding piece along the ceiling. Then we attached 4 inch MDF boards, perpendicular to the molding. Finally, we attached a 3 inch MDF board right under the molding piece. All pieces were attached using liquid nails and brad nails.
Step 4: Caulk and paint
Once the liquid nails dried we caulked all of our seams, and painted the whole upper half.
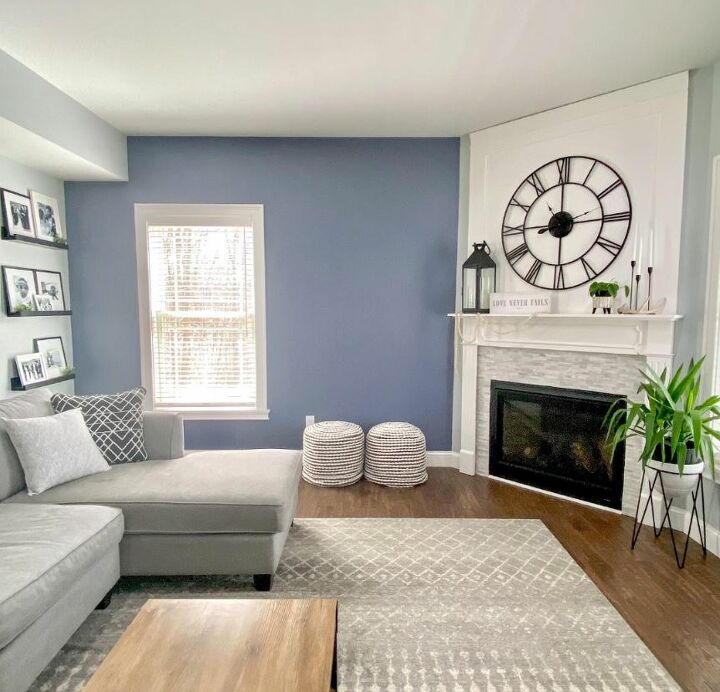
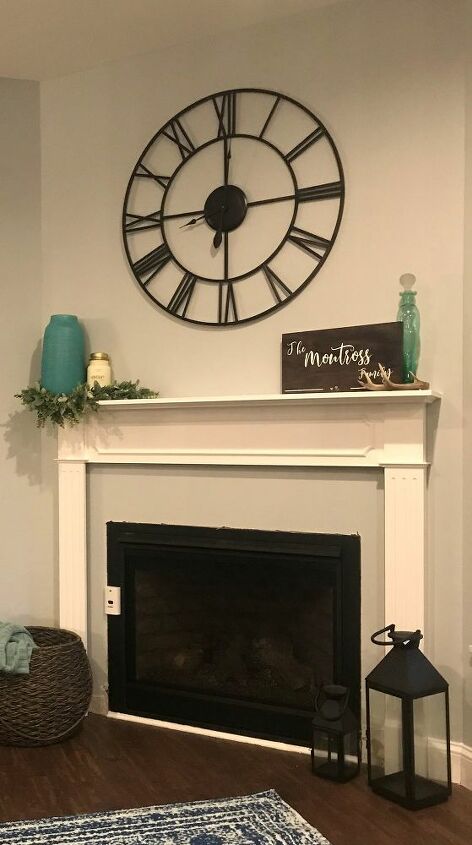
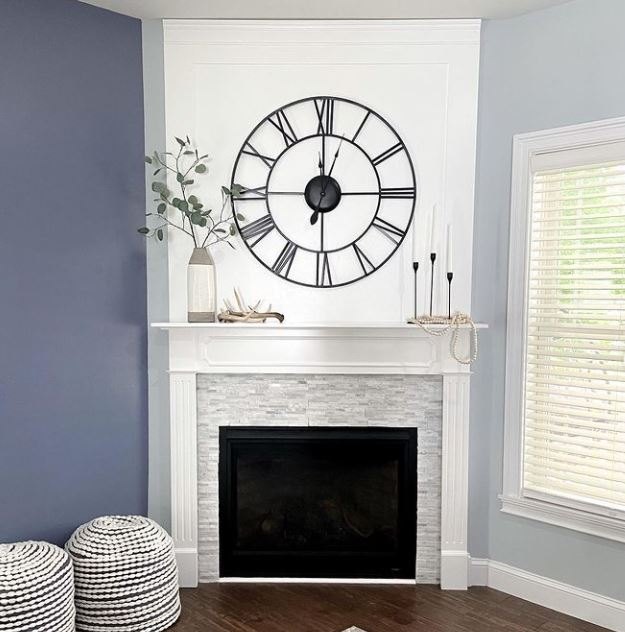
Stone around a fireplace is just beautiful, and extending a fireplace up to the ceiling adds so much height to a room, because it draws the eye up. We were amazed at how tall our living room felt once we added the top portion! This was one of our most impactful DIYs, that really made the fireplace the focal point of our living room.
Resources for this project:
See all materials


Comments
Join the conversation
-
Beautiful. What color of blue is on your wall? It is a beautiful color.
-
Fabulous room! If it was me...I would hang the family photos on the bold blank blue wall so while viewing the fireplace, I could see my wonder family, instead of behind me. Enjoy


Frequently asked questions
Have a question about this project?
What an amazing change to this room! Your sense of style is spot on! The room is very clean-looking but still very warm and inviting (It looked stark and cold before). I love the tile that you used around the fireplace. It seems that the individual little tiles are set very close together. Did you have to grout it?
Beautiful!!! What I don't get is, why would they build a house without a fireplace completed? or did you guys have it built and told them not to finish that because you wanted to tackle it yourselves? Any way, it turned out amazing!!! love it.
I would love to do this to over my steam radiators, do you have any suggestions...?