


Landscape Wow

While replanting and changing the configuration of our flowers beds I decided to give something a try that would add a nice pop and exciting visual. What better way to do that than to add a koi pond.
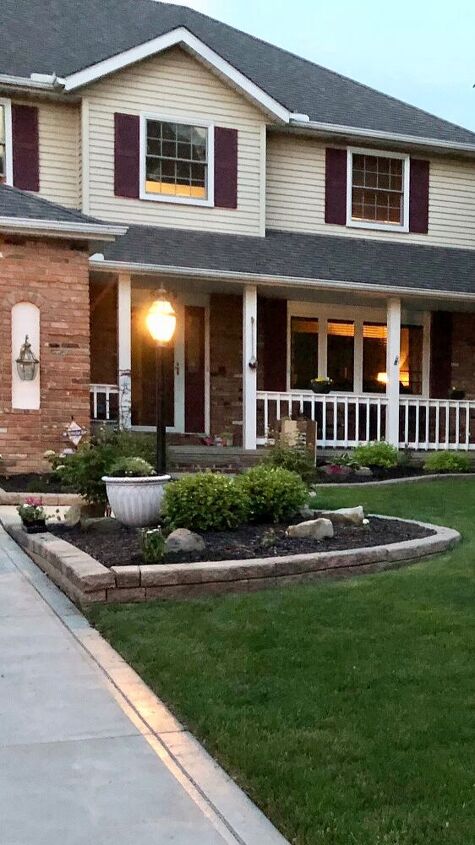
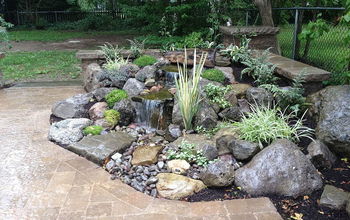
Decided to make this island the focal point of our landscaping to start I removed the planters and the rock decor from this flower bed. I also carefully removed bushes as I planned to replant these.
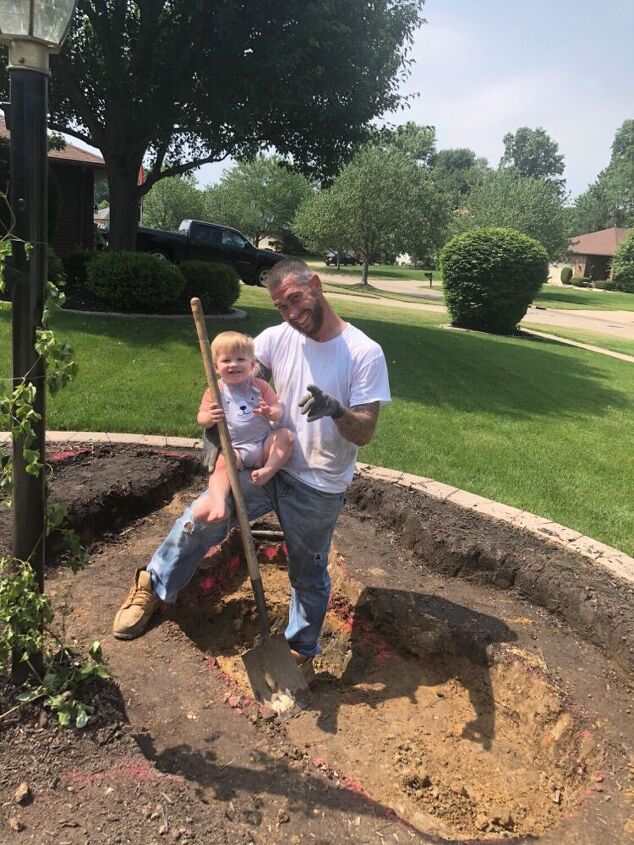
After recruiting my handy helper here I started by spray painting a random design out in the flower bed. This painted area allowed me to design the pond shape and follow the paint lines for digging.
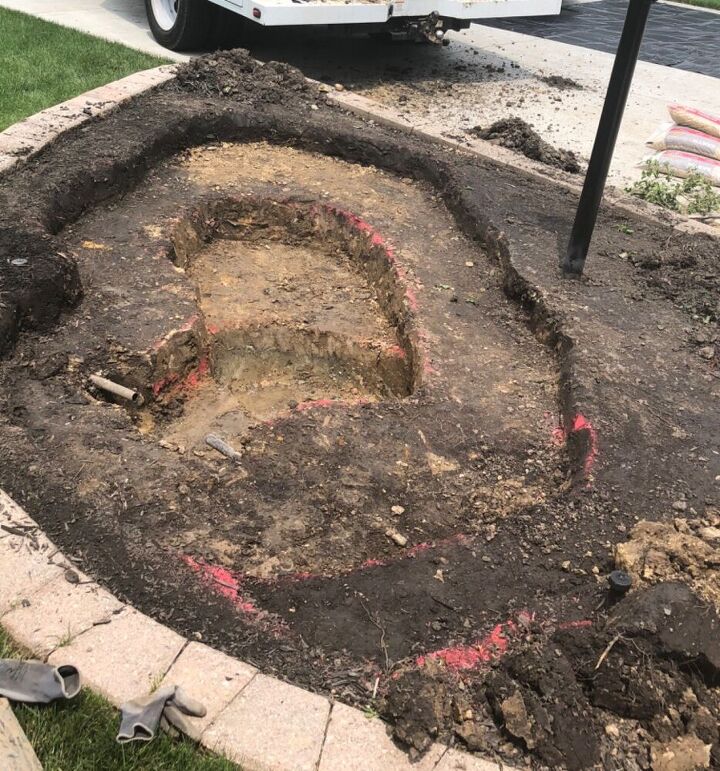
With the anticipation of adding fish to this pond I wanted to make sure it was deep enough to allow survival though our winters. To achieve a depth I added 3 levels to the pond level 1 was 12inch deep. Level 2 was 24inch and the smaller deeper level was 36inch. I also periodically checked each level as I dug and checked level from side to side so water level would be even once filled.
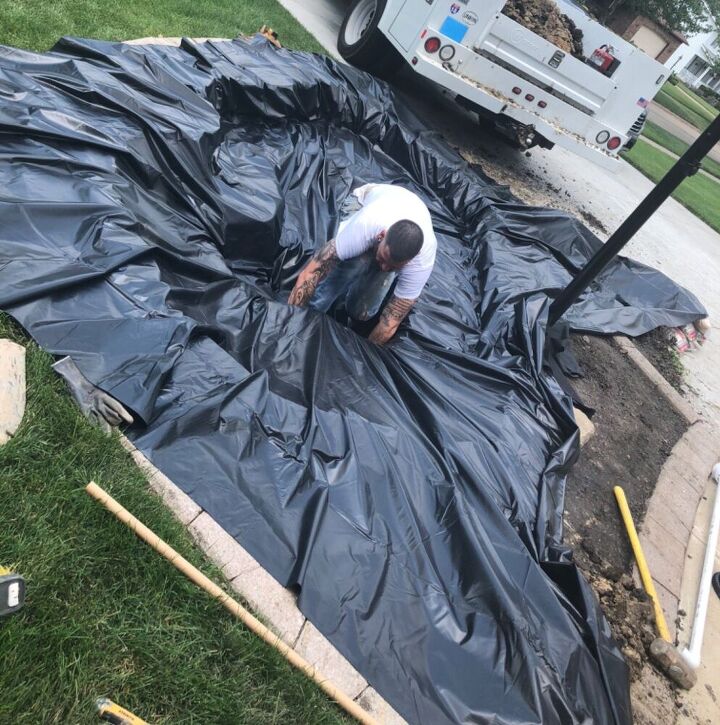
While digging laid the rubber liner out in the sun to soften this made installation easier to stretch and move. I started in the lowest layer making sure I had enough material to cover the bottom and the side walls.
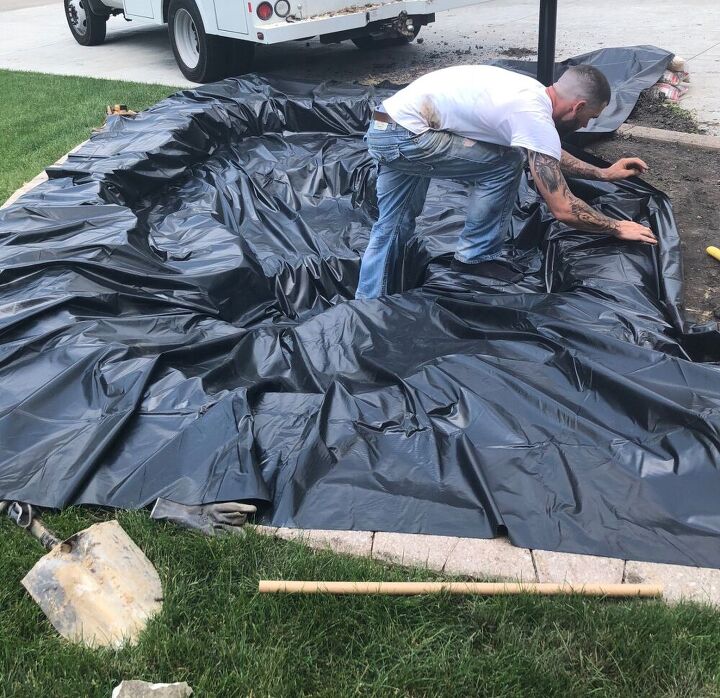
Working my way from the bottom to the top portion I stretched the liner making sure it formed to all areas and shape of what I had dug out. This is also a good time to feel around make sure you have no sharp rocks or anything that could cut your liner.
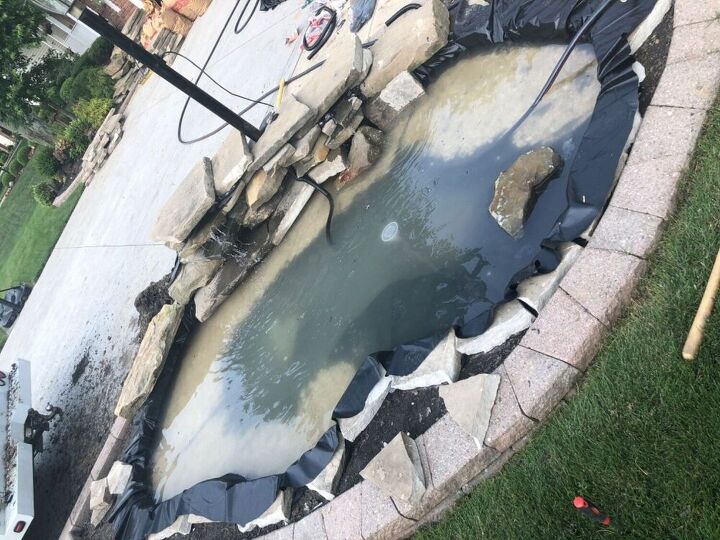
Here I began to fill the pond with water. Once the pond water level was close to full and liner was tight I trimmed around edges and began to place rock around the boarder as well as forming the waterfall. There is no specific way to do this it’s all about your vision. While forming waterfall it’s important to slightly angle rocks toward pond for water flow. I also added a few bags of river rock inside to hide some of the liner for a more natural look.
Once I got the hardscape were I wanted ( this took a couple times of stepping back and redoing) I then added my pump and tubing to the waterfall. In my case the light pole had existing electrical I was able to plug into. This size pond I used a 2000gph pump with a 1 inch hose. Secondary pump is just a small fountain pump.
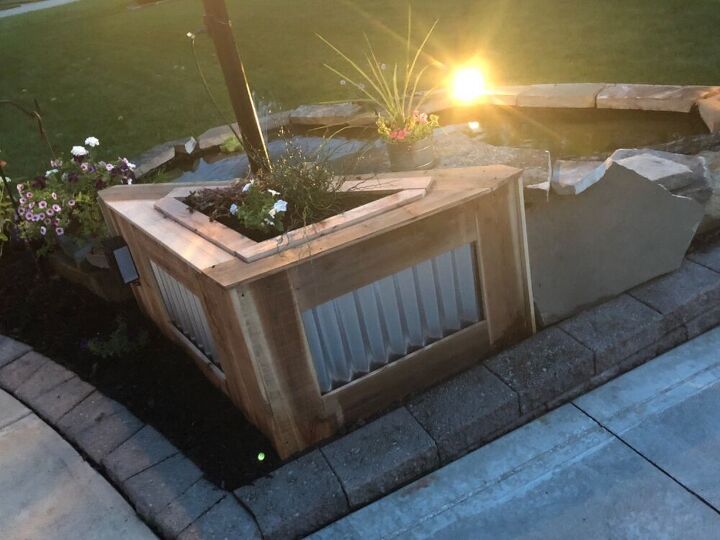
With the hoses and filter being exposed behind the water fall feature I decided to build a custom planter behind that would allow access to clean filter but function as a planter.
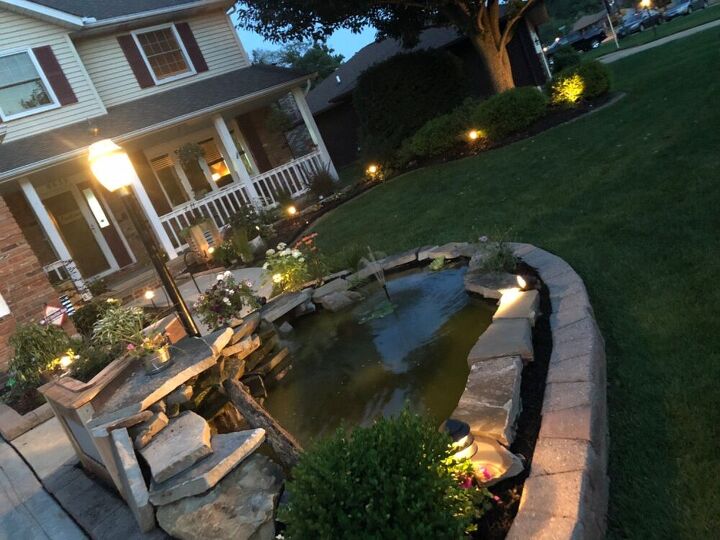
With all of the plants replanted and adding in some landscape lighting to accent with fresh mulch around it was time to enjoy. The neighbors and kids walking by enjoy it more than I do I believe.
Resources for this project:
See all materials


Comments
Join the conversation
-
In our town, this is illegal to have one in the front yard because 2 children drowned. After the second drowning, I took our backyard out even though we are surrounded by a wood fence.
-
We built a lily pond just like this & we love it. The only thing we did different was to lay down old carpeting underneath the liner so we didn't have to worry about sharp rocks or tree roots. 5 years later, it's still great!


Frequently asked questions
Have a question about this project?
OK - how many times have you caught neighborhood kids in there 'swimming'? Looks great! 😎
Omg! I love it!❤️
It's beautiful! I love that you were able to use the existing landscape as part of the design. Very nice work!
Do you have a post on how you built the planter?