


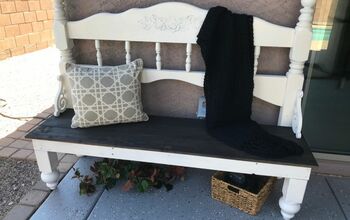
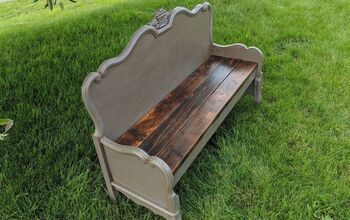
Upcycle an Old Headboard to Make the Perfect Porch Bench

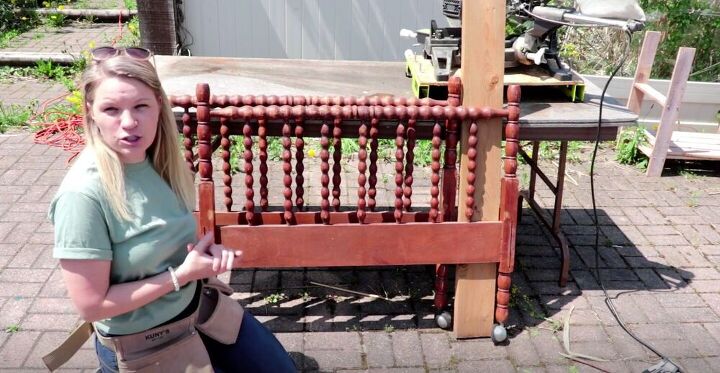
It’s no secret that I love a good upcycle, so when I saw a headboard and footboard that somebody was throwing away, I knew I had to grab it. This DIY bench project is the perfect fit for an old headboard and footboard. It’s a great project if you’re just getting started using power tools, as there aren’t any complicated cuts or joins. I set mine on my front porch for some simple seating perfectly suited for a Sunday afternoon. Follow my step-by-step tutorial below to build your own DIY headboard bench in no time!
Tools and Materials:
- Headboard and footboard
- Jigsaw
- Electric sander
- Electric screwdriver
- Miter saw
- Nail gun
- Nails
- Paint
- Paintbrush
- 3" wood screws
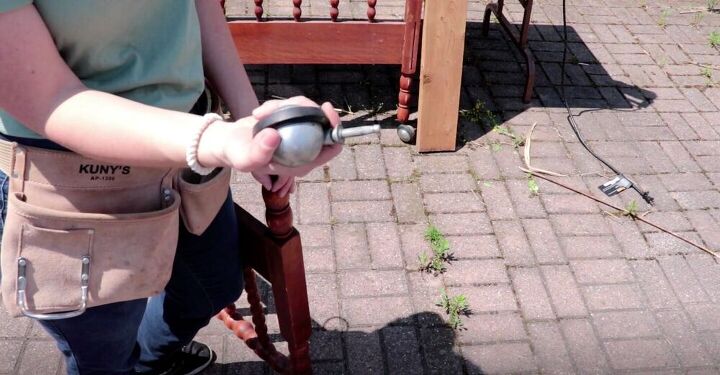
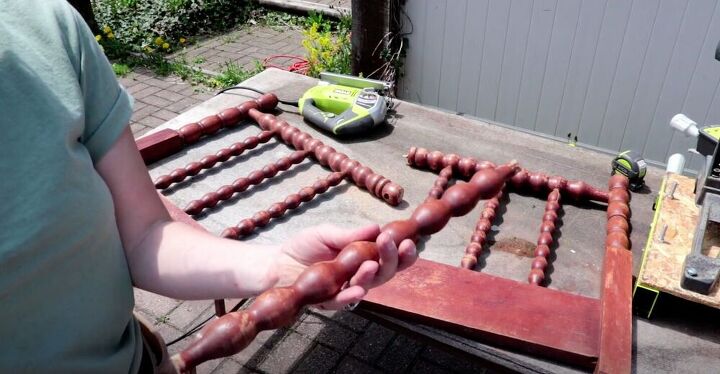
The headboard and footboard that I found had wheels attached, so I started by removing the wheels. These wheels were in great shape, so I decided to save them for another project. If you’re going to save something like this, make sure to get all of the pieces of the wheel off of the headboard.
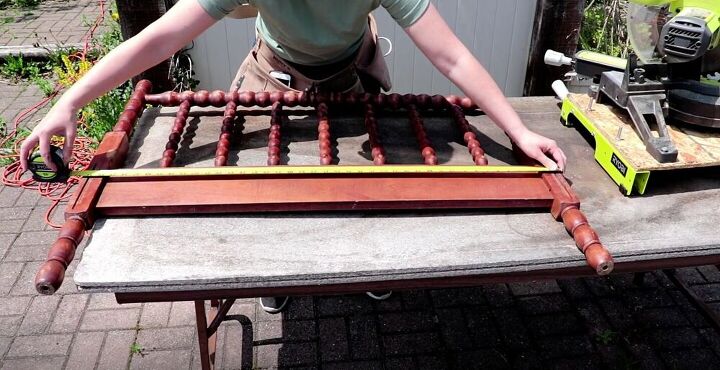
My headboard and footboard are the same size, but if you’re working with a piece where the footboard is shorter, then make sure to use that for the side pieces. I measured the footboard to find the exact middle.
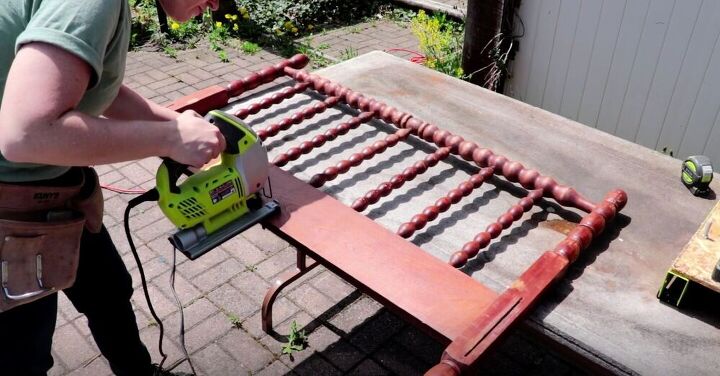
I marked it with a pencil and then used a jigsaw to cut right down the middle. I stopped when I got to the spindle and flipped the footboard to cut the top of it.
I didn’t need to worry about cutting the spindle because once I’ve made my cuts it will be easy to pull the spindle out.
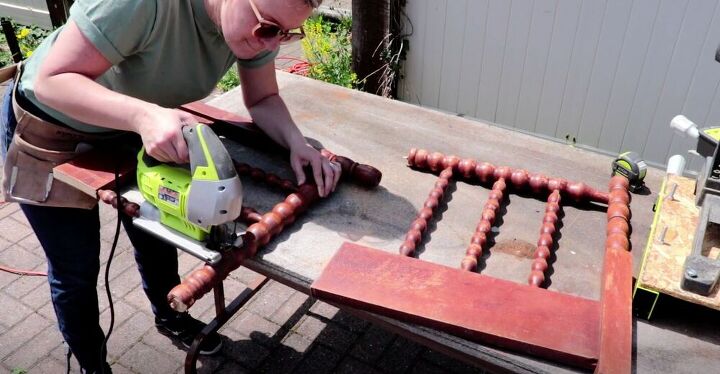
I didn’t like the look of uneven spindles, so I decided to remove a bit more. I saved the spindle for a later project, you never know when it will come in handy! Then I gave the pieces a nice sanding.
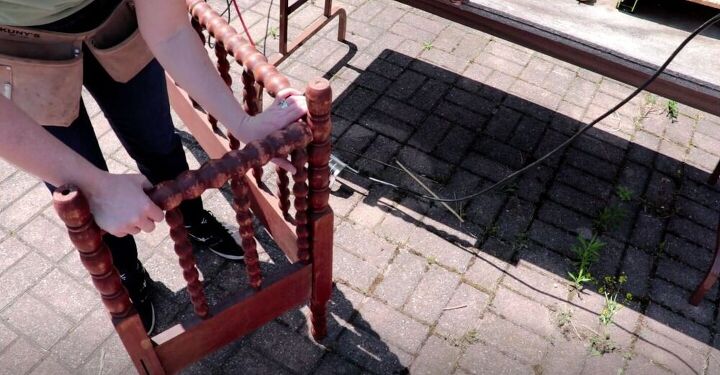
When I put the sides against the headboard, I saw that the third spindle was stopping the side from sitting flush so I decided to remove the third spindle from each side as well.
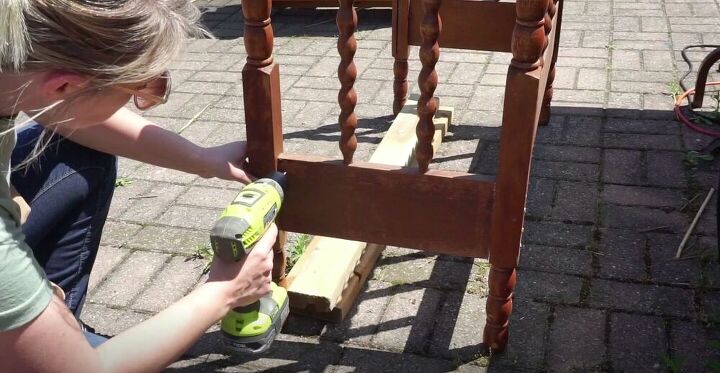
I clamped the headboard to my table so that it was standing straight up.
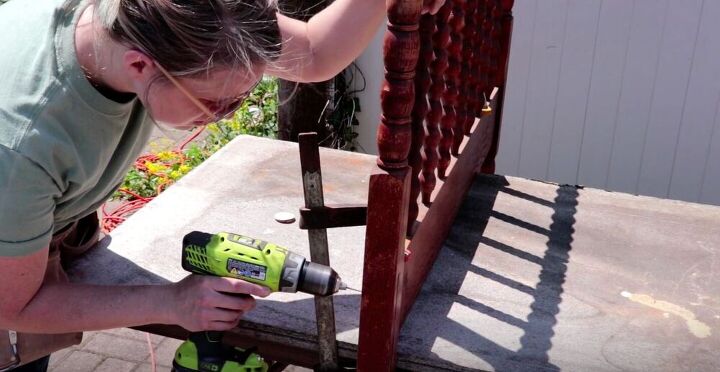
I drilled three pilot holes for where I would be attaching the side piece onto the headboard.
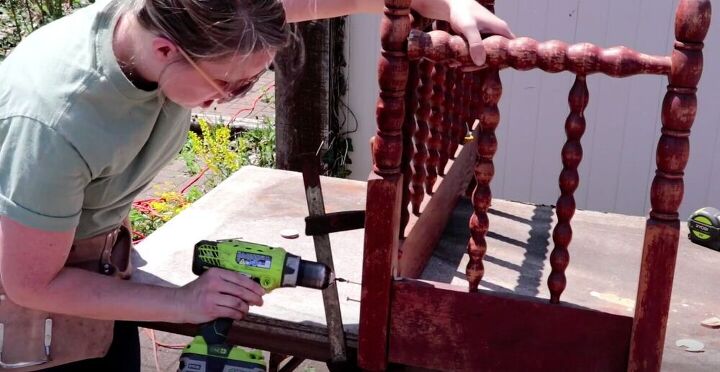
Then I screwed them together and repeated the process on the other side.
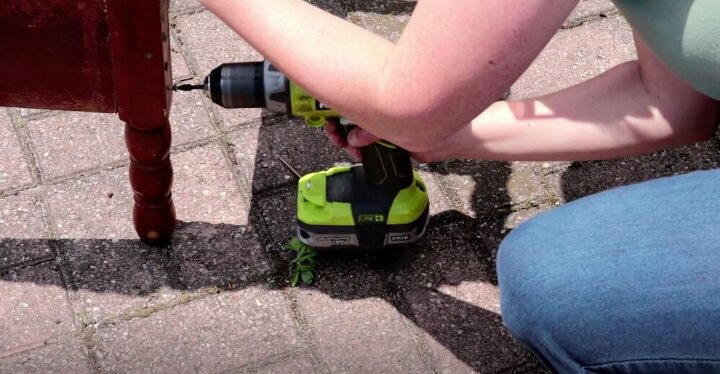
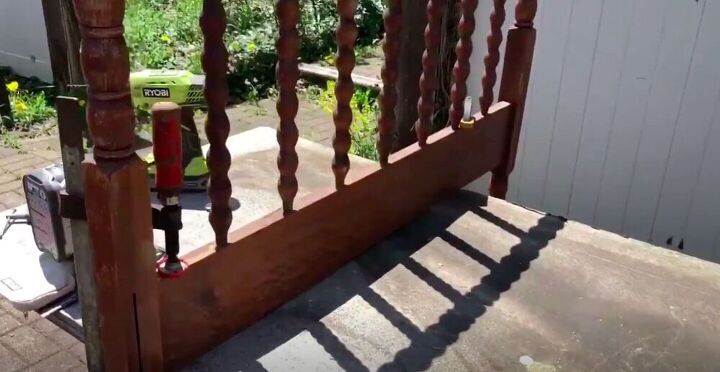
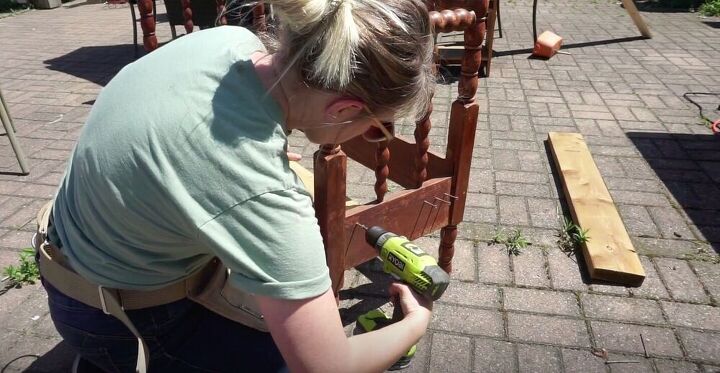
I also screwed the bottom of the headboard to the footboards. Once again, it is very important to use pilot holes, especially when working with older wood, because you don’t want the screws splitting the wood when you screw them in.
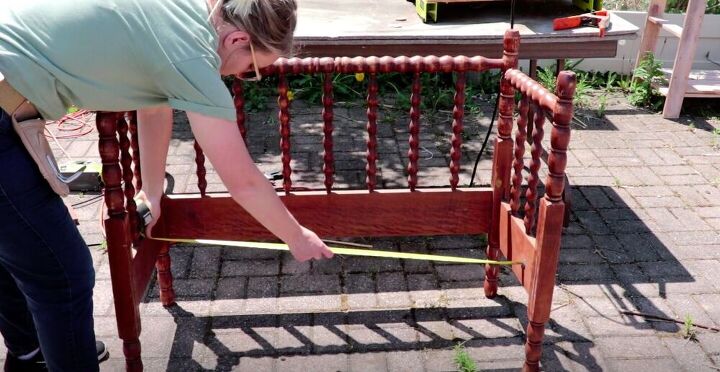
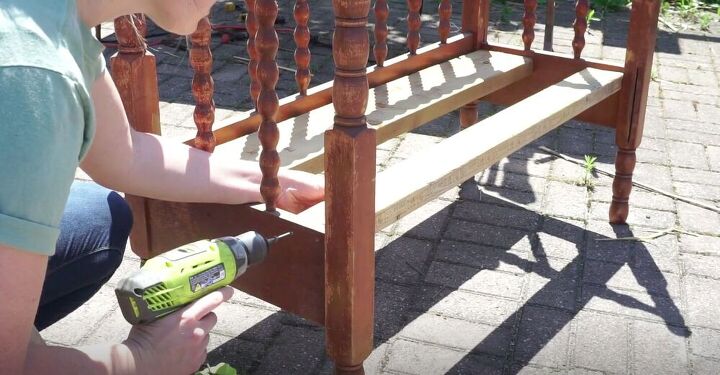
I started by measuring the inside of the panels. I cut some wood to this length.
I drilled pilot holes in the side panels and then placed the wood pieces in place and screwed them in using 3” screws. I repeated this on the other side, using two pieces of wood all together.
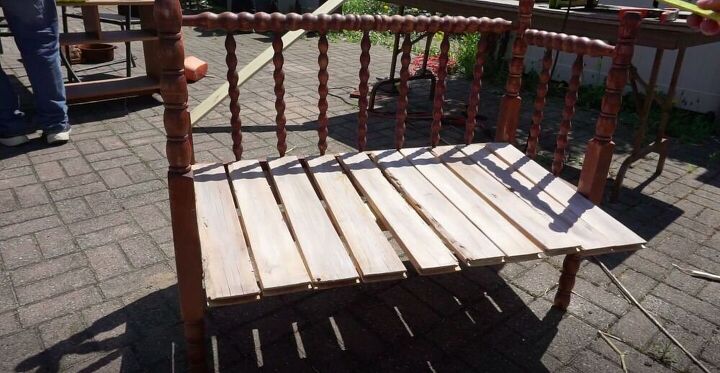
Using some scrap wood from another project, I lay them vertically across the two pieces of wood I had just screwed into place.
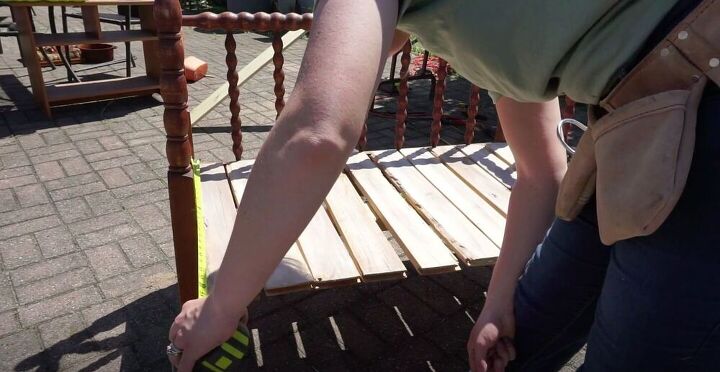
Then I measured and marked them where I wanted to cut so that there wouldn’t be a large overhang.
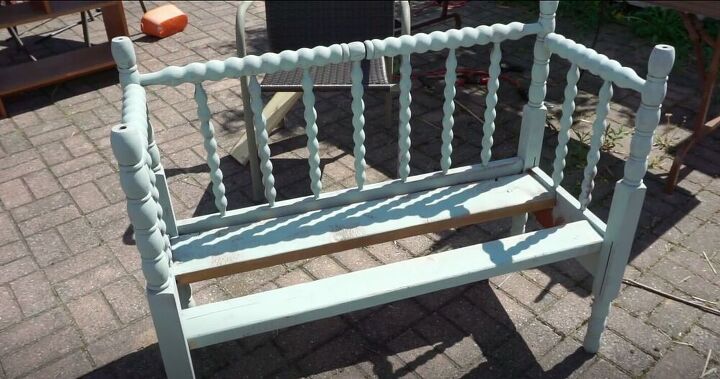
I liked the weathered look of the vertical pieces of wood, so before I attached them I painted the rest of the frame. I made sure to paint the wood frame of the bench seat as they would be seen through the vertical slats. I simply love this color.
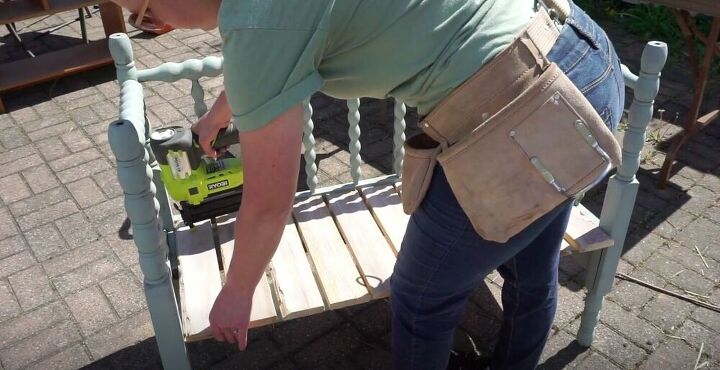
Once the paint had dried, I used a nail gun to nail the vertical slats in place, making sure to attach them to the two wooden boards underneath.
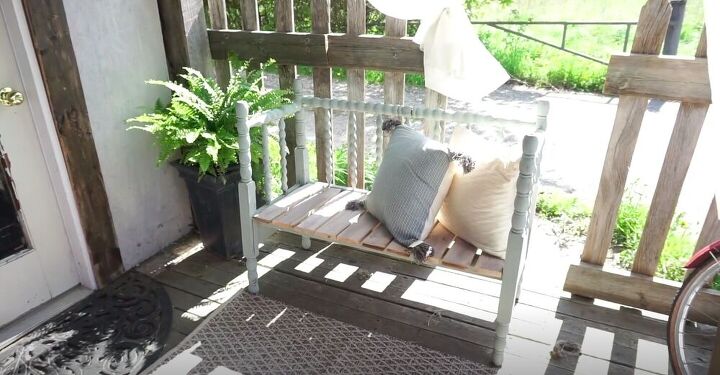
This upcycled bench is the perfect place to read a book on a sunny Sunday afternoon. Have any great upcycle ideas? Let me know in the comments below!
Comments
Join the conversation
-
Very beautiful!! Love the idea!!
-
I have a Jenny Lind bed, but after reading one of the comments above I am hesitant to chop it up! I do love your idea though, and it would make a nice spot for my sweet hubby to sit and remove his shoes before coming inside.


Frequently asked questions
Have a question about this project?
Can you use a crib instead of a headboard?
Hi Holly, before you cut the frame up did you check to see if it was a Jenny Lind bed? Well it is too late now and I would hate to tell you what some go for. Anyway, your bench came out wonderfully except for one thing, the seat planks. They do not go with the bench. It is another look such as farmhouse and does not enhance the look of what you did. My suggestion if you don't mind is to get a solid wood sheet or even plywood and make a seat that is all one piece. You can add some molding that will compliment the head and footboards to the front of the seat. I would add a muslin pad that can be made easily, and if you want you can add a front or side stripe with some fabric paint. OR if you do not want to paint the muslin get ticking instead and make the cushion from that. Hope you don't mind the suggestions.
Did you attach the back to the sides where the spindles meet at the top in any way? Or does screwing the two pieces together at the bottom hold it in place?