


Wooden Wall Art DIY
I've always wanted to make a wall art piece, and so I started looking for ideas on Pinterest and Hometalk. I finally decided to come up with my own design, something that reflects a positive message for the times our nation faces right now.

I used a 2ft by 2ft, 1/2 inch plywood as the back board. And 1.5 in. by 3/4 in. by 48 inch boards for the hands and other pieces. You'll need approximately 12 of the 48 in. boards from your home improvement center. You can also get the 2ft by 2ft plywood there.
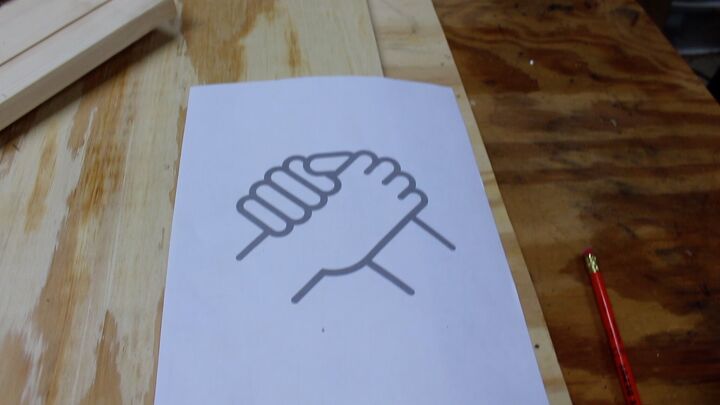
I scoured the internet for ideas on the hands clasped together, and I finally found this piece of clip art. The final art piece doesn't look exactly like this, but I liked this layout. There is also tons of clip art that show just the standard handshake which would probably have made a great design as well.
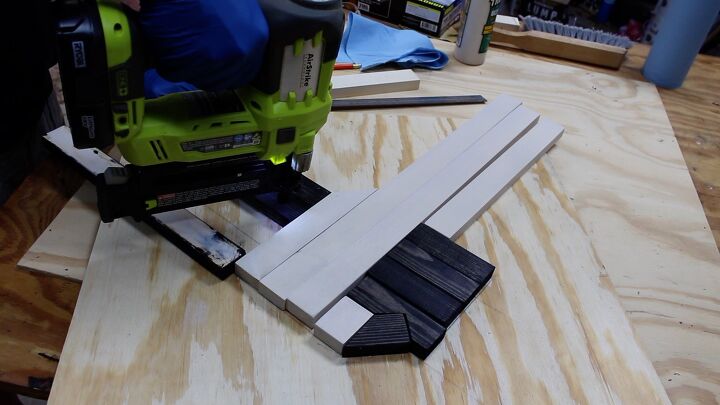
Dry fit the pieces first, then stain boards. Then apply glue and use 1 inch brad nails to tack the boards down to the plywood. I used an almost white gray stain for the white hand and a black stain for the black hand.
Remember to wipe off excess stain and DON'T stain the side that will be attached to the plywood.
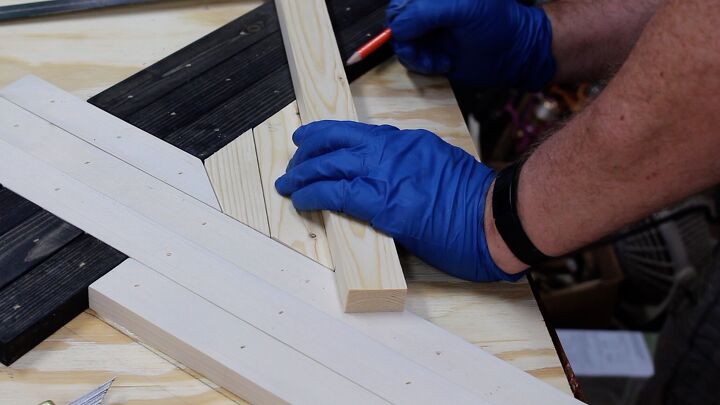
The rest of the wall art project is just measuring and fitting all the little pieces. Be patient with this step. Measure twice and cut once.
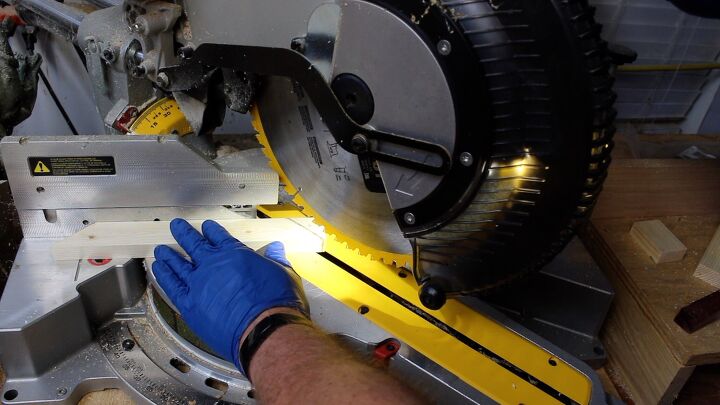
I used the ever-so-useful miter saw to cut all of the boards, especially cross cuts and angle cuts.
When making these cuts it's extremely important to keep up with which side of your marks to cut. So, think about what side is the waste piece and the side you want to keep.
For some pieces you will need a jigsaw or bandsaw to cut sections to fit.
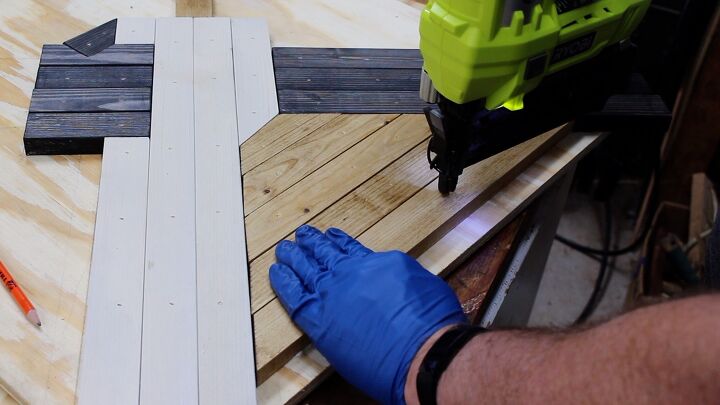
Once you've got all the remaining pieces cut out and dry fitted, then apply glue and tack down with the nail gun.

Once you have all the boards in place, you will probably end up with some gaps on the edges of the wall art. I just measured my boards and used a table saw to rip those boards down to fit.
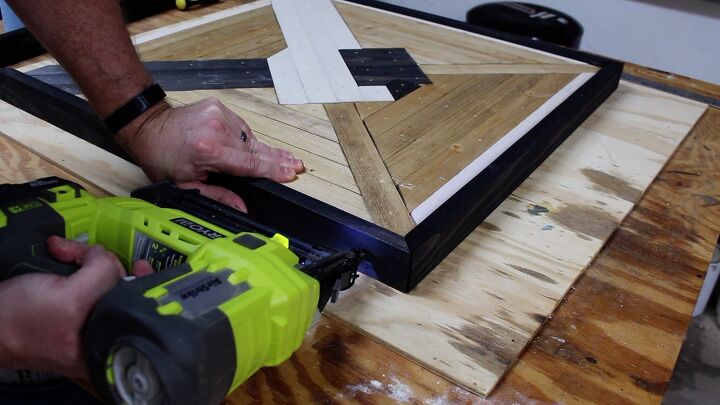
I took a couple of 4 in. by 1in. by 48in. boards and ripped those in half on the table saw. Then I measured out the length for each side and cut a 45 degree bevel.

This is the finished wall art. Now you just have to attach some hardware on the back and decide where to hang it. It's is probably heavier than your average wall art, so make sure you attach it to a stud in your wall.
You can see more details of my DIY project on my website. Checkout this link to learn more.
Here is my YT video showing you step by step how to make the wall art. If you like this video, please consider subscribing to my channel.
Resources for this project:
See all materials


Comments
Join the conversation
-
Very original and creative!! beautiful.
-
This is absolutely ingenious, I salute you for such an inspirational piece of art. Love it, and enjoy looking at it repeatedly.


Frequently asked questions
Have a question about this project?
Wonderful work! Could this be made in a smaller scale?