


A Piece of the Past

Hey my friends! I love finding vintage pieces of furniture and giving them a little bit of love. A friend happened to be selling this beautiful dresser on Marketplace. I had to have it!
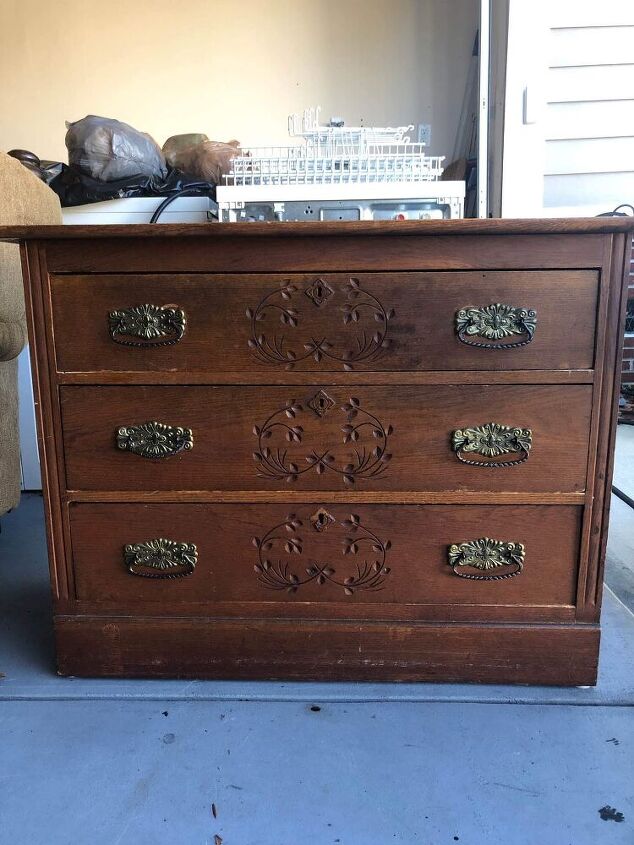
I loved the flowers carved into the drawer fronts! The handles needed to be changed because after taking closer look one was different from all the rest. Can you find it?
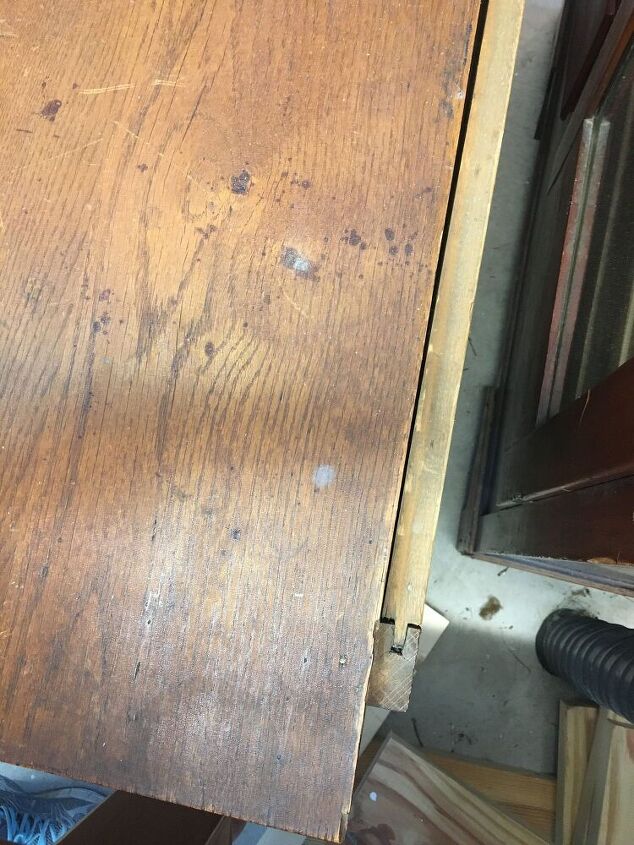
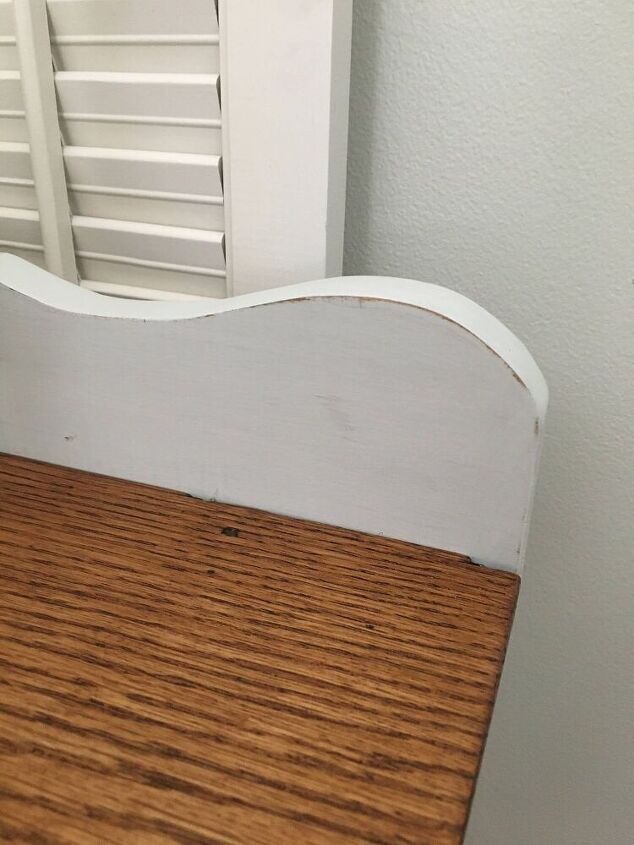
The top showed its age and that was fine with me. I could also see there was a gap in the back where a mirror was once attached to the back.
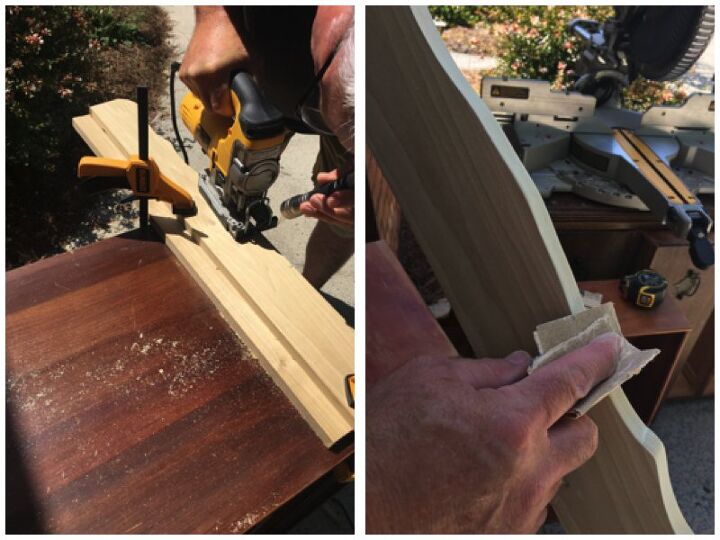
The remedy for the space in the back was add a decorative piece. My hubby had actually traced a piece from a previous project. First, he traced the pattern onto a new piece of wood. Then he used a jig saw to cut the curves. To smooth out any rough edges and make sure it was even, he sanded the cuts with 220 grit sandpaper. (This piece was painted and added later.)
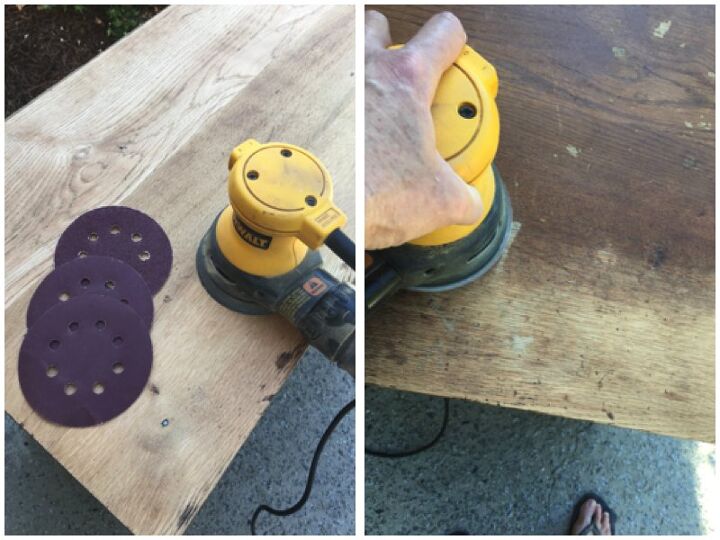
While he worked on that, I gave the dresser a thorough cleaning with Simple Green, a sponge, and bucket of clean water to rinse. Then it was on to sanding down the top to raw wood. I started with 60 grit sandpaper, then 120, and finished with 220 grit for a smooth surface.
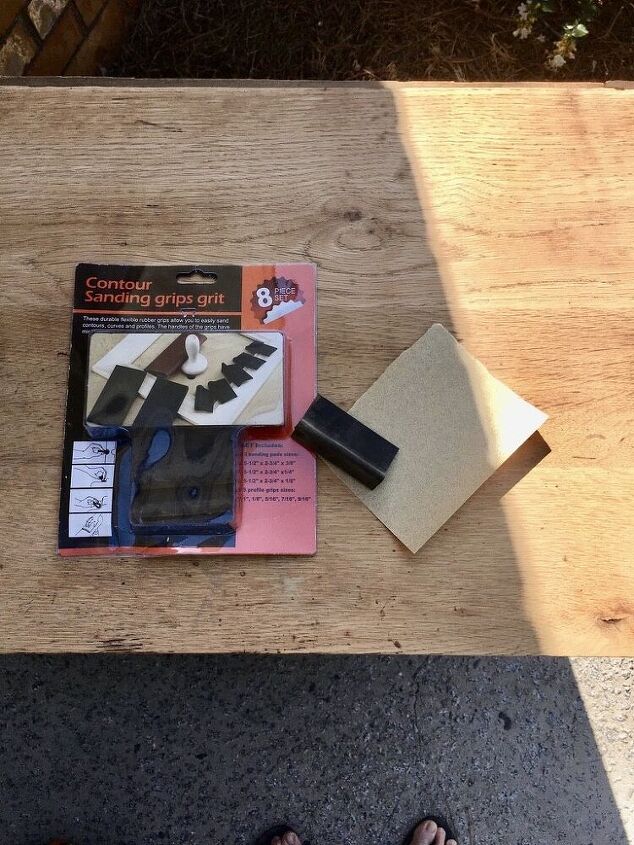
To tackle the curved edge, I used one of the grips from my set of Contour Sanding Grips set. These really help in those tough spots that have to be hand sanded. After the top was sanded, I used a shop vac to clean up the sanding dust and then wiped the top down with a microfiber cloth.
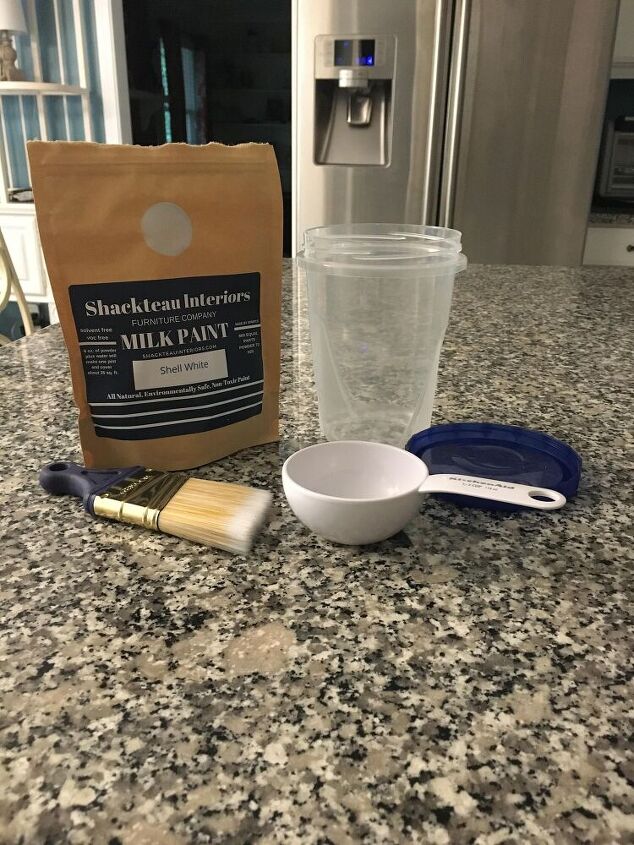
Then it was time to move on to painting. I wanted a chippy finish for the piece so I used Shackteau Interiors Milk Paint in the color Shell White. This is in powder form which you mix with equal parts of water. I only mixed 1/2 cup of each. I always start out with that much when using milk paint so I don't mix more that I will actually need. I applied 3 coats of paint. When it was dry, I sanded it with 220 grit sandpaper to get a smooth surface especially where there was chipping.
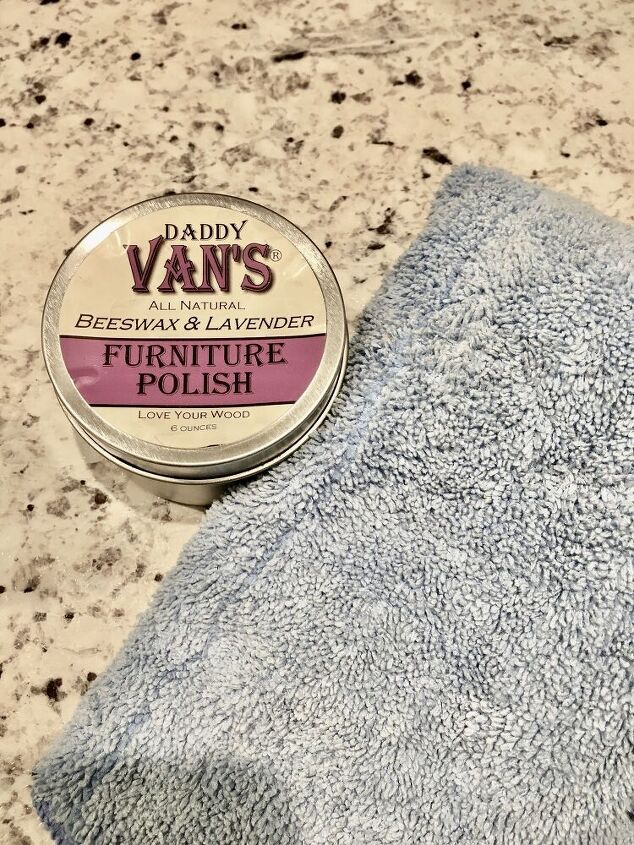
To seal the paint, I used Daddy Van's Beeswax & Lavender. I applied it with a lint free cloth and buffed with a microfiber cloth.
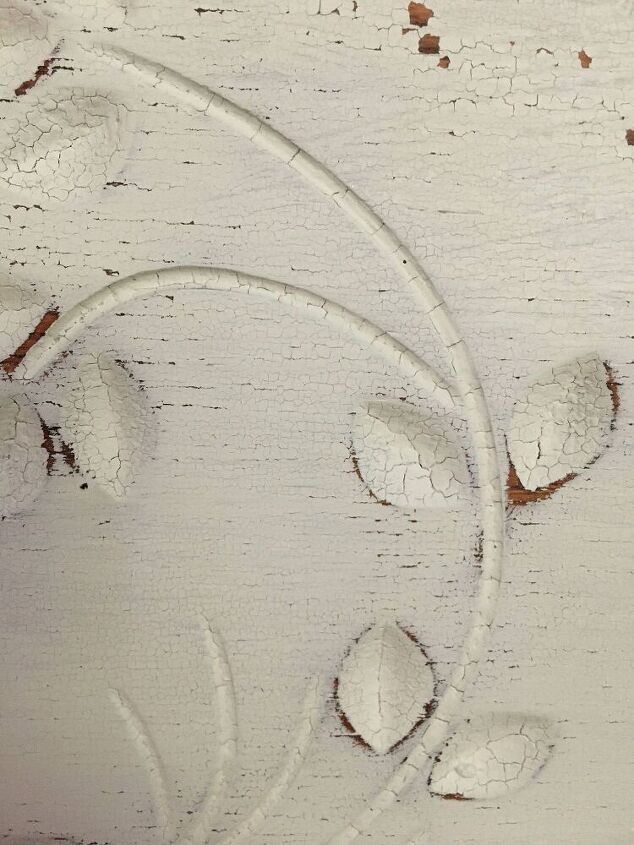
You never know how much a piece will chip when you use milk paint. On this dresser there was some crackling and it chipped more on the drawers that anywhere else and that was okay with me.
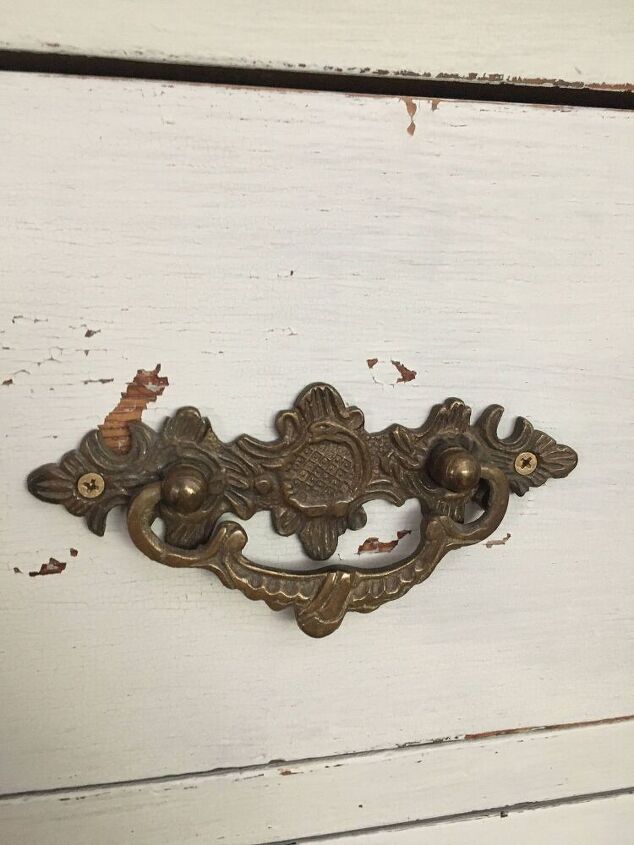
Remember, I told you that the original drawer pulls were not the same? I found these great pulls from Hobby Lobby.
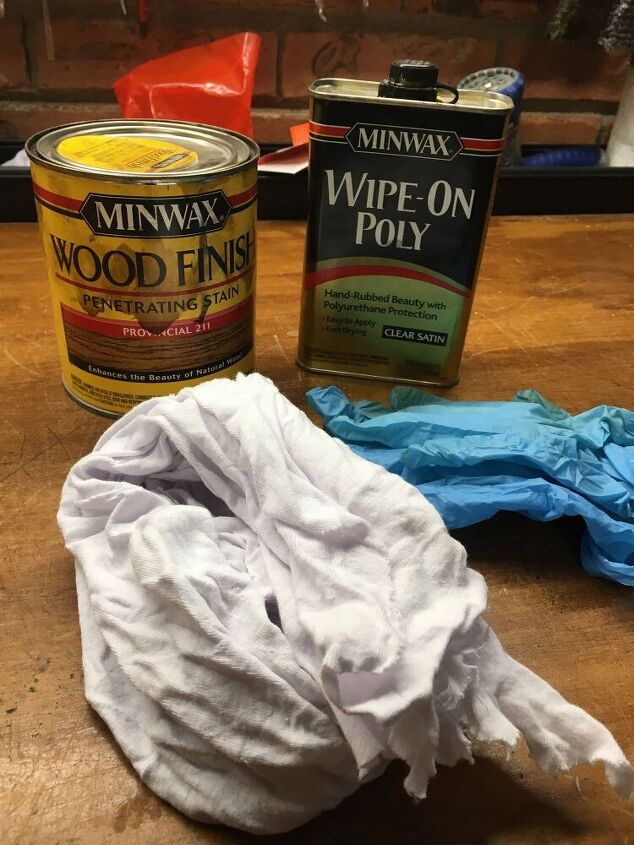
On to the top! I stained the top with Minwax Stain in the color Provincial. This color was not too dark nor too light. To seal the stain, I applied 3 coats for Miniwax Wipe on Poly in Satin with a lint free cloth.
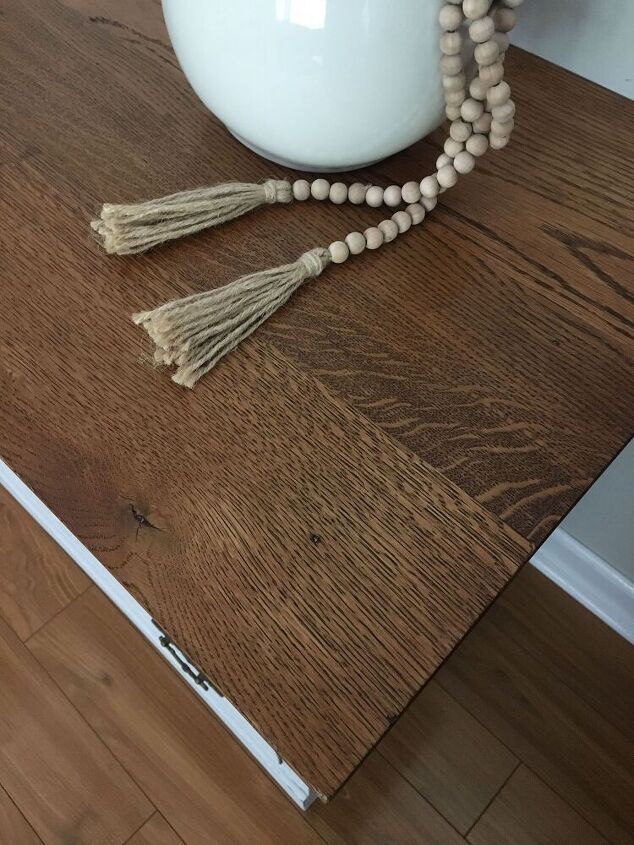
The color and finish were just what I pictured!

The new painted back piece was screwed onto the back of the top. This made a huge difference!
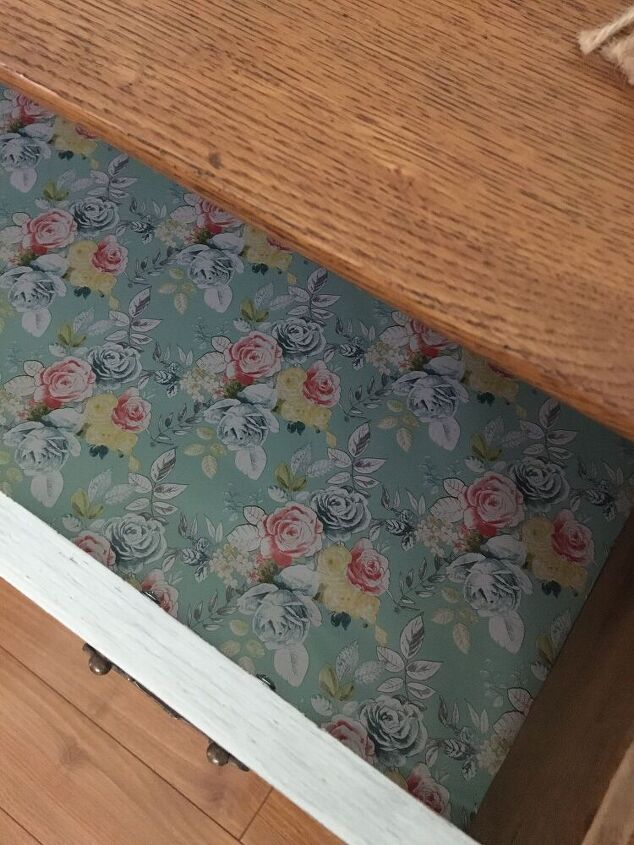
The insides of the drawers showed some age, as they should. For a little extra touch, I used some gift wrap from Home Goods as drawer liner.
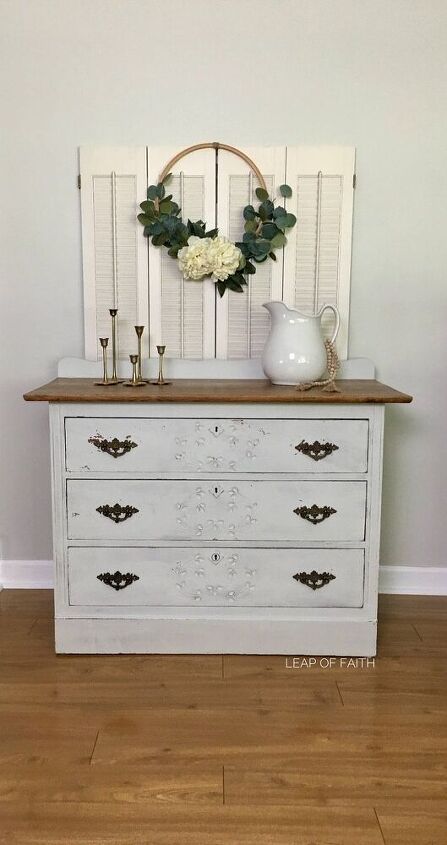
Isn't she pretty!
Resources for this project:
See all materials


Comments
Join the conversation
-
Such a beautiful piece of furniture to update. The color is great and brings out the details and leaving the top stained looks great. Nice job.
-
It turned out beautiful! I’m keeping this idea for a project I have waiting.


Frequently asked questions
Have a question about this project?