


Peacock Inspired Dresser

I found this great canvas of a peacock at a yard sale and knew instantly I want to paint a dresser to match.
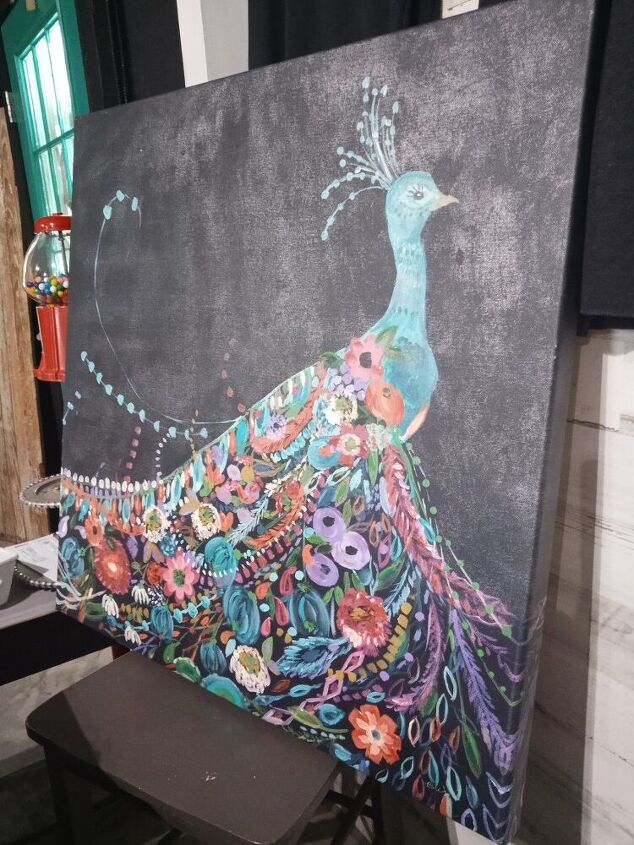
My first step was to choose paint colors that I saw in the canvas.
I knew I wanted a blue for the final coat, so I chose the accent colors.
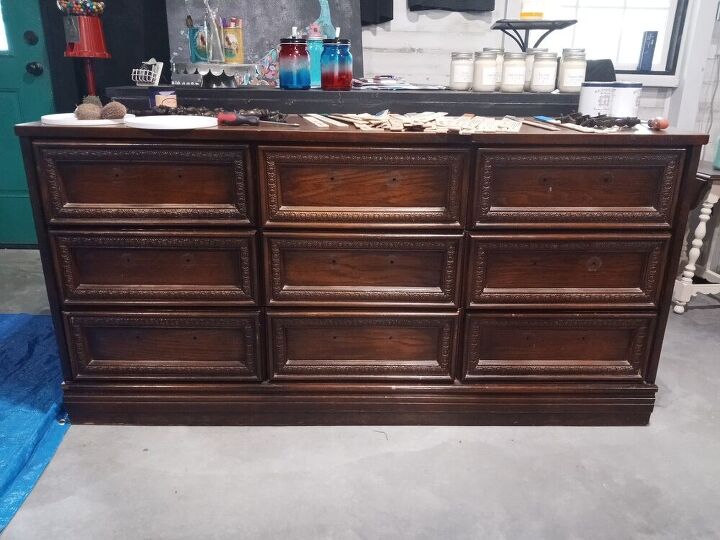
This dresser was perfect for the look I was going for. I removed the hardware so that I could paint that separately. Then I cleaned my piece with a mixture of TSP and water. Since I was using chalk paint I did not need to prime or sand.
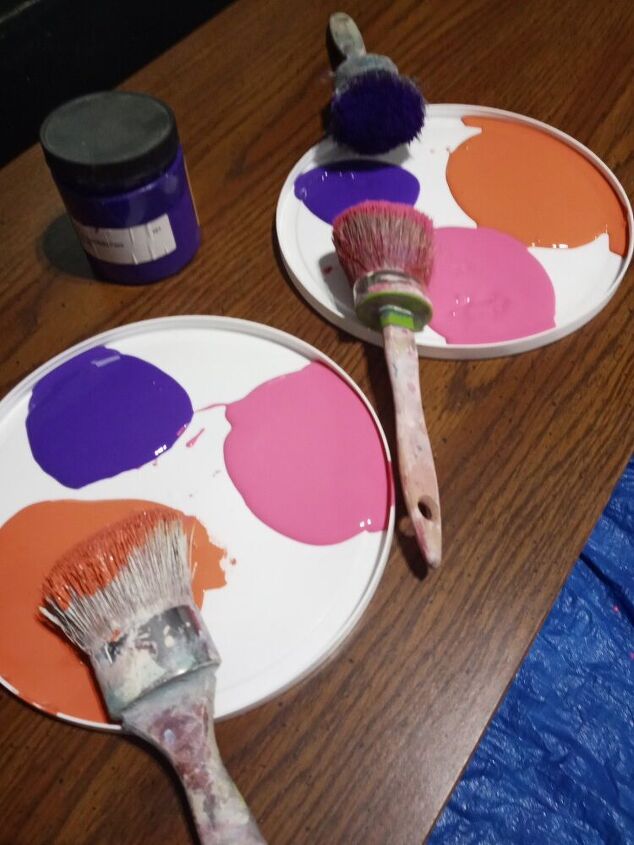
To make it easy I poured a little of each color onto a plastic top I was recycling. I also had a different brush for each color.The reason why there is two is because I had a little help with this project. 😁
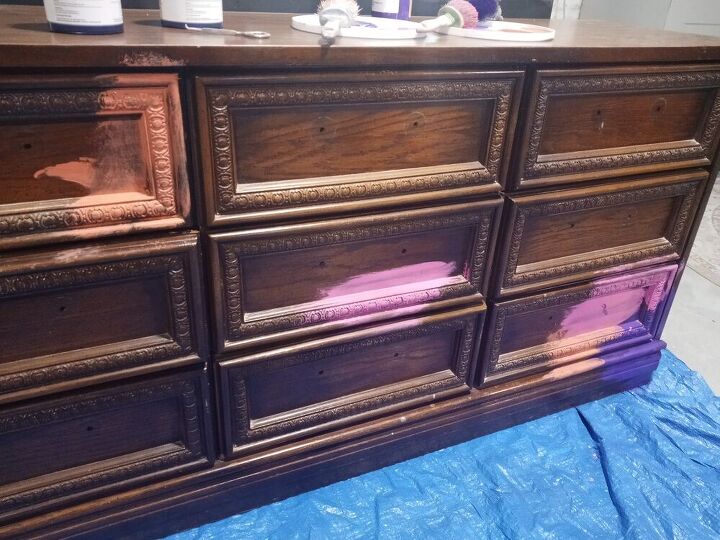
This is the fun part. You want to randomly paint splotches of different colors all over the dresser until it's covered.
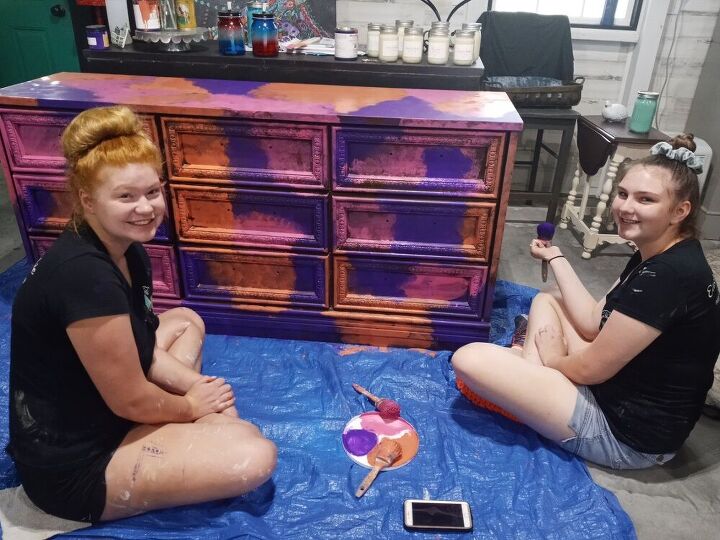
This was a perfect job for teenagers or even kids!😁 I knew the girls would not overthink it. They just had fun not knowing what it would end up looking like later.
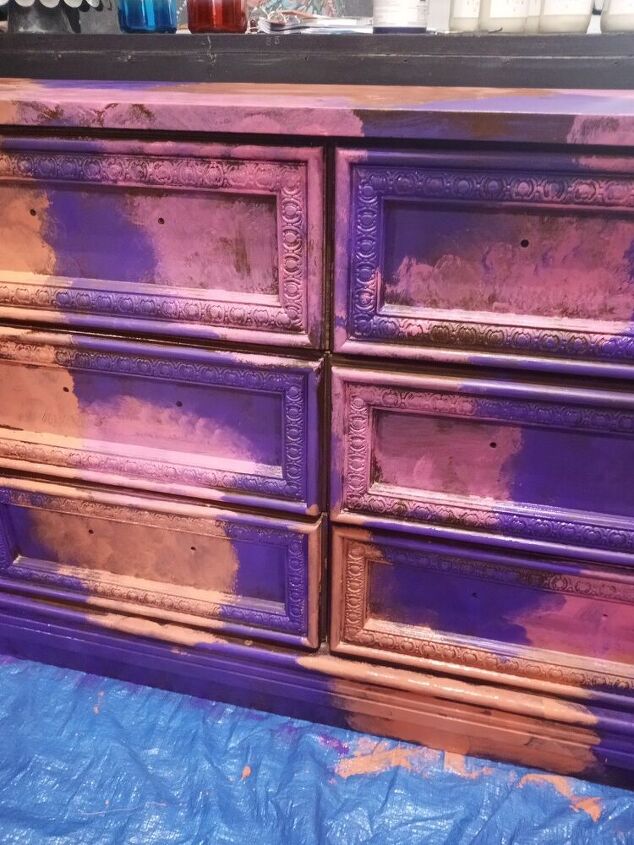
After the girls were done randomly painting splotches of different colors we let it dry thoroughly. Since I used a chalk paint it really did not take long. Afterwards I sealed with Retique It Polyacrylic. The reason why I did that, is so that I could control how much I'll see of the underneath colors. If I was to put too much of the top color (blue) this allows me to wipe off some of it.
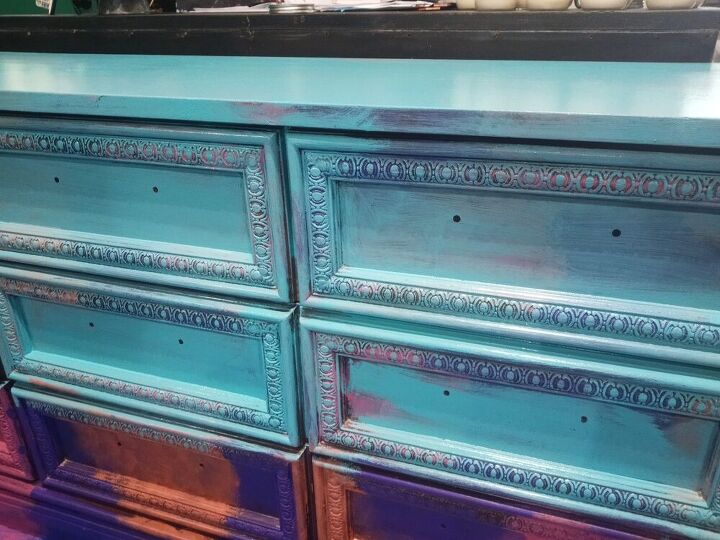
When your sealer is completely dry, go ahead and lightly brush on the top color which was blue on my piece. Over the raised details on the drawers.. I dry brush a little blue over it, not completely covering up all of the colors underneath. If you feel you put too much of the top coat color you can always take a damp rag and lightly wipe it off.
Take a step back and if you are happy with your results, seal again. Just a quick light coat of sealer will let you wipe off any extra glaze without the paint absorbing it. Plus it will protect your dresser.
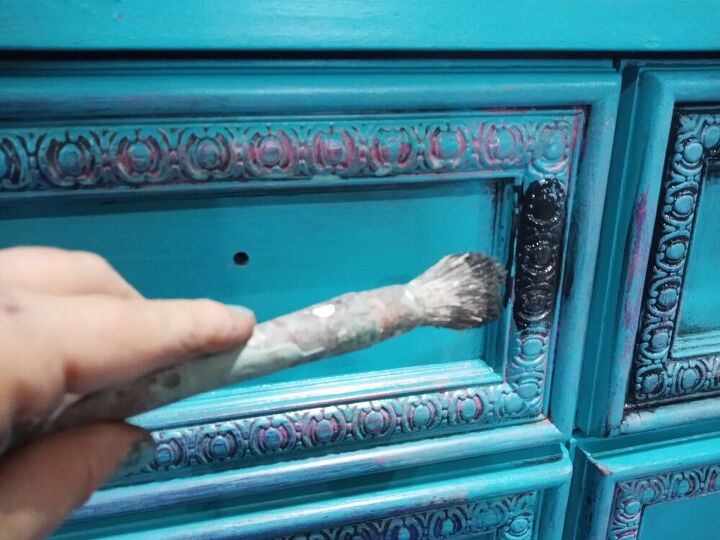
I used a black glaze and really worked it into the grooves of the drawers. I followed behind with a wet rag and wiped off the extra leaving only the black in the nooks and crannies.
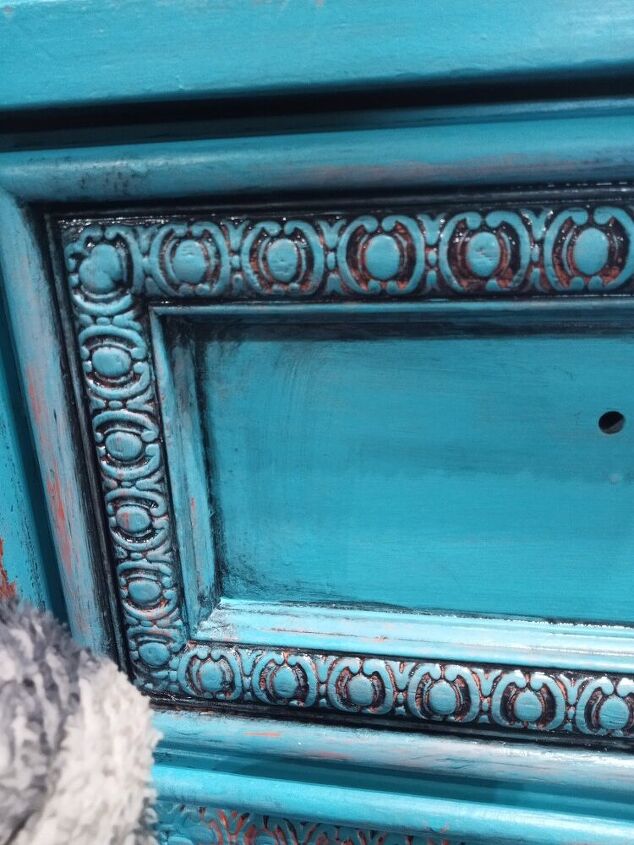
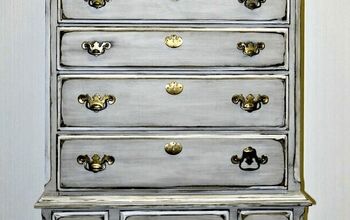
Here's a close-up of the drawer after I wiped off the extra glaze. You can see all of the underneath colors peeking through, but not looking to wild because the glaze took it down a notch. If your piece does not have all of these details or you like the brighter look you can totally skip the glaze step.
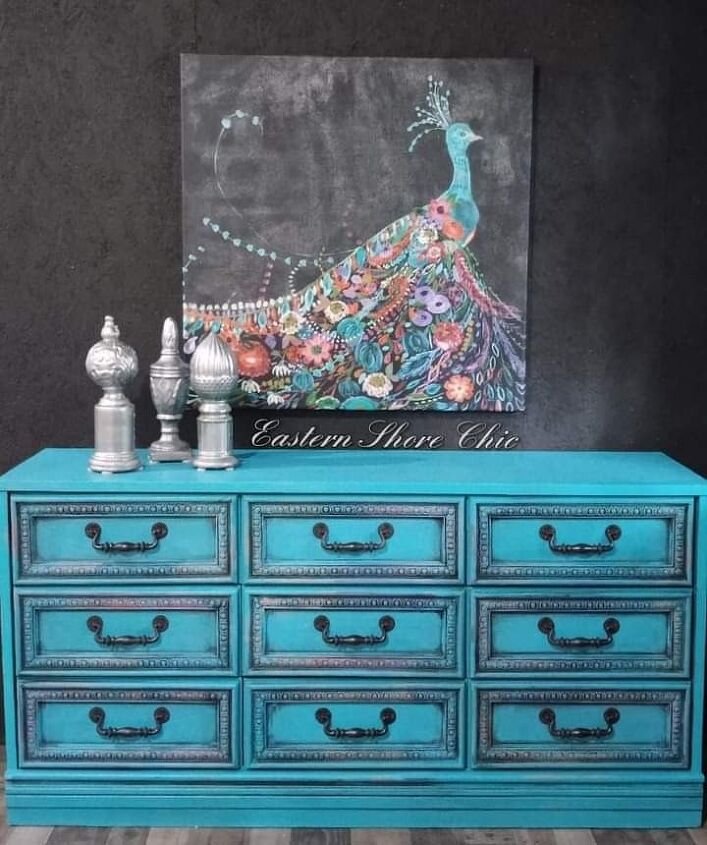
I could not have been happier how it turned out. It went with my canvas perfectly! I should mention that I used the existing hardware and just refreshed the color by spraying them with Rust-Oleum oil rubbed bronze spray paint. The black hardware and the glaze really brought it together with the black in the picture don't you think?
Note: It was really hard to estimate how much money was spent on this piece because you use very little amount of each supply. if you purchased paint and sealer, you will be able to use that for many other projects.
Resources for this project:
See all materials


Comments
Join the conversation
-
Thank you!
-
You nailed it! The colors are beautiful.


Frequently asked questions
Have a question about this project?
I just came across this awesome project and was curious on the peacock painting that you used for inspiration. I read that it came from a yard sale, but could you give any info on it? Was there any artist info on it? Thanks!
Just curious. Would you have been able to get the same look in less time if you had painted the blue and dry brushed the other colors on afterwards in the locations that it shows through in the last photo? I love the end result.