


How To Adapt A Light Kit To Use With A Spider Shade

Like most folks, life has changed a lot in our home. I have my home office but now I've had to add 2 more office spaces for our youngest who is in virtual school since March & for my Mr. who has been working from home since March.
Until now, they had been working at the breakfast bar. That had to change! So while I was creating spaces for them to work, moving things around either changed or added to some other areas of the house.
THIS is one of those areas. It's our former charging station. It's still a charging station, but it's also a music corner now! I had to relocate the turntable & records from Mr's media room to
- make space for his desk/bar
- so that we can all enjoy it anytime or all the time!

Note: This project cost me nothing because I already had the 3 materials on hand. The price I'm quoting is if you purchased everything new (or thrifted).
I have a few of these light kits hanging out around the house. (Get it? "Hanging out"... okay enough with the corny jokes)
This one has a switch on the cord so it's very functional compared to the others that have no switch at all.
These light kits are great for decorative hanging lights because they take up no (table or floor) space & can be used anywhere. Even if there's no plug nearby, you can use an extension cord to hang it anywhere.
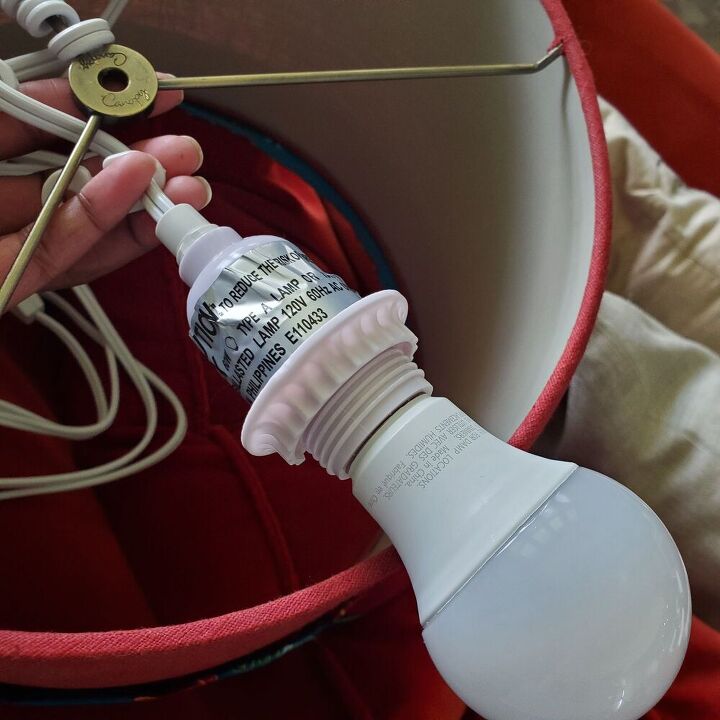
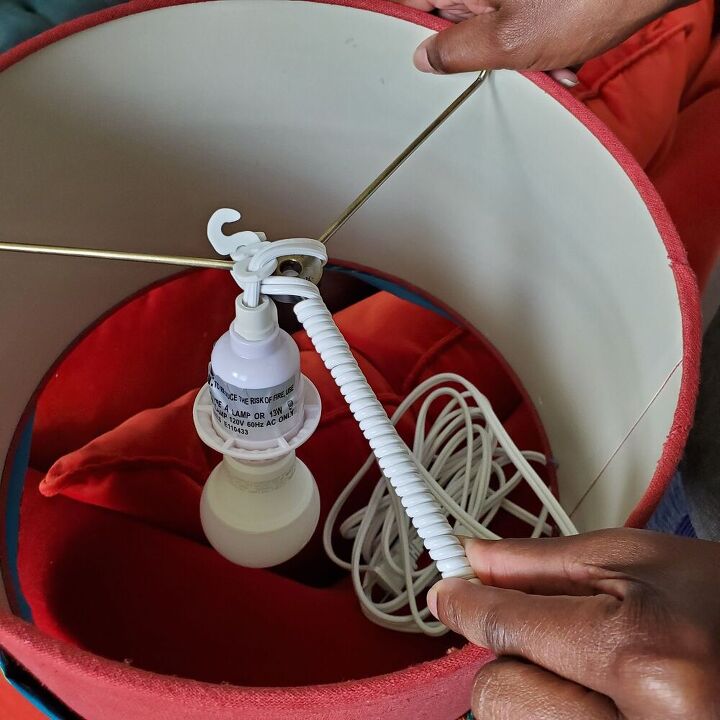
BUT, the kit is meant to be used with UNO shades only. I personally have not seen 1 for spider shades.
I was intent on using this light kit for my spider lampshade but I was definitely NOT feeling having to re-wire it to fit.
After looking & thinking & looking & thinking, I decided that the little S-hooks that come with hanging light kits are going to be the answer to "converting" my ight kit from UNO to Spider.
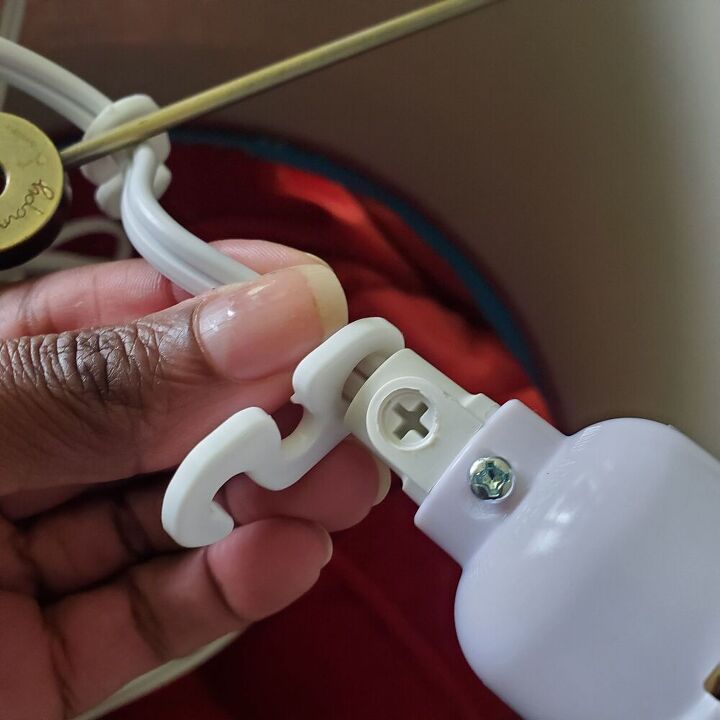
Normally the s-hooks are used to hang the light from the ceiling or wall, but I'm going to use them to secure the cord to the spider shade.
There are usually 2 included with a light kit & they have 2 "openings" - 1 is smooth & the other middle opening has a tiny notch.
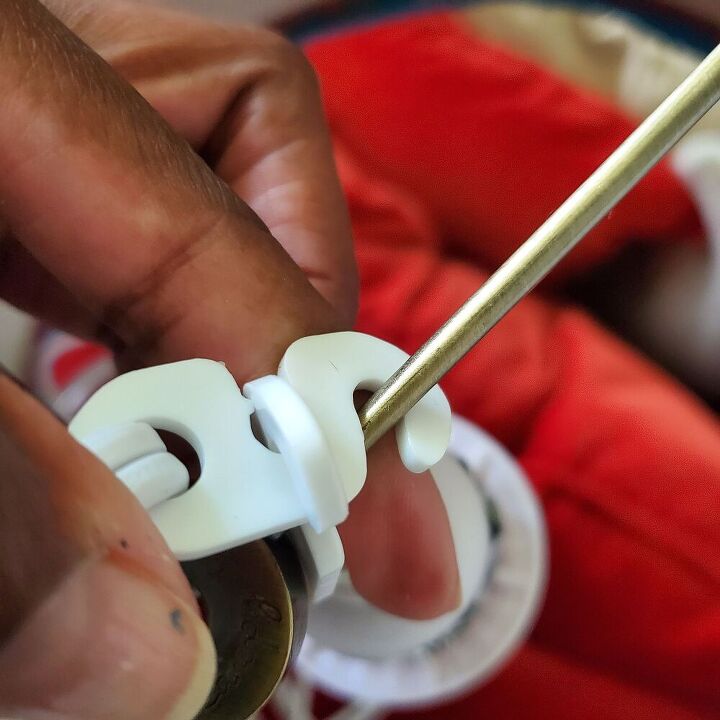
Keeping the hooks as close to the base of the light, I attached the center notched section of the 1st hook to "arm "1 of the spider assembly facing down.
Then I attached the notched section of the 2nd hook to the smooth section of the 1st hook.
And the smooth section of of the 2nd hook to "arm 2" of the spider assembly facing down.
(NOTE: I specify to keep the hooks facing down so that gravity will help keep them in place.)
If all of that sounds a bit strange, I get it. Here's a quick video to explain & show what I did.
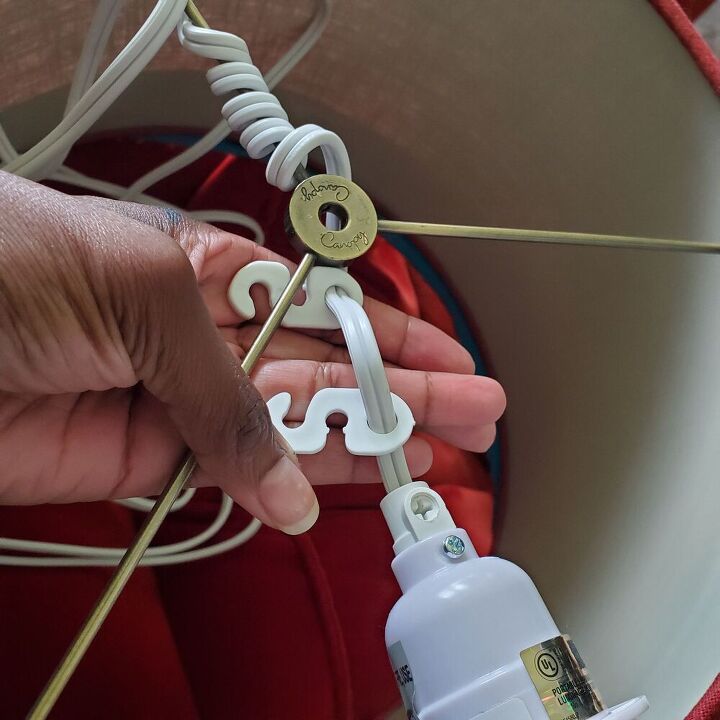
Once the s-hooks are attached to each other & the shade, I wrapped the cord around 1 arm of the spider shade.
Since I also added some fabric to customize my lampshade, I chose the arm facing the side of the shade that I didn't necessarily care about being seen - that's the part that will be facing the wall.
I love the pattern of the fabric & wanted to make sure the best parts were visible.

And then I just hung the light kit as normal EXCEPT that I didn't have the s-hooks soooo...
Since I am the keeper of random hardware AND I hate seeing cords, I used cable clips to "hang" my light kit.
You can't see it here because I placed it as close to the top of the shade as possible & then ran the cord back behind the poster, along the back of the console into the plug on the wall.
(If you look closely, you can see a bit of the cord between the bottom of the frame & the top of the records. But DON'T look that closely! )


Frequently asked questions
Have a question about this project?