


Girls Bedroom Transformation

Finishing my daughters room was no small project. Her room had nothing and needed so much. The sloped ceilings were also a challenge to work with. "Closets" and a window bench was a must. Follow along with me and I will show you how I used IKEA waredrobes to create amazing storage for my daughters room.
This is still a projects I cannot believe I did all by myself. Im so I'm love.
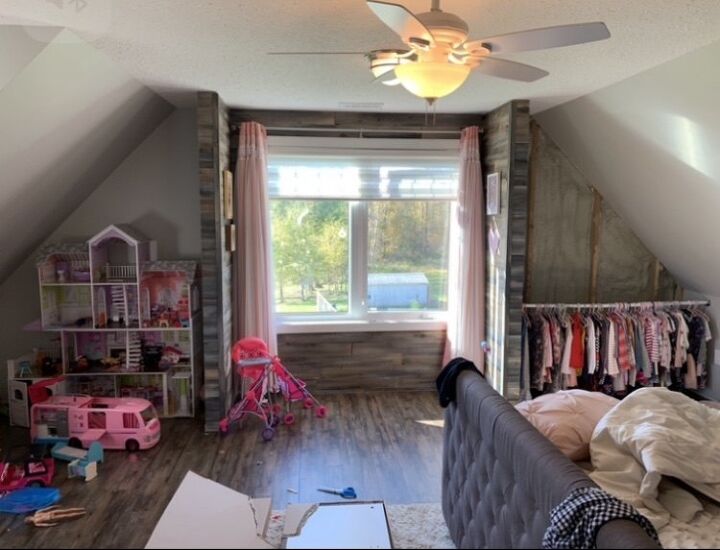
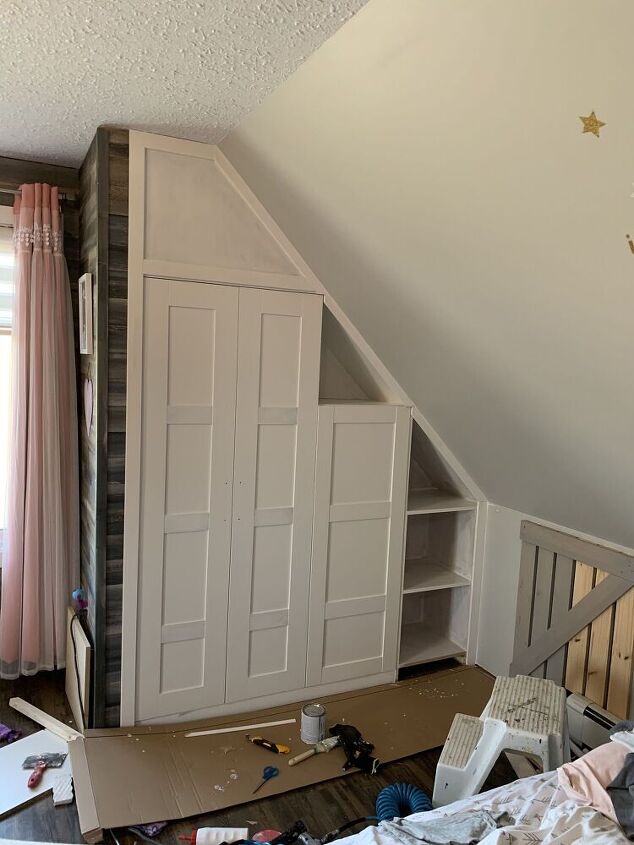
My plan for this space was to make waredrobes on either side of the the window and to create a reading nook/ window bench under the window. I had lots of work ahead of me.
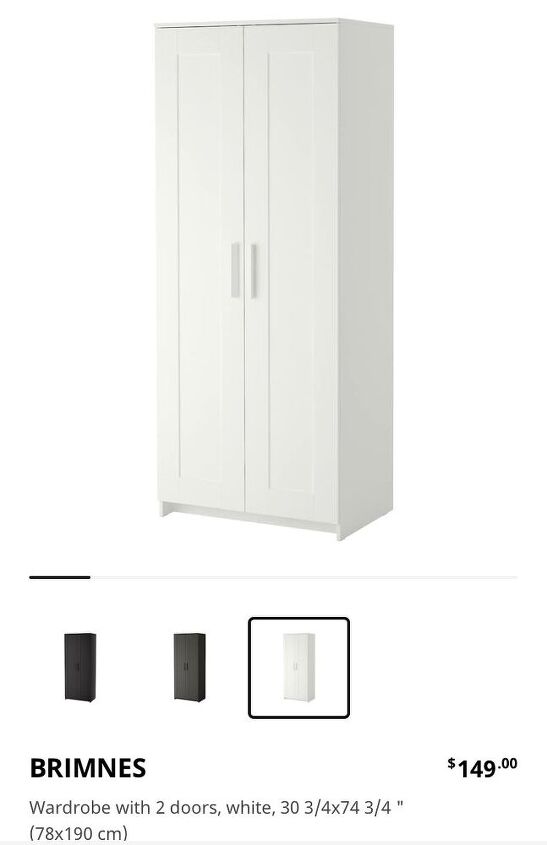
I purchased two of these units from Ikea. This was the Brimnes unit. One for either side. They fit perfectly into the space without having to be cut down.
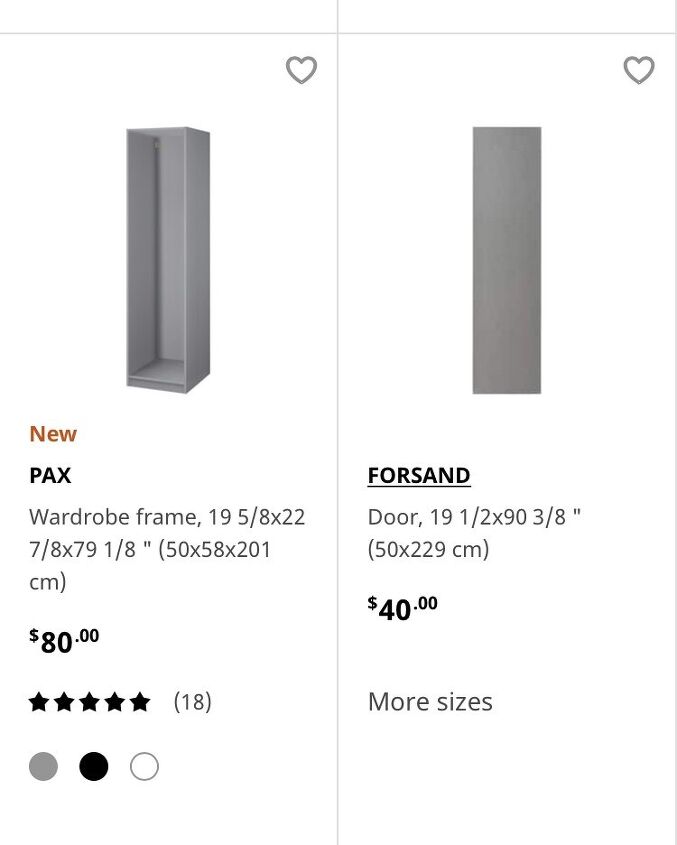
I also purchased 2 of these PAX wardrobes in white. These I had to cut down to fit with the slope of the ceiling. These would sit beside the two other larger wardrobe units.
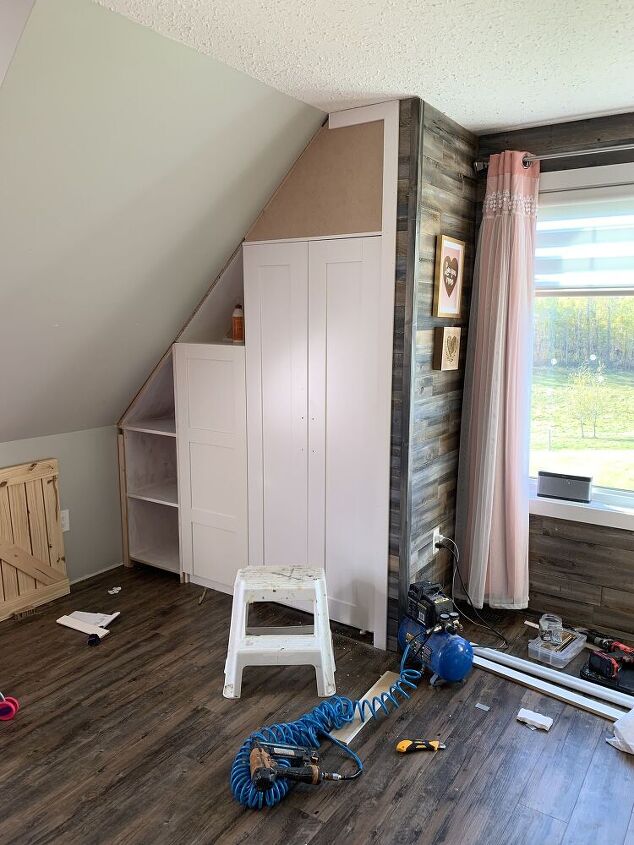
After the two Ikea units were installed and secured, I used 3/4" MDF to make the last section of shelves. I slide these into place and secured them to the wall.
I used 2" trim along the sides and the bottom to finish off the edges. I them primed everything, and painted it all white.
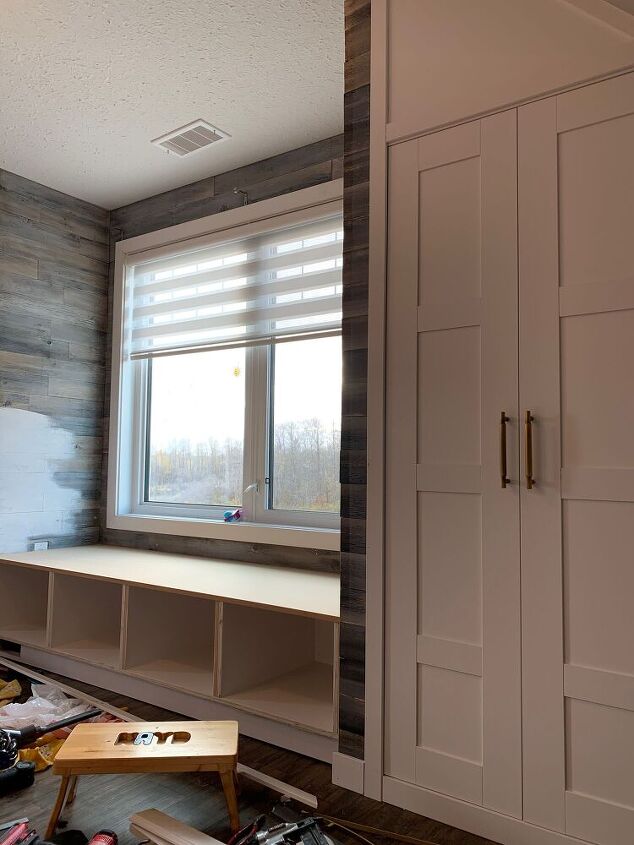
I then used 3/4" MDF to build a 4 cubbie window bench. Dimensions will definitely vary based on the size of space you have to work with.
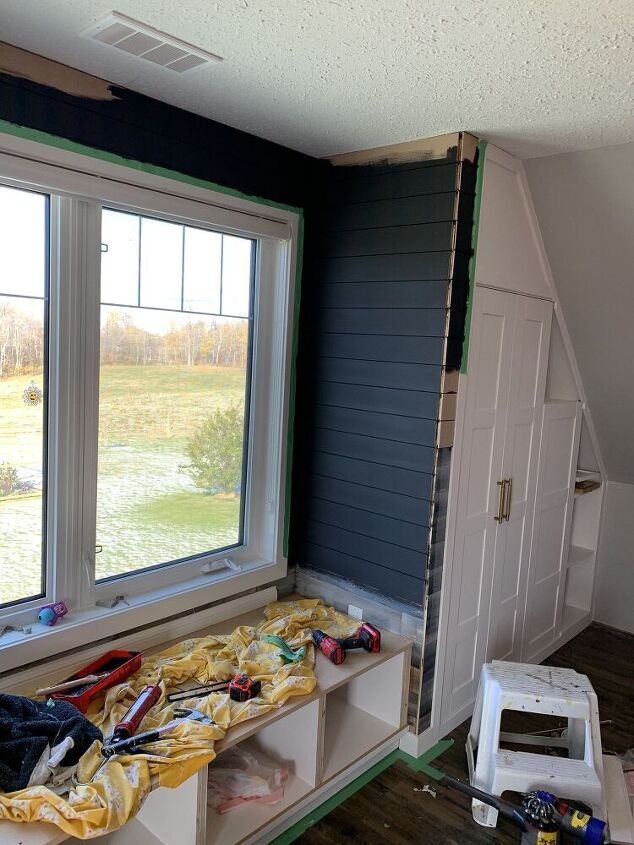
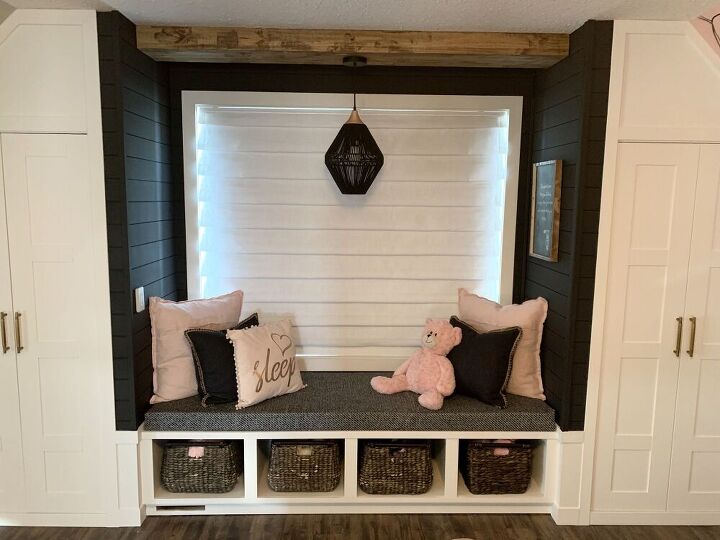
I didn't like the wood that was around the window, so I used 1/4" MDF and cut it into 3' strips and painted to black to create the look of black shiplap around the window.
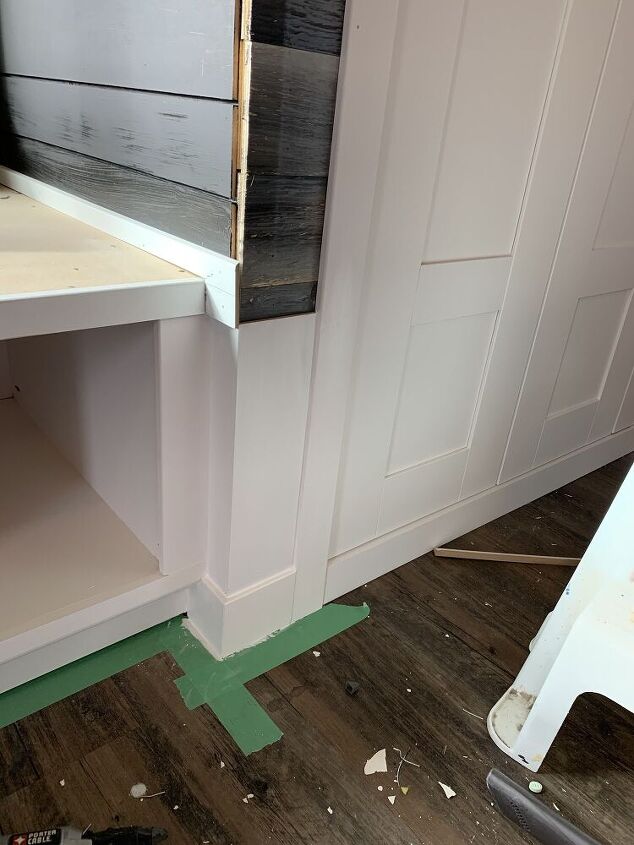
I then finished off all the trim work and painted it white.
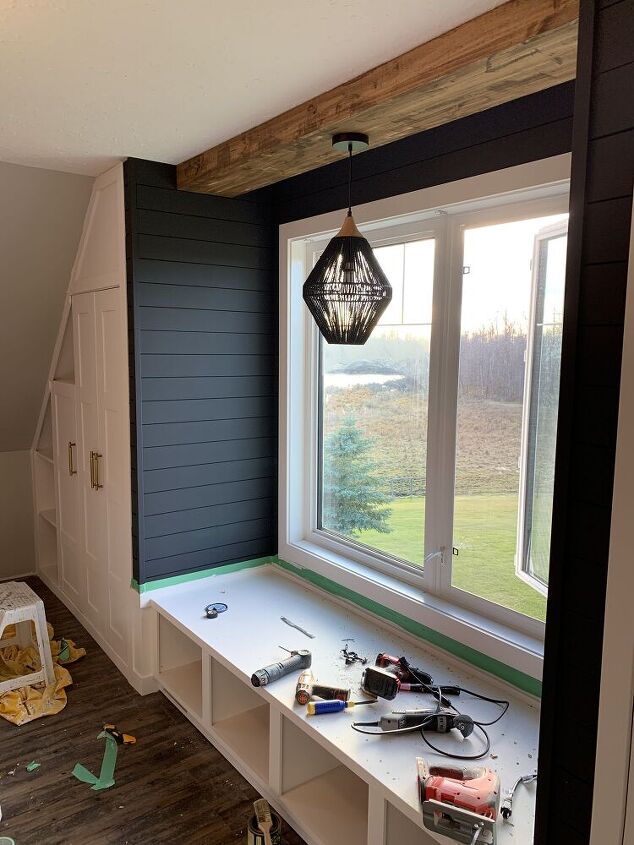
Once all the shiplap and trim was done, I decided to put a faux beam in the centre of the window bench and add a cute pendant light.
The beam is just a box open on one side made with 3/4' pine and it it secured to 2x2 pieces that run the length of the ceiling that are secured into studs. The beam is simply secured to those 2x2's with brad nails.
To create the look of the beam I used a belt sander to sand it and then used golden oak coloured stain.

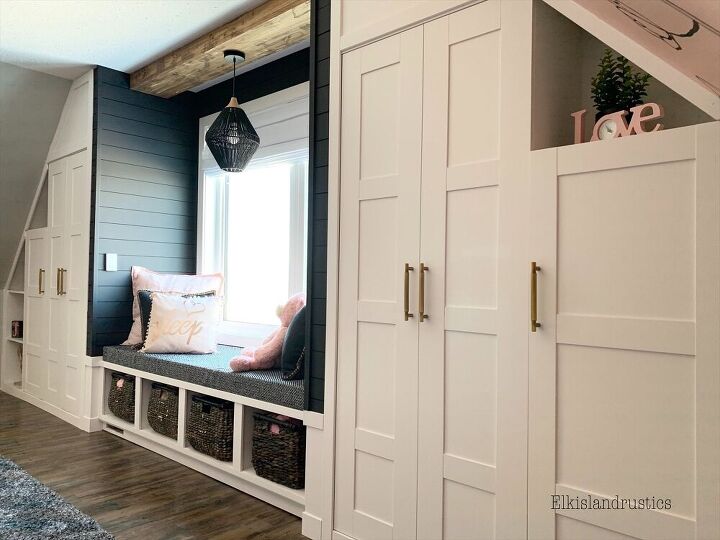
I upholstered a cushion to make the window seat more comfy. Added a few cute pillows and baskets in the cubbies.
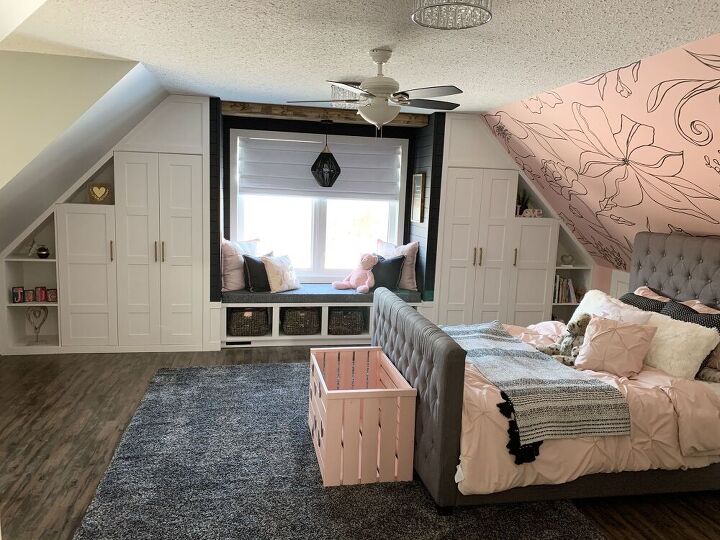
This definitely was not a quick project. However I couldn't be happier with the results. It is so crazy that Ikea wardrobes could help make this space into exactly what I wanted.
This post was a bit different them most, I can't really provide full cut list and such since every space is so different. However, I do hope that you are able to find some inspiration with what I did and create a gorgeous space of your own.
Thanks so much for following along with me. Please be sure to hit the follow button on here, HOMETALK .
As well, be sure to follow along with me on INSTAGRAM
Cannot wait for our next DIY together
xo
Amber
Resources for this project:
See all materials


Comments
Join the conversation
-
One of the best projects I’ve seen here!
Thanks for sharing!
-
You are very handy and it turned out so nice!


Frequently asked questions
Have a question about this project?