


Scrap Plant Stand

Anyone else really love plants but super tired of paying $50-$100 for cute plant stands.
I certainly am! So I dug deep into my scrap pile for this simple yet super project!
Step 1: Measure your ceramic planter to determine how big your stand should be. My planter was 6 inches across so I made sure my cross bar was 6 and 1/4 to leave some wiggle room!
Step 2: you want to create a cross bar that will hold your planter. To do this I cut two pieces of wood to 6.25 inches. Then I cut .75 inches off of one of the pieces and then cut that remaining piece in half. Leaving me with
- 6.25 inch piece
- 2- 2.75 inches pieces
Step 3: Next up you will want to cut the “legs” of the planter. I cut mine to six inches tall. So I ended up with 4 six inch pieces.
Step 4: Now that the cutting and math is done, let’s put it all together! First you will create the crossbar by gluing the 2.75 inches on either side of your 6.25 inch piece to create an X. This is best accomplished by using a clamp to
hold the 3 pieces together. I recommend letting this dry overnight and placing a weight of some sort on top of your wood so it doesn’t bow.
Step 5: Now that you have created the crossbar just use a nail gun to attach the 4 legs to each end. This really goes best with an extra set of hands but clamps could be used here as well. Be careful to Brad nail into the wood and watch those fingers!
Step 6: Next I gave everything a light sanding because I used some very scrap wood that had paint splotches.
Step 7: Next I painted the stand a beautiful green. The color is backwoods by Benjamin Moore in case you are interested!
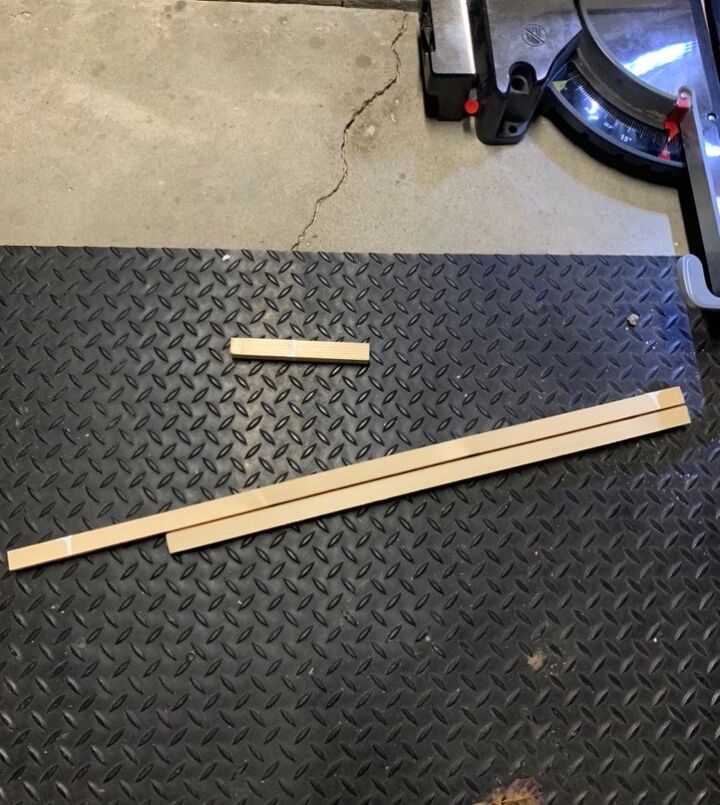
I chose this 3/4 inch x 3/4 inch scrap wood to start
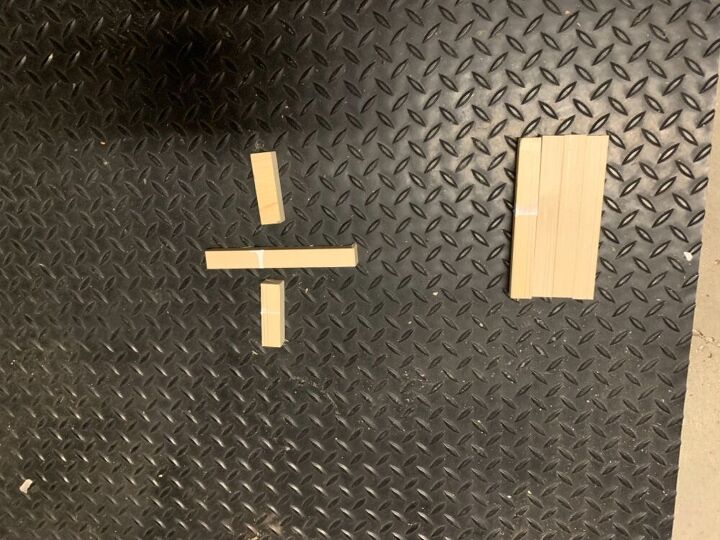
Here are all my pieces to our plant stand puzzle.
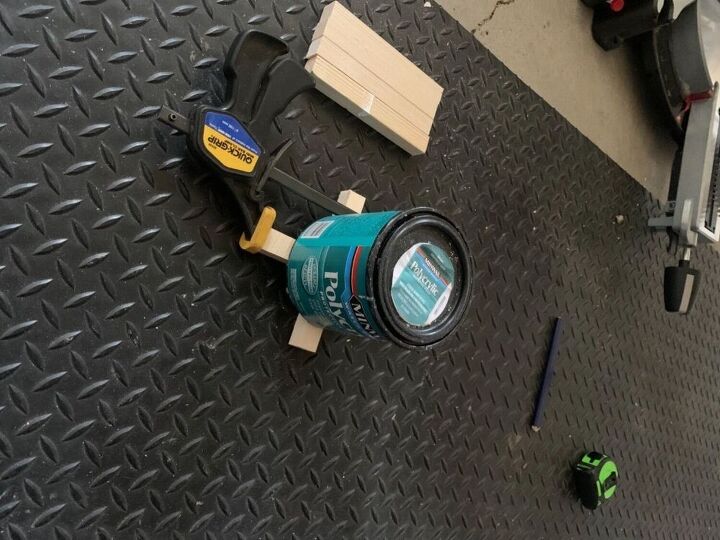
Step 4 is best accomplished with clamps, glue and some weight.

Paint the stand or even stain it!
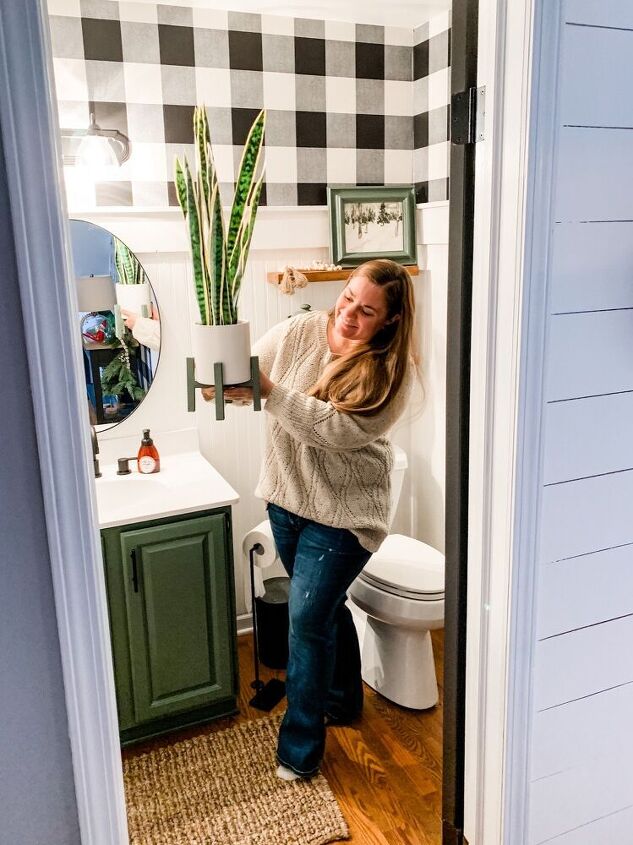
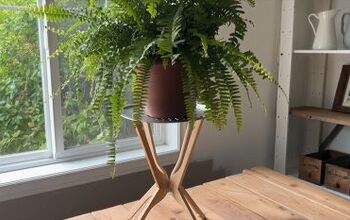
All finished! I really love this project and might just make some more soon
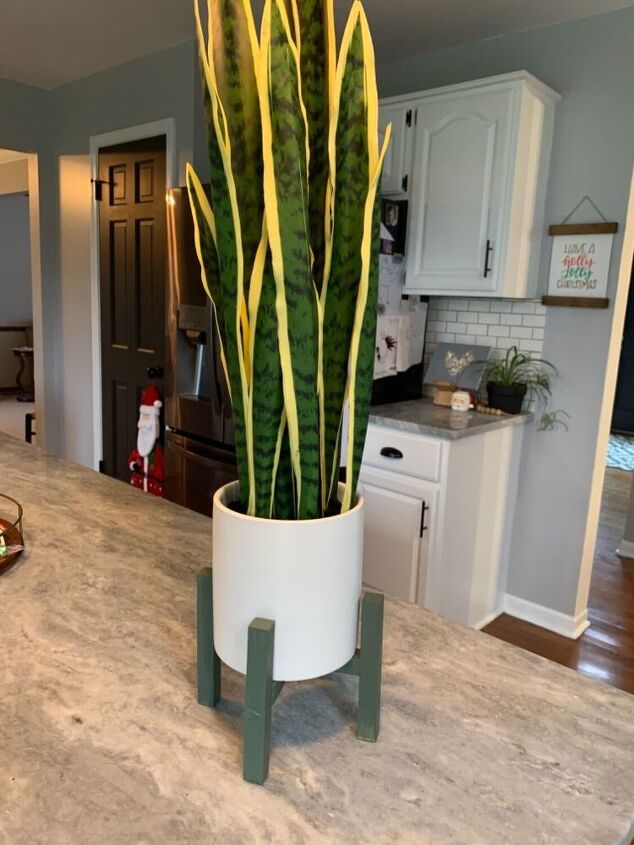
The plant stand makes this plain white pot more interesting!
Resources for this project:
See all materials


Comments
Join the conversation
-
The little plant stand is adorable! I’ve made several and the great big ones I made years ago, I did reinforce the bottoms. I used to have several but I really have no idea what’s happened to all of them. Guess I’ll have to get into my garage come spring..
-
Love it


Frequently asked questions
Have a question about this project?