


How to Make an Easy Resin Trinket Dish, Step by Step

I hope you’re well and looking forward to finding out about resin trinket dishes!
Hopefully, you saw my earlier post on how to make the perfect resin geodes which may give you a little leg-up on making these beautiful little trinket dishes too, but if you didn’t, don’t worry, everything you need to know will be in this post.
More Mother's Day Ideas
Just keep on reading or check out my YouTube video, linked below, to learn how to make these gorgeous little gifts.
I’ve listed everything I’ve used in today’s project below as well as a link to the online resin store where I get my resin from. They do free shipping and if you use my discount code below, you can get an extra 10% off any order with them! 
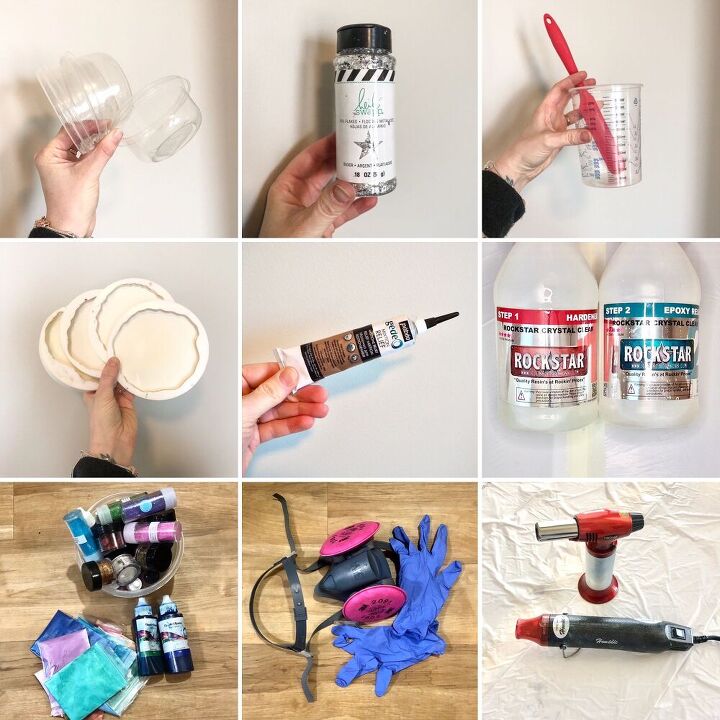
Tools and materials
- Resin - 4 Star 1:1 Thin Coat resin from Rockstar Resins. Use HANNAH at checkout for 10% off your entire order - https://rockstarresins.com/r?id=0b4e77
- Silicone molds
- Mica & Liquid pigments
- Plastic mixing containers and sticks
- Heat gun
- Blow torch
- Small plastic bowls
- Glue
- Silver/gold leaf
- Protective wear
Always read up on how to use resin safely 
If you would prefer to watch this tutorial then just click on the video link above to see my YouTube video of this project.
Please check out my YouTube channel and subscribe for future crafty tutorials.

How to mix the resin
I initially wanted to make 2 trinket dishes so I mixed 200mls of resin. Using this amount, I had enough to make 3 dishes.
If you want to make 2, I advise mixing 150mls of resin and for a set of 4 dishes, I advise mixing 300mls.
Depending on how many dishes you want to make or how much resin you have, scale up or down any future measurements I mention, but I’m basing my measurements on 200mls.
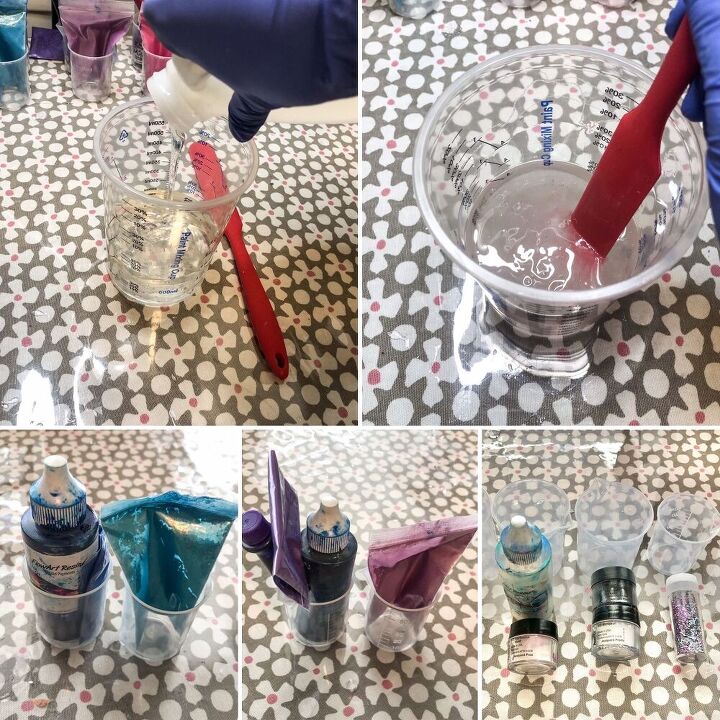
So, I added 100mls of resin into 100mls of hardener (whenever you buy ‘resin’ you will receive both parts, the resin and the hardener). Always add your parts this way around too as it makes for an easier combination and a more thorough mix.
Next, you want to combine the 2, stirring and mixing for at least 5 minutes. Take the time to do this step to get a nice rock-hard finish in the end.
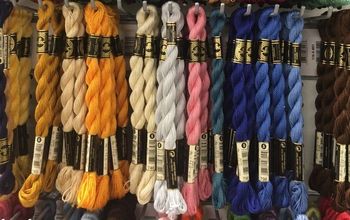
Once fully mixed, separate approx 125mls out into lots of little cups. The number of cups will depend on how many colours you want in your dishes. Then mix up the colours you want using liquid and mica pigments.
If you want all your dishes to have a uniform look then I advise mixing 1 centre colour (like a glitter or gold leaf for example), 2 accent colours (like blue and purple) and 1 or 2 ‘overlaying’ colours (like white, silver or gold). This combination usually makes for an interesting aesthetic.
There are no rules though and you can use whatever colours make you happy; experimenting is all part of the fun
Colors
I mix the following colors:
- Sparkly purple glitter - 25mls
- Dark blue - 25mls
- Dark purple - 25mls
- Light blue - 25mls
- Light purple - 25mls
- White - 50mls
- Silver - 50mls
For my 3 dishes, I used my colors as follows:
- Sparkly purple glitter, dark blue, light blue, silver, and white.
- Sparkly purple glitter, dark purple, light purple, silver, and white.
- (leftovers from 1 & 2 when I realized I could make another dish!) Sparkly purple glitter, a mix of dark blue and dark purple, a mix of light blue and light purple, silver and white
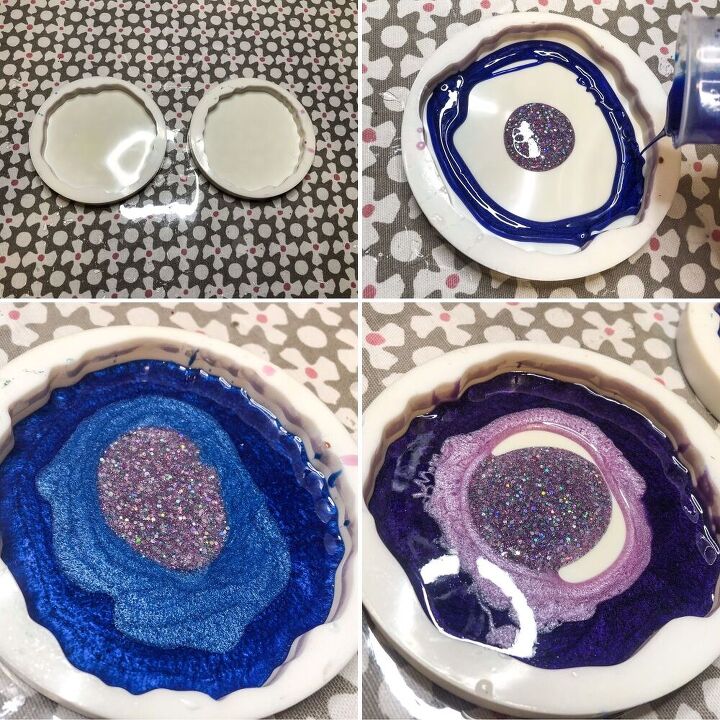
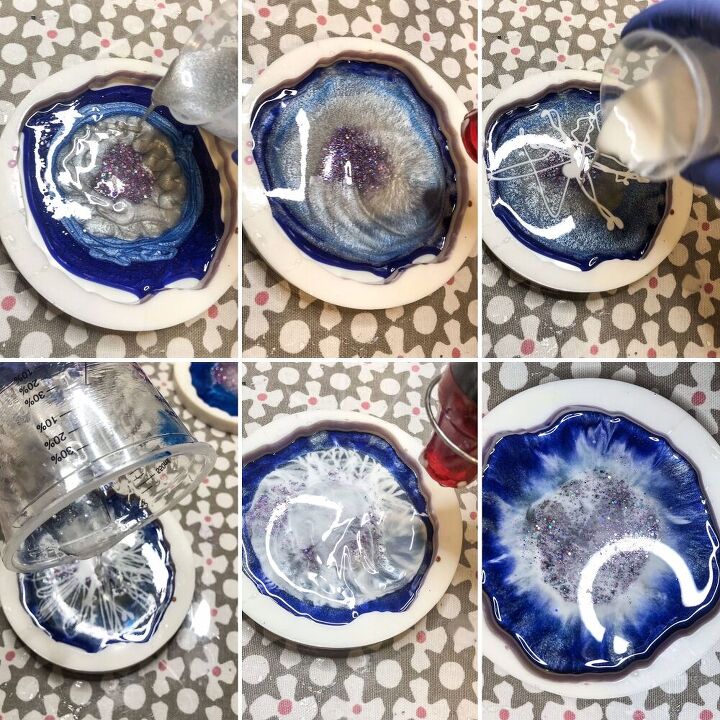
I add my colors to my geode silicone molds starting with my sparkly center color and then my accent colors, working my way from the outside in.
*It may be easier to see exactly how I poured my resin by checking out my step-by-step YouTube video of this project, linked above*
Once the blues and purples are down, I add rings of silver and white over the top of these. For my 3rd dish, instead of a ring, I added my white in a multi-pointed star-type fashion for fun as I wasn’t expecting a 3rd dish and thought I’d experiment a little.
After laying all my colors, I split the remaining 75mls of clear resin between the 3 molds, pouring this into the center of each.
I use my heat gun to blend the colors and then pop any surface bubbles with my blow torch.
You can also pour your resin in the style of the geodes in my earlier post. Every step up to the point in which you allow your resin to cure is the same.
This will mean that your trinket dishes will look like my blue and white geodes. I also have a YouTube video for this. Check out my channel to see.
Once you’re happy with how your dishes are looking, leave them to cure for a little less than half the time that they would usually take to cure. This resin, the 4 Star Thin Coat resin, takes approx. 12 hours to fully cure so I leave them for appro.x 5 hours.
Shaping the trinket bowls
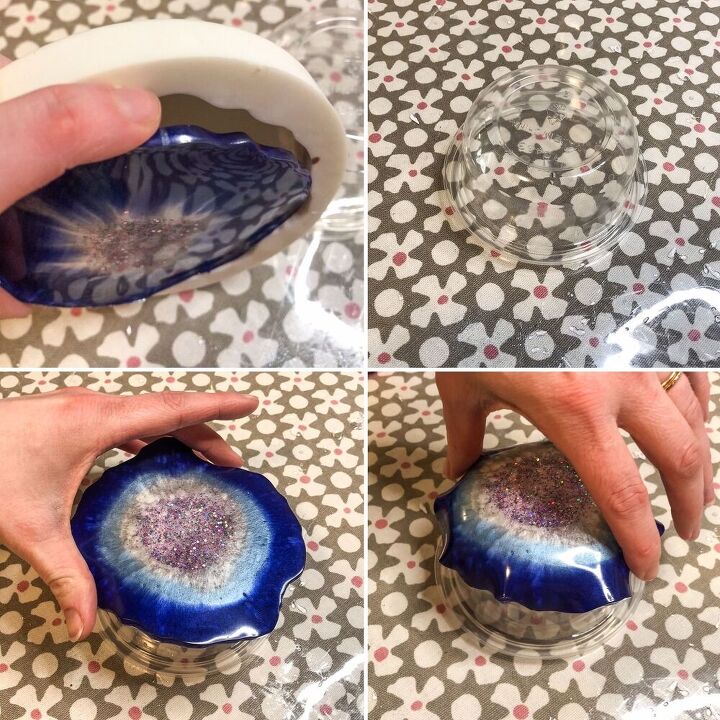
Five hours into the cure, remove the resin from the molds. The resin should be soft and bendy but no longer liquid. If the resin doesn’t come away nicely from your molds, then check back on it in 30 mins.
If the resin comes away from your mold nicely then we’re good to go. The resin may be tacky to the touch, this is fine, but try to handle it as little as possible to avoid fingerprint marks.
Now place the resin pieces face down on your up-turned plastic bowls (you want your favorite side to be the one you see when flipped the right way around).
If the resin is a little bit too stiff/rubbery and isn’t staying in place when you bend it around the base of your bowls, use your heat gun to slightly warm up the resin so that it softens and becomes more malleable.
This should enable you to bend the edges of the resin around the bottom of the bowl to create the dish shape that you want.
Apply less heat than you may naturally want to or your resin may then become too soft and droop down the edges of your bowls during the final cure. A little heat at a time and patience when shaping is the way to go.
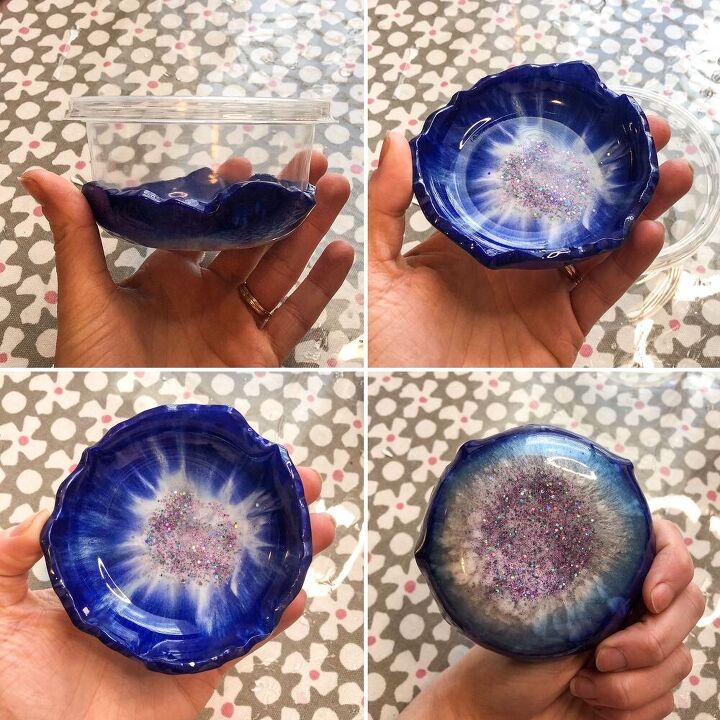
Once you’re happy with the shape, leave the resin to fully cure for the remaining 7 hours.
Adding gold to the edges
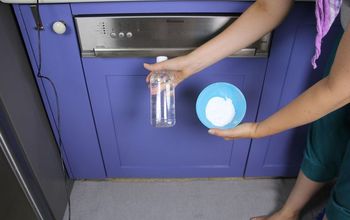
Once fully cured, separate the resin from the bowl.
This should happen with ease as long as you use plastic bowls. Your plastic bowls should also be completely unharmed and you can continue to use them as bowls or reuse them to make more trinket dishes.
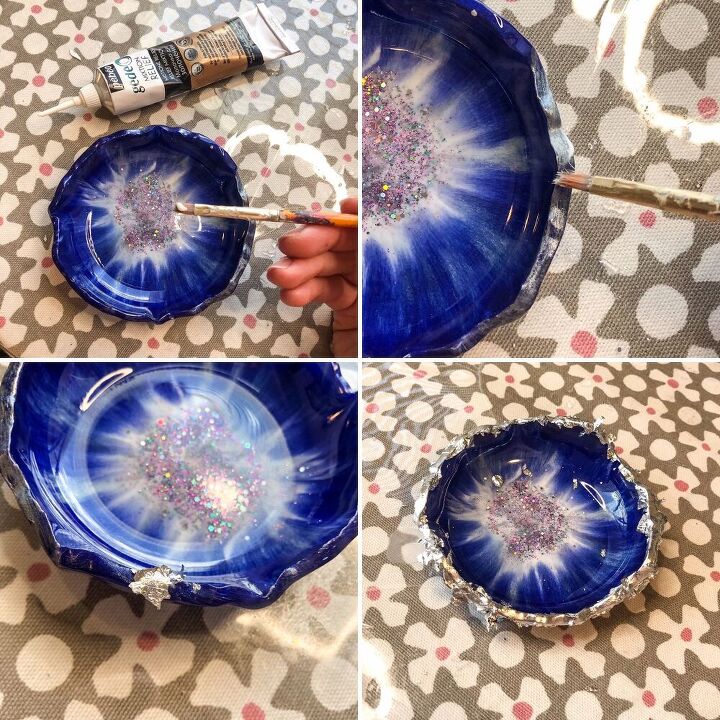
Use glue or relief paste (which is great for gold leaf because it remains sticky/tacky for a lot longer than normal glue) and apply it to the edges of your dishes with a thin brush.
If you do use relief paste then leave the paste to sit for 10 mins after applying before moving on to the next step so that it goes from being wet to tacky.
Once the paste is tacky, fully cover the edges by applying your gold flakes/sheets. Leave for another 30 mins after all your leaf has been applied before dusting off the excess with a brush or your finger.
If you missed any spots, just repeat the last step until your bare edges are no more.
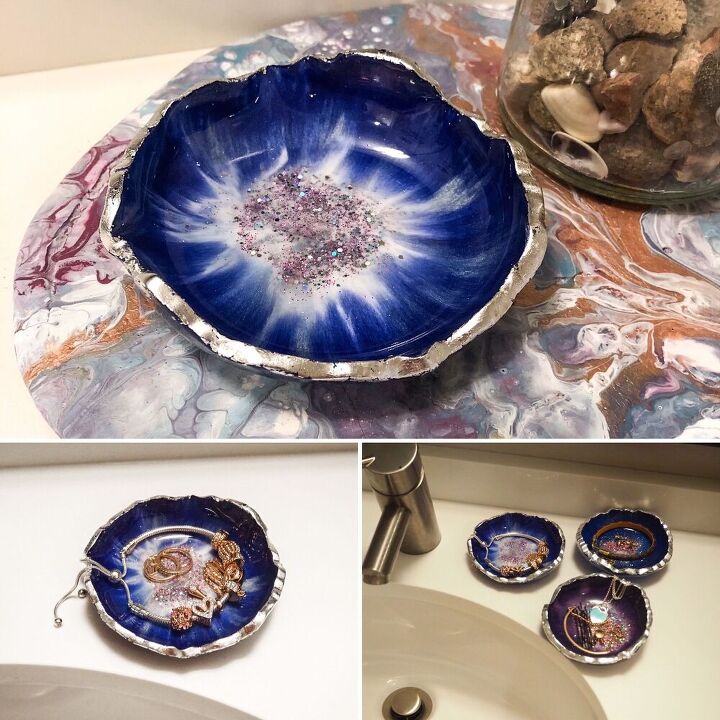
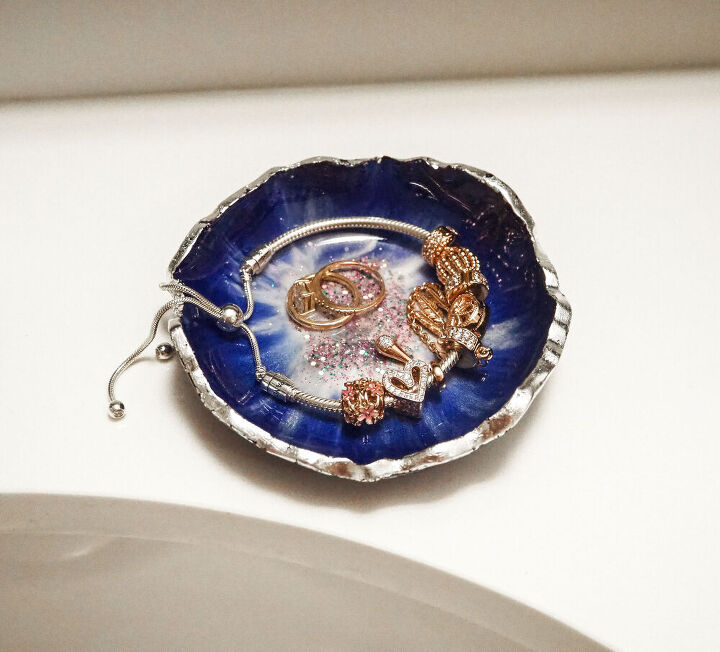
Resin trinket dishes
Your DIY trinket dishes are complete and perfect for rings, pins, necklaces, and of course, gifts!
I kept these dishes for myself but I made more and have them for sale in my Etsy store. Click here to visit and take a look at all the pieces I have for sale.
Please drop any questions you have down below and I’ll be more than happy to get back to you.
Take care and happy crafting x


Comments
Join the conversation
-
Really beautiful, especially how you finished the edges
-
I am SO DOING THIS! I am in love with amethyst. Utterly, completely in love with amethyst. I can see amethyst trinket bowls (probably in absurd numbers) in my future. I'll also be experimenting with other stones to make gifts for friends. And experimenting with my faux malachite and faux lapis lazuli painting techniques to see if I can adjust that for use with resins! I had never thought of that before!
MUST BUY HEAT GUN!


Frequently asked questions
Have a question about this project?