


Super Easy DIY Crate Bookshelf for $100
Do you need to separate a room in your apartment or add more storage on a budget? Make your own DIY wooden crate bookshelf! We made this SUPER EASY crate wall for just $100!
If you love this project, grab your quick start DIY guide & subscribe to our blog!
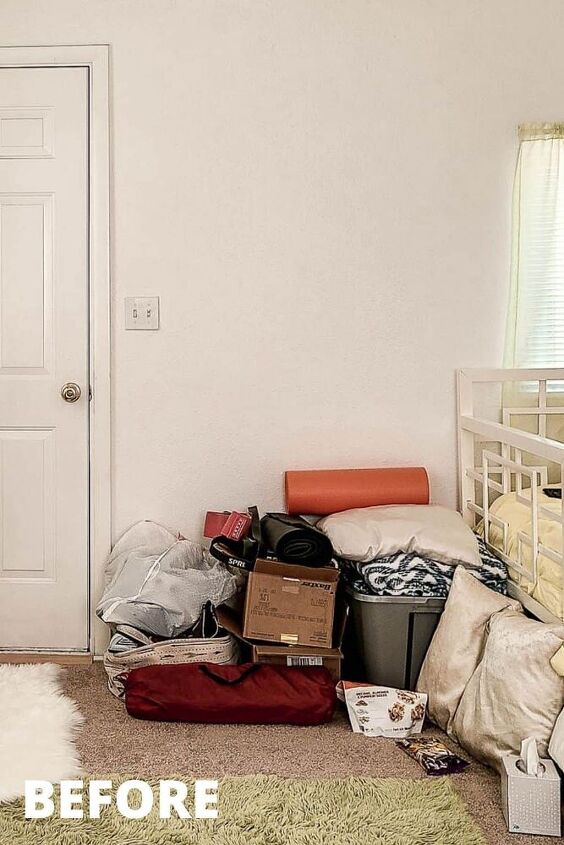
Here’s what the area looked like before! This is their front door area, so we wanted to create some separation so you don’t walk in the front door and BOOM, there’s a bed there. It also provides a great place to store the shoes right when you walk in too.
Step 1. Figure out the configuration for your crate bookshelf.
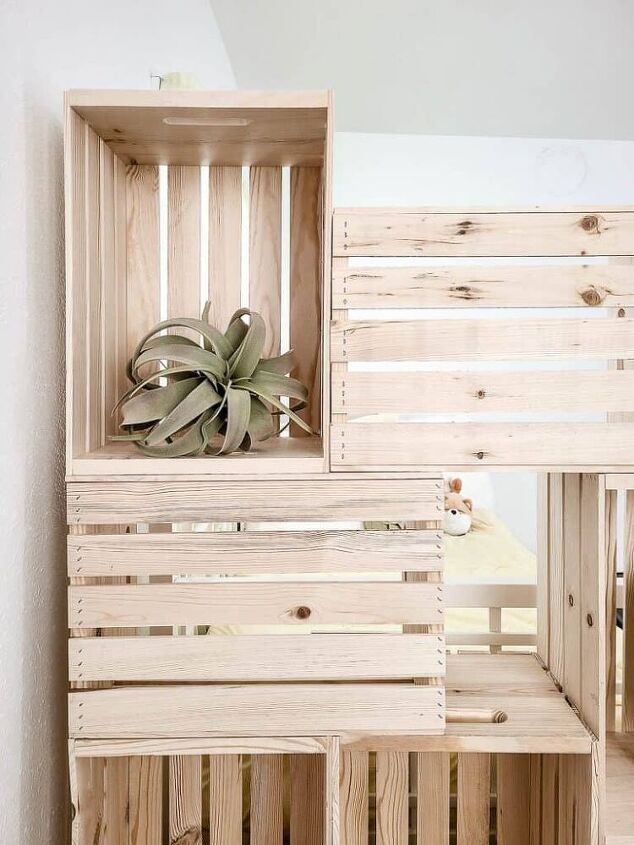
Play around by stacking the wood crates in different configurations to get the right arrangement that will work for you. Remember that you can put the crates facing either way to make the crate wall usable with storage on either side.
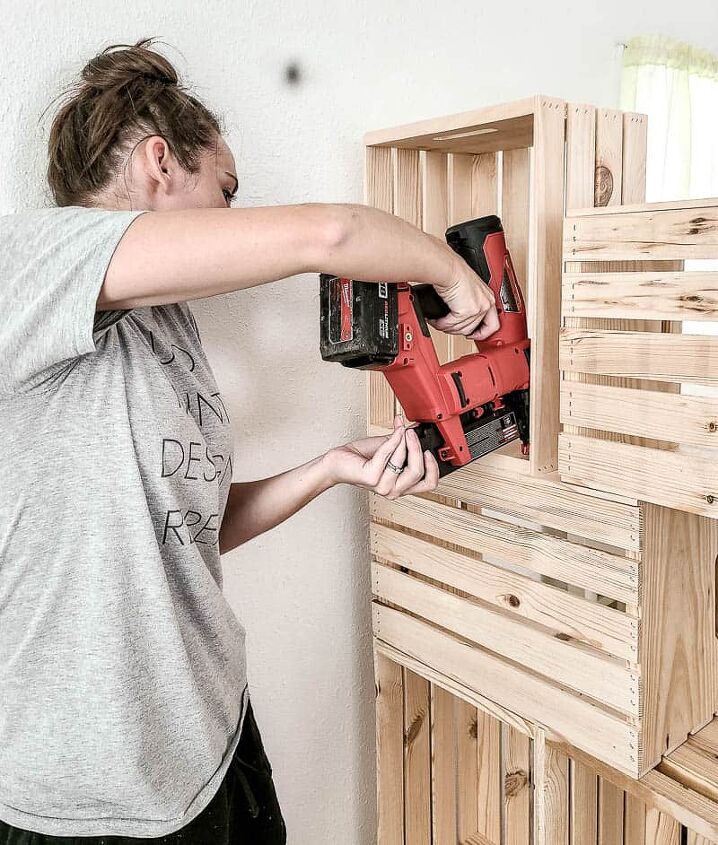
Step 2. Nail wooden crates together.
Nail the crates together in several places on each end of the crate.
Be sure to only nail the crates on the ends because that wood is thicker (3/4″) and the slats of the crates are 1/4″ thick. Together that is an inch and we’re using 1 inch nails.
Step 3. Secure to wall (recommended).
It is recommended to secure the crate bookshelf to the wall, ESPECIALLY if there are any kids around. Depending on how your baseboards are, you may or may not be able to get the bookshelf to sit flush against the wall.
You have a few options to secure the crate bookshelf to the wall:
- If no baseboards – Nail directly into the wall through the inside of the crate, preferably at the location of studs in your wall
- If you have baseboards – Add a spacer with a small piece of wood between crate and wall and nail, preferably at the location of studs in your wall
- If you have baseboards – Add a corner bracket, like this
*Note: if the wooden crate bookshelf is not secured to the wall, be sure to not load it too heavy on the top crates.
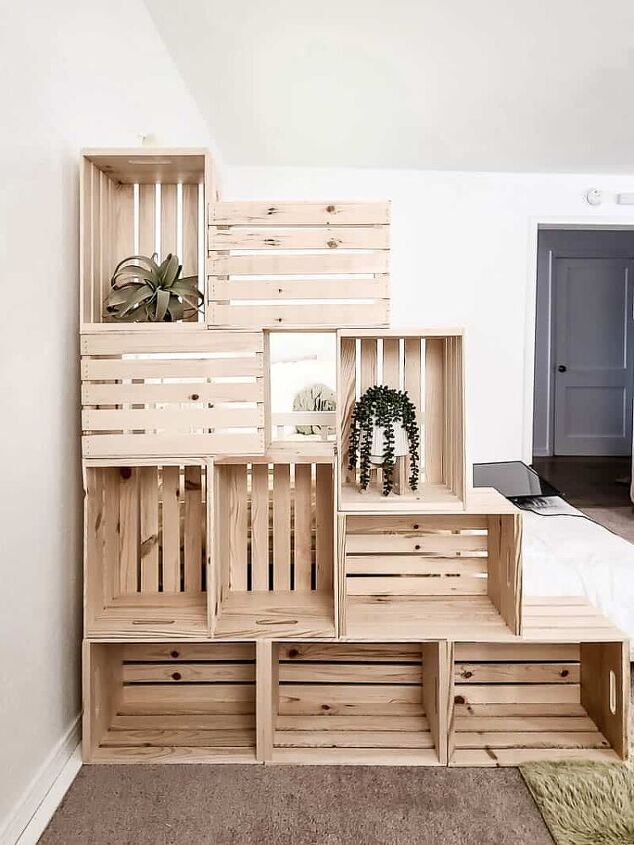
So cute, right?! This crate wall is SUCH an easy and cheap way to add simple storage to your open, separate the room of a studio apartment, or just to add a fun place to decorate.
If you love this DIY wood crate shelf, check out all of my DIY wood projects tutorials in the archive here!


Comments
Join the conversation
-
Here is a CRAZY idea.... Use heavy duty VELCRO (at least 1.5 inch wide) to attach the crates together... then the whole thing can be taken apart and moved if needed or re-arranged... glue the Velcro to the crates with a good quality glue for longevity and the crates can be painted to match the color of the Velcro... white, black or tan
-
You could use L brackets to attach to the wall. It is a better choice than nailing. Especially at the top so it does not fall over forwards or backwards. Loaded shelves are heavy and can kill a child if they crash down on a child.


Frequently asked questions
Have a question about this project?
what are the crate dimensions?
Very cool, but for $100 couldn't you have bought a piece of furniture with shelves? Maybe at Ikea?