


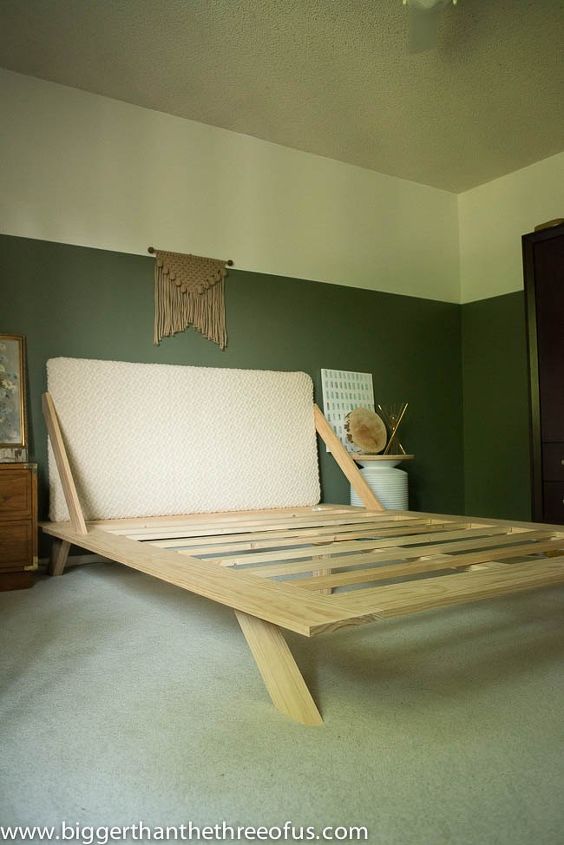
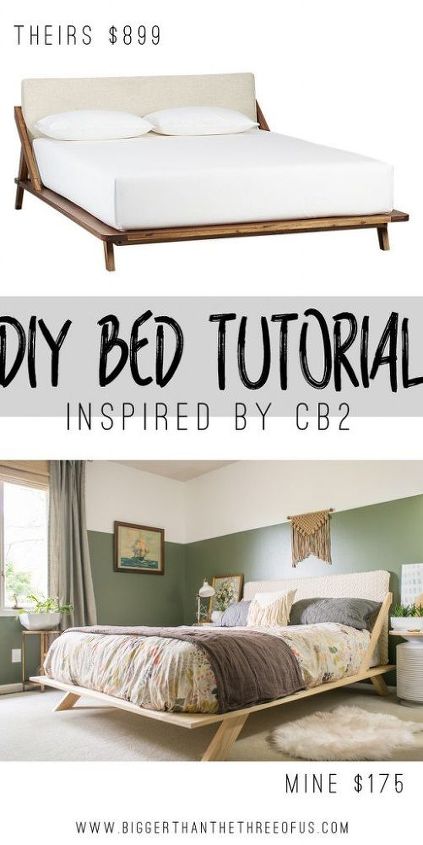
DIY Mid-Century Modern Inspired Bed
$175
3 Days
Advanced
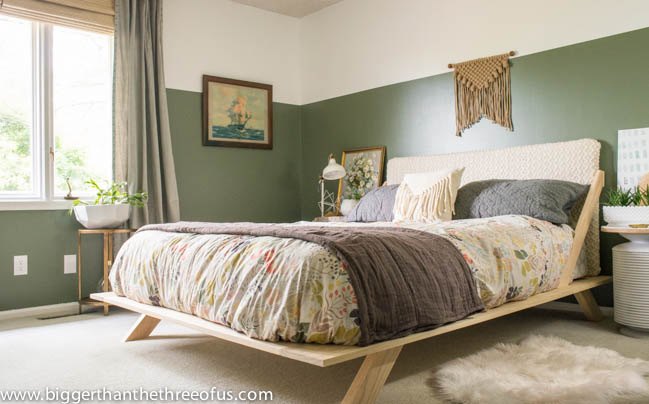
Today, I'm sharing a tutorial for a queen size mid-century modern inspired bed. This bed was inspired by one at CB2. Theirs is $899 and my husband and I made this one for $175.
I hope you love it as much as we do!
*This tutorial is very lengthy. If you would like to see more pictures of each step, please visit my blog.
http://biggerthanthethreeofus.com/mid-century-inspired-diy-bed/
I hope you love it as much as we do!
*This tutorial is very lengthy. If you would like to see more pictures of each step, please visit my blog.
http://biggerthanthethreeofus.com/mid-century-inspired-diy-bed/
*For disclosure purposes, we are not carpenters or extremely skilled at building projects. So, this tutorial has worked for us but we wanted to share that we are learning as we go and what worked for us may/may not work for you. Thanks!
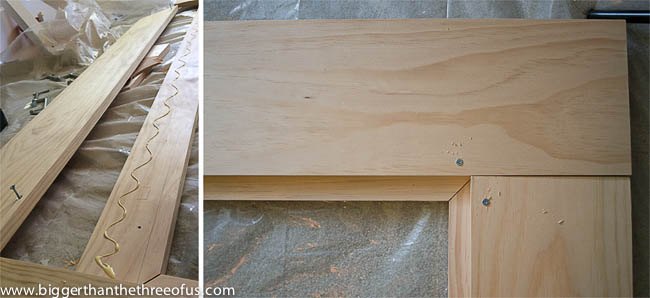
1. Gather your Supplies
Step 2:
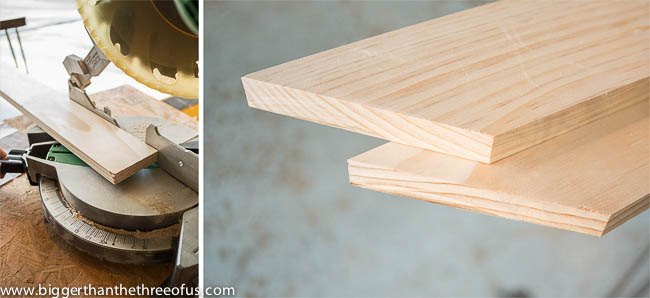
(Picture of step 2 continued)
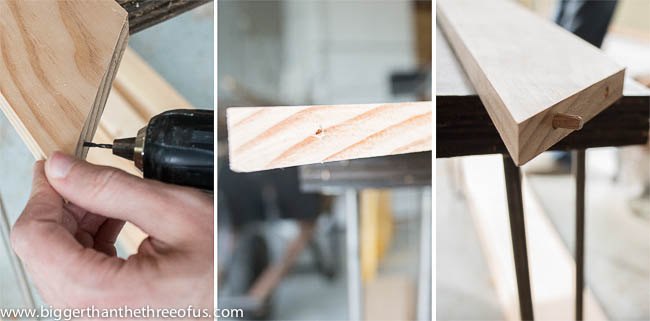
Step 3: Assemble the Support System
Make sure your 1/4″ bit is handy along with wood glue and 4 more 3″ screws. I recommend fitting everything together and pre-drilling all of your holes before applying glue. You’ll need to drill in from the outside corner of one of the boards far enough to let the three inch bit reach into the joining board. How deep you need to drill depends on the placement of your dowel pins and where on the board you started to drill. Just be careful no to go too far. Once you’re ready, go ahead and apply a good amount of glue inside the holes we drilled for the dowel pins and to one face of the board (where it will meet the other board). Push everything together and then drill in the 3″ screw to hold it all tightly together while the glue dries.
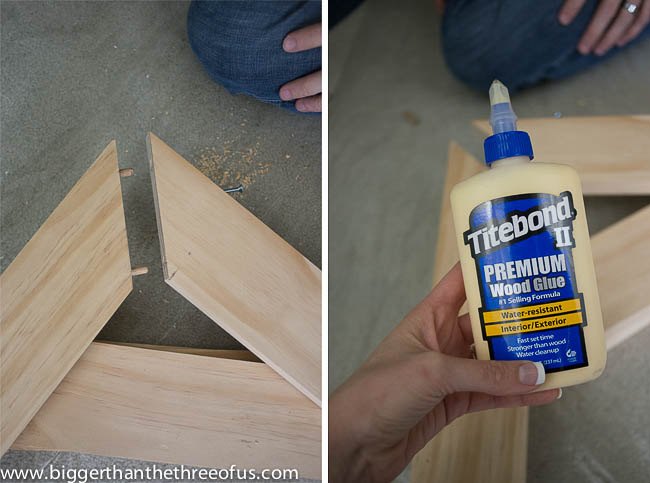
The last part of assembling the support system is to attach the center support. Because all of the support system will be hidden below finish boards, you don’t need to worry much about any holes used to attach the pieces. Attach the middle support at the midpoint, between the two long sides. Use the 1/4″ bit to drill 2 holes on each side. They should go about half-way through to the inside starting from the outside edge. Apply wood glue and then use 3″ screws to secure everything.
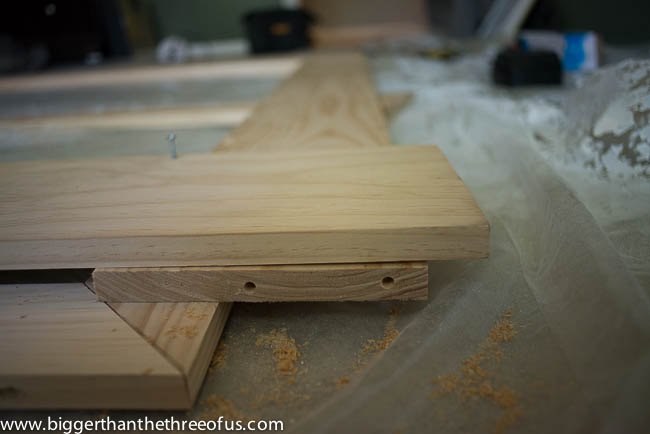
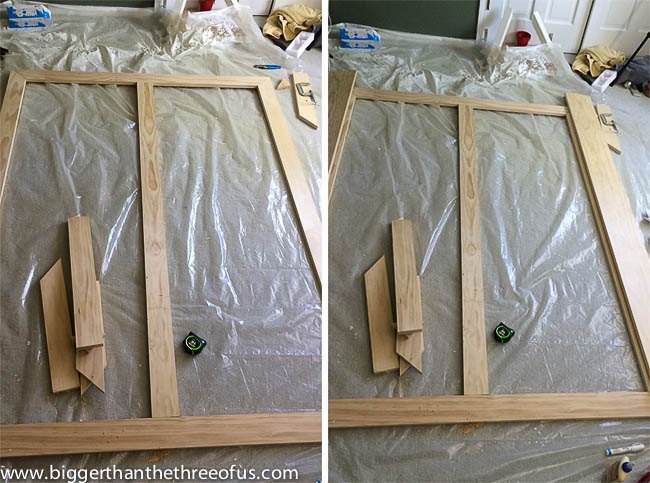
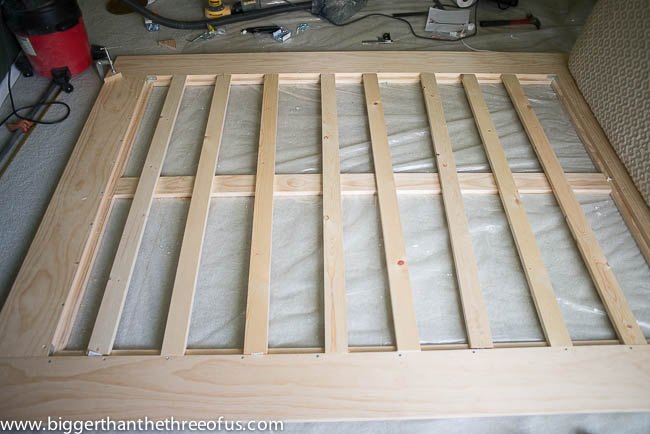
Step 4: Attach the Finish boards
Once you know everything is in place, you’ll want to screw and glue the short boards in place from the top. Use the 1 1/4″ wood screws but be careful to keep them close to the inside edge of the boards. If you go further out than 1/4″, your mattress will not cover the screws. Once the short boards are glued and screwed in place, you’ll want to glue the dowel pins and ends of the short boards where they meet the long boards. Additionally, glue the top of the support system where the long boards will sit. With all of that glued, place the long boards and then secure them with 1 1/4″ screws (like you did with the short boards). Again, be careful to keep the screws towards the inner edge of the bed frame so your mattress will hide them.
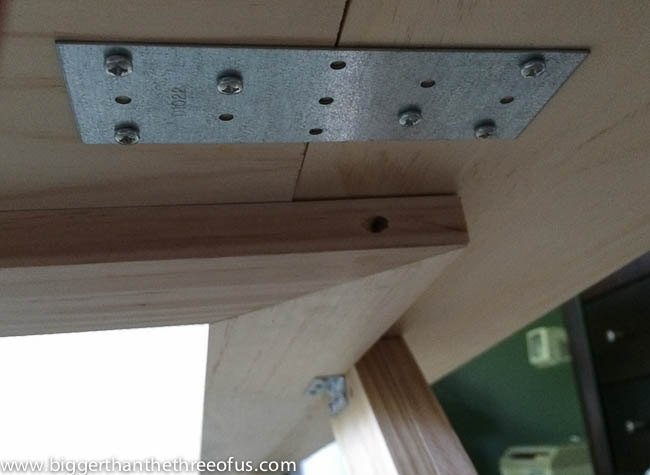
I used the one 3/4″ x 1 1/2″ corner braces to make sure the finished boards were held tightly to each other. I also used 1 3/4″ x 5″ metal ties underneath each of the corner connections to add a little stability.
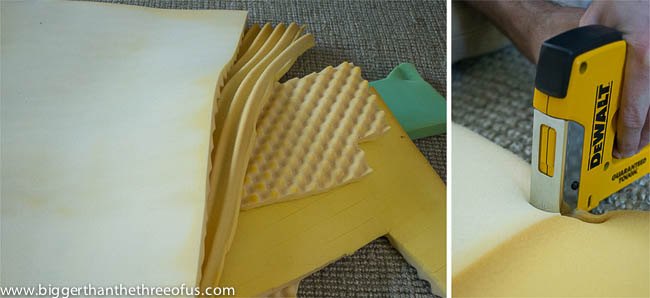
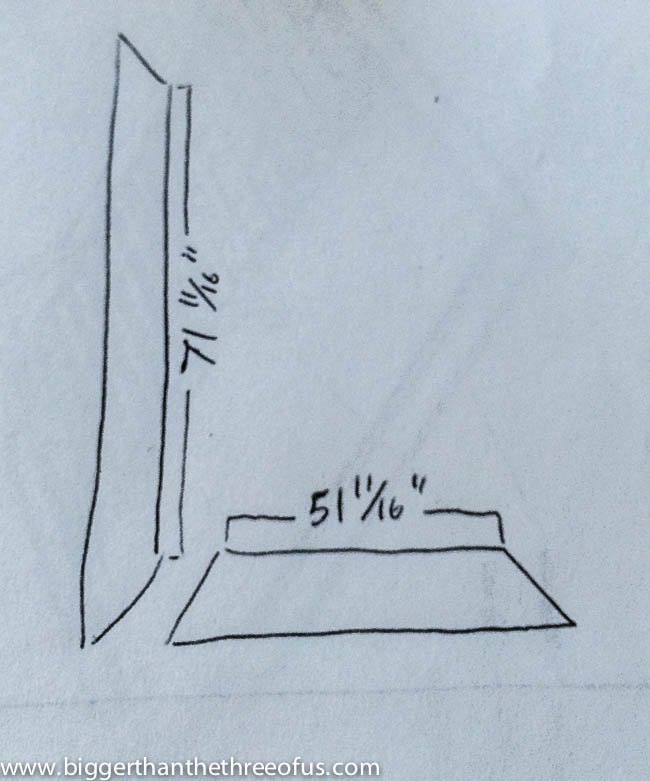
Step 5: Make the Headboard
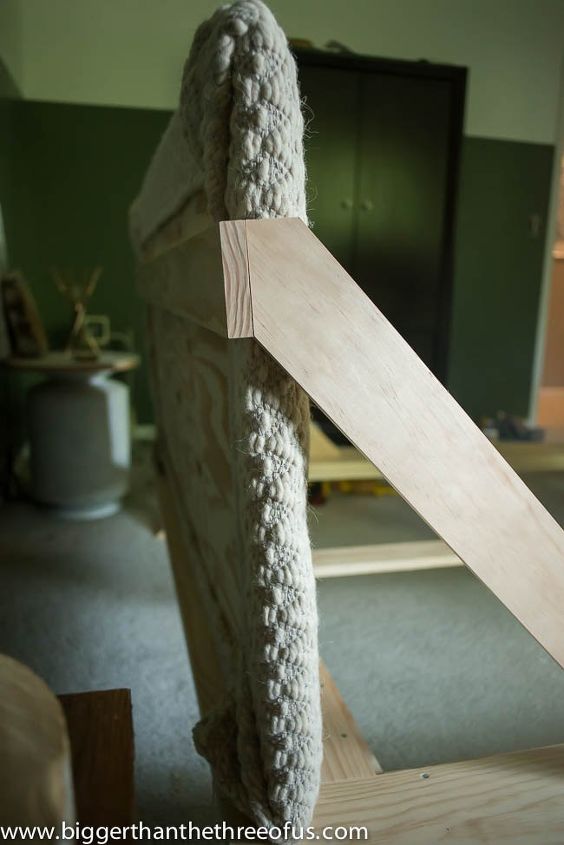
Step 6: Attach the Headboard

The support that connects the two arms and runs along the back of the headboard is just a simple 1″ x 4″ x 6′ board trimmed down to 62.5″. Before attaching the arms to the frame of the bead, I attached the arms to each other using the 62.5″ board. You’ll probably need an extra hand for this part. We held everything in place, headboard included, and then tacked the boards to each other using finish nails. Once you’re happy with the positioning, use 1 1/4″ screws to hold the support to the arms. Next, we removed the headboard and one of us held the arms and support in place while the other went under the bed and screwed into the arms from the underside of the frame. The 3″ screws are best for this job, but you’ll need to measure (and then re-measure) the placement because it will be hard to cover up an extra screw hole at this part of the frame.
Step 7: Make Your Slats
We haven’t stained our wood, because I can’t decide on the color. But, because we used Pine and it’s a soft wood it needs to be stained. To get a better finish, apply wood conditioner and then stain. I will update you all on this part once I finally decide what stain I want to use.

Want more details about this and other DIY projects? Check out my blog post!
Comments
Join the conversation
3 of 64 comments
-
My first thoughts were the same. Oh it's lovely, Oh my shins hurt.
-
I really love what you did...i know it's simple woods, but its sexy and kind of has a luxury feel to it! You softened it nicely with your bedding. Really great job! It makes me feel like I'd love to sleep on that! Awesome.


Frequently asked questions
Have a question about this project?
you had a link to a rug in your tutorial. Which rug is it? As the link didn't take me to a specific rug. thanks in advance.