


How I Revamped My Bathroom With a Plank of Wood
Weeeeee! I've been wanting to do this for the longest time! Check out how I revamped my bathroom with a plank of wood. It was so easy! (and I didn't spend a dime!)
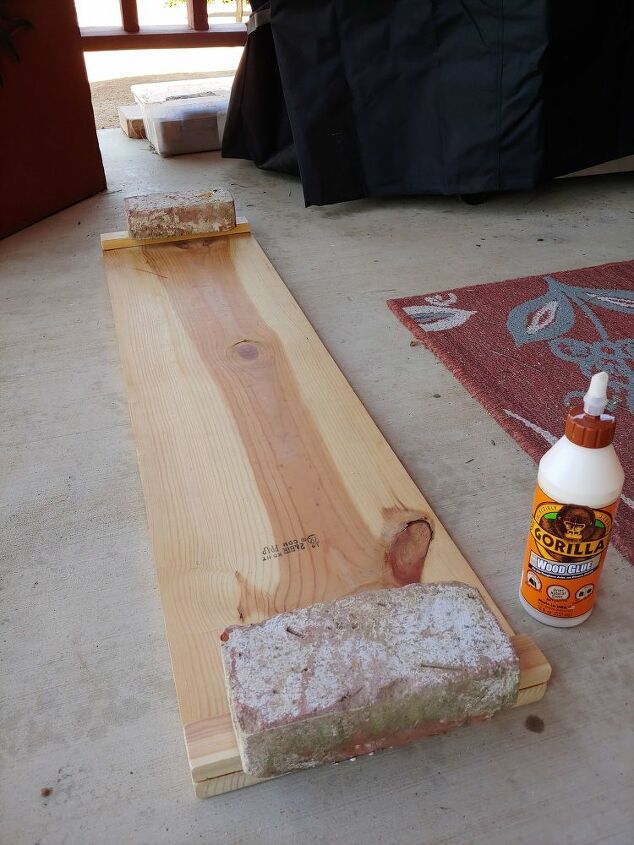
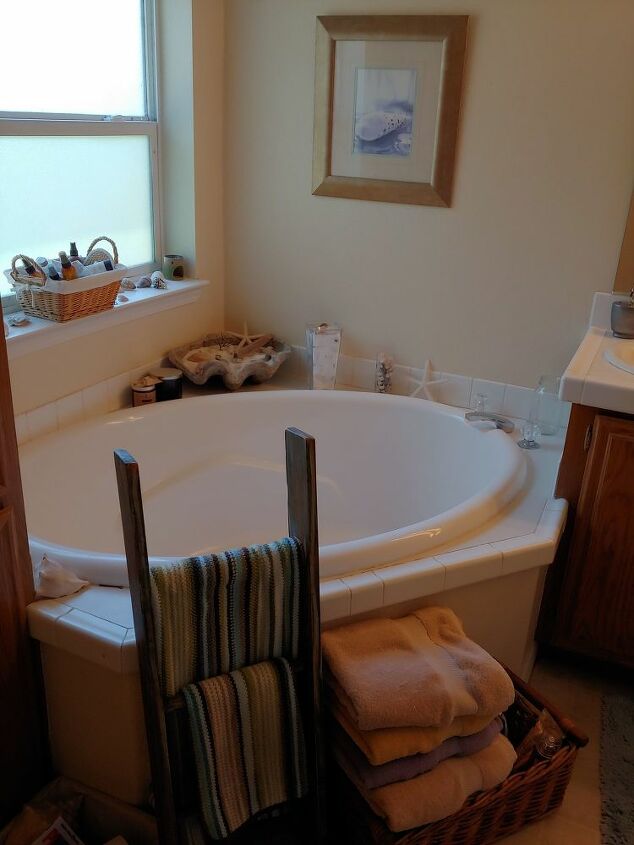
Our master bathroom hasn't had an update in over 5 years, and I was (quite frankly) getting tired of looking at it. I keep seeing these stylish bathtub caddys on Pinterest, and I have wanted one for the longest time. This week I remembered that my friend gave me some wood planks when she moved, so I brought one into the bathroom to see if it would be a good fit. OH MY! It worked out PERFECTLY! Since I already had stain and wood glue from previous projects I ended up NOT SPENDING A DIME on this update! YAY ME!
Basically, its a wood plank and two cross pieces, one for each (underneath) side of the plank. After cutting all the pieces to size I used wood glue to attach the cross pieces.
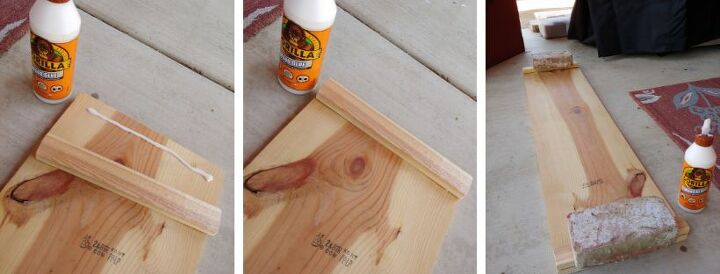
The glue dries in less than an hour, so this is when I take a lunch break and fold laundry...lol
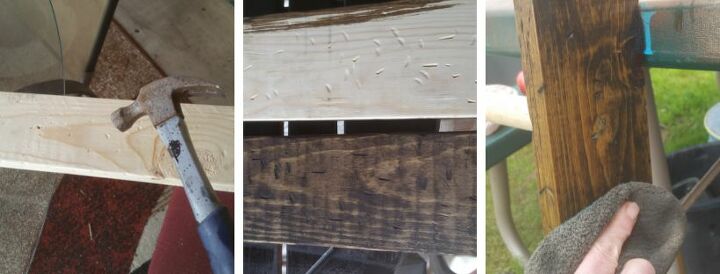
Here are a few pictures from a previous project, this is how I distress the wood to make it look like a barn find. Bang up the plank with a hammer, then stain it with Jacobean colored stain. I don't want a heavy stain look, so I wipe off the wet stain with a clean cloth (old t-shirt)...this really gives it an interesting "aged" look.
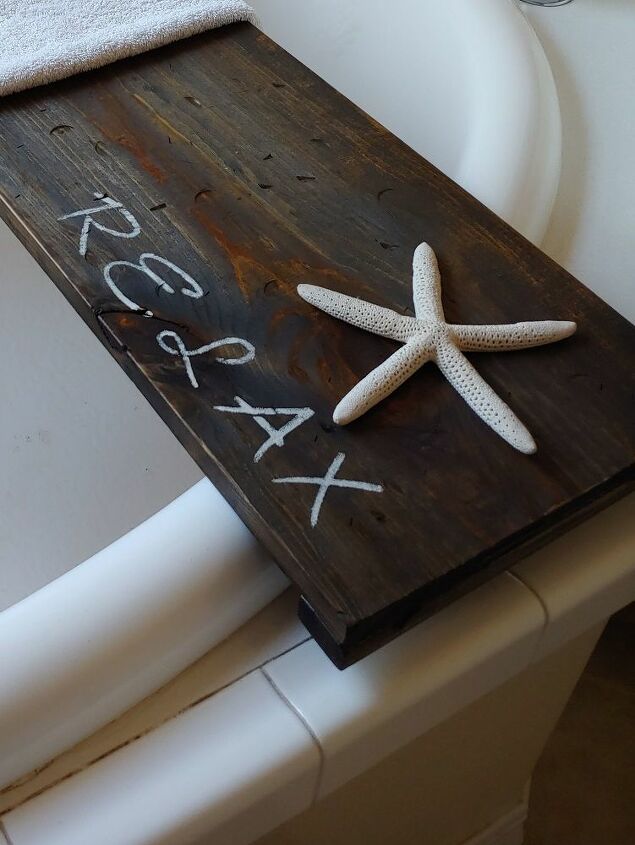
The final step was stenciling the word "RELAX" onto a corner of the plank, and I hot glued a starfish over the wording. It came out SO CUTE.
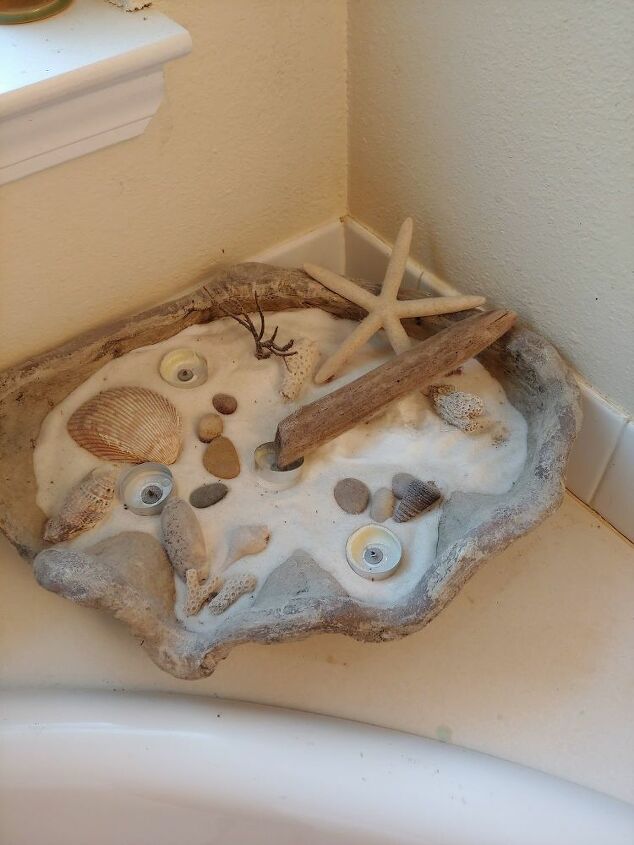
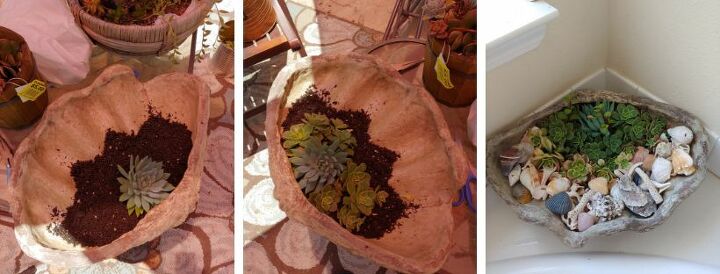
This entire corner of my bathroom is peppered with seashells. Including this large plaster clam shell I picked up at a garage sale years ago. In a previous bathroom update I filled the clam shell with salt (representing white sand) and decorated it with smaller shells, other beach finds, and candles. That was 5 years ago...its looking old and tired now. The "white sand" is not so white.
I took the clam shell outside, saved the small shells and tossed the salt. This is now going to be a succulent planter. This bathroom gets nice morning sunlight and plenty of humidity from showers...so I think succulents will do well in here. I put a small amount of potting soil in the deepest corner of the clam shell and then started adding succulent cuttings.
After a few small other touches, like white towel and handcloths...here is my final reveal. Squeeeeee! I'm SOOOO happy!
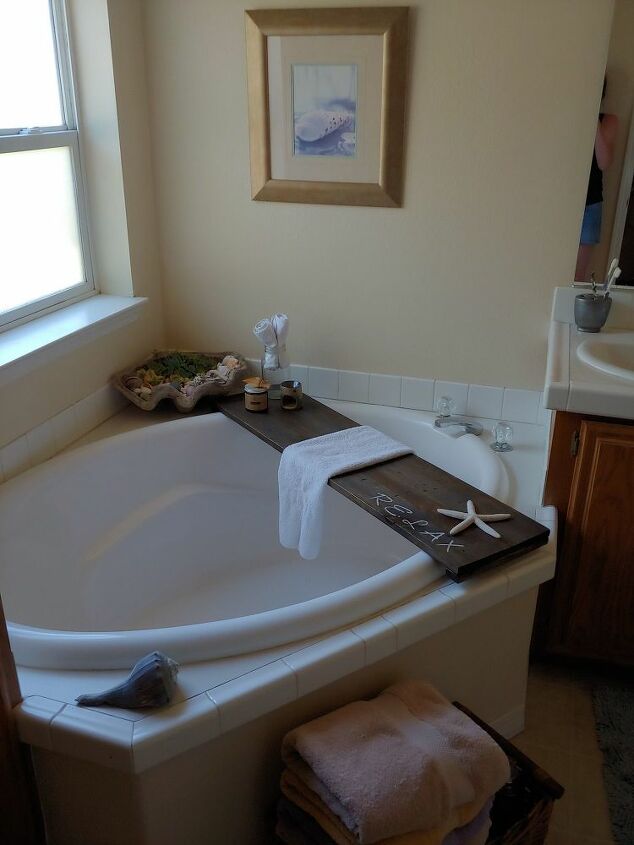
There is still more I want to do with this wall (and the rest of the room), but for now, I am loving the new update, I couldn't wait to share it. Eventually my goal is to stain all the cabinets this same color...it will look SO COOL.
Questions? Comments? Feel free to contact me or say hello below! Be sure to follow me on Facebook and Instagram @JanesRealLife
Find this and other fun projects on my website: https://www.janesreallife.com/


Frequently asked questions
Have a question about this project?