


Bathroom, Shower & Bedroom Remodel

I decided after the many comments on my individual projects, to go ahead and put together just a before and after photo results of the 4 room remodel we did to show what it all looks like altogether! If you are interested in the steps I took for each of the rooms, I've broken it out in 4 separate projects; the bedroom, the sink room, the shower build, the walk in closet, and the toilet area (if you look at the projects I have listed it shows all the steps for each room.) Thanks for all the positive comments. This was a 5 month project overall, we put it off till last in the total house reno project. The kitchen remodel (with penny backsplash) and antiqued cabinets are in a separate project.
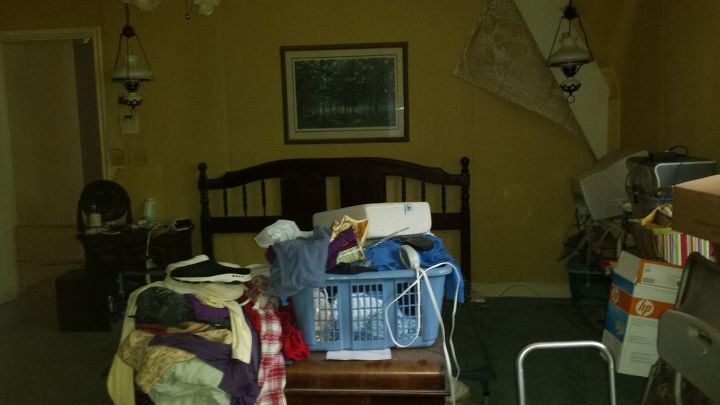
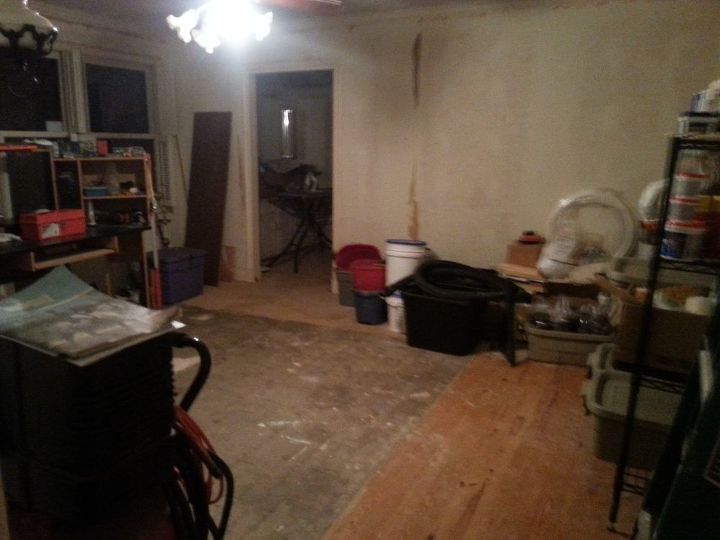
So the first time we walked through the home before purchase, all the rooms had wallpaper (some had wallpaper on wallpaper), popcorn ceiling, 30 year old carpet was so filthy we had to cut it in slices to be able to carry it rolled up, and to say it was filthy (walls, floors, every corner) is being nice. 

I loved the antique lamps, and kept those; new paint, popcorn ceiling gone, new carpet, new vents, great results!
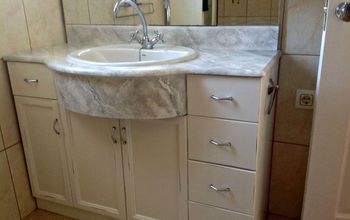
This is the wall opposite the bed. You could see the old windows whose argon gas was long gone, totally nasty inside the double panes, you could barely see through them. The door way led to a single sink in a wall to wall 60s 80 inch vanity with broken doors, a huge mirror hung over it with two 4 foot florescent lights on either side. There is a walk in closet across from the vanity. It also had carpet as did the sink room, and looked like it hadn't been painted since it built (70s)
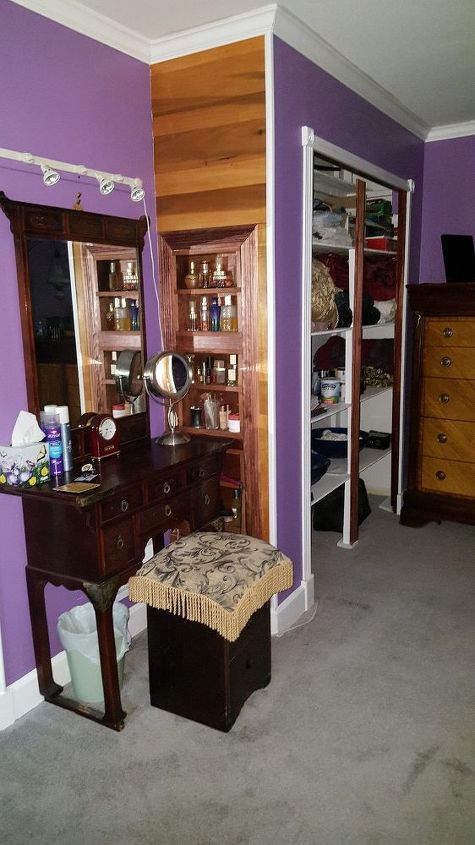
this is the wall to the right of the door. I wanted a linen closet and built this closet about 17 inches deep. I had planned to put my makeup table in this area so I built a shelf area for perfumes and 'stuff' in the end of the closet, 6 shelves.
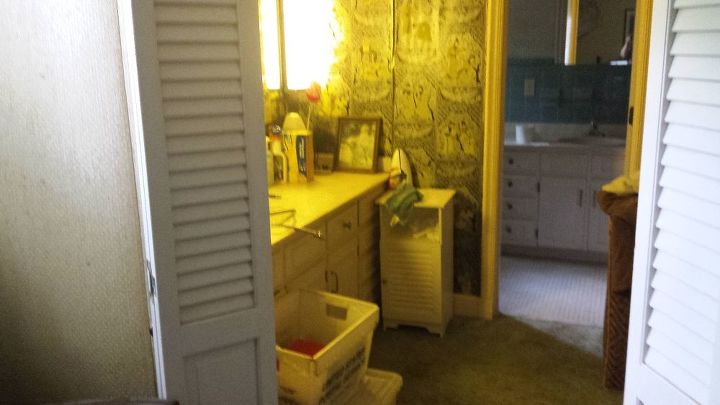
This was the sink area, it had geisha girls in shiny reflective wall paper peeling off the wall. You can see the doorway leading to the tub/toilet area.
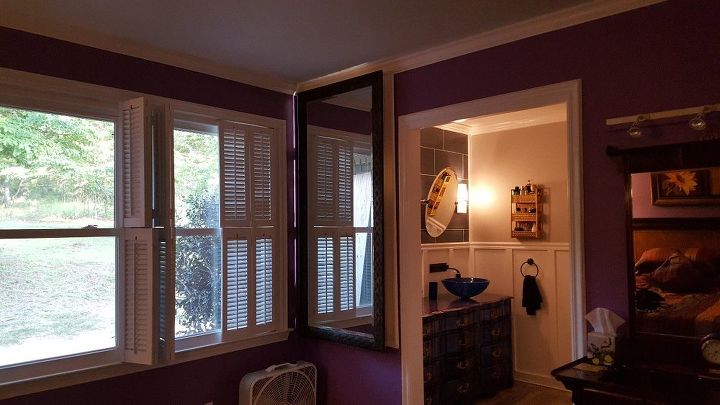
Looking from the bed into the sink room, you can see the new windows double hung that we installed, and we painted and reinstalled the plantation shutters. The mirror on the wall actually covers a Murphy ironing center I built from scratch the has a full size ironing board, electric, shelf for the iron, and it's lit as you can see coming around the edges in this photo. The ironing board is mounted on a chair swivel so that you can turn it which ever side you want to iron on. We decided to leave the doorway open rather than put the folding doors that were there prior.
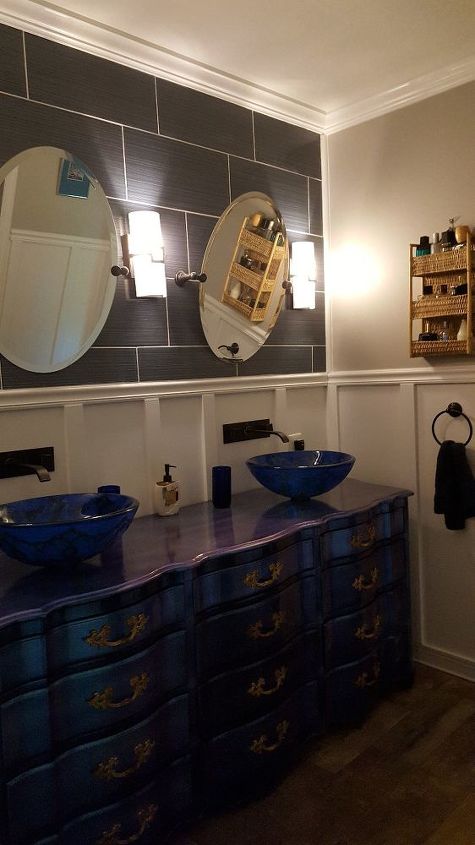
I bought a gorgeous french provincial dresser to turn into a vanity. I painted it with chameleon automobile paint so that it changes color from purple, to dark blue to teal green as you walk by. The top drawers were cut back by 1/2 to clear the plumbing but are still usable. I created the wainscoting around the entire room, an installed crown molding.
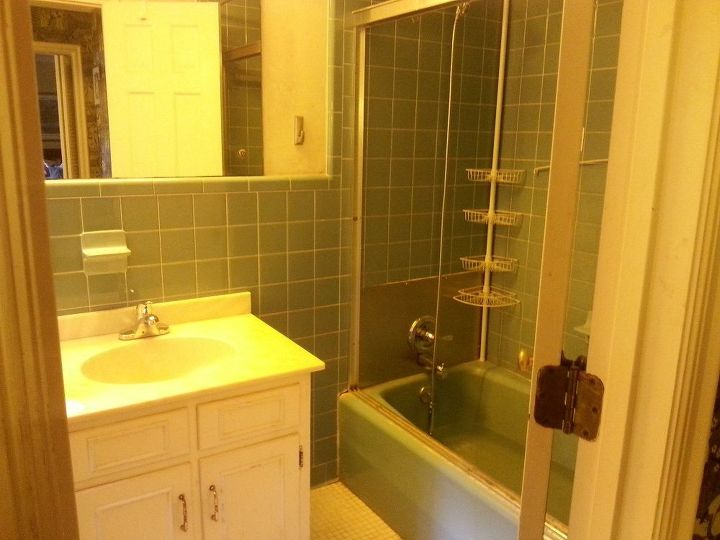
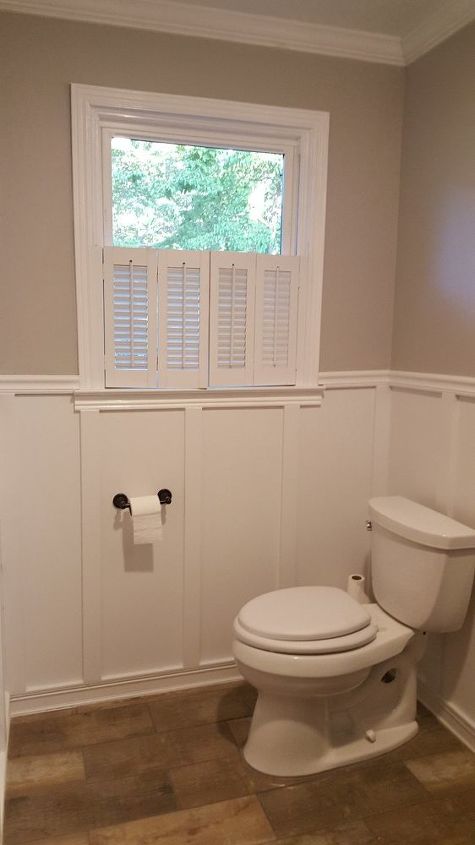
This is the view of the original tub and toilet room. There was a hole in the floor in front of the tub, a huge mirror on the wall with florescent lights above the mirror. This tile was mounted on about 6 inches of concrete attached to chicken like wire attached to the back of the studs, the floor was the same. It took a month just to demo the tile, without falling through the floor. The demo pics are in the project for the shower and toilet room, lots of trips to the dump with the truck.
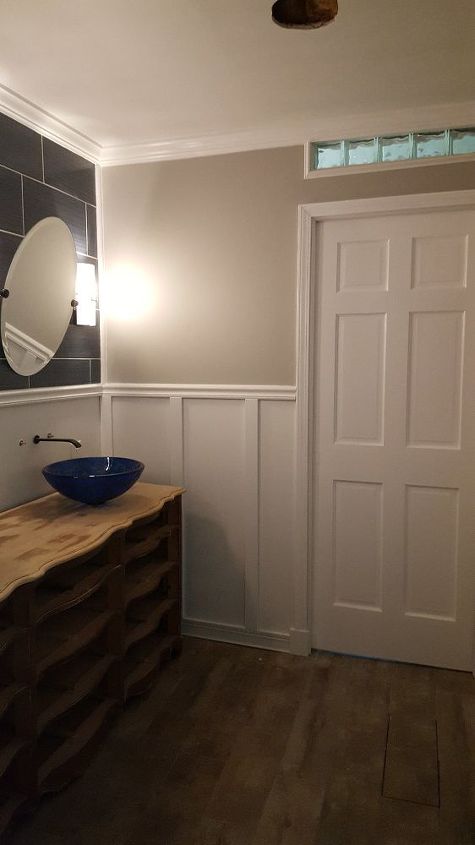
This is the doorway now, we installed a pocket door and I wanted glass blocks up over the door, so I ordered those and installed them, trimmed them out. The tile floor is gorgeous as well, it flows from one room to the other.
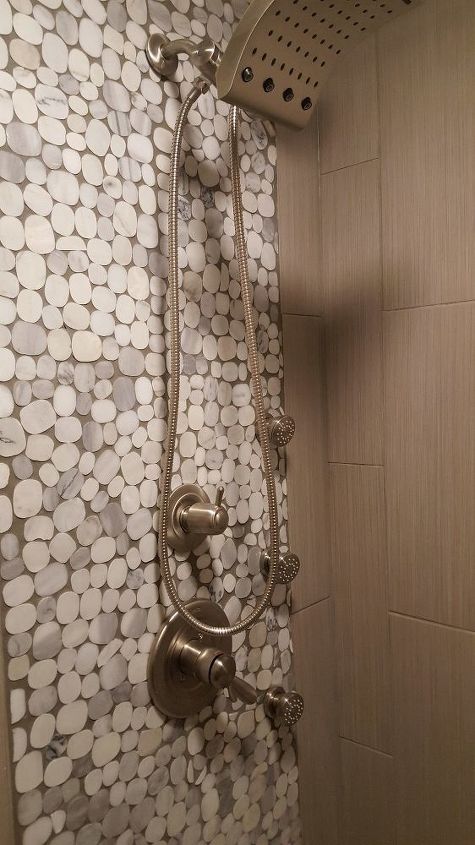
the tub was replace by building a 4 x 5 shower in the space the tub was in, actually a little larger. Our first shower build, I researched methods and watched tons of videos for months while renovating the rest of the house. We opted to purchase the Schluter Shower system for several reasons, it's light weight and waterproof, lots of videos on how to do it, easy to use and seal up the edges. We are in our early 60s and the thought of handling cement board.....I just couldn't do it lol. We used large tiles and that was bad enough when you butter them with thinset lol. Using the marble tiles for around the hardware was also easier than cutting tile around all the handles.
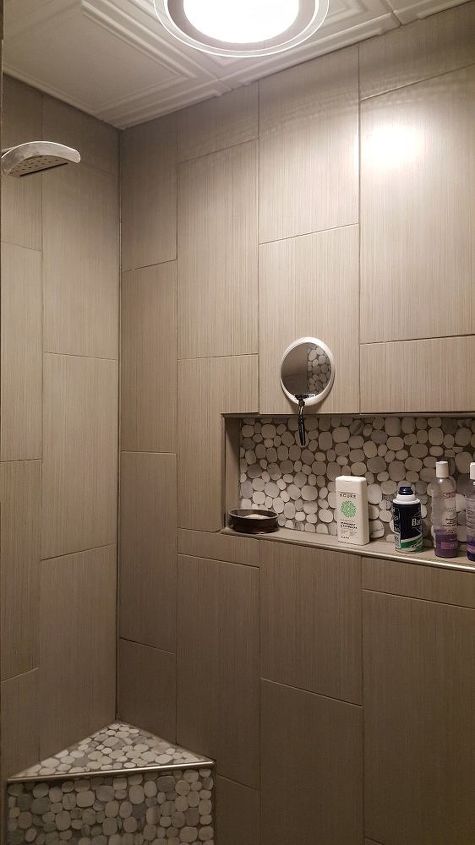
I wanted a large niche so I built one that spanned 3 studs, the floor and and niche and the corner seat all had the marble 12 in tiles. The ceiling was purchased from . So easy to install and cut, just dabs of adhesive caulk and press to the ceiling. 3 tiles wide did the whole room. The shower has no door, just an entry. But it's really hard to get water to splash out, since it's so large.
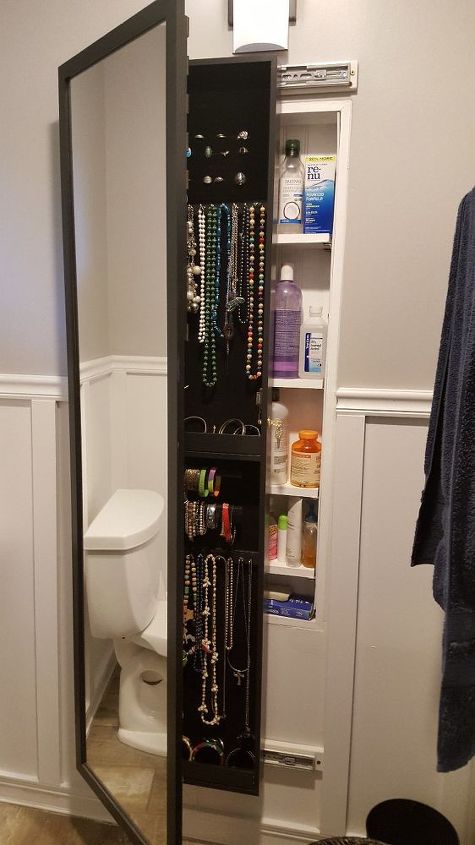
I also built in a medicine cabinet between studs, and installed movable shelves. The mirror that covers the medicine cabinet doubles as a . I installed it on drawer slides so it slides to the left if you need in the medicine cabinet. The wall to the right where the towels are, also is installed on drawer slides and the bottom part of the wall (the wainscoting portion) also slides open to access the plumbing without having to tear out the wall.
So this is the rest of the bathroom to the left of the mirror, same room as the shower. The tile was not in the least shiny, and looked so much better we we put 2 coats of sealer on it, and it made it gorgeous. For more detailed instructions on how each room was re-engineered, check out each individual project by room.
Comments
Join the conversation
-
Wow, wow, wow! This looks just incredible!
-
AMAZING! You did a lot of work. Everything is perfect. Great share and great job.


Frequently asked questions
Have a question about this project?