EZ & CHEAP! Henry's Concrete COPPER Counter With Patina...OVER TILE!

by
Jacque
(IC: homeowner)
8 Materials
$30
2 Days
Medium
Yes, I said it and I did it! Even though everything I have read & researched says not to concrete over existing tile...but have you ever tried to remove tile? Especially tile with an inlaid sink? It's virtually impossible and honestly unnecessary IN MY OPINION! (To the small peanut gallery out there, if you do not agree, no need to read further! ) I combined two of my fav things; copper & concrete to begin my full bathroom makeover.
 ) I combined two of my fav things; copper & concrete to begin my full bathroom makeover.
 If this sounds familiar then you're correct! I came upon this idea while scrolling thru another hometalker's page.
Here is my inspiration: http://www.hometalk.com/diy/bathroom/countertops/copper-countertops-under-20-what--18910246). My process and products were a little different but the end result was pretty much the same.
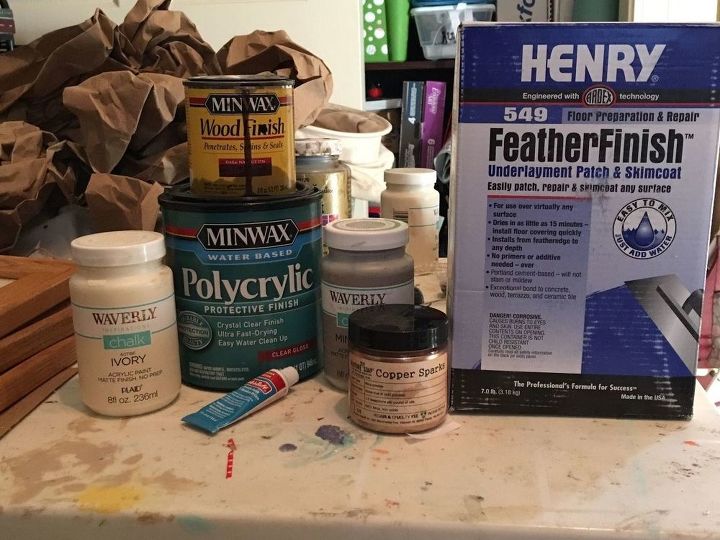
I really loved working with Henry's Feather Finish concrete and look forward to using it again. (I was not paid nor was it free.) This hands down is the easiest concrete process that I've seen (Insert: Again, my opinion). Seriously, anyone can do this. No special tools or training required; just the desire to make something one of a kind and beautiful.If you're thinking about concrete, this is a great method (did I say that already??)! Why? Well, let me count the ways...1) It's cheap! It won't break the bank at under $20 a box (only half used).2) It's simple to do (yup, I did it ALL on my own). 3) It's quick, not a lot of downtime for drying.4) Plus, it holds up and is STRONG! 5) and AGAIN it's WAY CHEAPER than real copper!I'm by no means an expert nor a professional so take my experience for what it is...I can give out advice, share my experience and offer any other helpful ideas but again I do this for fun. I hope you enjoy it!
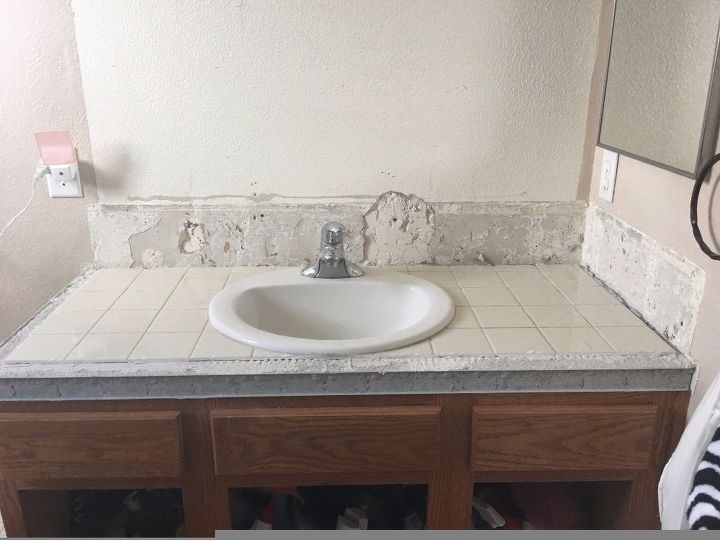
My husband removed the tile around the vanity and backsplash. We were keeping the sink and all fixtures, so we had to be careful not to crack the porcelain. Therefore, some tile could not be removed without damaging sink and had to be concreted over. I sanded the remaining tile down to remove any gloss and then got the concrete ready for first application.The first batch of concrete I made I tried to mix the mica directly with it but it just looked like mud. Even when it dried it did not look like copper. So, I stopped using mica in the mix and instead used it on top as a finish. (I will get to that in a second.) Make sure not to add too much water to the concrete mixture, you can always add more as needed. Consistency shouldn't be watery or it won't set well and will take forever to dry.
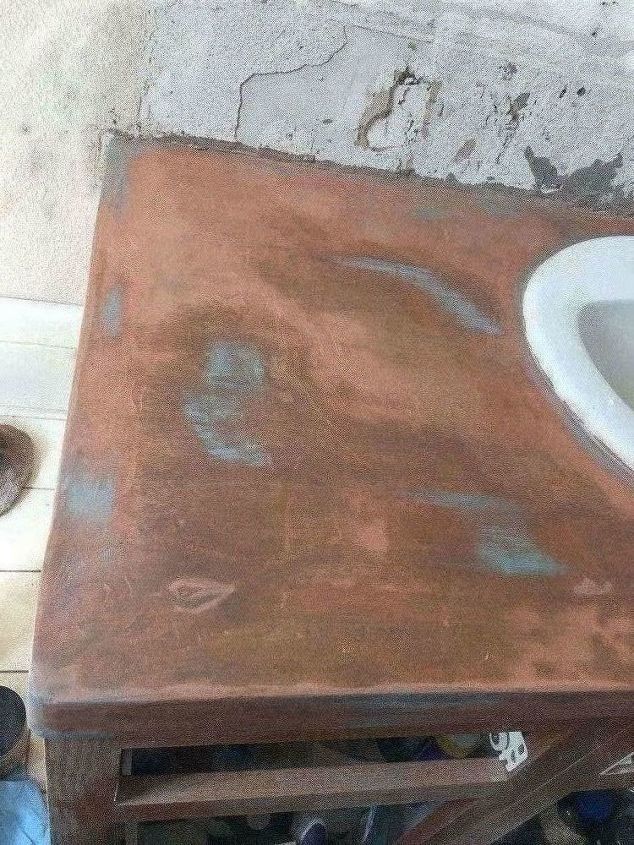
The 1st layer of concrete did settle into the grout lines when drying (4hrs). I did about 3 good thick layers of concrete, each layer took a bit longer to dry (total16-24 hrs) and was able to completely fill in the grout lines until they weren't seen.A light sanding was done on the 2nd & 3rd layers after they were completely dry, skipping the edges to give it more of an unfinished "concrete" look.
After wiping down concrete of all dust, dampen it with water. I mixed the mica with water to make a "liquid copper" mixture. I used a soft wet 3" synthetic paint brush (with edge) to apply the mixture evenly. I applied a very generous coat. It dries fairly quick.Then I went back over it and added smaller "puddles" to darken areas for an aged look. Be warned, the mica will easily come off if rubbed, Continue to apply until you reach desired color. (Note: it will be 2-3 shades darker once polycrylic is applied)
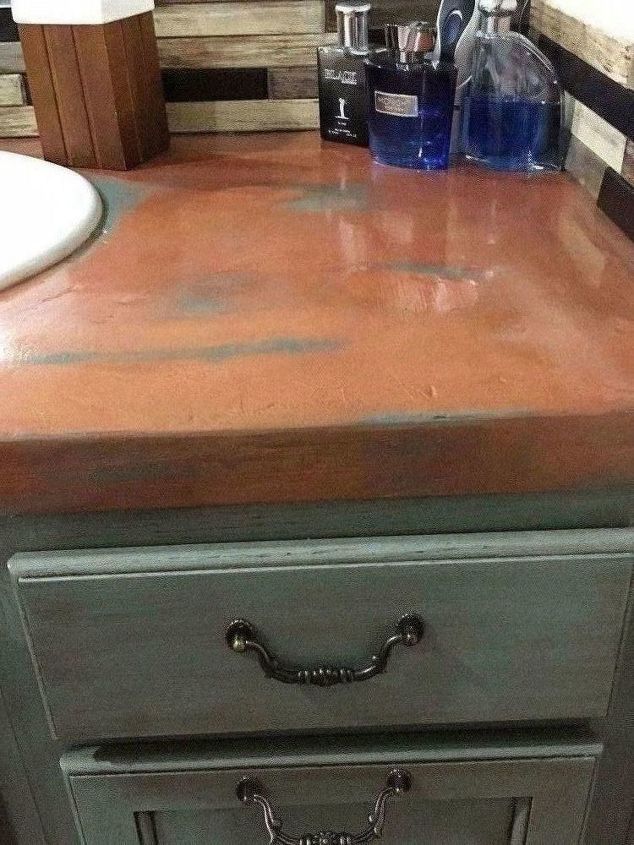
After mica was applied, I used the Rub & Buff wax (metallic Patina finish) to apply a patina coat to the copper counter. A small painters brush is all you need for application; Strategically utilize wax in small amounts or else it won't look as authentic. A little goes a LONG way! This stuff is GREAT!!! I thought I would use the whole tube but it seriously is VERY concentrated. What an awesome find & value!Very little dry time needed for wax...make sure you like it because once it's sealed no changing it!
Now it is time to seal it all in with a coat of polycrylic, which is water based. I used clear gloss to give it a nice shine. It dries really quick only 1 hr between each coat! I put on about 5 coats to ensure it would stay safe. It looks so beautiful with the shine on it! I had painted the backsplash weeks earlier.
It was pretty simple and quick to install the 4-shade (White, grey, dark stain, and white w/ stain) wooden slate backsplash. I bought a bag wooden sticks for about $4 at hobby lobby. Each are exact width with varied lengths so they worked great as tiles. If I don't tell people, they think it's actually a glass backsplash because the polycrylic makes it shiny.We laid out the design on the ground and as my husband put liquid nail on back of slate, I attached them in place to the wall (which had some liquid nail on it too). Note: If your dry wall comes off like mine, you will need to build it back up so the backsplash has something to hang onto!Once backsplash was in place, I let it set before covering it all with polycrylic to protect it from water damage. As I applied a coat of poly to backsplash, I added another coat to the counter. I did this 2-3 x's to help ensure no damage could be done and it also helped to solidify it as one piece.
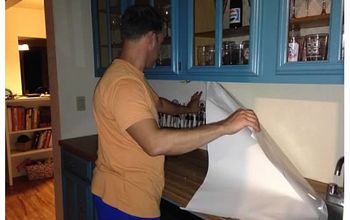
Finally ready to paint the faucet (and water drain), each are spray painted with Rustoleum oil rubbed bronze ! I actually covered the entire counter with butcher paper & tape before painting rather than remove the whole faucet.
I love love love my counter top and backsplash! So happy for the inspiration I find here everyday! I hope this gives you some!
This is one part to a whole bathroom remodel we are doing. We put the mirror back up after we installed backsplash and put up wallpaper.
You can see my vanity remodel in this photo... I may do a full reveal of the entire bathroom down the road...still have lots to do! (I have a matching His/Her's vanity on the other side of walk-in bathroom, we also have a walk-in closet that we want to organize, and a small "toilet room"...they're all kinda in one space.) Thank you so much for reading!! If you have questions regarding any part of the process please let me know! I will do my best to answer. If you don't like it or disagree with things I've stated, that's totally fine we all have our opinions. All I request is, please just keep remarks positive...skip writing anything negative. It's best to keep those comments out. We do this for free & fun...let's keep it that way!!
Enjoyed the project?
Resources for this project:
See all materials
Any price and availability information displayed on [relevant Amazon Site(s), as applicable] at the time of purchase will apply to the purchase of this product.
Hometalk may collect a small share of sales from the links on this page.More info
Published July 13th, 2017 8:50 PM
Comments
Join the conversation
3 of 157 comments
-
 MJ
on Mar 10, 2022
By now you KNOW many of us are impressed with your “copper” makeover! How has it held up to water. I have used Polycrylic to find it peels if wet (somewhat like too thick nail polish does).
I don’t know how I missed this in ‘18. But want to try in my tiny bathroom. Thank you for great instructions - and giving your inspiration credit.
-
-


















Frequently asked questions
Have a question about this project?
What product did you use to paint your vanity, I love the color! This is a beautiful makeover, I want to do this, but I am Thanks great job, waiting for the full reveal.
I plan to use this idea, can it be done in different colors.
Can you do this on Corian counters in the kitchen? How will it hold up?