


Chalk Painted Children’s Table

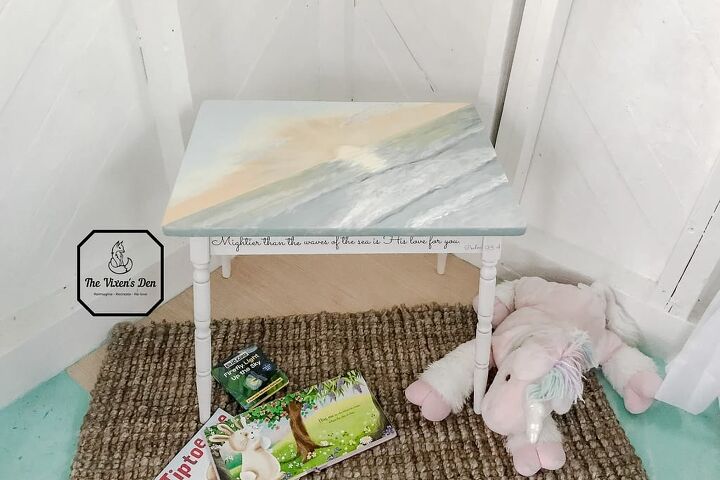
Are you looking for inspiration to make your children’s play area a little more unique? This custom chalk-painted children’s table will give them a beach vacation every day. Feeling a little jealous? Me too!
This project was a custom request from a family that absolutely loves the beach. Their one request was that the waves not be “curled” or stylized like in a cartoon. They really wanted this piece to be something that would work with pretty much any room decor.
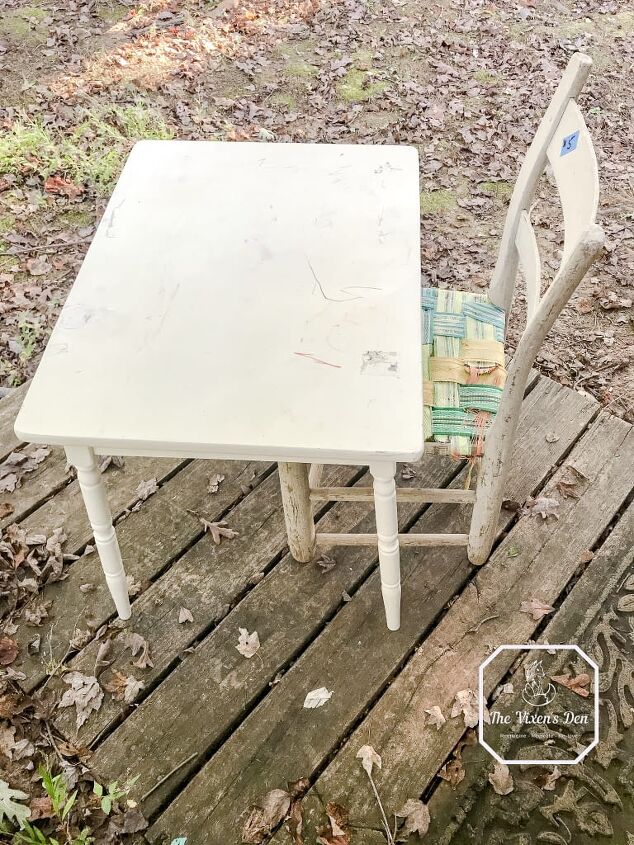
This is where we started, with a table that had already been well-loved. There were some deep gouges to go along with the scratches and crayon marks. But the piece is also solid wood with beautiful spindle legs. Are you ready to see how I customized this sweet table into a statement piece that will grow along with the little ones?

THIS POST IS SPONSORED AND/OR CONTAINS AFFILIATE LINKS TO PRODUCTS. AS AN AMAZON ASSOCIATE I EARN FROM QUALIFYING PURCHASES AT NO COST TO YOU. YOU CAN SEE MY FULL DISCLOSURE HERE.
Tools and Materials
Tools
- Mouse sander
- Extension cord (if needed)
- Bucket
- Mister
- Dixie Belle Mini Angle Brush
- Dixie Belle Oval Medium Brush
- Artist’s brush
- Laser printer – Budget model or the fancy model
- Permanent pen
Materials
- R.A.D. Pad Surfprep sanding sponges
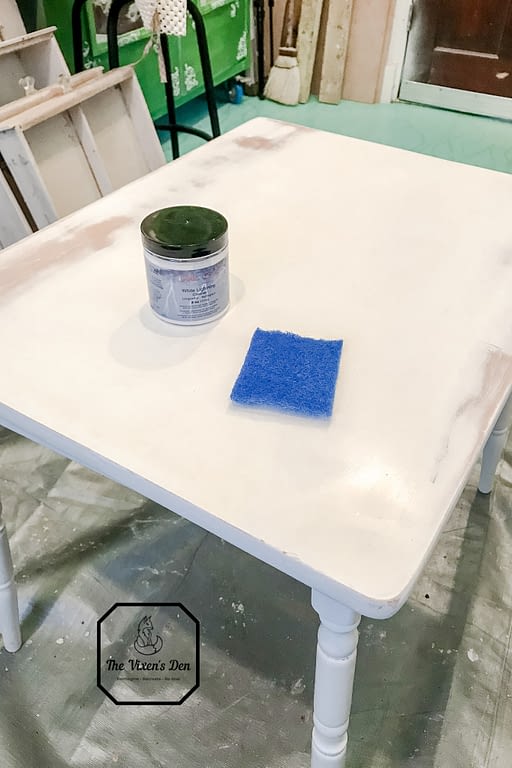
- Dixie Belle White Lightning Cleaner
- Scratch resistant scrubber
- Tack cloth
- Slick Stick primer
- 220 grit sanding sponge
- Finishing pad
- Pie pan or artist’s palette
- Dixie Belle Fluff Chalk Paint
- Dixie Belle Vintage Duck Egg Chalk Paint
- Dixie Belle Caviar Chalk Paint
- Dixie Belle French Linen Chalk Paint
- Dixie Belle Daisy Chalk Paint
- Dixie Belle Lemonade Chalk Paint
- Dixie Belle Haint Blue Chalk Paint
- Dixie Belle Gold Digger Moonshine Metallics Paint
- Painter’s tape
- Printer paper
- Satin Clear Coat
- Grunge Gray Best Dang Wax
Cleaning and Prepping
Thoroughly prepping a piece before painting or sanding sets the stage for a successful project. This piece had some deep gouges as well as some scrapes in the factory finish. I opted to sand all of the areas smooth with my mouse sander instead of trying to fill them.
Hindsight is 20/20: I probably should have filled the gouges instead. The factory finish was THICK and therefore provided great protection for the wood underneath. Filling the gouges would have also saved me a ton of sanding time.
Once the tabletop was smooth, I used a medium grit Rad Pad to sand all those beautiful details on the legs. These sponges are great because they are able to conform to curves and get into all of the tiny crevices. After vacuuming off all of the dust, I then filled my bucket with White Lightning mixed with water and gave the table a quick scrub with a non-abrasive sponge. To be sure that all of the dust and residue were gone, I rinsed the table with fresh water and let it dry. Then, I wiped down all of the surfaces with a tack cloth.
Whew! It’s a lot of work, but it ensures a clean solid foundation. Now it was time to apply the paint base. Since the factory paint on this table still felt a little slick and I had exposed wood in some areas, I applied a coat of Slick Stick, just to make sure that there wouldn’t be any problems down the road. This is a children’s table, after all, so I’m expecting some use and abuse over the years.
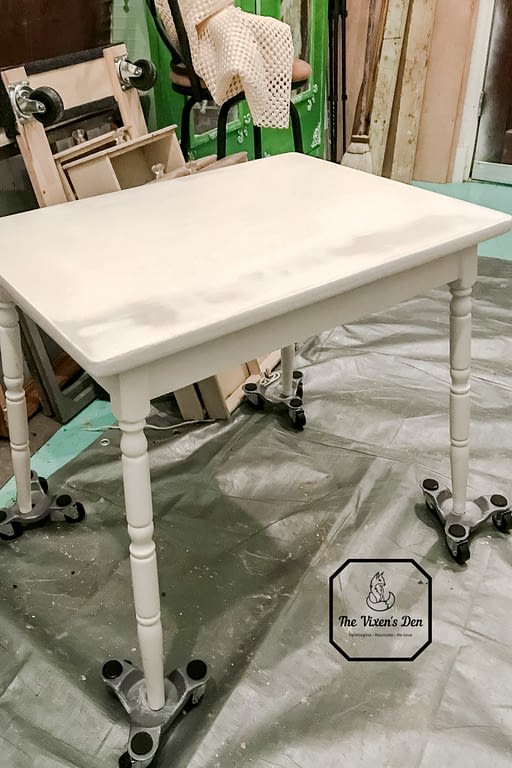
With all of the prep work complete, the table was now, quite literally, a blank canvas.
Painting the Children’s Table
Painting the Base Coat
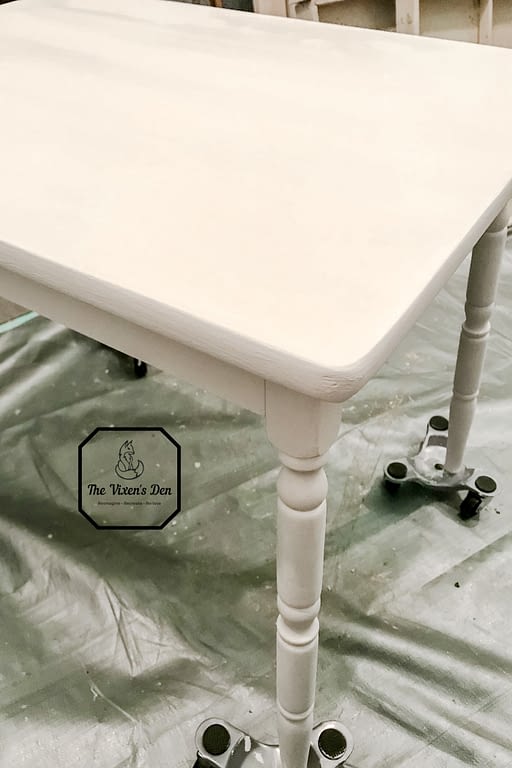
The first coat of paint that I applied was a soft white chalk paint called Fluff by Dixie Belle. This is a great white, not too warm, with just a slight hint of gray. It’s the perfect neutral white. After painting the entire piece in one coat, I let it dry overnight. The next step involved taping off the painted surface, and I wanted to ensure that the painter’s tape would not peel off the paint when I removed it.
Painting the Ocean Waves
The next day, I pulled up my inspiration photo, a gorgeous picture of the ocean with very prominent sunbeams. I studied the picture, the lines of the waves, the colors, and the shadows. I was so nervous about painting freehand, but I figured if I messed it up, I could always sand it down and paint it again.
Just to boost my confidence, though, I also pulled up a couple of painting tutorials on YouTube.
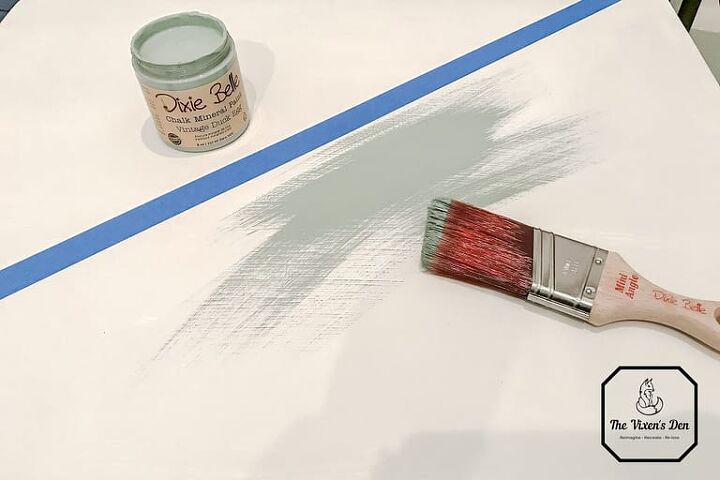
With my confidence boosted, I applied a strip of painter’s tape to divide the ocean and skyline. Then I applied a coat of chalk mineral paint in Dixie Belle’s Vintage Egg Blue to create the base for the ocean.
With the ocean in place, it was time to make some waves! I grabbed a rescued pie tin for my painter’s palette and added dollops of Dixie Belle chalk paint in Caviar, Fluff, and Fench Linen. I misted the pie pan and paints with a light spritz of water, just to help moisten the paint and blend the colors smoothly.
Pro Tip: Always mist your brushes before you start painting. It helps keep the paint from adhering to the brush and makes for easier cleanup.
Dabbing colors into each other and across the table, I began creating waves in the Vintage Egg Blue. To create the blended effect, I used a dry medium oval brush. I wiped the excess paint off onto a paper towel in between blends. It was a process, add a little here, blend a little there.
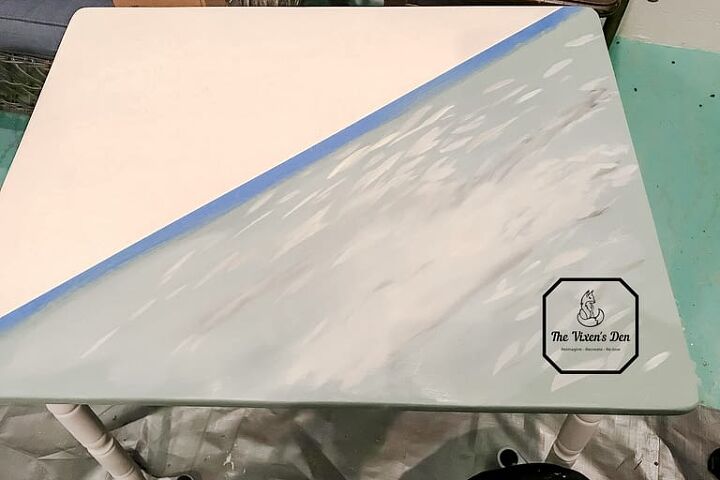
I continued adding a little color here and there until I felt that I was starting to add too much, then I stopped.
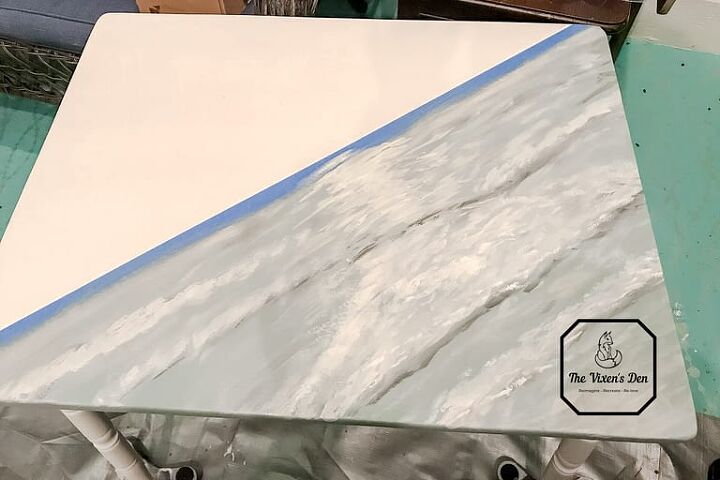
I immediately removed the painter’s tape as I was still concerned that it might peel up the chalk paint underneath. Luckily, it didn’t, and I was ready to start on that beautiful sunrise.
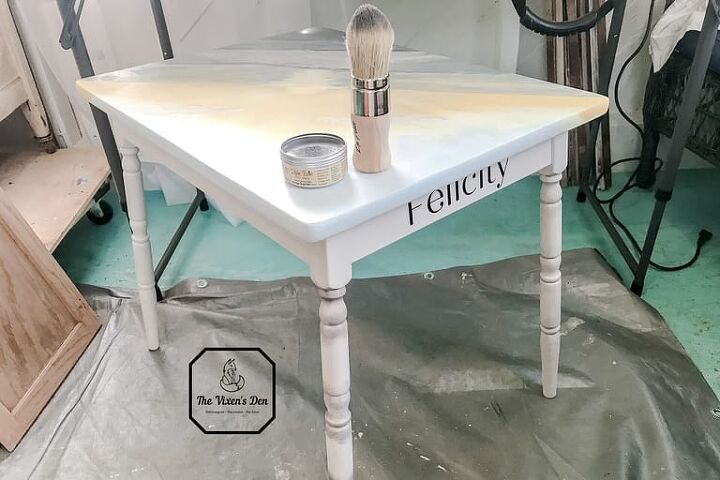
Painting the Sun and Sky
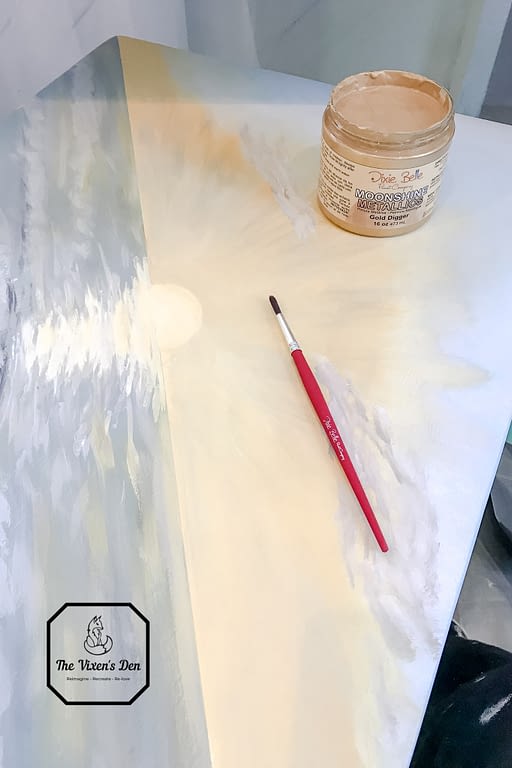
Continuing with my pie plate palette, I added more Dixie Belle chalk paints, this time in Daisy, Lemonade, and Haint Blue. Starting against the waterline, I began by creating the sun ball with Lemonade and the skyline and darker rays with Daisy. I added a few streaks of paint from the ocean blend to create the impression of sun rays.
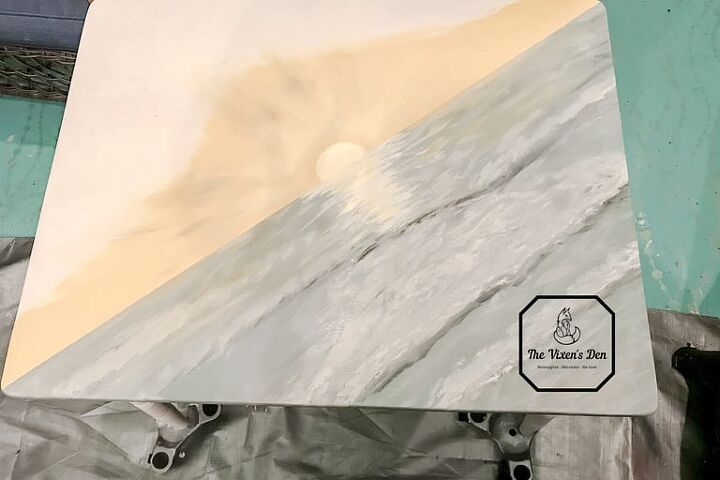
Using the dry brush, I blended in more highlights with Lemonade, adding hints of reflected light on the waves. Towards the top of the sky, I blended in Haint Blue and then began adding light gray puffy clouds.
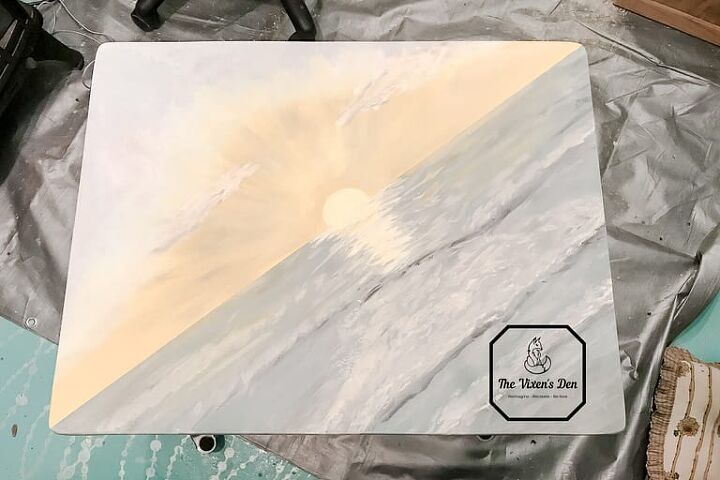
To add a little bit of extra shimmer, I lightly stroked in a bit of metallic gold paint in Dixie Belle Gold Digger. It’s a subtle hint of gold that has to hit the light just right before you see it. It’s the perfect hint of special!
Finally, to smooth everything out in preparation for the next step, I used a 220 grit sanding sponge on the legs. I also gave the tabletop a gentle swipe before rubbing everything down with a finishing pad. The finishing pad grabs dust and gives the surface a nice buff. It was time to add the final details!
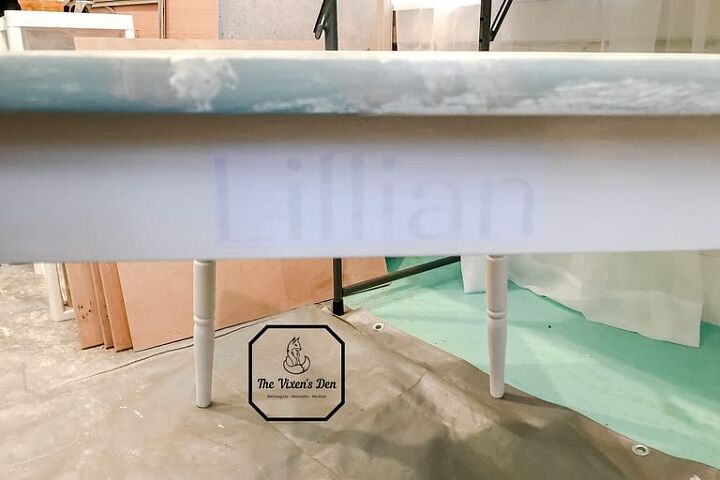
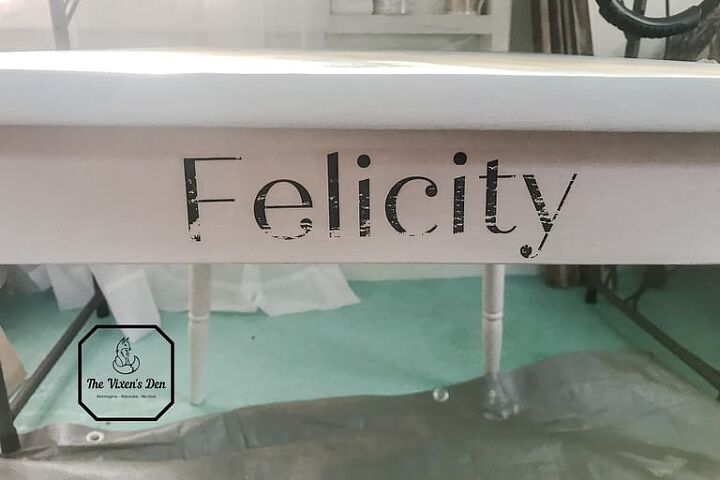
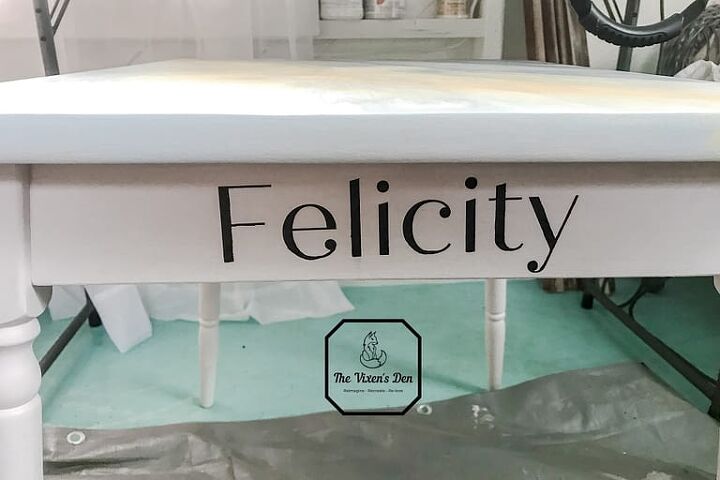
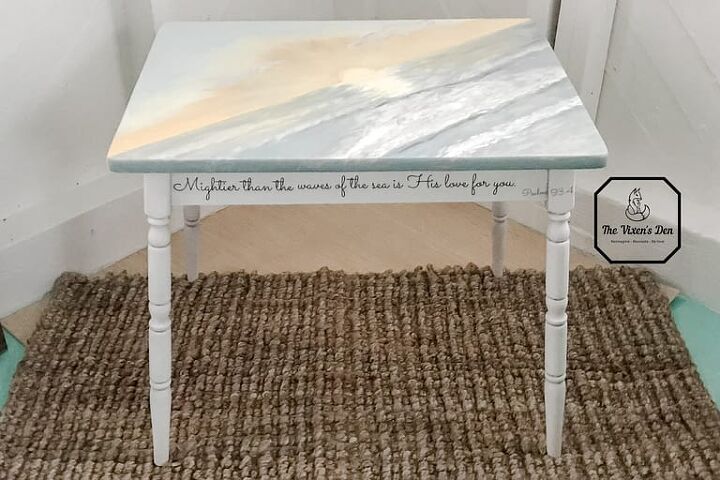
Adding Custom Transfers
A custom transfer is such a sweet way to personalize a piece of furniture. If you’re new to DIY custom transfers, I have this post describing the process that I use to create and print transfers. For this piece, I switched things up a little bit by using Dixie Belle Clear Coat in Satin for the transfer medium.
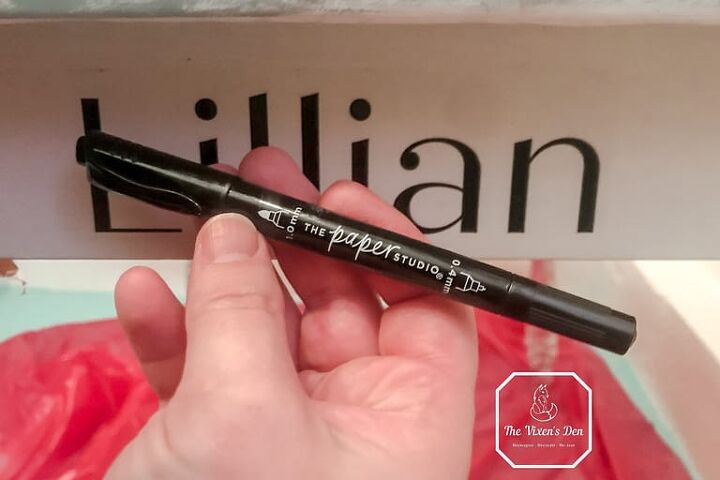
I think I may have not pressed as firmly as I should have to adhere the first transfers to the piece, because a lot of the ink rubbed off when I removed the paper from two of them.
Luckily, I have my favorite dual point permanent pen from The Paper Studio. The 0.4mm tip is perfect for touching up thin lines or creating edges while the 1.0mm tip fills in large gaps beautifully. These pens are great, working on a variety of surfaces without hesitation. They’re a staple tool in my toolbox.
And see how pretty the transfer is now?
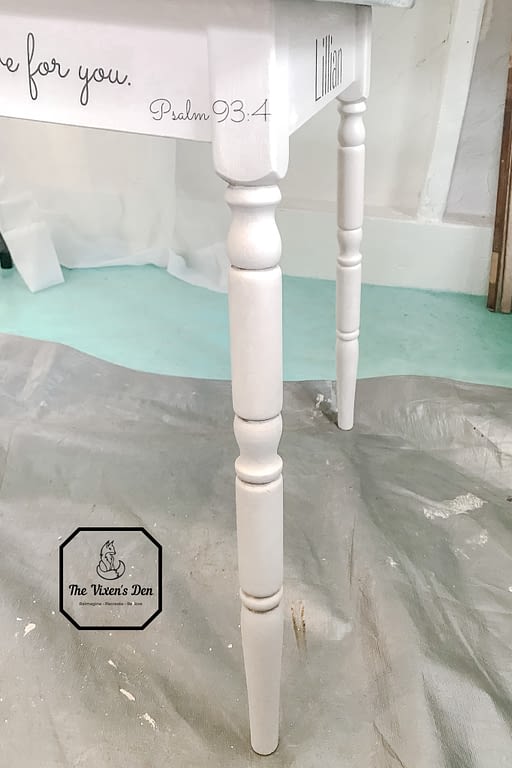
Adding Dark Wax Details
Those lovely spindle legs were begging for a hint of something to help them realize their full potential. I grabbed the Dixie Belle Petite Brush and a container of Grunge Gray Dark Wax. Dipping the brush into the wax, and giving it a little swipe, I then brushed a coat into and around the indentations of the spindles.
Using a clean rag, I then wiped away the excess. This left just a hint of detail on the legs so that they don’t fade into the background against the tabletop.
Sealing the Children’s Table
Because this is a children’s table, I expect a lot of banging and beating to occur during its lifetime. To seal all of this work in and protect it from tots and their toys, I used the Mini-Angle Brush to apply two coats of Dixie Belle Clear Coat in Satin.
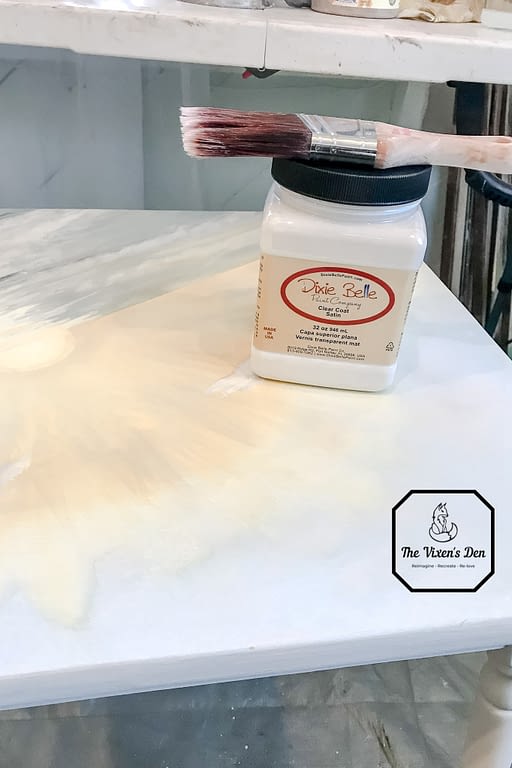
The satin clear coat sheen is so subtle that it’s barely discernable, but it provides excellent protection.
Painted Children’s Table Reveal and Takeaways
Here is the final result with a view of the before and after. The ocean waves and shimmery sun definitely have me yearning for a trip to the beach.
This project contained some fun challenges, especially when the transfers were falling apart. Luckily, the longest transfer did not require as much touch-up. I think that’s probably because I spent more time pressing the paper transfer against the seal coat. It’s a good tip to remember for next time.
So, what do you think about this project? Do you enjoy freehand painting or stencils and transfers? Let me know in the comments and then sign up to receive an email so that you don’t miss any of the misadventures. Until next time, have a lovely and blessed day!

Linked up to:
The House on Silverado
Funky Junk Interiors
Shabby Art Boutique
LIfe Beyond the Kitchen
Life as a Leo Wife
A Stroll Thru Life
Our Hopeful Home
My Thrift Store Addiction

I am so excited to be a Dixie Belle affiliate! Whenever you make a purchase from the links on this site, I receive a commission at no additional cost to you. My Disclosure page has more information if you’re curious. Thank you for supporting The Vixen’s Den!
Resources for this project:
See all materials


Comments
Join the conversation
-
Beautiful!!!! Awesome job.
-
So uniquely beautiful, creative and special. ❤️❤️❤️


Frequently asked questions
Have a question about this project?
Very Beautiful indeed !! Have you tackled the chair as well ?