How to Makeover a Dark Dresser Into a Stunning Sideboard
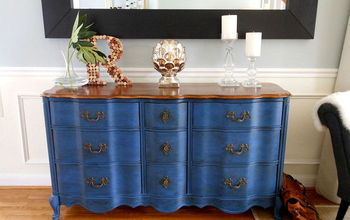
I’m going to take you through the step-by-step process of transforming a dark, dated, and damaged dresser into a stunning sideboard. Get ready to breathe new life into your old furniture with a fresh coat of paint and a touch of creativity!
Table of contents
Tools and materials
- Bondo for filling holes and indentations
- Screwdriver for removing keyholes
- Sandpaper for smoothing surfaces
- BlackBerry House Paint Furniture and Brush Cleaner
- Shellac spray for preventing bleed-through
- BlackBerry House Paint in the color Milk Pail
- Spray gun for efficient paint application
- Varathane Ultimate water-based polyurethane for a protective top coat
- Drop pulls for a decorative touch
- Paintbrush for distressing edges
- Cleaning cloths
Step 1: Assess and Repair
Begin by assessing the dresser for any damaged areas. Use Bondo to fill in holes and indentations, providing a smooth surface for the upcoming paint job.
Step 2: Remove Keyholes and Add Drop Pulls
If you don't have keys for the doors or want to enhance the aesthetic, remove the keyholes. Replace them with stylish drop pulls for a unique and personalized touch.
Step 3: Sanding for a Smooth Base
Give the entire dresser a thorough sanding to create a smooth base for the paint to adhere to. Pay special attention to curves and details to ensure an even finish.
Step 4: Deep Clean with BlackBerry House Paint Furniture and Brush Cleaner
Clean the dresser's nooks and crannies with BlackBerry House Paint Furniture and Brush Cleaner. This step ensures that the surface is free from dirt and grime, providing a clean canvas for your paint.
Step 5: Prevent Bleed-Through with Shellac
Spray the dresser with shellac to prevent bleed-through. This step is crucial for achieving an even finish and avoiding uneven spots in the grain or wood caused by sanding.
Step 6: Apply Base Coat with BlackBerry House Paint
Now, it's time to bring out the color! Paint the dresser with BlackBerry House Paint in the enchanting shade of Milk Pail. Using a spray gun ensures efficient and uniform application.
Step 7: Distress for Character
For a touch of vintage charm, lightly sand the edges of the dresser after the paint has dried. This step adds a distressed look that enhances the overall aesthetic.
Step 8: Protect with Varathane Ultimate Polyurethane
Apply Varathane Ultimate water-based polyurethane as a protective top coat. This not only adds durability to the finish but also provides a beautiful sheen to the painted surface.
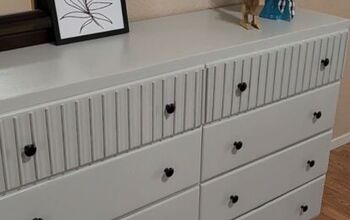
Dark dresser makeover
There you have it – a step-by-step guide to painting and refinishing dark furniture. If your dark furniture has undergone a stunning transformation, share your experiences with furniture makeovers in the comments below. I would love to hear about your creative journey and any tips you might have for fellow DIYers.
Follow @rhettsrefinishes on Instagram for more DIY ideas.











Frequently asked questions
Have a question about this project?