


Reviving A Dated Dresser
5 Materials
$50
2 Days
Easy
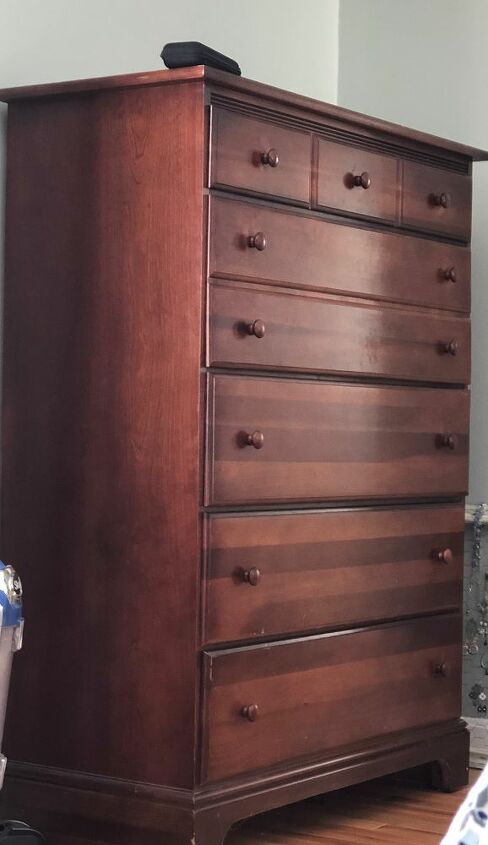
I recently updated my bedroom. We had a dated cherry sleighbed and matching dressers (Can you say Y2K!!). I gave away the bed and replaced it with an beautiful upholstered headboard.The dressers were solid wood so I wanted to give them a facelift to fit with my current style.
I picked out a gray shade of paint (Sherwin Williams 'Software") and made a batch of chalk paint using this recipe: https://cottageonbunkerhill.com/chalk-paint-recipe/ .
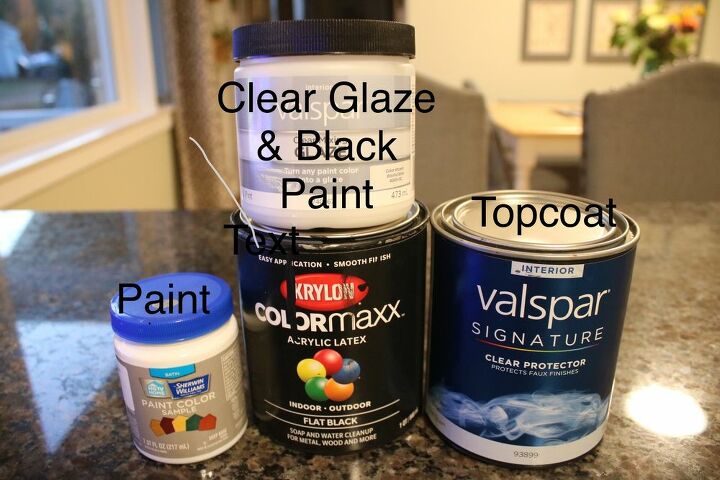
This is a 3 step paint process. 1) Base color 2) Black Glaze 3) Top Coat.
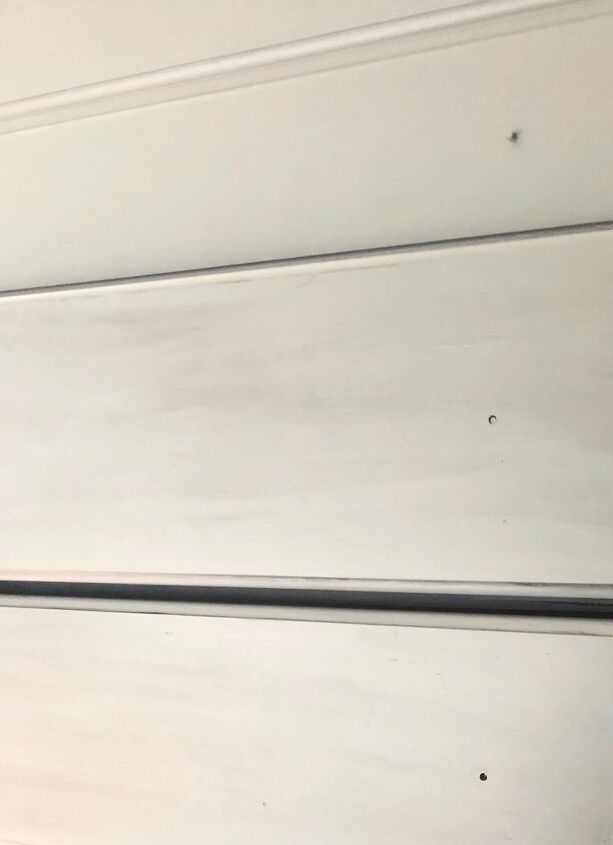
I painted the dresser with 2 coats of the gray chalk paint letting the paint dry between coats. I love working with chalk paint on furniture; you don't have to worry about prepping the piece before you start painting.
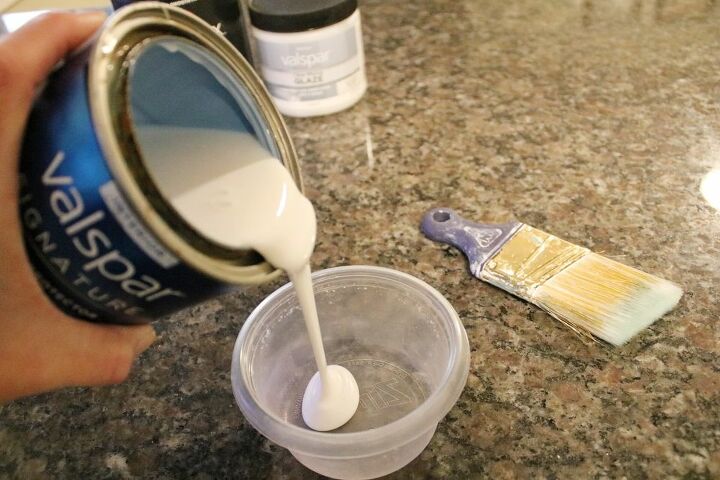
This was my first time working with a glaze and I was a little nervous! The clear glaze looks like glue.
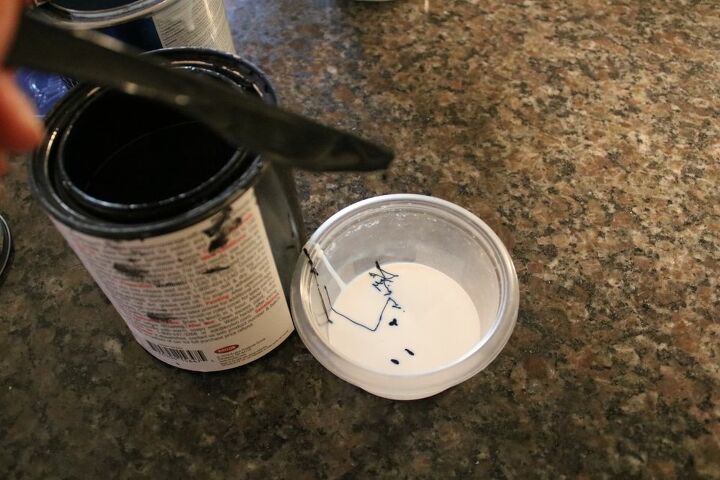
To make a black glaze you need to dribble a very small amount of black paint. Start with a little black paint and you can always add more if it doesn’t look dark enough.

Mixed Glaze
Just stir until it's evenly mixed.
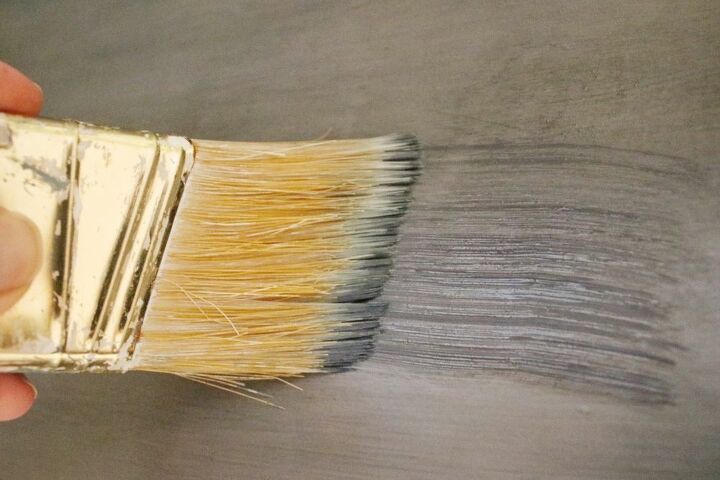
Using a paint brush, I lightly brushed on the glaze to one area.
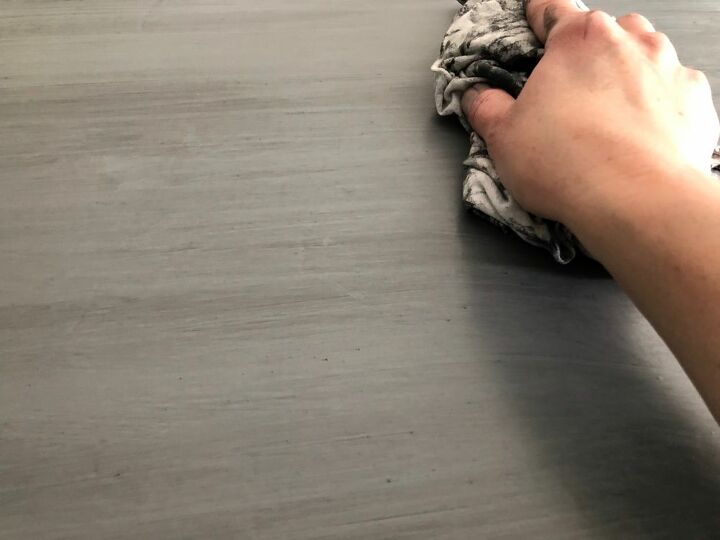
After I brushed on the glaze I went over the area with a lint free cloth. You need to do this when the glaze is still wet. I did the glazing process in sections- first I did the top, then each side, and finally drawer by drawer brushing on the glaze and then wiping off.
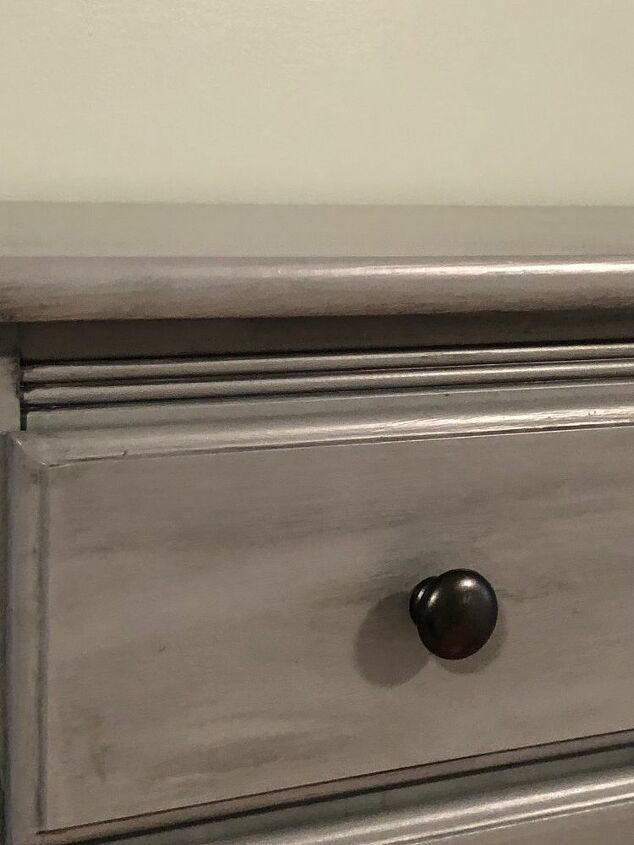
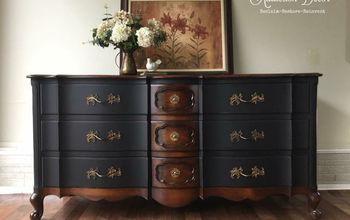
I love how the glaze brought out all the details on the dresser!The knobs are actually the original wood ones; I sprayed them with a metallic bronze spray paint. (My husband is a creature of habit and I didn’t want him complaining that new ones felt different 😂).
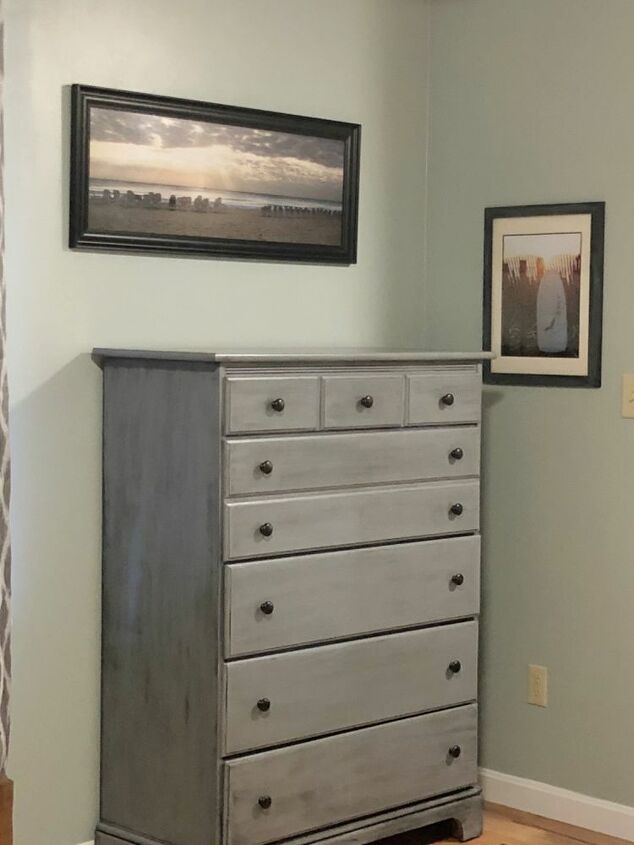
Finished Dresser
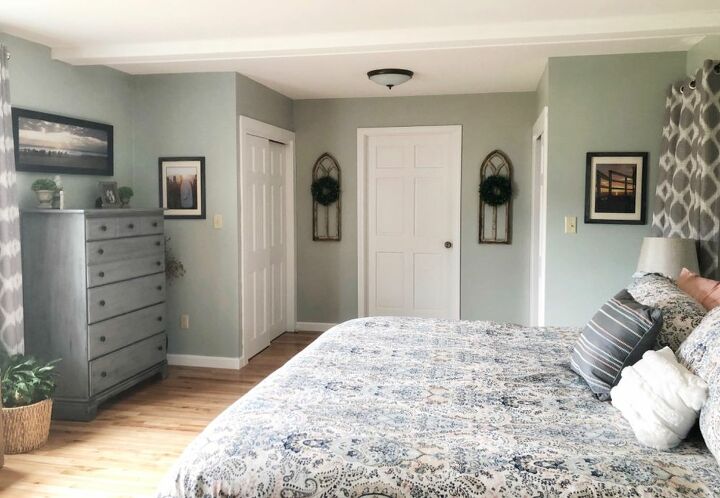
I’m so glad I took the time to save this old dresser! I’m so pleased how this project came out. You can see more of my home here
Resources for this project:
See all materials


Any price and availability information displayed on [relevant Amazon Site(s), as applicable] at the time of purchase will apply to the purchase of this product.
Hometalk may collect a small share of sales from the links on this page.More info

Want more details about this and other DIY projects? Check out my blog post!
Comments
Join the conversation
4 comments
-
It's a beautiful update- gorgeous work!!
-
That looks amazing!


Frequently asked questions
Have a question about this project?