


DIY Stuffed Animal Zoo
Having three girls, we have A LOT of stuffed animals. The Beanie Boo craze didn’t help. Don’t even get me started with the Squishmallows! First we stored them in a basket in each of their rooms, then we graduated to hamper sized containers. Fast forward a few years and all their beds are full of fuzzy creatures and the containers are now overflowing.

For more fun DIY ideas, check out my blog HERE.
I needed a solution. That’s when I came across the DIY stuffed animal zoo concept on Pinterest. There are a lot of different versions out there but I wanted something midsized. I came up with a DIY stuffed animal zoo that measures 24″W x 25.5″D x 36″H.
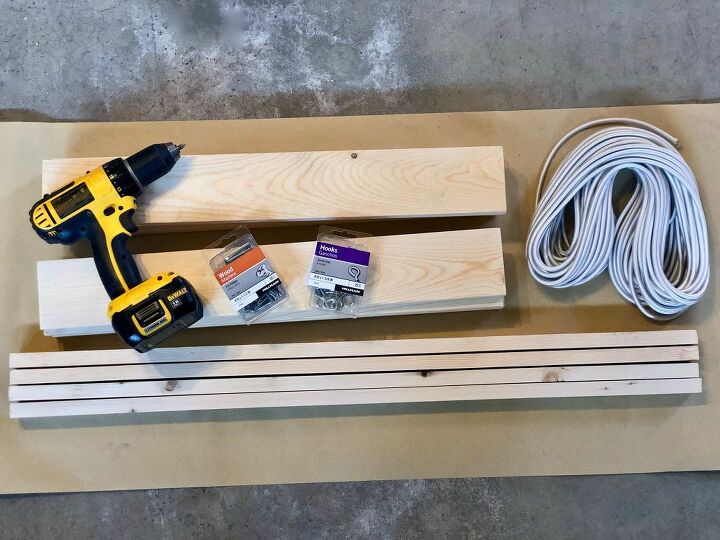
Here is what you'll need:
- Four 3-ft long 1 x 2’s
- Eight 2-ft long 1 x 4’s
- 1-1/2″ wood screws
- screw eyes
- drill
- 36′ of 1/4″ diameter shock cord (Amazon–came in 50 ft & a lot of colors)
- paint/brush
- Stickers (or Cricut/Silhouette) for ZOO letters
- ***I also used a countersink drill bit so my screw heads were deeper (but definitely not necessary) and wood filler.
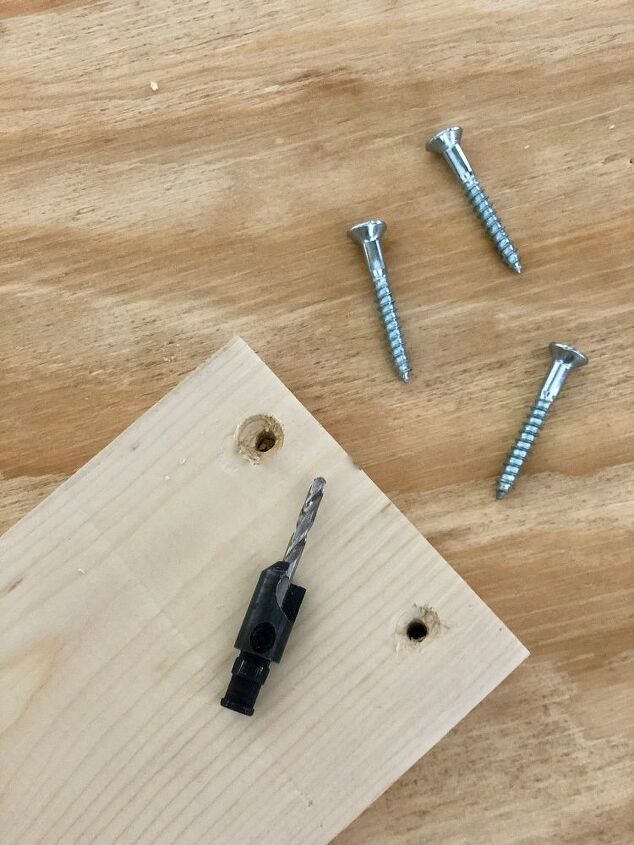
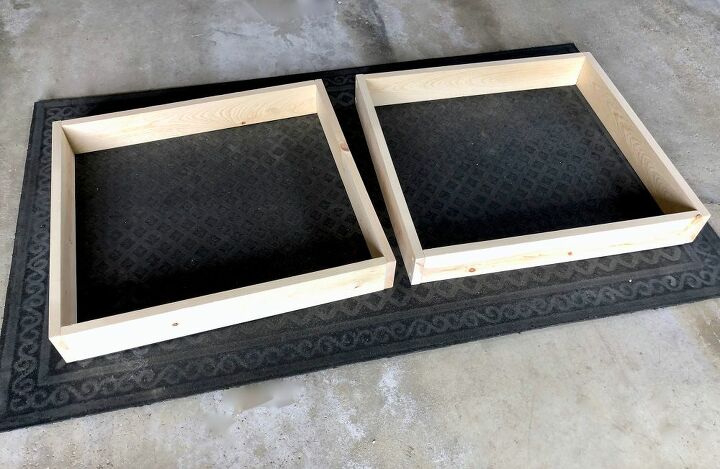
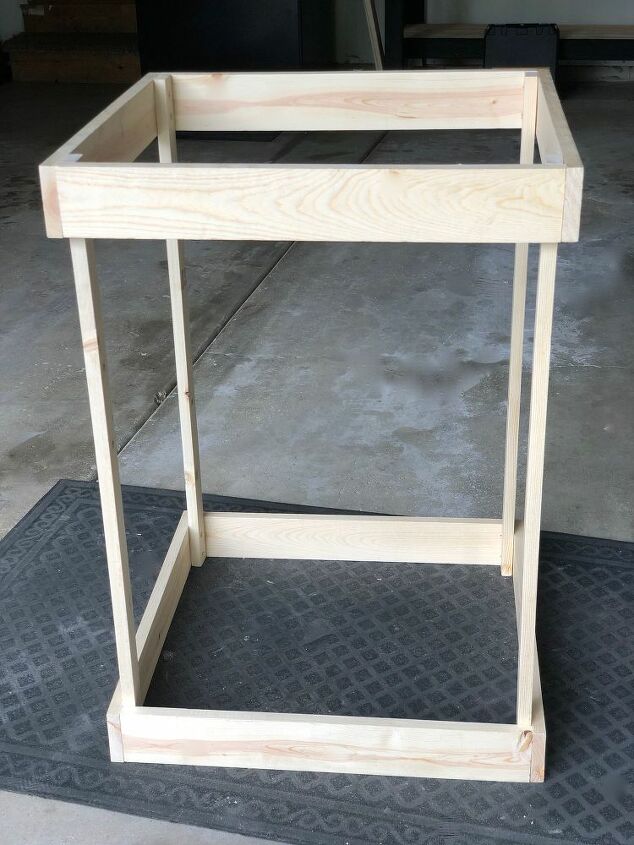
I started building the stuffed animal zoo by creating the base first. I took four of the 1 x 4’s and formed a square. I then drilled pilot holes in two of them, 1/2″ in from the edge. I repeated the same thing with the other four 1 x 4’s for the top of the stuffed animal zoo.
Next, I screwed a 1 x 2 piece into each corner of the square base using two screws.
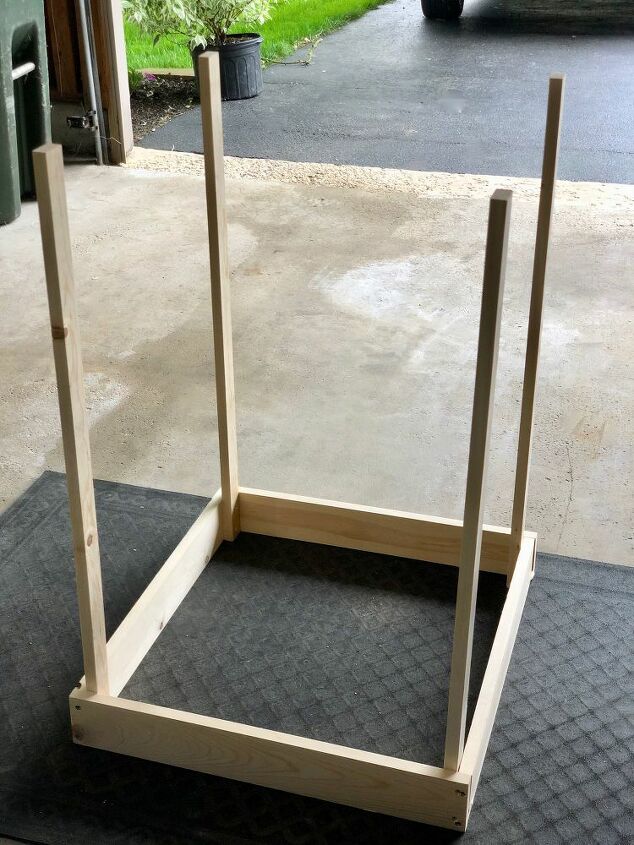
Then I set the whole thing on it’s side to attach the top square and stood it back up.
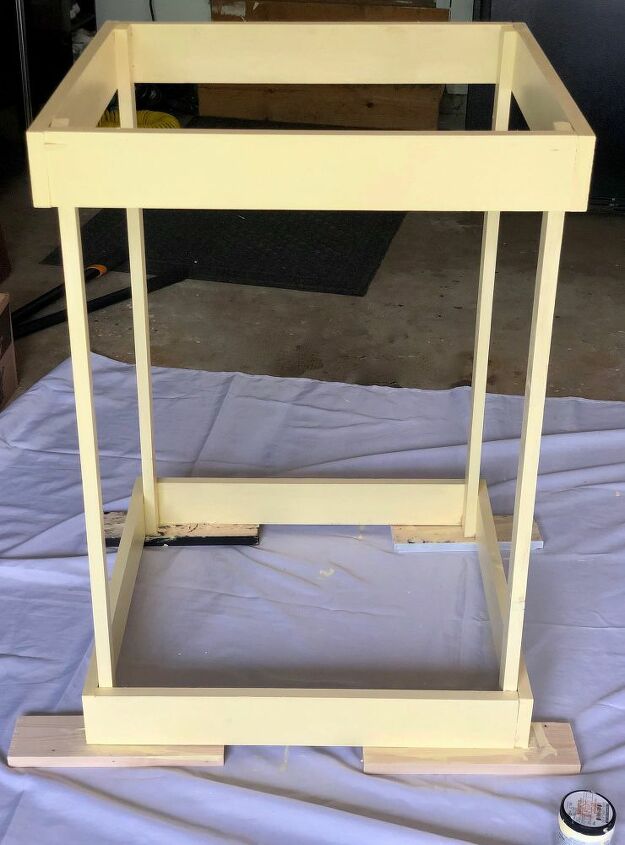
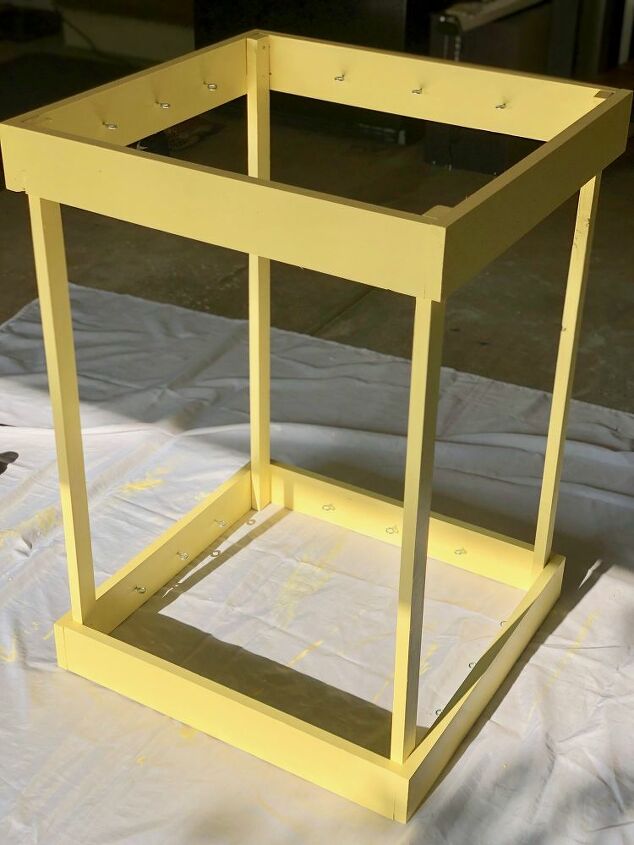
Before painting it, I filled in the screw holes with wood filler to hide the screws. I propped it up on boards to paint. I used three coats of Behr’s Roasted Corn paint and let it completely dry.
Once dry, I drilled holes for the screw eyes. They measured 5.5″ apart.
I then cut 12 pieces of shock cord about 3.5 ft long each and started at the top, tying it through the screw eyes.
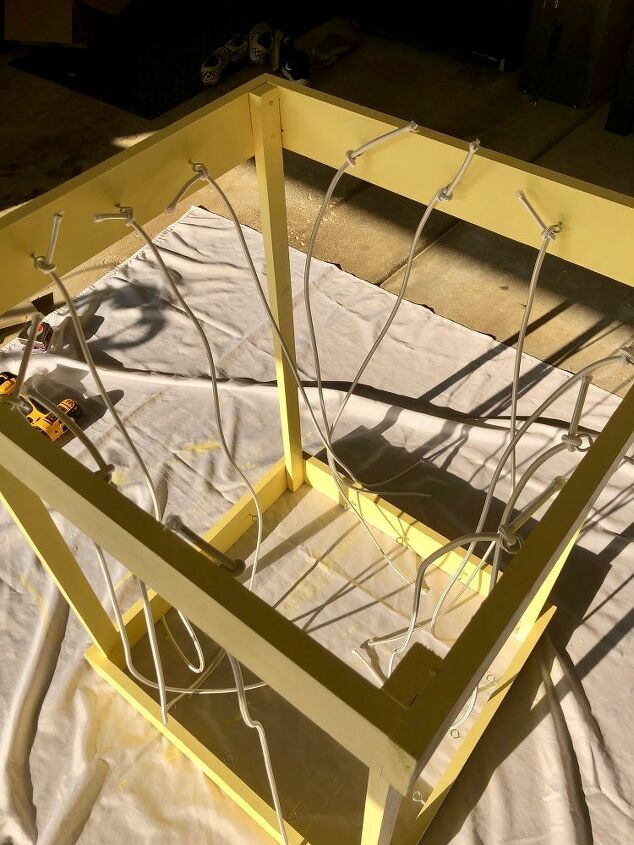
I did the same thing at the bottom, making sure it was pulled taut. Then I cut the ends. To give it some personality, I downloaded an animal print font from Etsy and printed it on printable vinyl. I used my Cricut to cut them out, but you could do it by hand or use any type of font stickers from your local craft store.
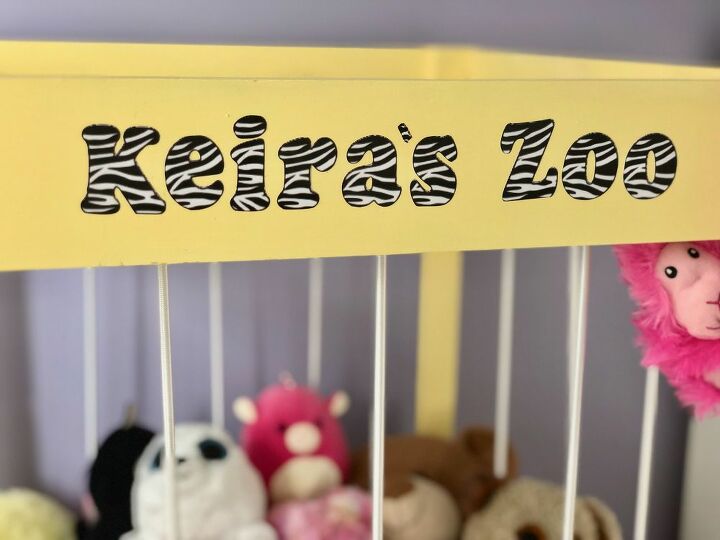
I think the zebra stripes are perfect!
This turned out so much better than I imagined.
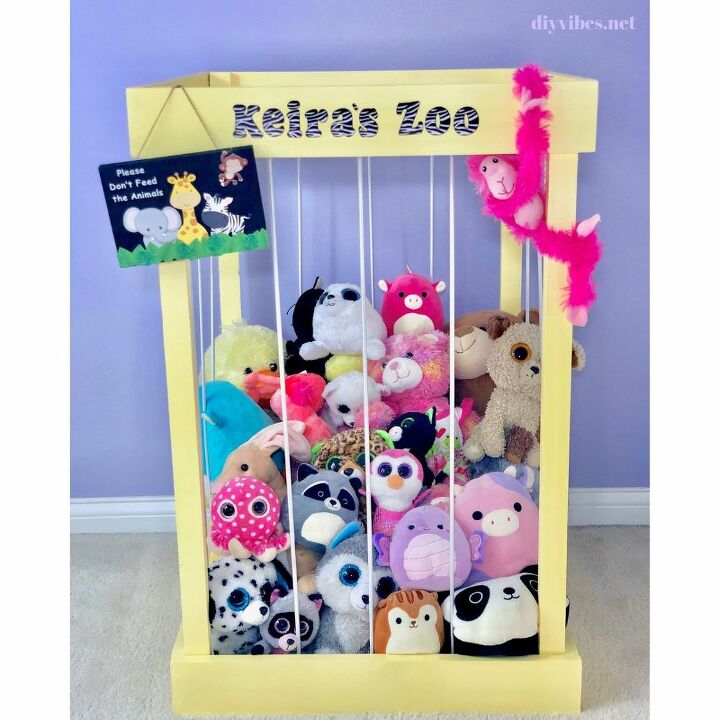
My daughter absolutely loves it and the best part is that her room looks so much cleaner! For more fun DIY ideas, check out my blog HERE.
Resources for this project:
See all materials


Comments
Join the conversation
-
This is absolutely the most adorable way of keeping stuffed animals contained in one area. Thanks for sharing such a cute project.
-
I absolutely love your work! Great idea:)


Frequently asked questions
Have a question about this project?
? Where did you use the 9th peace of 1 x 4 ?
Would the shock cord be called something else on Amazon? I could find only cut lengths, not a 50' piece. Love the project!
Is there a bottom? If you try to move the zoo won't the critters fall out?