


Free-standing Closet Made With an Old Door

by
Lori Rowe
4
Easy
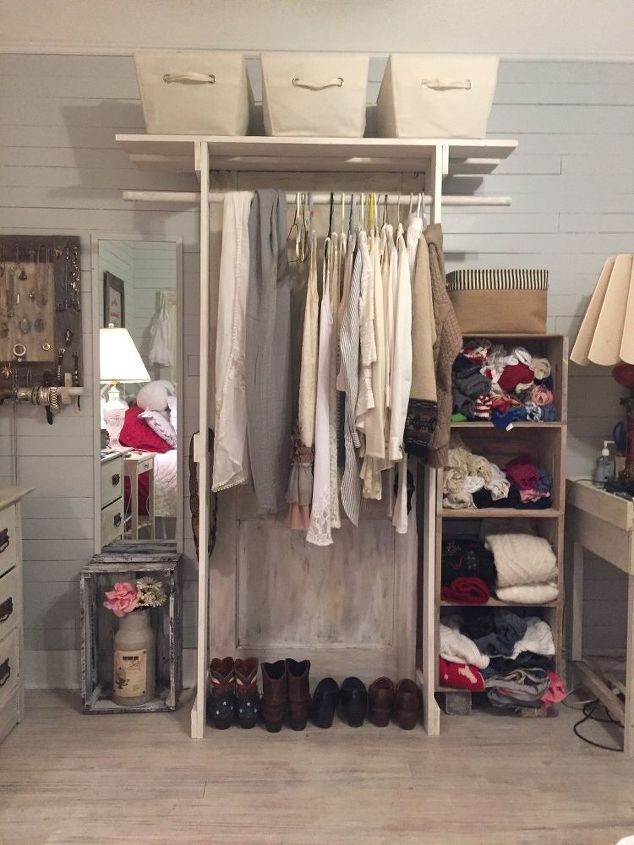
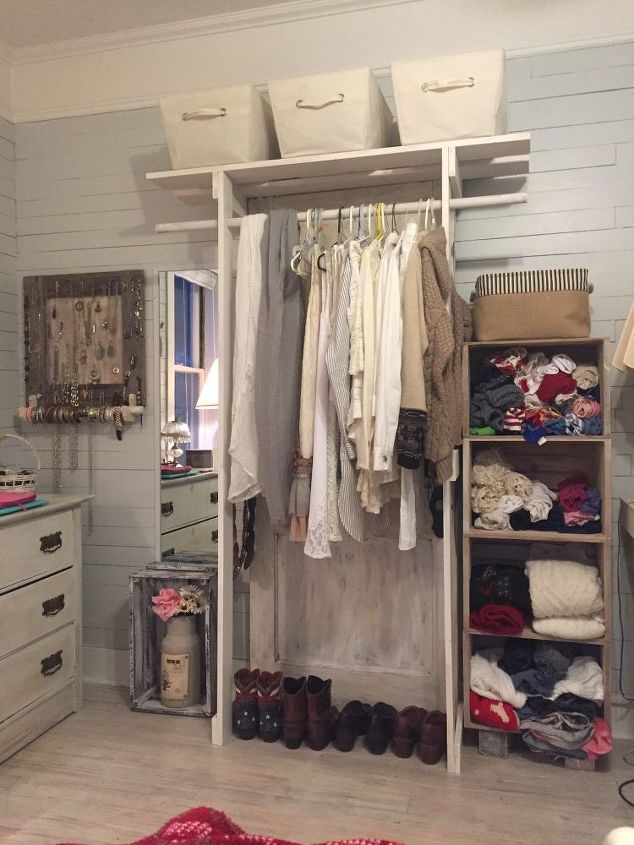
So I live in an old house that has small closets. That led me to have to be creative on adding more closet space. I love the open closet look that I've seen on various blogs. This is what I came up with and I LOVE how it looks and helps keep me organized.
Materials needed:
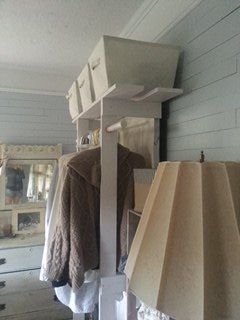
Before the clothes...
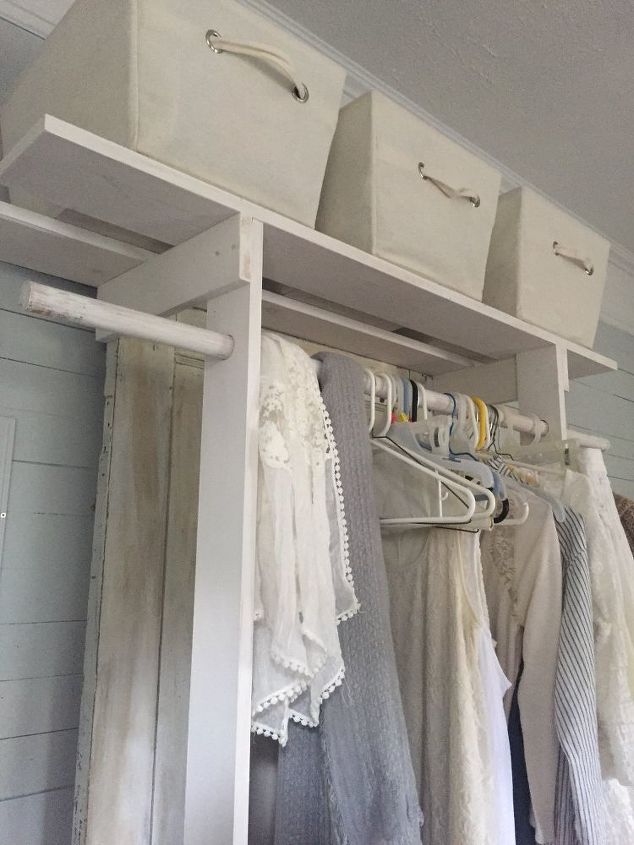
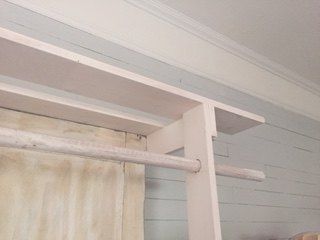
Drill 1& 5/8" or 1 & 3/4" holes in the center of the 1x4's that are going to run parallel to the door 6" down from the top end. This is what the wood dowel will run through to hang your clothes. This will allow a 6" clearance from the bottom of the top shelf to the wood dowel that you hang your clothes on.
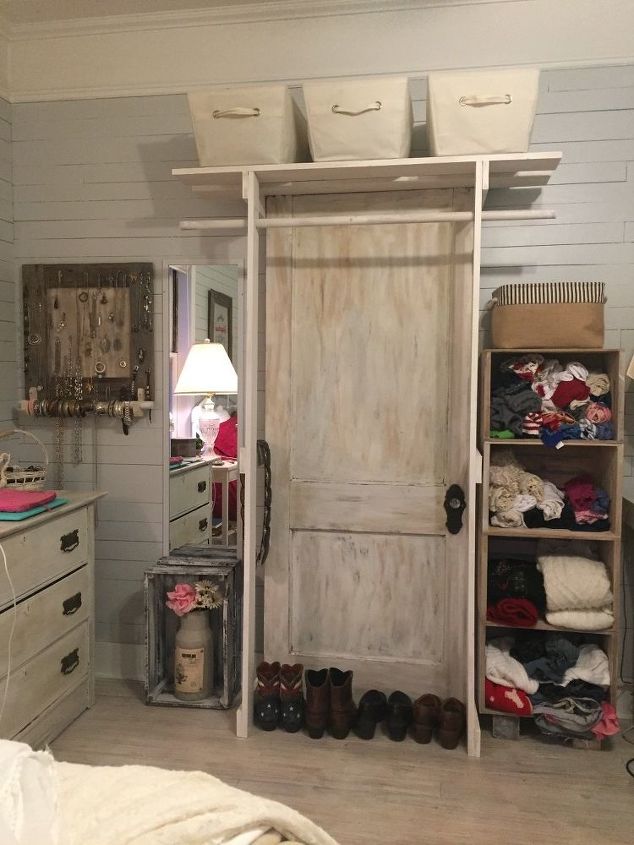
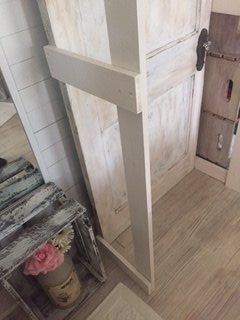
Using 1 & 5/8" drywall screws, screw the short 1x4's that will run horizontal to the door to the door on either side of the door so they are flush with the back of the door. Two at the top of the door, two halfway down, and two at the bottom. I am also huge on pre-drilling holes to prevent the wood from splitting. Next, attached the long 1x4's that run vertical to the 1x4's that run horizontal to create the "walls" of your closet. The long 1/4's should be attached inside the horizontal 1x4's and and be flush with the ends. I used 1 & 1/4" drywall screws for this and pre-drilled.
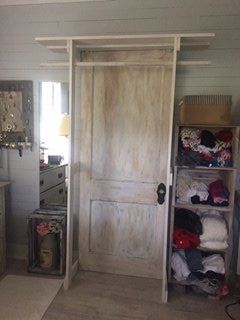
Now stand it up :). Trust me to get leverage for drilling you'll be flipping it every which way....haha. Then run your wooden dowel through the drilled holes of the 1x4's that run parallel and are in front of the door.
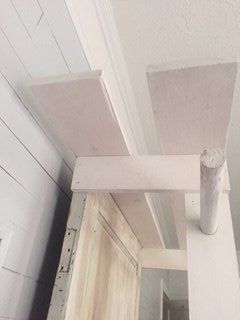
Finally attach the 2 1x6's that will be your top shelf to the 1x4's at the top. I placed my 1x6's flush with the back of the door and the front of the horizontal 1x4's. Now hang your clothes and use baskets or whatever on the top shelf :).
Want more details about this and other DIY projects? Check out my blog post!
Comments
Join the conversation
3 of 23 comments
-
This is so smart love
-
This is an awesome idea. I live in a mobile home and the only closet is a very small one in my room, so this would ideal for the other 2 bedrooms. Tysvm. I can see what I'm going to be doing this summer IF we survive all this snow this winter . LOL


Frequently asked questions
Have a question about this project?