


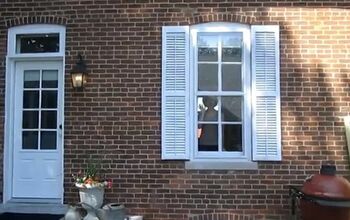
How to Build and Install Functional Wood Shutters

Adding functional shutters to the exterior of your home is an excellent way to increase curb appeal! It’s also very doable as a DIY. In this article, I’m going to show you exactly how I built and installed them on the house we are renovating.
What are functional shutters?
Before we get started, let’s discuss the difference between functional (real) shutters and fake ones.
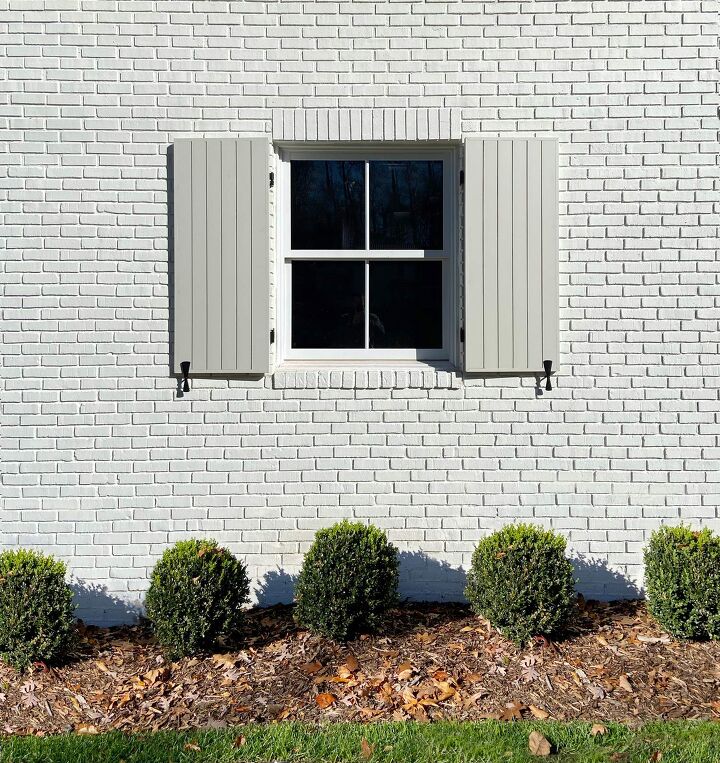
Shutters weren’t always meant to be purely decorative. They used to serve several purposes like protecting windows during storms, keeping the house warmer in the winter, and creating privacy. So in order for a shutter to function as designed, it needs to be mounted on hinges and be the right size in order to cover the window when shut.
Fake shutters are usually made of plastic, the wrong size, and usually mounted in the wrong place. But builders and homeowners have been installing shutters like this for a long time now and people have gotten used to this look. This is why homes with functional shutters really stand out!
Tools and Material
- miter saw
- tape measure
- pencil
- drill
- impact driver
- level
- router
- clamps
- wood boards (pine or cedar)
- shutter hardware
- tapcon screws (for instulation on brick)
- masonry drill bits (for instulation on brick)
Step 1: Determine the Style of the Shutters
There are all kinds of shutter styles. The style you choose really depends on the look you are going for. We decided to do a simple and clean vertical board look.
Step 2: Calculate Shutter Size
As mentioned above, shutters need to cover the entire window in order to function properly. Before you start, you need to decide if one or two shutters will work best for the window you are building for. In most cases, you should do two shutters per window. But sometimes if you have a smaller window, one shutter is the way to go.
For this window, I decided to go with two. I measured the width and height of the window opening, from brick to brick. Then I divided the width by two since one shutter only needs to cover half of the window. To give me a little wiggle room, I subtracted 1/4″ from both the width and height. This gave me the overall dimensions for my shutters.
Once I knew the dimensions, I was able to calculate how many boards I needed. Since we wanted several boards per shutter, I ended up going with 1x4s and 1x2s to trim out the edges and add additional thickness to the shutters. I ended up with 6 1×4’s per shutter.
Step 3: Make the Cuts (most of them anyway)
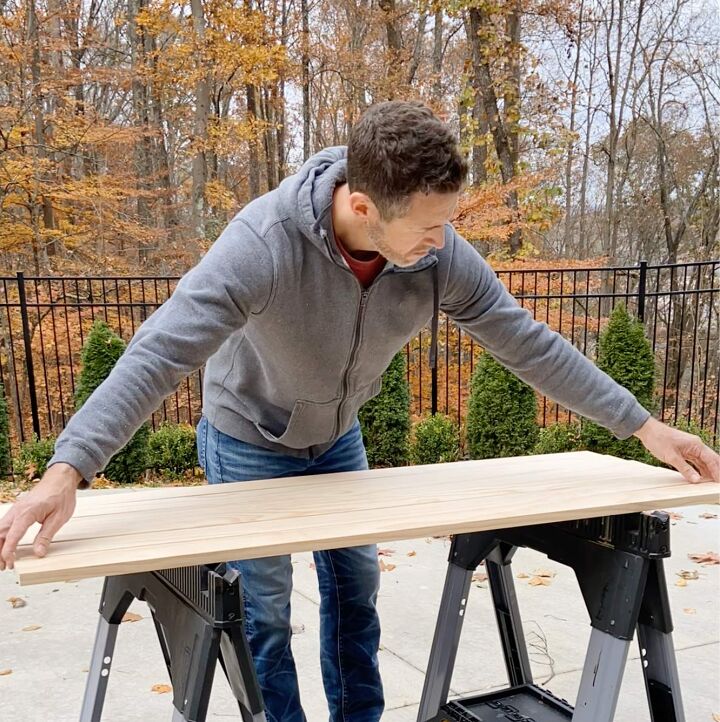
First, I cut all of the 1x4s to length. I did subtract 3″ to account for the 1×2 trim. Then I had to use a table saw to rip cut each 1×4 in order for them to add up to the right width.
Step 4: Fasten Boards Together
Once I had all 6 1x4s cut, I placed them side by side and made sure they were square. Then I used a clamp to hold them in place.
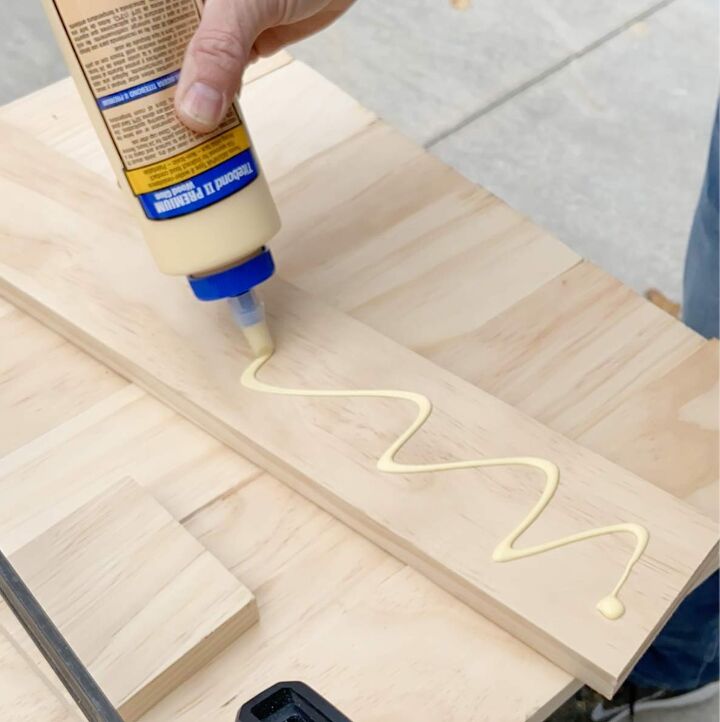
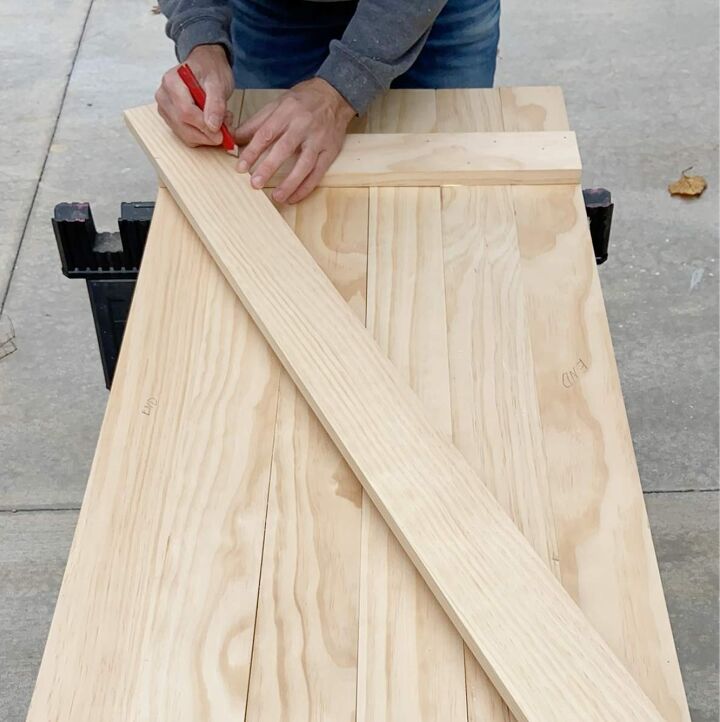
I measured the overall width and cut two pieces of 1×4 to that length to act as battens. I applied wood glue to the back of each and nailed one 6″ from each end. I used 1 1/4″ finish nails.
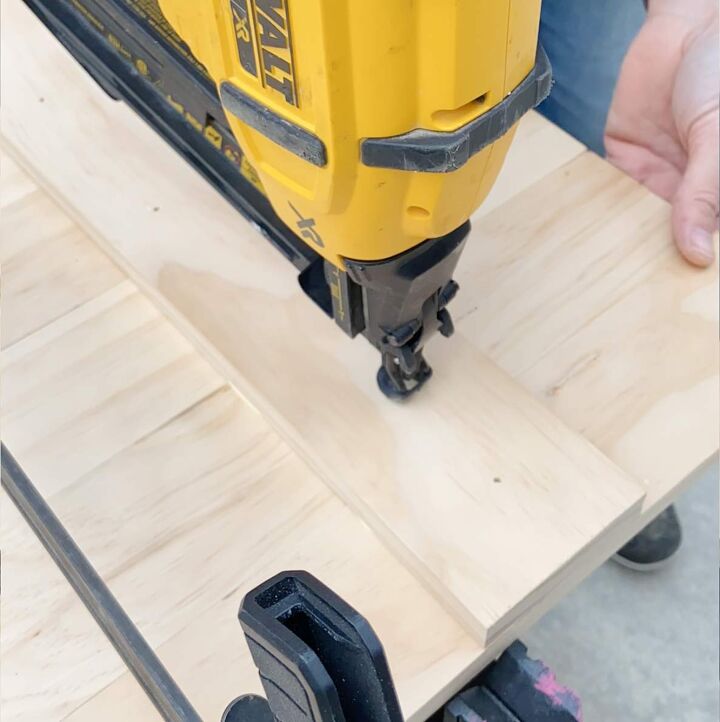
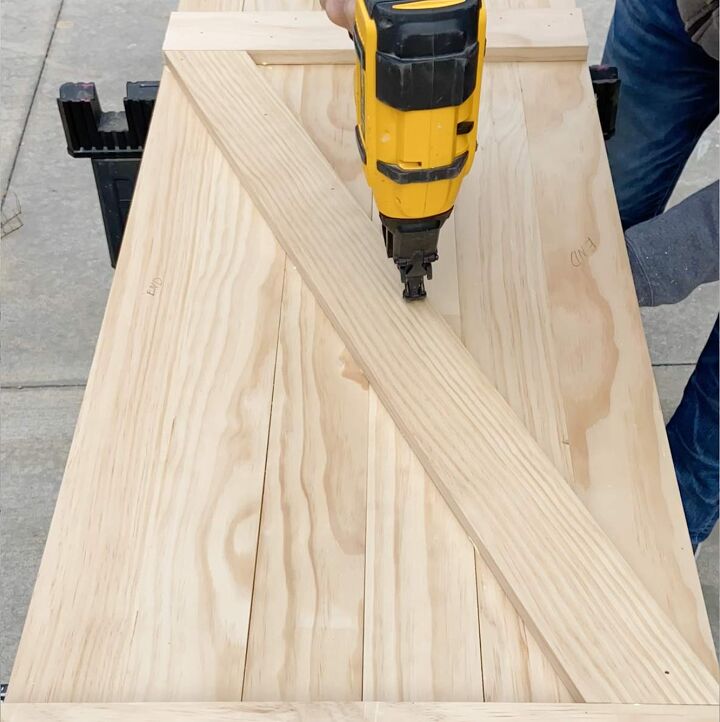
Then I laid a 1×4 across at an angle overlapping the outside edge of each batten. I marked where they overlapped on each end and cut the board on the marks. Then I applied wood glue and nailed it in place.
Step 5: Cut Grooves on the Front of Shutters
To make the appearance of individual boards more prominent, I decided to use a router to cut grooves along each joint on the front of the shutter. I clamped a scrap board to the shutter to act as a guide for the router.
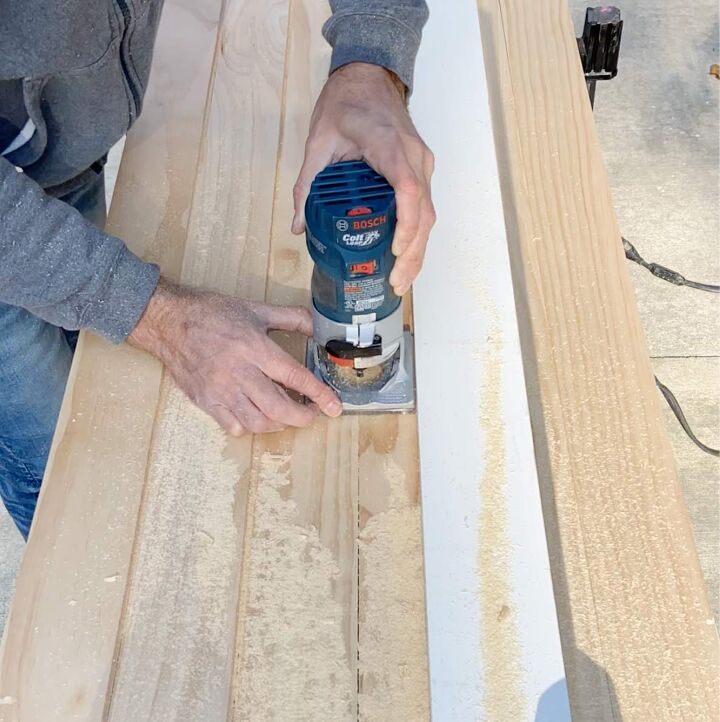
I moved the guide accordingly to cut each groove.
Step 6: Add the Trim
After I finished cutting the groove, I measured the width and length of the shutter. Using these measurements, I cut a piece of 1×2 for each side with a 45-degree angle on each end.
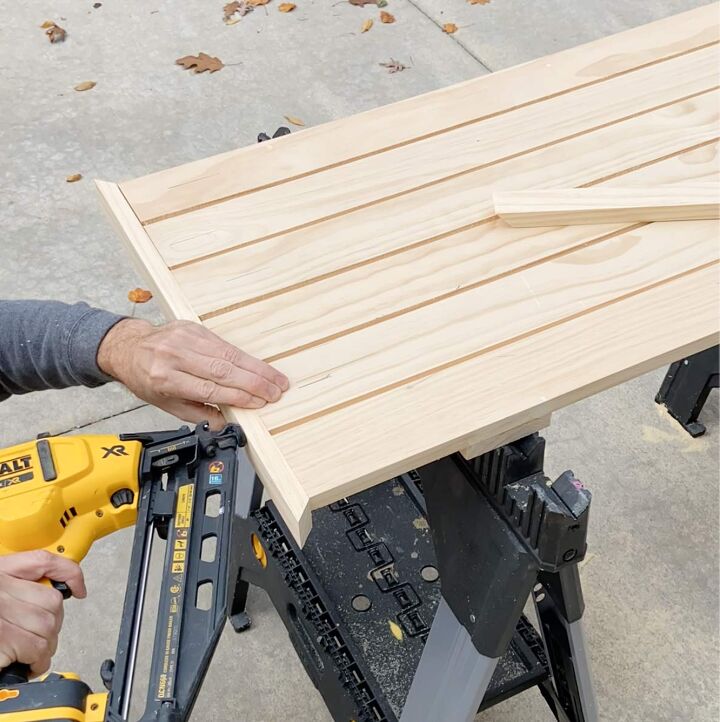
Then I glued and nailed them in place using 1 1/4″ finish nails.
Step 7: Prepare for Painting
After I finished building the shutters, I filled all of the nail holes and sanded the surface and edges.
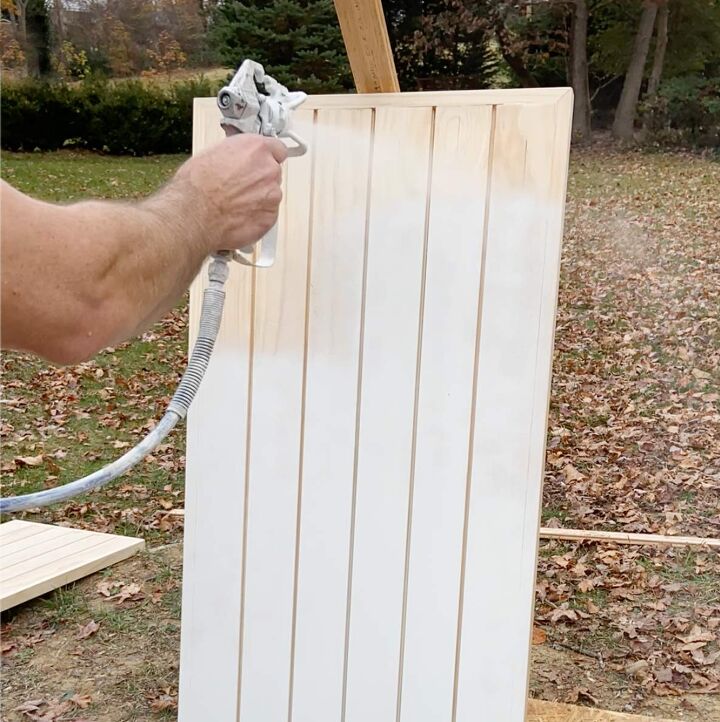
Step 8: Paint the Shutters
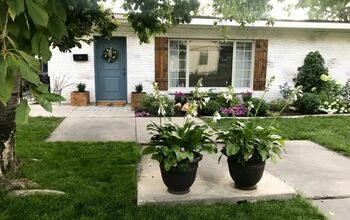
We decided early on that we wanted a warm light gray shutter against the white brick. We decided on Agreeable Gray by Sherwin Williams. I used a Grayco airless sprayer to paint the shutters in a satin finish.
Step 9: Install Strap Hinges on Shutters
There are several different options for shutter hardware, but we chose to go with strap hinges and pintles.
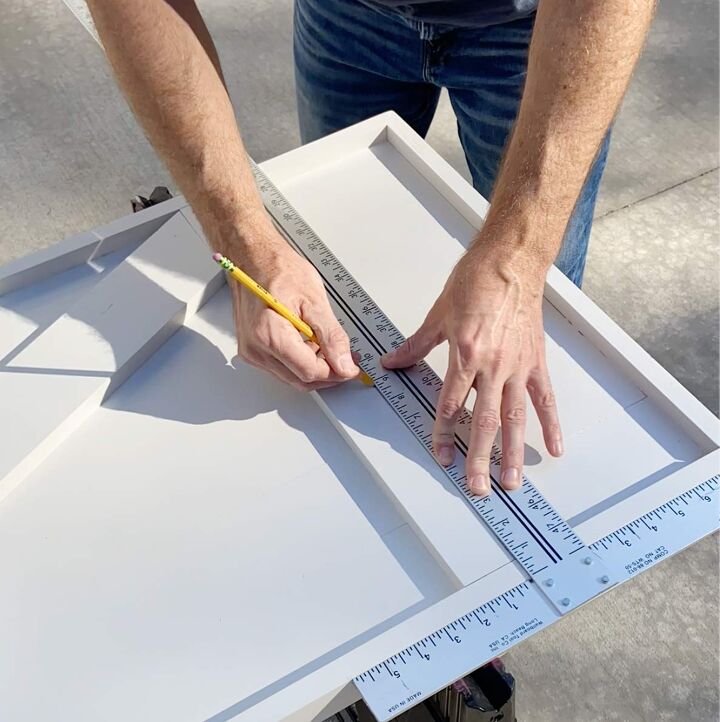
Once the paint dried, I installed the strap hinges on the back of the shutter. I used a T-square to mark the center of the batten to ensure that the strap was lined up square with the shutter before fastening it with wood screws.
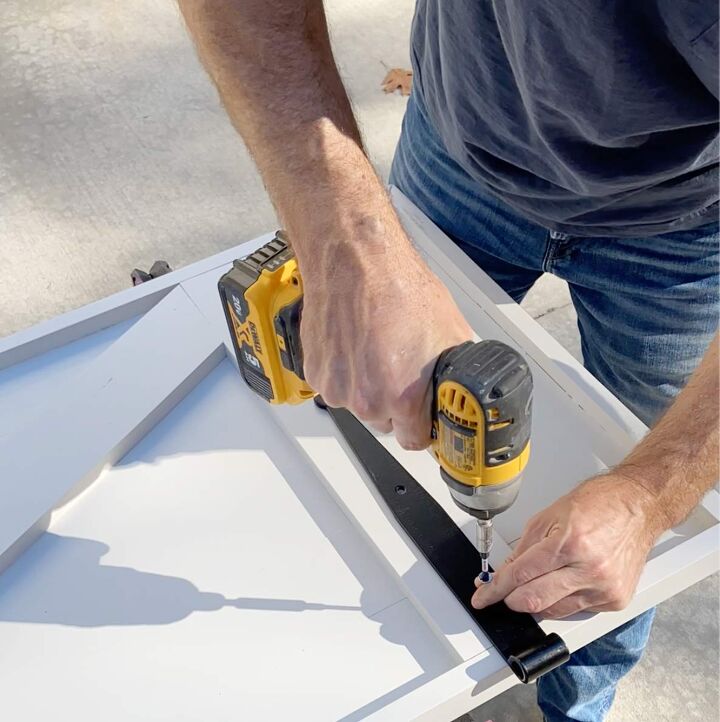
I did the same for the other strap hinge on the other batten.
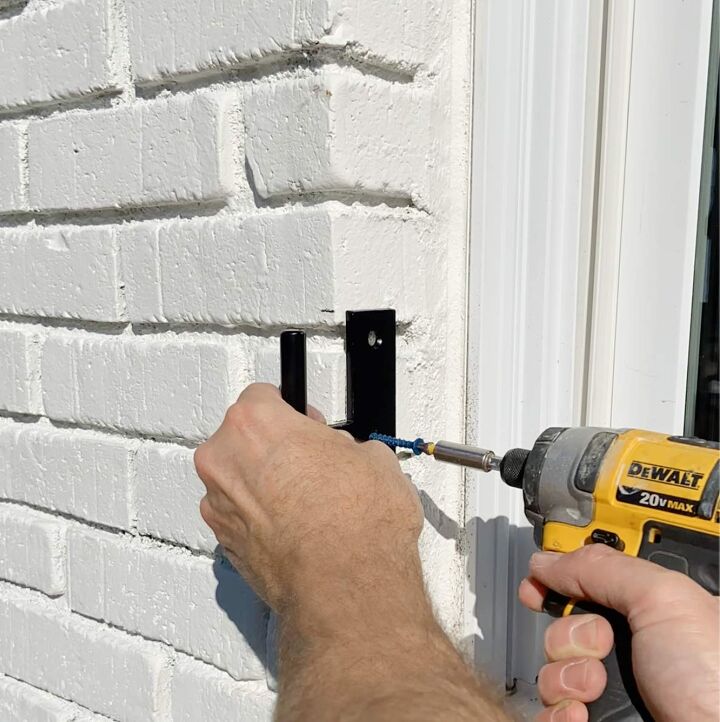
Step 10: Install Pintles on Window Opening
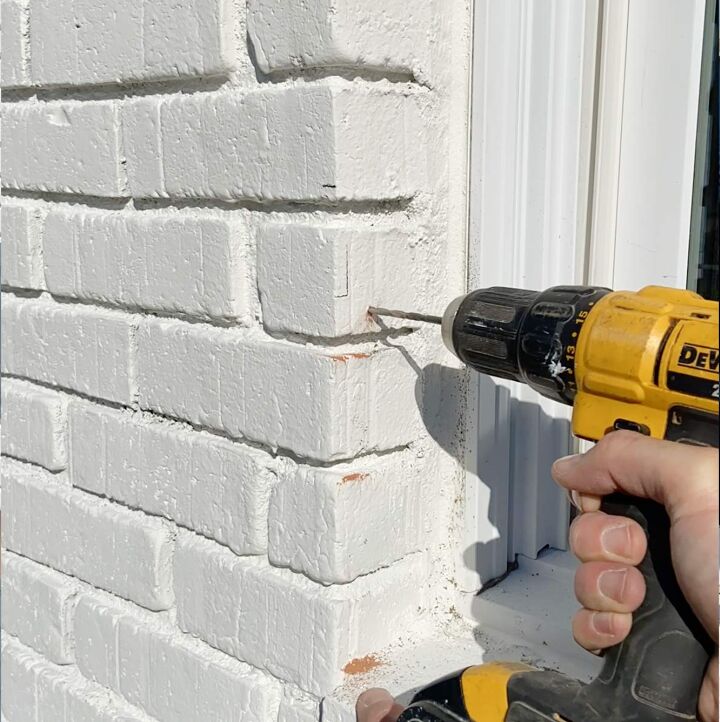
I could have measured to determine the place of the pintles, but I’ve discovered an easier way. I placed the shutter in the window opening in the shut position and used a pencil to mark the place of the pintles on the brick.

After I marked all of the pintle hole locations, I used a masonry drill bit to drill the pilot holes. Then I fastened the pintles to the brick using Tapcon masonry screws.
Step 11: Install Shutter Dogs
A shutter dog holds the shutter in place when in the open position. There are several different styles you can go with. We chose the propeller style since it is less ornate. Shutter dogs are usually mounted near the bottom of the shutter either below or to the side. I mounted these below about 2 1/2″ in from the corner.
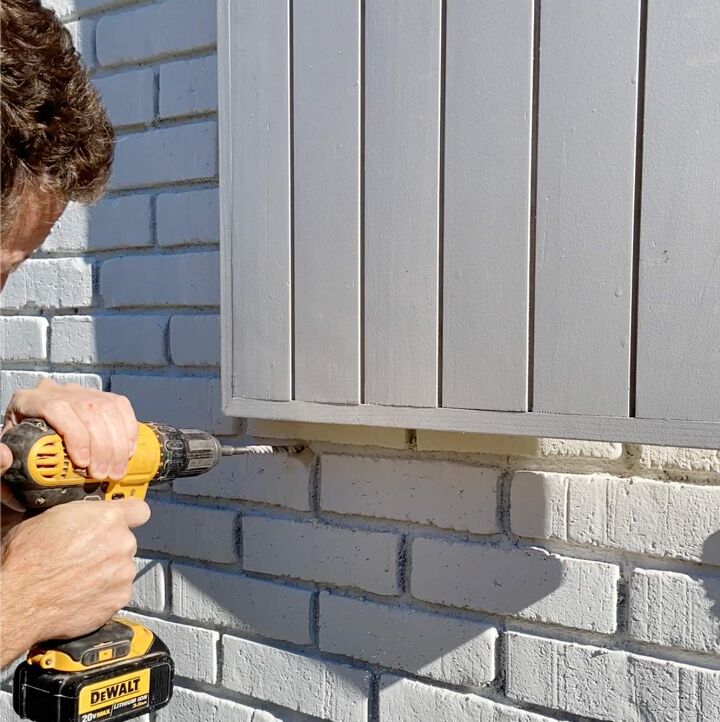
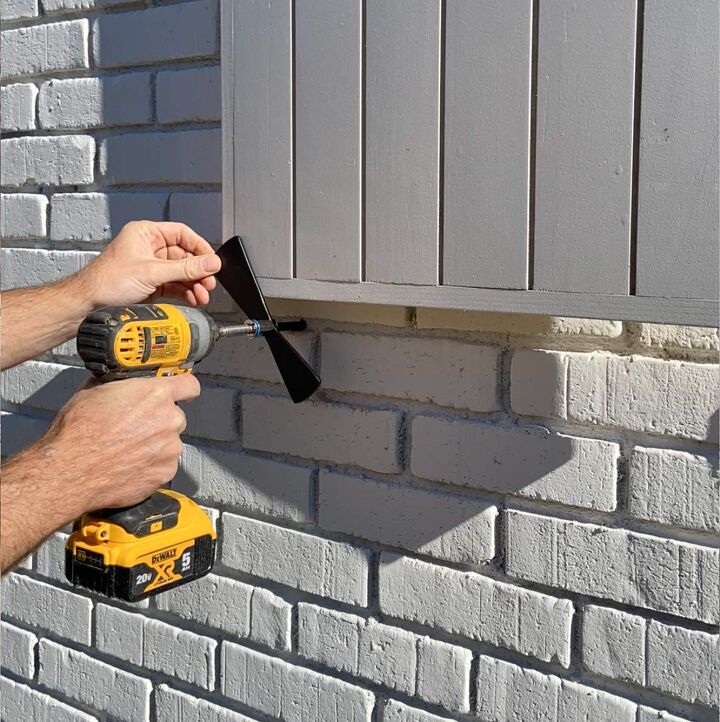
I used a masonry bit to drill a pilot hole. Then found the right size socket for the head of the shutter dog, and used an impact driver to drive it in place.
More Brilliant Ideas to Transform your Home's Exterior
Comments
Join the conversation
-
They also only belong on smaller style windows, not modern ribbon windows.
-
LOL! Thank you so much.


Frequently asked questions
Have a question about this project?