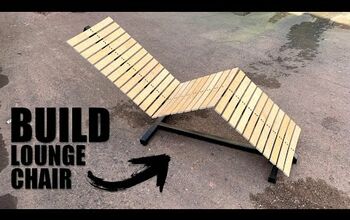
Adjustable Outdoor Lounge Chair

Amanda C, Hometalk Team
by Amanda C, Hometalk Team
10 Materials
$70-100
8 Hours
Advanced
Soooo every once in a while I like to sunbathe on my rooftop, but I have been laying on the floor on a towel. With that being said, I thought it would be nice to put together an outdoor lounge chair that was adjustable. This piece can lay completely flat if you need to put it away and can adjust to various sitting / lounging positions. This is mostly a matter of wood and measuring and is simpler than it looks!
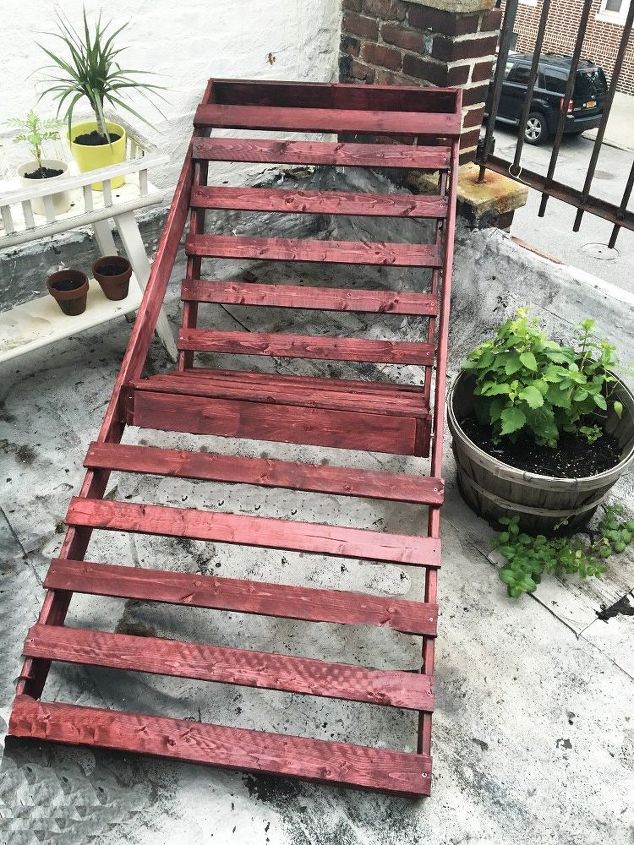
Can't wait to catch some vitamin D in this beauty. Don't worry I will wear sunscreen... I'll also probably do some star gazing (though I only tend to see 1-3 stars in these parts)
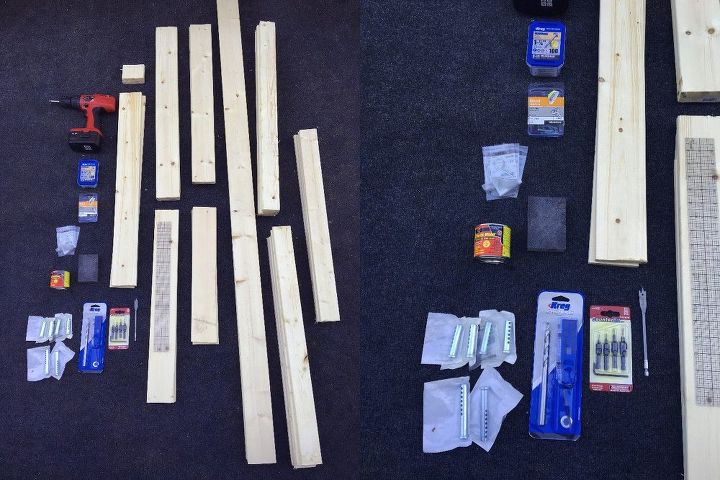

*Side note: The 8 HR time estimate really could be less, but I did this among rainy days and had to work around the humidity. This caused the stain to take longer drying and such. I actually had to wait to complete it over a span of 3 days. With that in mind you could certainly accomplish this in less time!
SUPPLIES:


-5 -1x4x8 Wood Beams


-5 -1x3x8 Wood Beams


-1 1/4" Wood Screws


-1 1/4" Pocket Screws


-4 -2" Clevis Pins (1/2" diameter)


-2 -3" Clevis Pins (1/2" diameter)


-6 -Hitch Pins / Clips (Make sure they are at least 1/2" wide to fit around the clevis pins


-Wood Glue


-Wood Stain (optional)


-Sealer


TOOLS:


-Spade Bit Set


-Kreg Jig


-Circular Saw


-Countersink Drill Bit


-Drill


-Tape Measure


CUT LIST:


-2 – 1x4 at 75”– Main Frame Sides


-2 – 1x4 at 29-1/2”– Main Frame Top and Bottom


-5 – 1x3 at 31” – Main Frame Slats


-2 – 1x4 at 19”– Middle Frame Sides


-2 – 1x4 at 26”– Middle Frame Top and Bottom


-2 – 1x4 at 2-1/2”– Middle Frame Spacers


-4 – 1x3 at 27-1/2”– Middle Frame Slats


-2 – 1x4 at 30-1/4”– Upper Frame Sides


-1 – 1x4 at 27-1/2”– Upper Frame Top


-5 – 1x3 at 29” – Upper Frame Slats


-1 - 1x4 at 30-1/2" - Head Rest
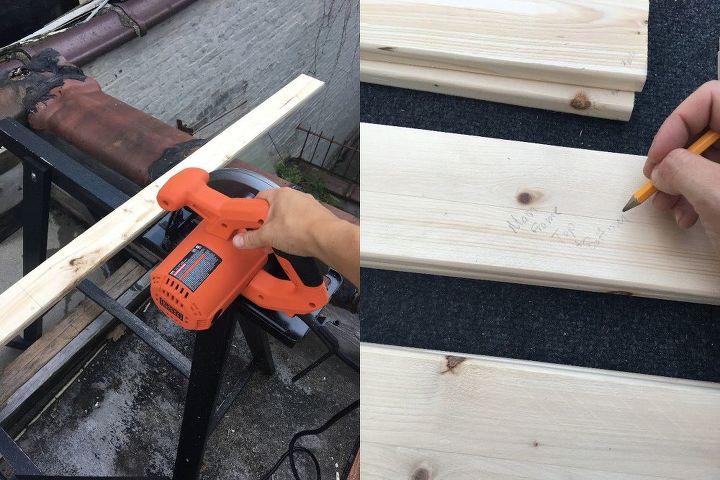
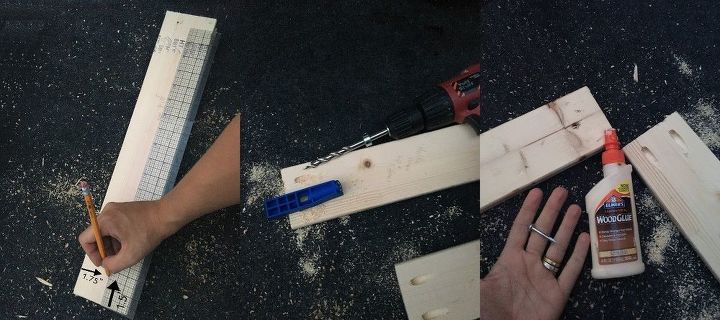
STEP 1: Cut all your wood pieces according to the cut list posted above.


Mark all of your pieces as you go so that you don't have to measure them for each step. It will help you stay organized and know which piece goes where (each piece is also labeled in the cut list).
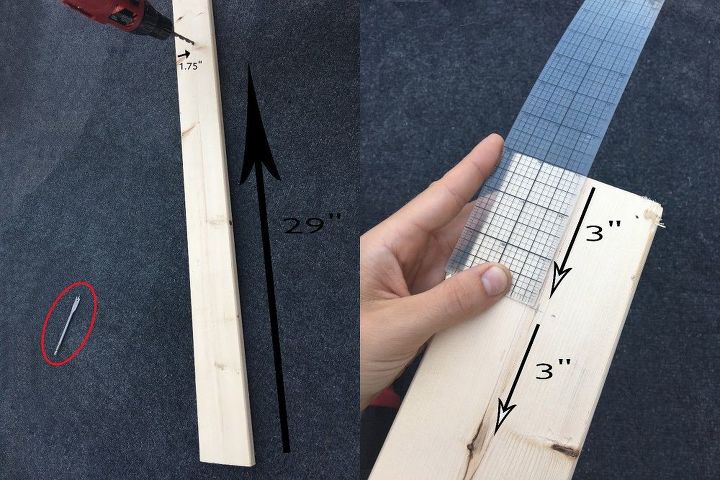
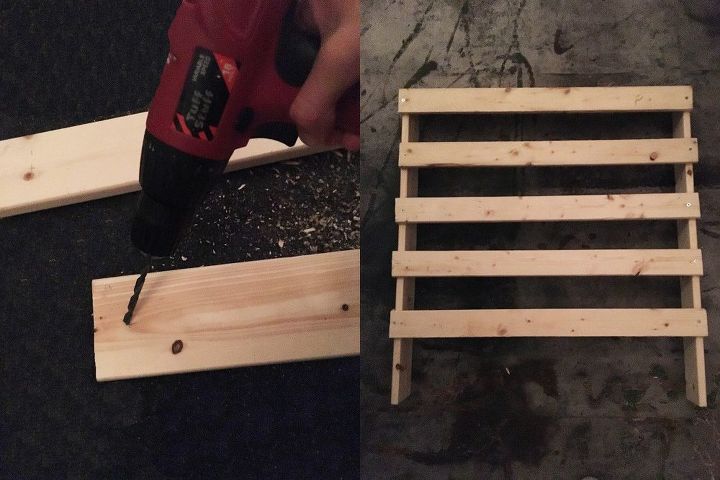
STEP 2: Drill a Hole


Grab your 75" pieces of wood. Measure 29" in from one end and 1 3/4" from the top and drill a 1/2" hole with your 1/2" spade bit. (I took a picture of a regular bit, but the bit to the left of the picture is the one you should be using)


From the other end of your 75" pieces of wood measure 3" in and 1 3/4" down and drill a 1/2" hole with your spade bit. Measure another 3" in and drill another 1/2" hole. Repeat this 5x. This will give us the ability to adjust the chair once it is complete.


*Be sure to do this to both 75" pieces of wood. These will serve as the main frames sides.
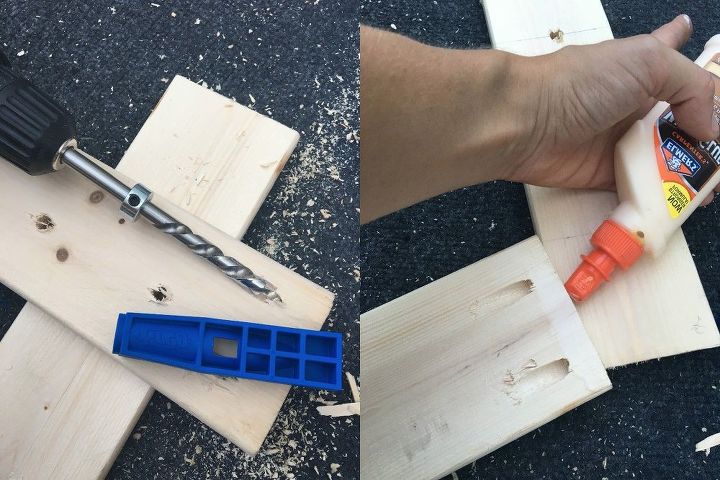
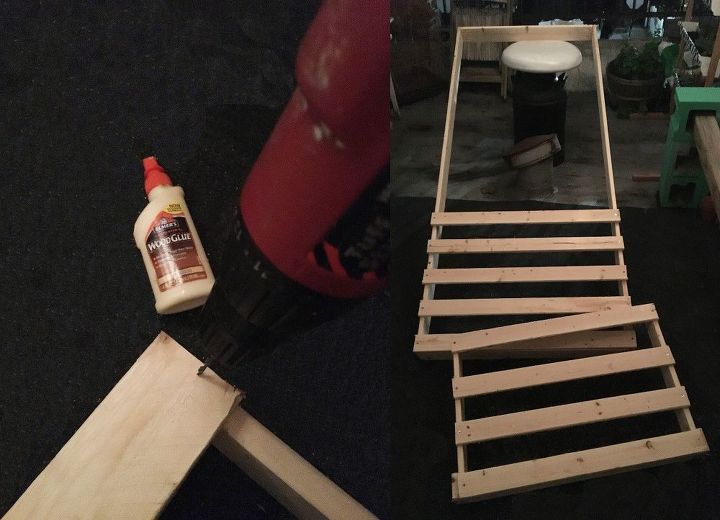
STEP 3: Glue wood together for your main frame


Grab your main frame top and bottom pieces (the 29 1/2" pieces) and your Kreg jig and drill two pocket holes one each end of the 29 1/2" pieces.


Using wood glue on the end of these pieces attach them so that the end rests on the inside of each main frame side piece. (see pic below)
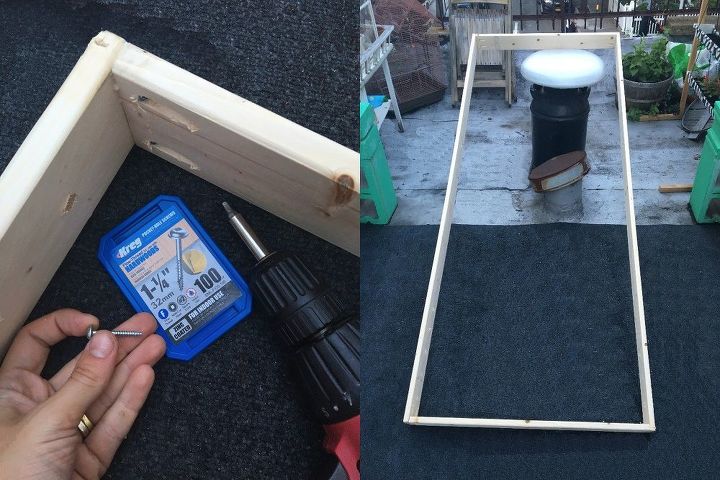
STEP 4: Screw the pieces in place


Once the glue has dried screw these pieces in place with your pocket screws into each hole made in step 3 with your Kreg jig.


At this point your main frame should look like the picture on the right. (Note how the 29 1/2" pieces rest on the inside of the 75" pieces. Be sure to attach them this way.)
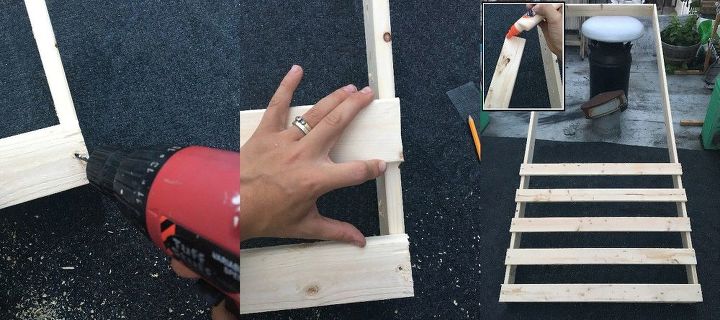
STEP 5: Attach slats to the main frame


Grab all of your main frame slats (31" pieces) and prepare to attach them to the main frame you just created.


The first slat goes at the bottom edge of the main frame. This is the OPPOSITE end of the one with all the 3" separate holes. It is the one where you measured 29" from.


Once you drill a pilot hole through this slat, apply wood glue and screw the piece in place. Once it is in place measure 3" up and place another slat in this spot. Repeat the same process of drilling a pilot hole, applying wood glue, and screwing the piece in place.


Once all your main frame slats are in place your piece should look like the picture to the far right.


*Again, be sure to place the slats on the end WITHOUT the 1/2" holes that are spaced 3" apart... that is the TOP of the chair and we are applying slats to the foot of it at this point.
STEP 6: Attach the middle frame and top frame


Grab your middle frame sides (19" pieces). You will be drilling 1/2" holes with your spade bit on these pieces as well. Measure 1 1/2" in from each end and 1 3/4" down and drill a hole in from each side. Do this for both side slats.


Now grab your middle frame top and bottom (26" pieces) and drill pocket holes on each end using your Kreg jig.


Now simply attach the sides to the top and bottom with wood glue and pocket screws through each hole you just drilled through the top and bottom. The side pieces will rest on the outside of the top and bottom pieces for this frame.
STEP 7: Attach the Spacers


Grab your middle frame spacers (the 2 1/2" pieces) and mark 1 1/2" over from the side and 1 3/4" down. You will drill another 1/2" hole with your spade bit at this cross mark. Repeat this for both spacers.


Now attach each spacer to the sides of the middle frame so that each hole rests over one of the middle frame side's holes made in step 6, and the edge rests flush with the edge of the frame. Basically this means that the longer portion of the 2 1/2" piece of wood goes towards the edge. (I also attached this piece with wood glue and 2 wood screws through pilot holes drilled on either end.)


Each of the spacers will be added to bottom portion of the middle frame. This means that one will rest on each middle frame side and be directly across from each other.
STEP 8: Add slats to your middle frame


Collect all 4 of your middle frame slats and attach them to the middle frame you just created in the same manner as you attached the slats to the main frame.


You will attach the first slat flush with the bottom portion of the frame by drilling a pilot hole, applying wood glue and screwing in place. Once you have attached the first slat you will go up 3" and repeat the process with another slat and so on.


The middle frame is resting on the bottom in the picture to the right. Note where slats and spacers rest on the piece.
STEP 9: Build the upper frame


On to the upper frame. For this we will start with the upper frame sides (the 30 1/4" pieces). Measure in from one end 1 3/4" and 1 3/4" down and cross mark. On the other end measure in 1 1/4" and down 1 3/4" and make a cross mark. Drill a 1/2" hole with your spade bit at each of these cross marks. You will do this for both side slats.


Grab your upper frame top and drill pocket holes at each end. Now attach each upper frame side to the upper frame top by gluing it in place and screwing pocket screws through the holes made in the top portion. Each side should be attached with the side that had the 1 3/4" hole from the end toward the top.


Once the side and top are attached you will grab your slats and repeat the same process you did with the main and middle frame of attaching the slats with wood glue and screws (after drilling pilot holes through each). Each slat is still 3" apart, but you will start at the top of the frame and work your way down until you run out of slats. *It will look like the picture on the right.
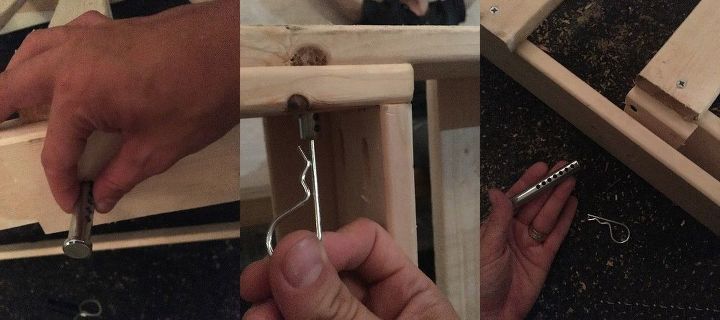
STEP 10: Attach your frames to each other


Now is when your chair will start to take shape. Each of your frames should be ready to go so all we have to do is attach them to one another.


First set the main frame down on the floor so that it lays flat. Place your middle and upper frame inside of the main frame in their according order.


Now attach your middle frame to your upper frame by lining up the 1/2" spade drilled holes and inserting 2 of the 2" clevis pin through the holes on each side.


Once the pins are in place, insert your hitch clip through the holes to keep it secure.


Now attach the middle frame to the main frame by inserting the 2- 3" clevis pins on either side through the main frame hole, the spacer hole and the middle frame hole you created with your spade bit. Line each up and insert the pin. Put hitch clips through these pins as well to keep them in place.


*Not pictured, but the same process: Insert the last 2 - 2" clevis pins through the main frame and the upper frame in one of the 5 holes you created at the top of the main frame positioning the chair as you desire. You will also keep these pins in place with your remaining hitch clips. These can be removed and adjusted if you want to change the position of the chair. You might need a tool to remove them, but they should come out pretty easily
STEP 11: Add a resitng spot for your head


The picture on the left is of the chair in the flat laying position. Once you will notice that the middle and upper frame move out from the bottom for adjustment. With that in mind I went on to add this next step.


When the chair is in a sitting position it lacks a resting space for your head. This is where the 30 1/2" head rest piece comes into play, about 2" or so above where the top of the upper frame rests when in sitting position you will screw the head rest in place. This could be customized if you and those you know will be sitting in your chair are taller or what not. I had several varying heights sit in the chair, and this seemed to be the best spot for it. The chair is still adjustable as long as you move the frames from the bottom of the chair for readjustment.
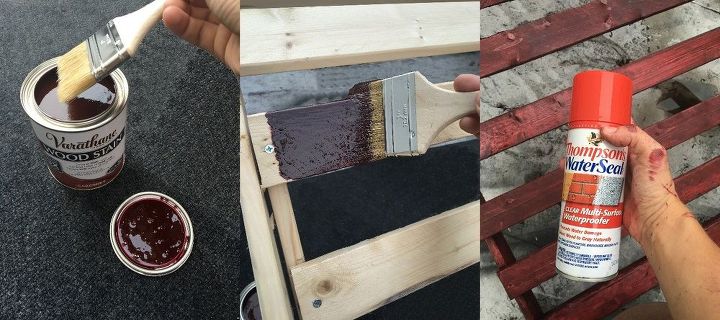
STEP 12: Stain the chair


The first portion of this step is completely optional. I stained my chair, so at this point you too can do this. You can also stain the wood before you assemble the chair (makes it easier considering crevices, but I knew it was going to rain and wanted to at least the the lounger assembled and went from there).


Once the chair is stained or painted and has dried you will need to treat it with an outdoor sealer. This will help preserve the wood from rot and water damage.


You can also use wood filler and put it over the screws to hide them and then stain and paint over the filler. Another good trick is to apply some paste wax over the clevis pins so that adjusting the chair is easier.
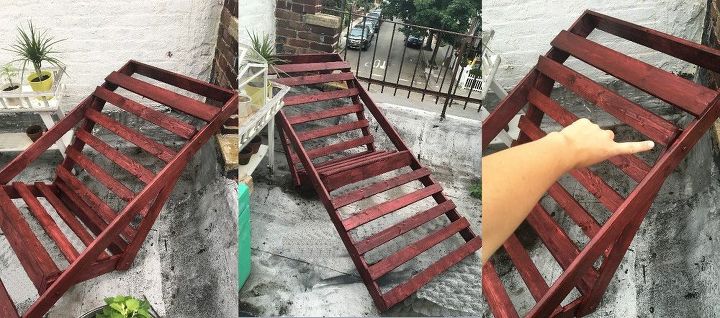
This position is with the pins posted in the 3rd hole down from the top. I think it is a pretty good standard position.


*Make note that it is best to exit the chair by leaning forward considering the back does not touch the floor. Just to avoid any rocking motion. You could also add some kick stands behind it for security, but honestly it is fine if you just exit properly.


Enjoy!
Resources for this project:
See all materials
Any price and availability information displayed on [relevant Amazon Site(s), as applicable] at the time of purchase will apply to the purchase of this product.
Hometalk may collect a small share of sales from the links on this page.More info
Frequently asked questions
Have a question about this project?
Comments
Join the conversation
2 of 6 comments
Next