


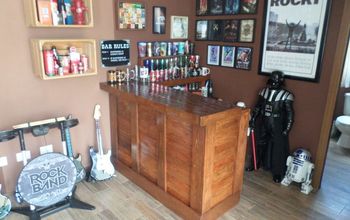
Custom Made Home Bar.

If you view some of my earlier postings, You’ll see: 1) I have made bars before;
https://www.hometalk.com/diy/bedroom/dressers/home-bar-but-possibly-a-reception-desk-or-service-counter-13894157
https://www.hometalk.com/diy/build/furniture/one-shipping-crate-equals-two-home-bars-35268069
and 2) I have also done several projects repurposing pianos and piano parts.
https://www.hometalk.com/diy/living-room/furniture/piano-repurposed-into-a-bookcase-43336777
https://www.hometalk.com/diy/living-room/furniture/piano-bookcase-28841066
This project is a mixture of both.h
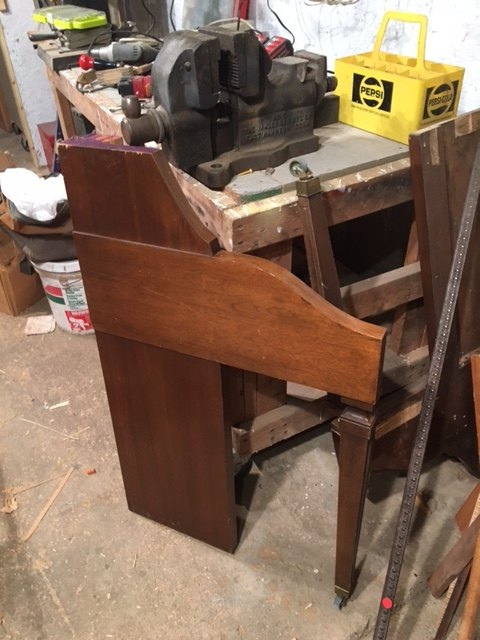
A friend who lives in a retirement community volunteered to dismantle and remove a spinet piano from their recreational area. He assumed I wanted the keys and some of the pieces. They served as the inspiration for this project.
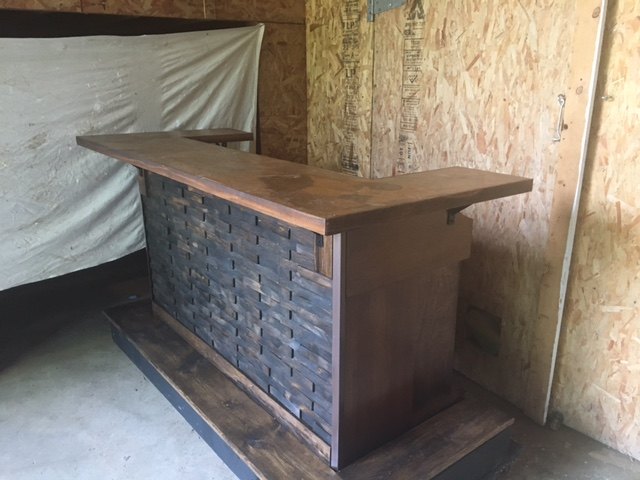
The bar was made in three sections that can be disconnected so it can be carried/moved by two people. They are: a U shaped countertop; the bar surround and bartender’s counter (with a backsplash); and a base/footrest.
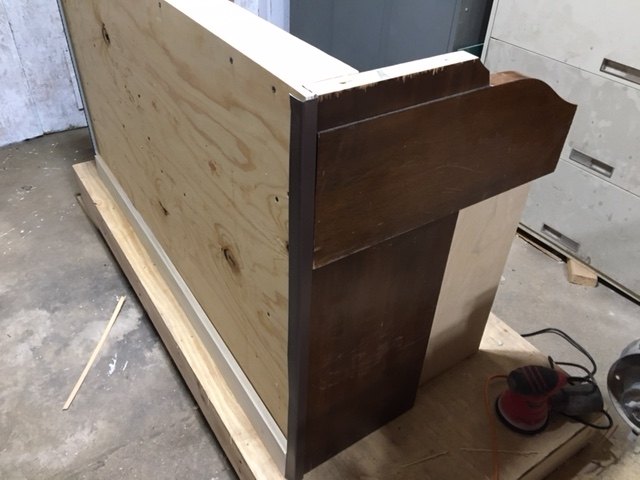
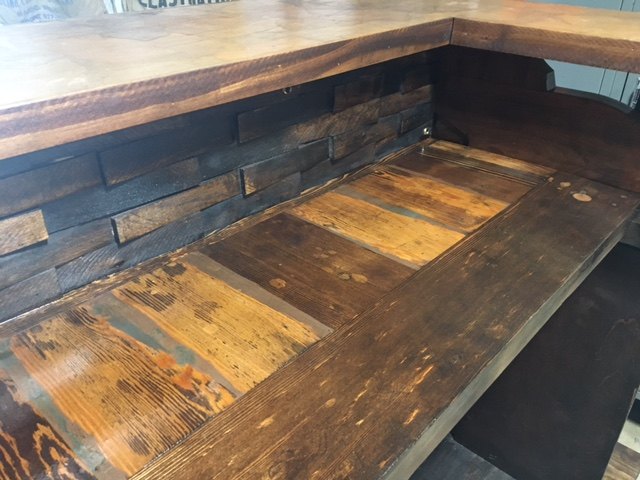
The surround- The two piano ends were connected with a 34” by 56” piece of 1/2” plywood. Dimensional lumber was added at the top (2x6) and bottom (2(x4) to increase rigidity. A rectangle of 1/2” birch plywood replaced the rear leg of the piano for stability and appearance.
The front and backsplash was covered with wood shims. The bartender’s countertop was originally the key support on the piano.
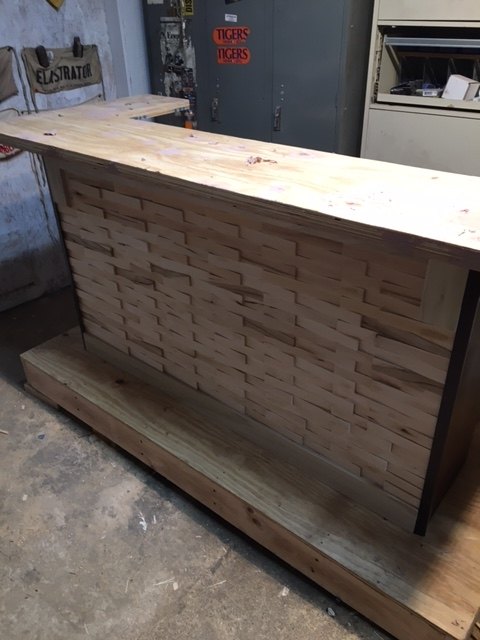
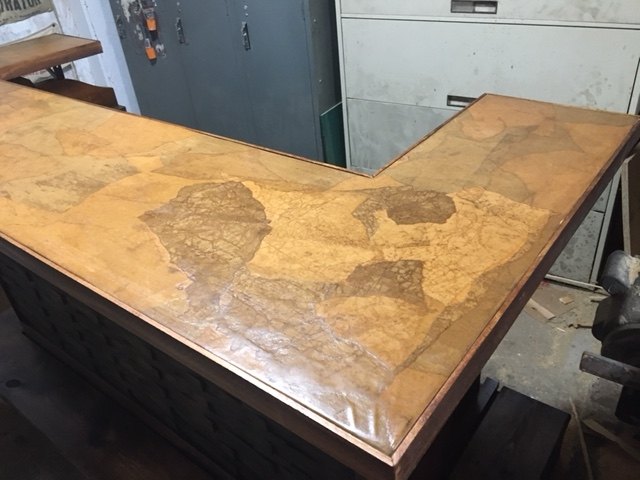
The countertop. Using three layers of 1/2” plywood made constructing the U shape easier and stronger because they are all rectangular pieces, glued together, with the joints alternated at the different layers.
I filled and sanded the joint on the top layer, so it wouldn’t be seen through the covering. I use automotive body filler (Bondo) as filler because it has great adhesion.
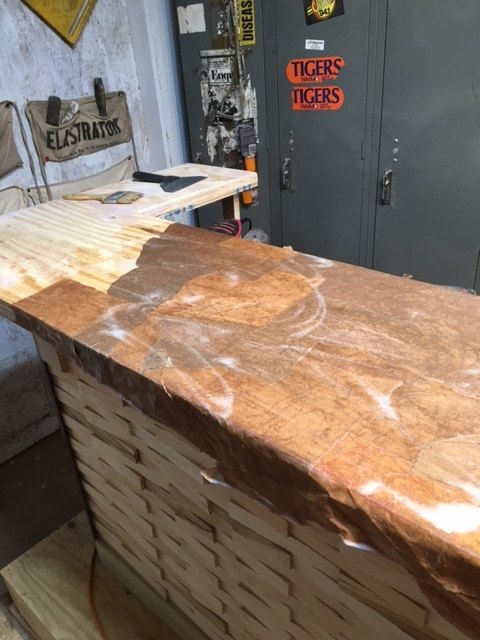
I decided to try “paper bag decoupage” to cover the countertop. Multiple techniques are covered in several HomeTalk postings for countertops and floors.
I am going to provide a summary of the technique I used because it didn’t work as planned.
After tearing the paper bags into irregular shapes, I soaked them in water and wadded them up. I “unwadded” them and soaked them in a 1:1 mixture of water and Elmer’s white glue and applied them to the top- overlapping them and overhanging the edges. This worked fine until it dried. After drying the first part that I did adhered well but the last part not so well. I surmised that because I was wetting the paper pieces with water first the glue mixture was getting diluted as the process continued. I pried off the loose sections and recovered this bare areas using the same technique, but didn’t dilute the glue.
i wasn’t pleased with the adhesion where the pieces overhung/wrapped the edges. I covered the edge with lengths of pine lattice (1/4” by 1 and 1/2”) that I pre-stained.
Once everything was dry I applied multiple coats of oil based polyurethane satin varnish and I am satisfied that it it a durable finish. Hopefully you can see in the photos that it has faux leather look. Interestingly, the color variation is simply due to using paper bags from different supermarkets. I wouldn’t recommend using any portion of the bag that had printing.
The base.
A support frame made from 2 by 6, covered with 1/2” plywood yields six inches of height. That coupled with the height of the surround and the countertop thickness yields an overall bar height of about 42” . A step was added to the front and sides using 3/4” pine makes the footrest just under 7” which is a good height.
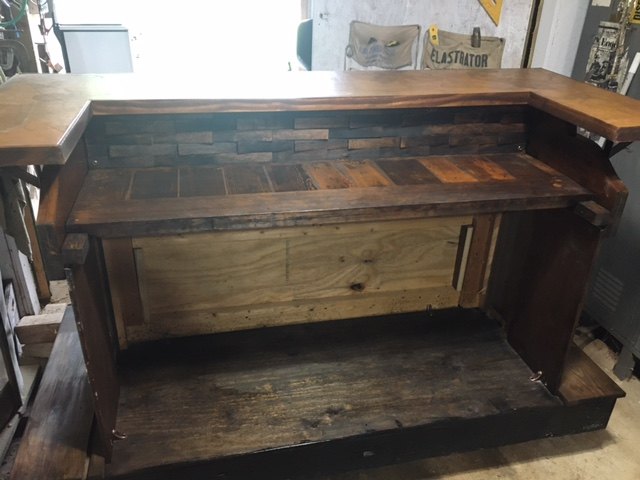
The space under the bartender’s countertop is for storage, possibly shelving, a wine rack, maybe a small refrigerator or a wine cooler.
The countertop is attached to the surround with four shelf brackets and the surround in attached to the base with chair braces.
This posting got unintentionally long. I appreciate you sticking with it and will be happy to answer any questions.
Probably should have mentioned that a google search on “bar specifications” provides suggested height for the bar top, foot rest, and bartender’s counter.
Comments
Join the conversation
-
Would you call this a "piano bar" 😁 Looks great. Good instructions. Great share


Frequently asked questions
Have a question about this project?