


DIY Built In Bench With Storage

In February 2021, my mom and I decided to renovate her back porch. We began by throwing away a lot of junk, decluttering, and cleaning. We removed everything from the space that we could and shuffled around the rest to redo the floor. I have a separate post here where you can read all about that process. (You can also find that post on my Hometalk page as well!) Once the new flooring was installed and we (mostly she) got the front half of the porch painted, we started brainstorming what kind of built ins she wanted for the space to make it more functional.
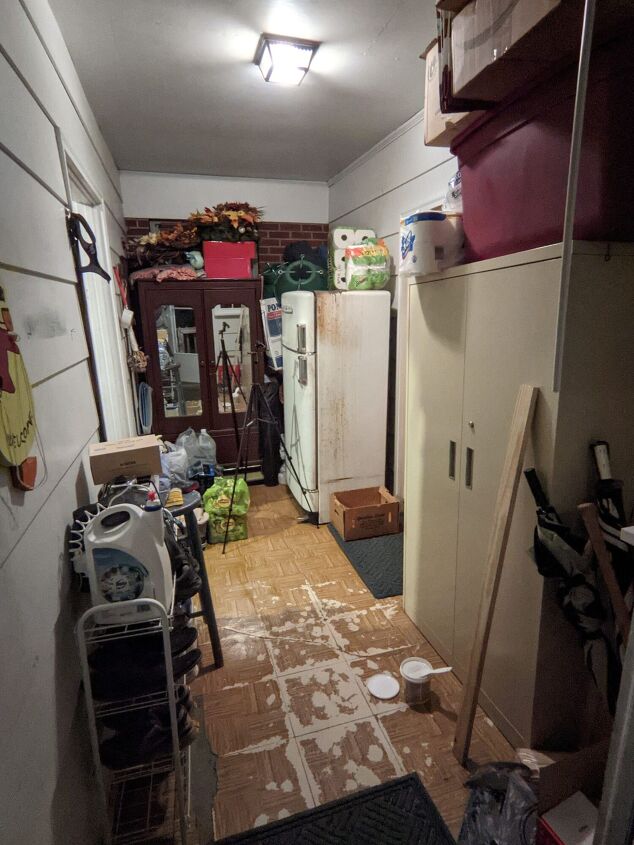
Here is the before of the full front area of the porch prior to any renovations.
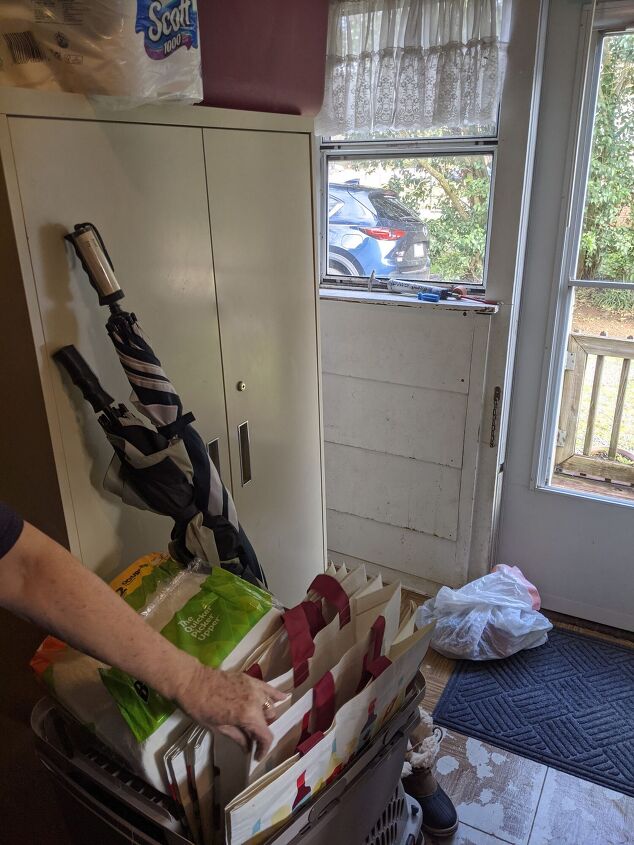
And here is the before of the area where the bench will go.
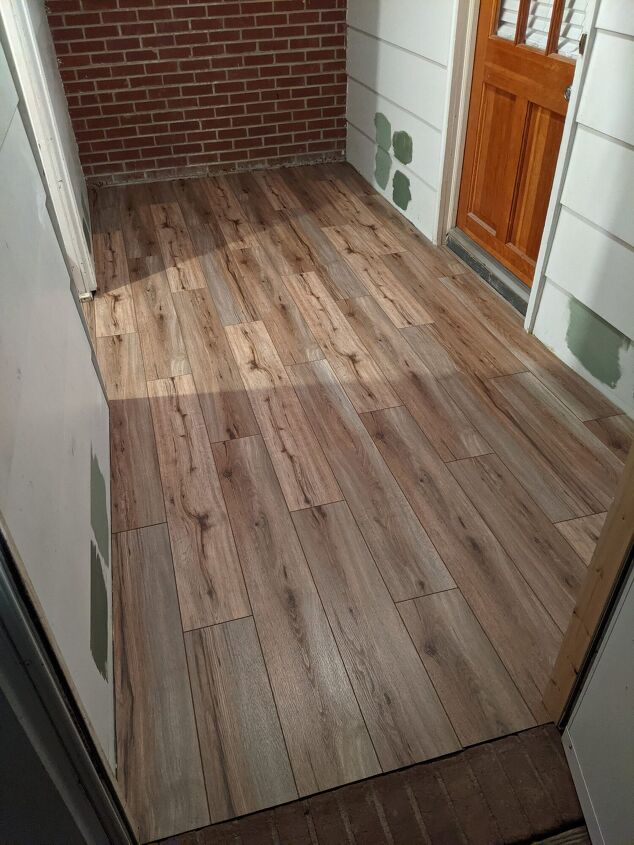
Here is the front part of porch after installation of the new flooring.
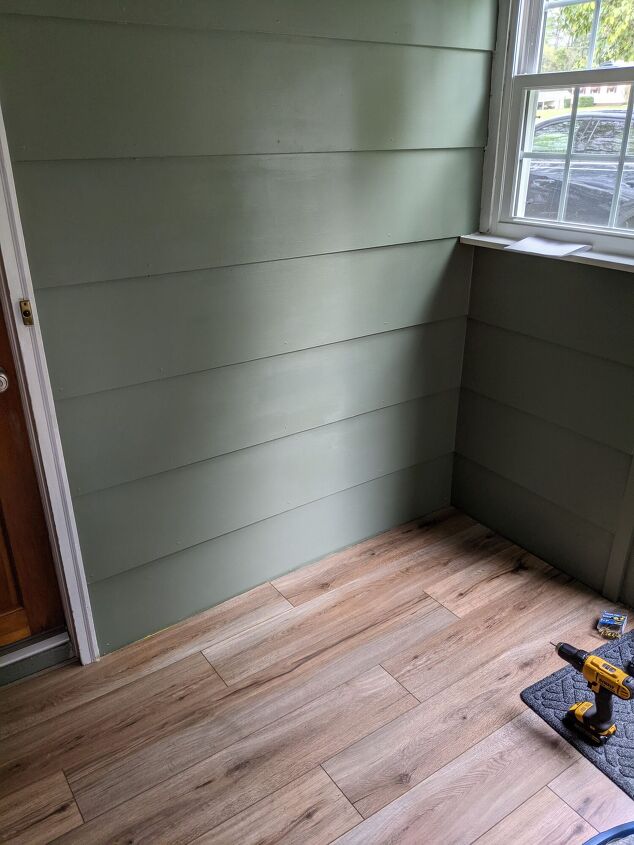
Before beginning any renovations, the original idea we had was to build a bench with storage underneath for shoes and cubbies going up the left side with an extra shelf on top for additional storage. My mom also wanted a few hooks in the area to hang jackets or bags and the like. Honestly, it took me a while to get started on this part because I was so nervous about the build. I had never built anything like this before and felt completely overwhelmed. I wanted to do a good job, particularly because it was for my parents, and make sure it was something that would last a long time. Once I finally got up the courage to get started, this is how it went. 😆 Pictured below is the area where the bench will go after floor installation and painting. We also did replace the single paned old window in this area too!
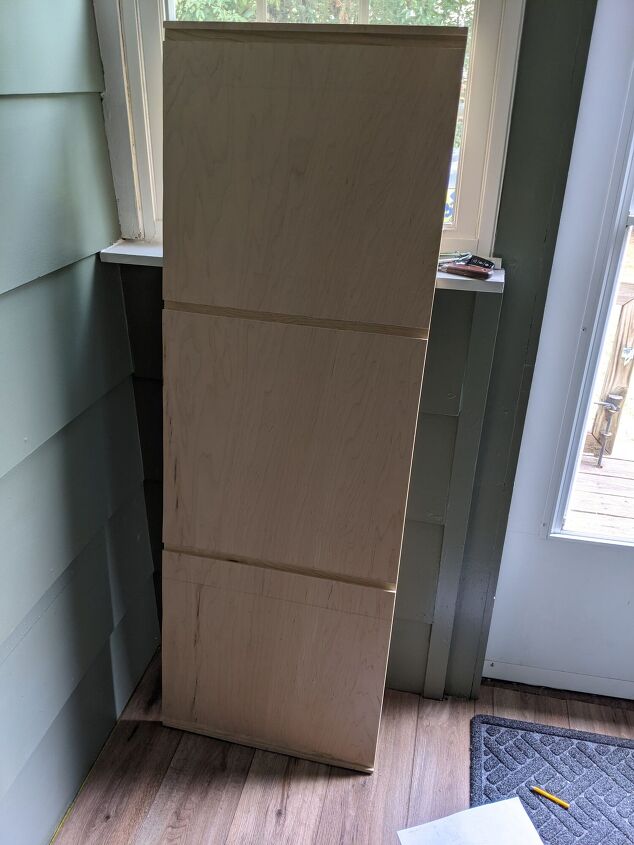
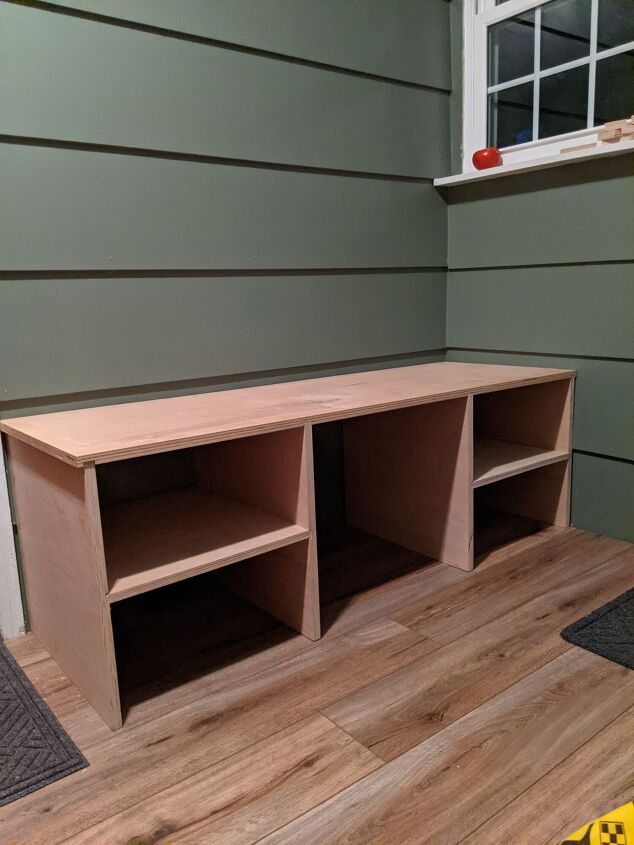
I began by measuring the space where we wanted the bench to go and cutting the bench top out of 3/4″ maple plywood. I actually did this first step at my house and ended up deciding that the original bench top was too short for the space. We changed our minds about how far we wanted it to extend so it needed to be a bit longer. We saved that piece for later and cut a new piece. Once the bench top was cut to the right size, I used my router to cut dados into the bottom side of the board. Because the plywood was 3/4″, I cut the dados 3/8″ deep (half of 3/4″). Dados are just slots cut in the wood for another piece of wood to sit in. The dados on the bottom of the bench top were for the legs of the bench. I wanted the pieces of the build to fit into each other and only require wood glue to attach instead of having to use screws too.
Once the dados were cut, I determined at what height we wanted the bench top to sit on the wall and then determined how tall the legs should be. This part was somewhat challenging because despite our best efforts, the floor is still not perfectly level. Of course we made sure the bench top would be level, but that meant that the legs were slightly different heights. This involved a lot of trial and error when making the cuts and trimming/sanding until it was just the right height. Tedious, but worth it in the end.
The beginning stages of the bench with one leg cut to fit.
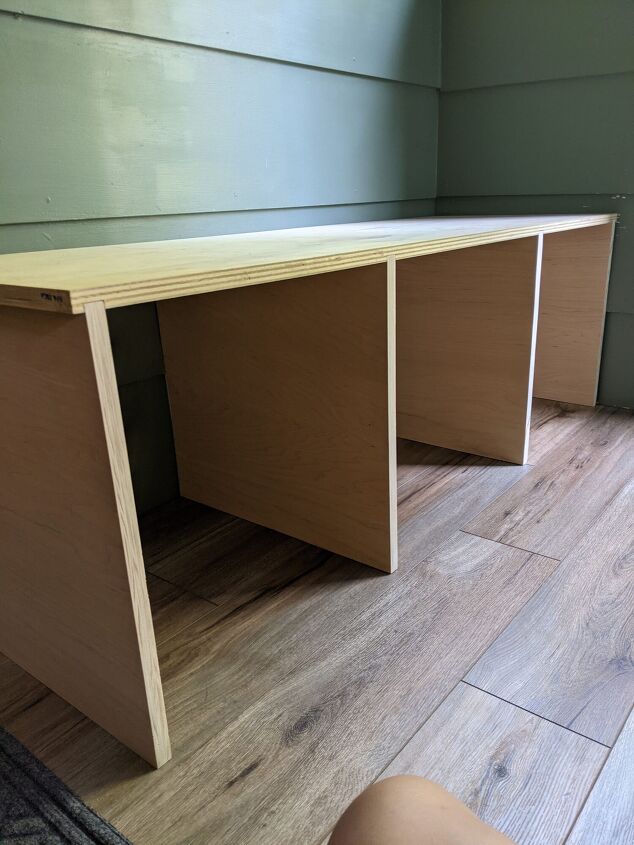
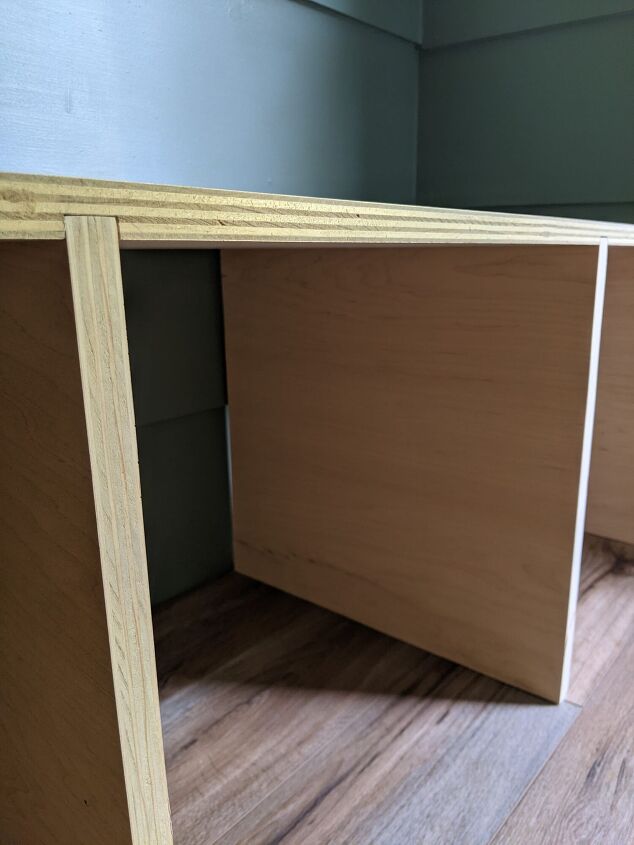
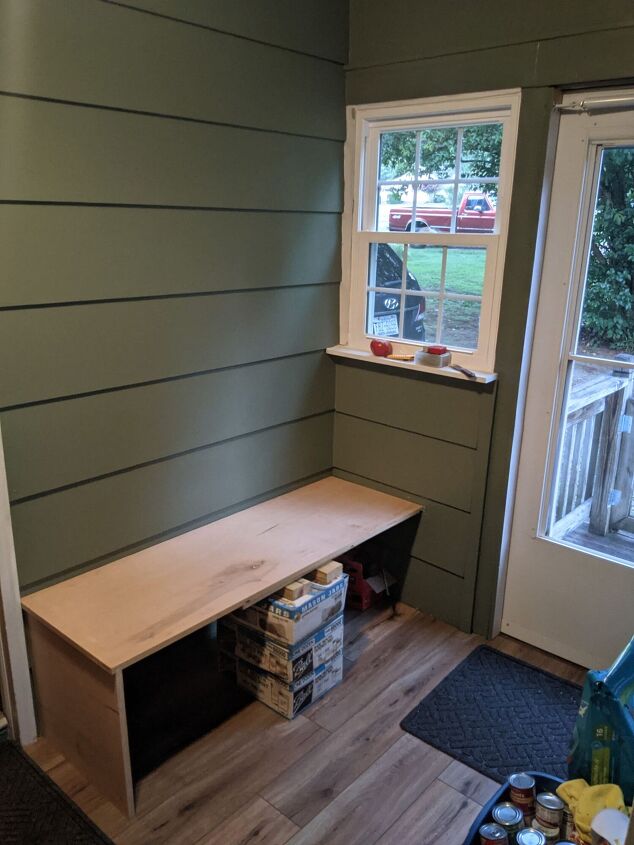
Once all 4 legs were cut, I then cut dados in the middle of the legs for the shoe shelves to sit in. At this point, the actual bench part was complete. I installed the bench top to the wall by screwing it into studs with pocket screws (I used longer screws here than you typically would for 3/4" plywood since I needed it to be extra sturdy) and then attached the legs/shelves to the bench by using wood glue. It was definitely a lot of work to get to this point, but I felt confident that the bench was sturdy and it was also easier to ensure everything was square because of the dados.
Before moving on to the second part of the build, my mom went ahead and stained the bench top. We wanted to place the vertical supports for the shelves going up the left side on top of the bench so we wanted to get that stained first. Here’s my mom tackling that part!
Once the bench top stain dried, we moved on to the second part of the build. I cut 2 vertical support pieces for the shelving and then decided how many shelves we wanted there to be. We decided how tall to make the vertical shelves based on the window. We knew we wanted an extra board across the top of the shelves and if they weren’t tall enough, that board would land on the window which is something we obviously wanted to avoid. The height of the vertical boards allowed us to have 4 good sized shelves, so I cut the dados for those as well.
Once the dados were cut and the support pieces were installed by screwing into studs or added boards that were screwed into the studs, I measured for and cut the actual shelves. These were installed the same way as the shoe shelves with just wood glue. After that, the last major piece to cut and install was the top board that extended all the way across to the window. I installed this board by screwing into studs along the back and side wall and also screwing it into the vertical supports on the top since it won’t be seen.
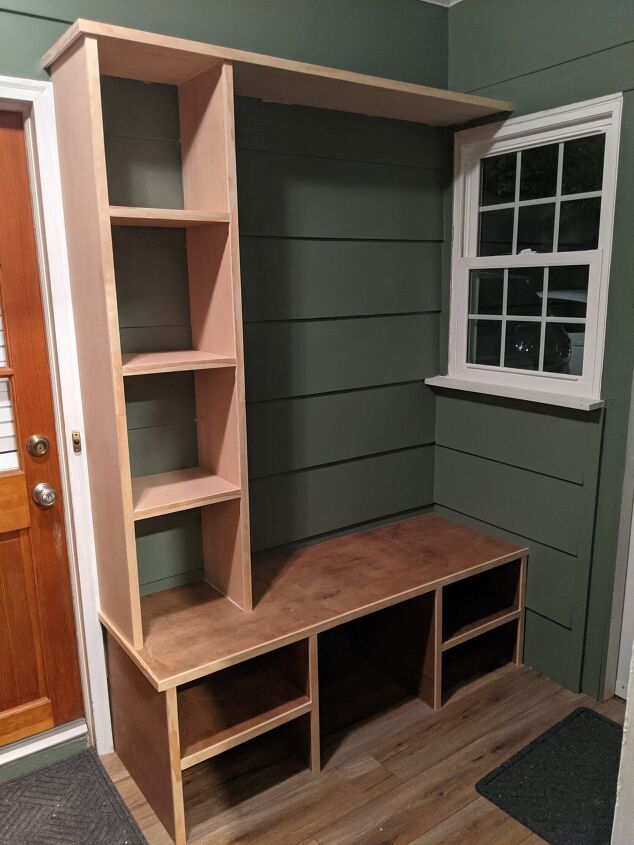
Here is the completed build prior to paint on the top part and before we finished staining the bottom part. We did add trim pieces to finish off the raw edge of the plywood. You could also use edge banding, but I chose to use more substantial wood to add more dimension to the build.

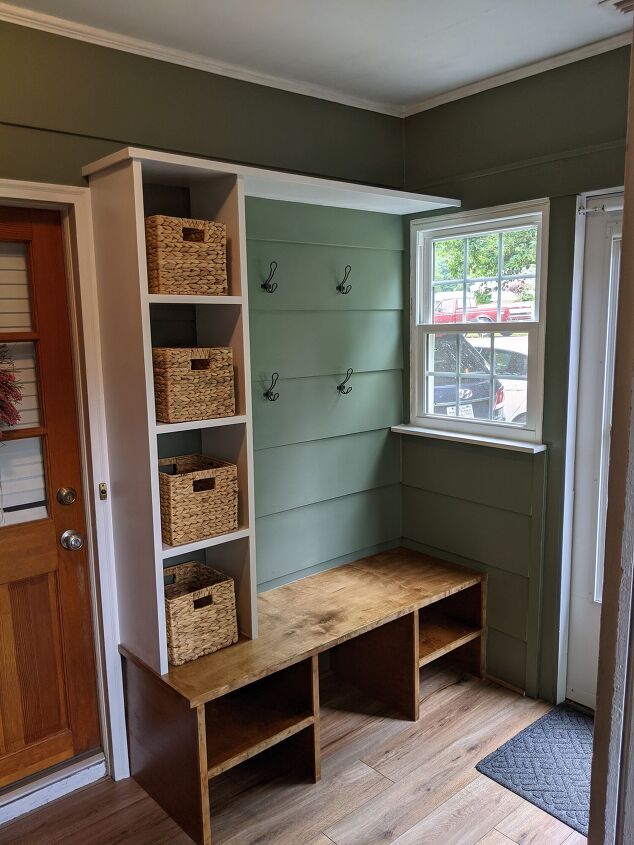
Here’s my mom finishing up the staining process after we were all finished building! She wanted to paint the top part of the build white and stain the bottom to give a bit of contrast while also not making it too dark. This bench is right where you walk onto the porch from the outside so she wanted it to be inviting and not too overpowering.
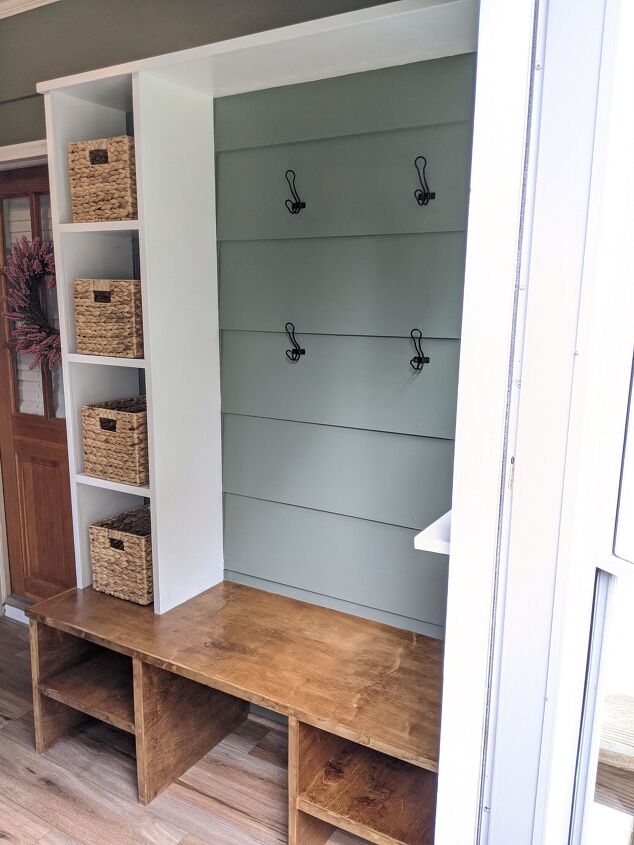
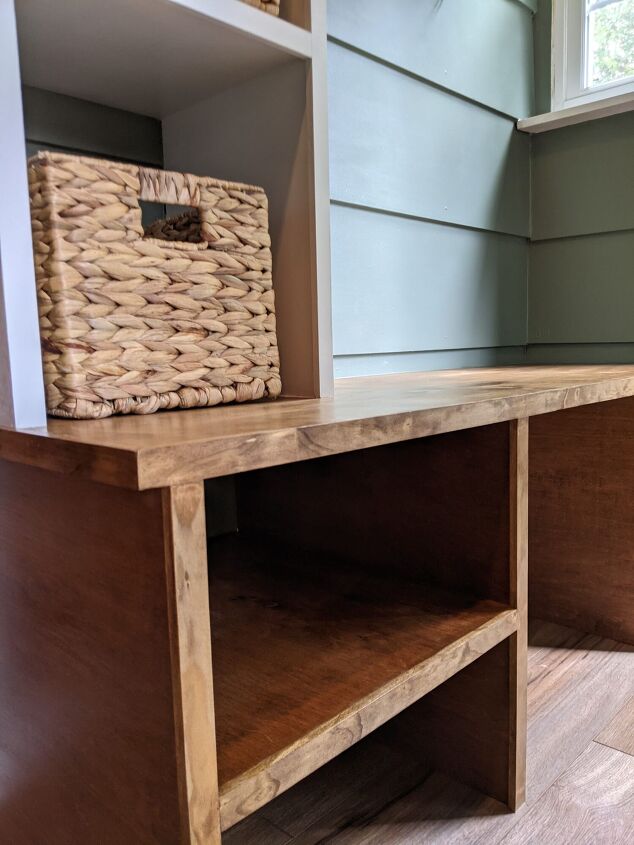
And here is the finished product! I love how it turned out so much and am so proud that we were able to build something so practical and pretty for her space. It’s a far cry from what it looked like before, don’t you think?! I’d love to hear your thoughts below and also let me know if this inspired you to build something similar in your home!
Resources for this project:
See all materials


Comments
Join the conversation
-
It looks beautiful 😍 what a great job!! You’re much braver than me with the power tools!
-
This is a beautiful job, I am sure your mom is a happy camper!


Frequently asked questions
Have a question about this project?
This is fantastic!! you should be very proud of yourself. What size and shape of bit did you use for the router to make the dados? What a great idea. Thanks.