


DIY Planters
4 Materials
$10
30 Minutes
Easy
Remember that faux fiddle leaf fig plant I just made?? If you don't-go check out that post on my blog and then come back. That little planter I put it in is a painted trash can. For reals. Did I fool you?? Maybe? Just a little? This was one of those projects that got invented in a random aisle at Big Lots. Maybe I'm a little crazy but I saw some trash cans and had to buy them...not for trash. That would make too much sense. These little planters are perfect on a deck or a porch or anywhere there are kids (and/or a dog) that like to knock things over. I made a few different versions of my trash can planters. They were $3 each so I splurged and bought a few trash cans. One trash can had to get thrown in the trash. Ironic, I know. I won't even try to explain to you what the heck I was trying to do but it was a total fail. The other two turned out pretty cute for only $3 and some paint.
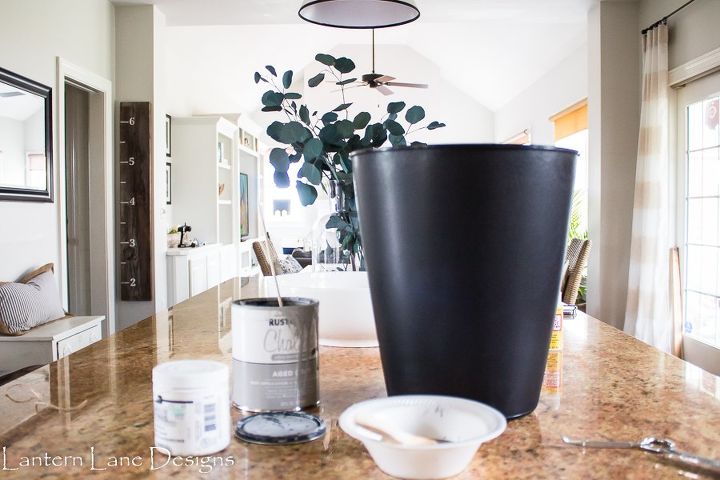
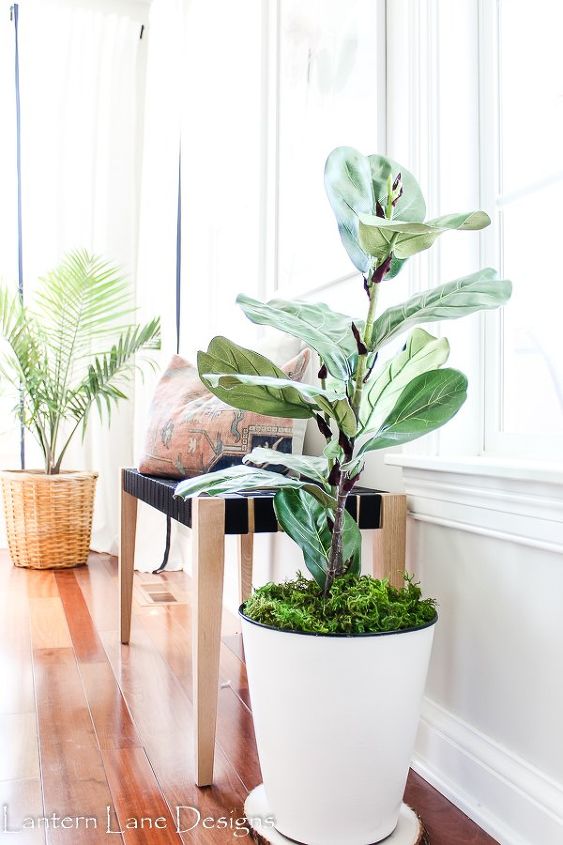
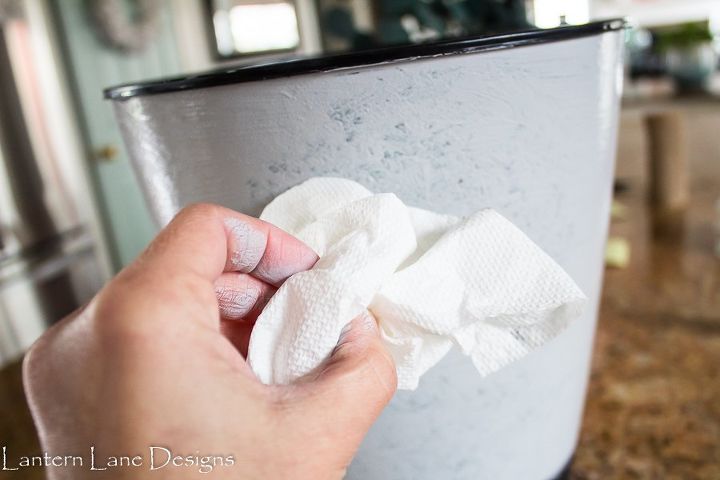
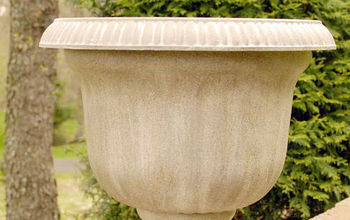
For the white planter I made for my fiddle plant I used white acrylic paint. You can use chalk paint as well. I used a cheap chip brush and went to town painting my can. I purposely left the lip of the can black as well as the inside of the can. I like the contrast and makes it seem less of a trash can.
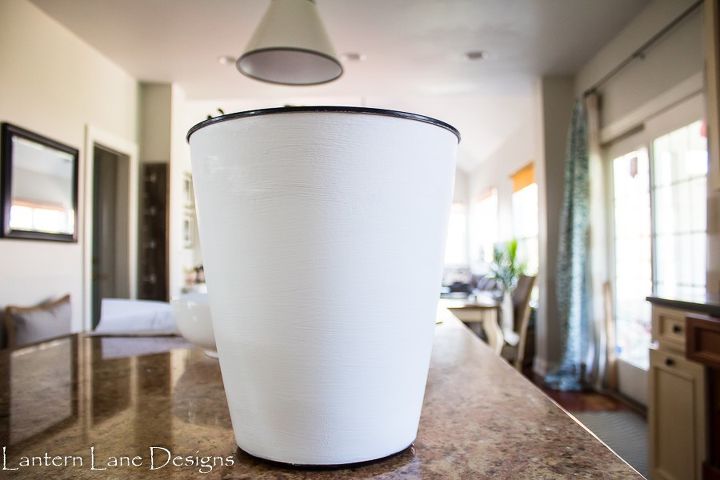
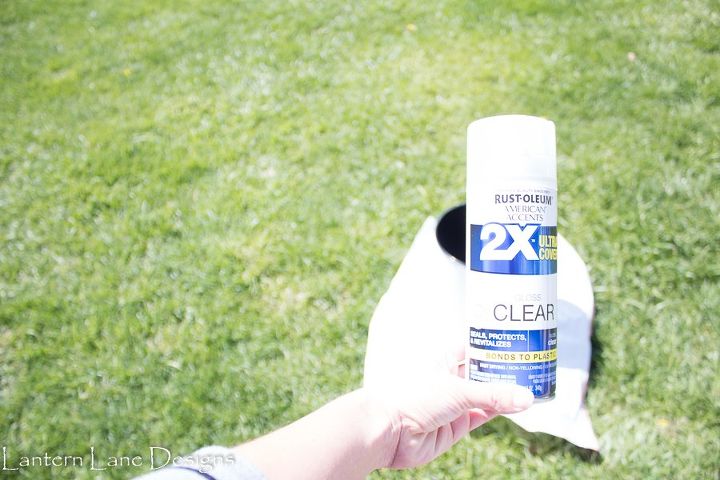
Once the paint was dry I used Rustoleum clear spray paint in GLOSS. This helps seal the paint and gives the can a slight sheen. I sprayed the whole can including the inside of the can.
I let my can dry completely and added in my fiddle leaf stems. Head over to my blog for more details on how to make your own fiddle leaf plant. I'm pleasantly surprised with how well this whole DIY project turned out.
While my white can was drying I moved on to can #2. I used a black trash can again but this time gray chalk paint. I did this one a little differently to give my can a concrete-ish look. After I painted my trash can with the gray chalk paint I quickly dabbed a waded up paper towel on the wet can. If you ever sponge painted anything in the 80s you might have a few flashbacks.
I sprayed this can with a clear MATTE spray paint just to seal it. I didn't want this one to have a glossy finish. I would also recommend drilling some holes in the bottom of the "planter" if you think you will need some drainage. It has been so cold here this spring that I'm not convinced it's done snowing so I am still using my favorite faux plants and flowers in my planters. I really love how easy and inexpensive this project was. You can't beat a $3 planter. Am I right or am I right??
Head over to my blog for more details on this project and other DIY projects
https://www.lanternlanedesigns.com/make-your-own-planters-with-trash-cans/
Resources for this project:
See all materials


Any price and availability information displayed on [relevant Amazon Site(s), as applicable] at the time of purchase will apply to the purchase of this product.
Hometalk may collect a small share of sales from the links on this page.More info

Want more details about this and other DIY projects? Check out my blog post!
Comments
Join the conversation
2 of 7 comments
-
I like this project a lot!!! I’m a gardener from the heart, and like big planters, but they can get pretty heavy. These would be so nice and light. I’d never have thought a plain trash can would turn out so beautifully.
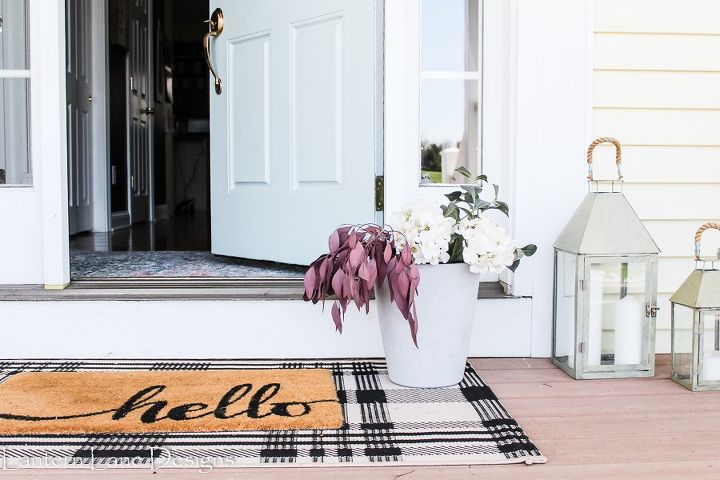
I adore you whole front porch. I never thought of putting a rug under the mat, but it looks fantastic! I have to get a rug now.
-
 will be trying this project beautiful


Frequently asked questions
Have a question about this project?
do you sand the surface before applying the paint? would a sealer be a good idea if using the pots outdoors - against sun damage?
Did you have to put holes in the bottom of trash can so plant water can drain?
Can a person put stencils on the can?