


How to Make a DIY Photo Ledge Design - DecorDIY/ProjectsHow to Make A

Using photo ledges in your home adds instant character and also saves from having to use nails on your wall to hang your photo. In this post I will show how to make a diy photo ledge yourself.
Determine the Size
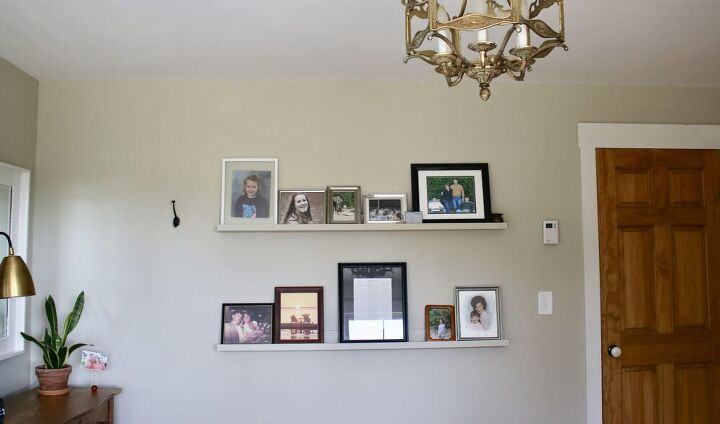
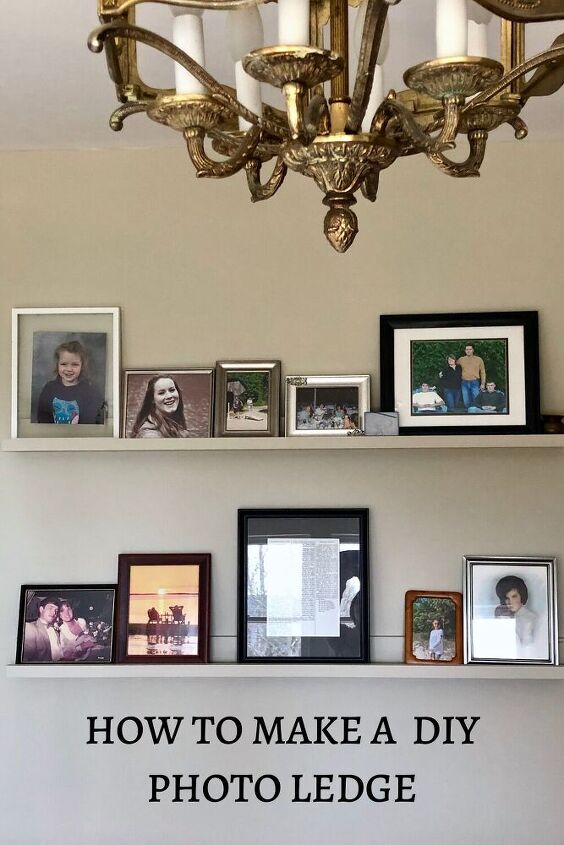
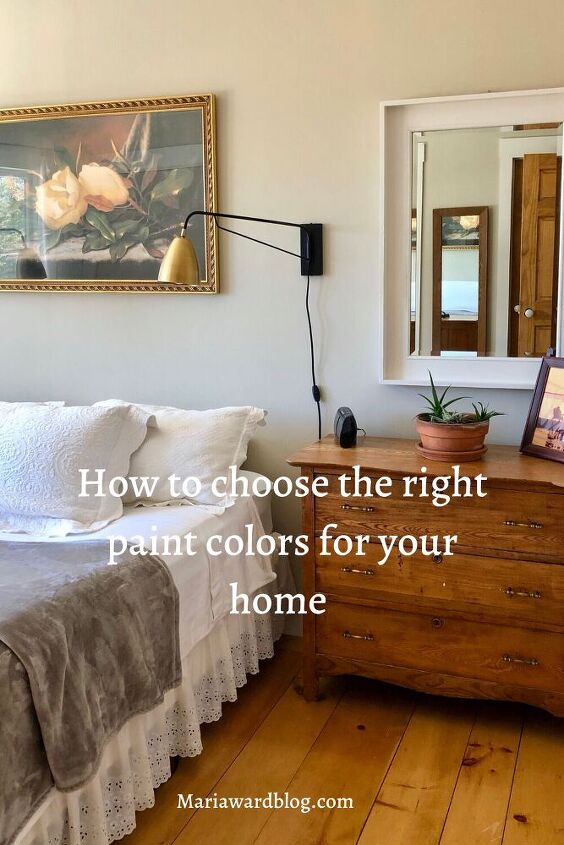
This photo ledge is in our bedroom that I recently painted. You can read the post How to Choose the Right Paint Color for Your Home.
For this space I decided to make the photo ledges 5 feet wide. The great thing about a diy photo ledge is that you can customize it to fit any space with any size.
You could do one long photo ledge or several shorter ledges depending on your space available and the look you want to achieve. You could also make the depth a bit deeper to accommodate bulkier frames or other items such as plants .
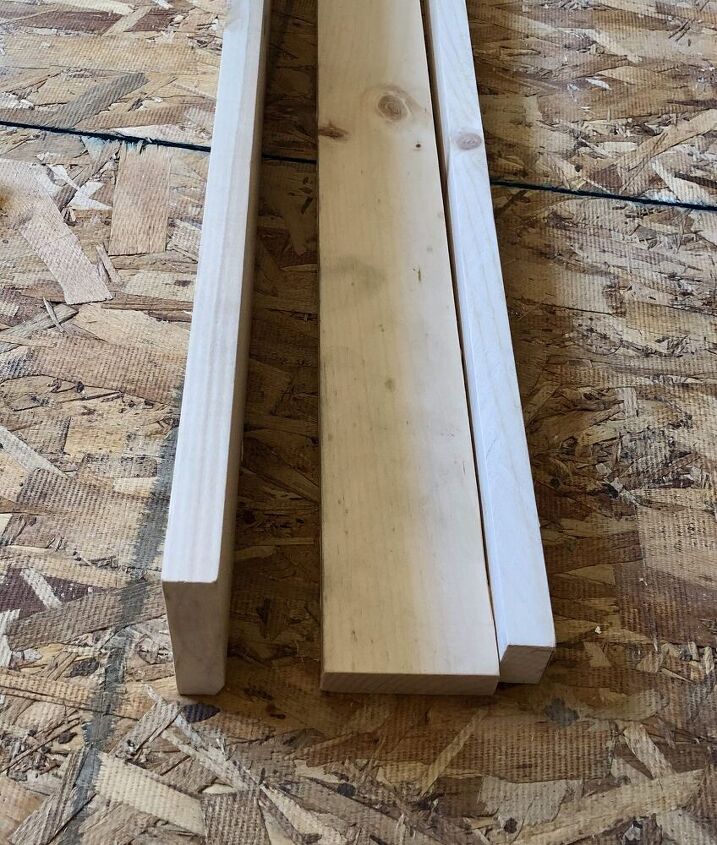
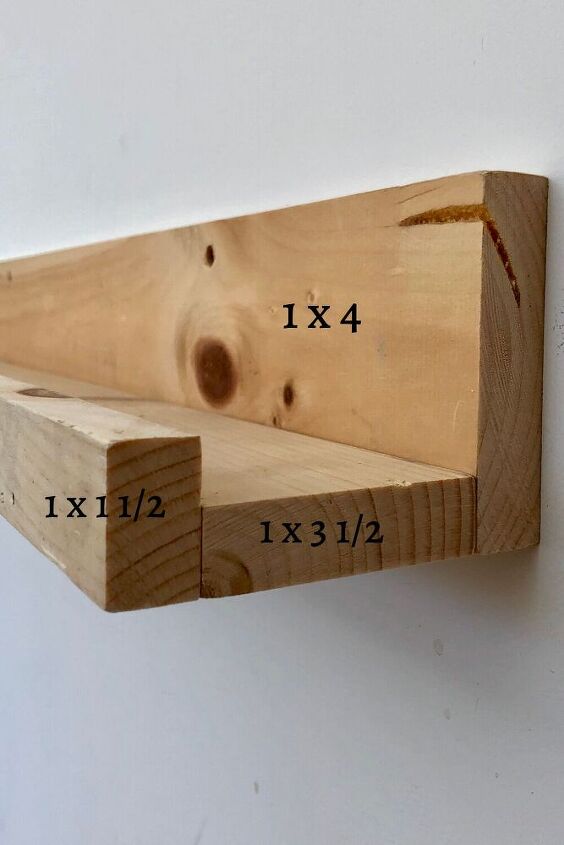
wood – We used 1 x 4 pine
(depending on size needed) For the size we wanted we used:
1×4 for the back
1×3 1/2 for the bottom
1×1 1/2 for the front
All in 5 ft. lengths
wood glue
clamps
drill
hammer
finish nails
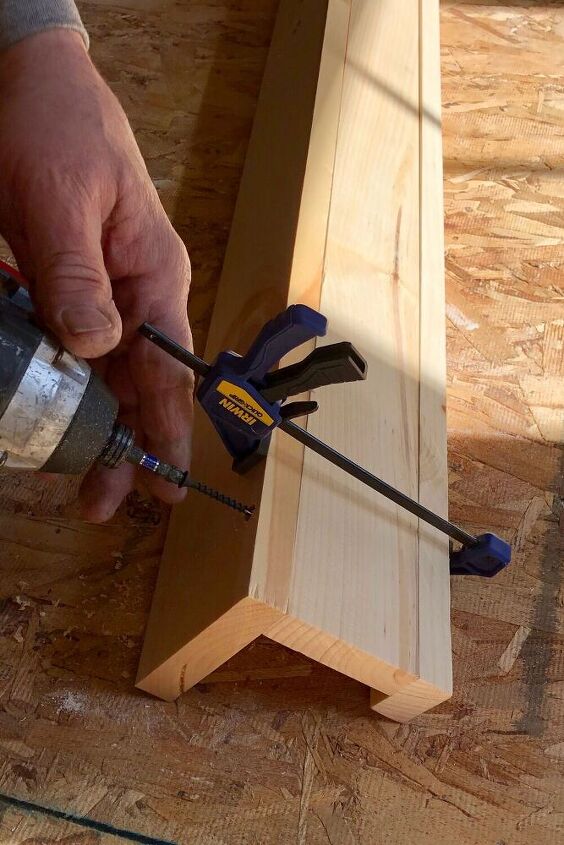
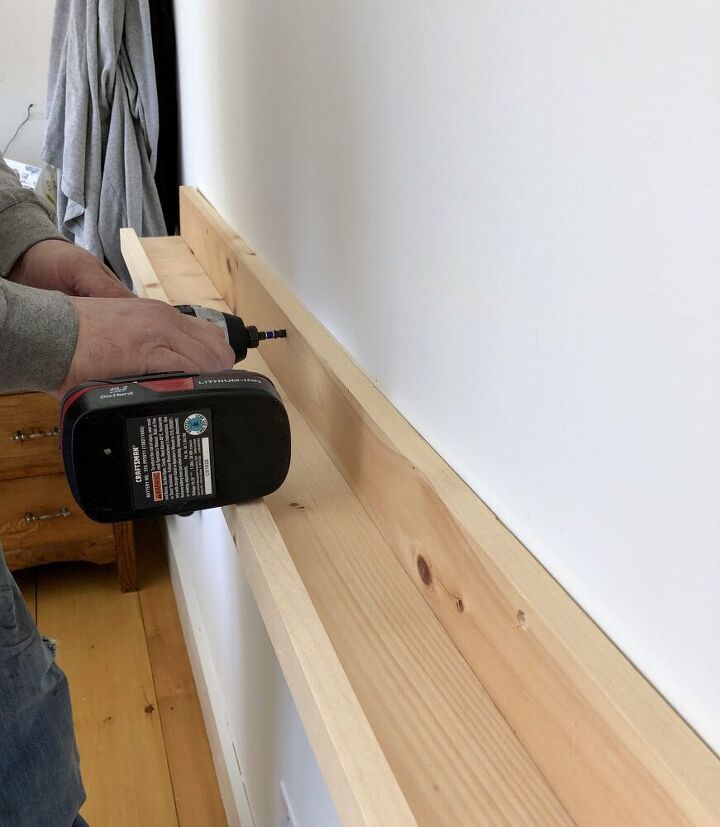
The boards were laid out the way they were to be assembled: back, bottom, front.
From there the back piece was glued to the bottom piece, secured with a clamp, and then the back was screwed to the bottom.
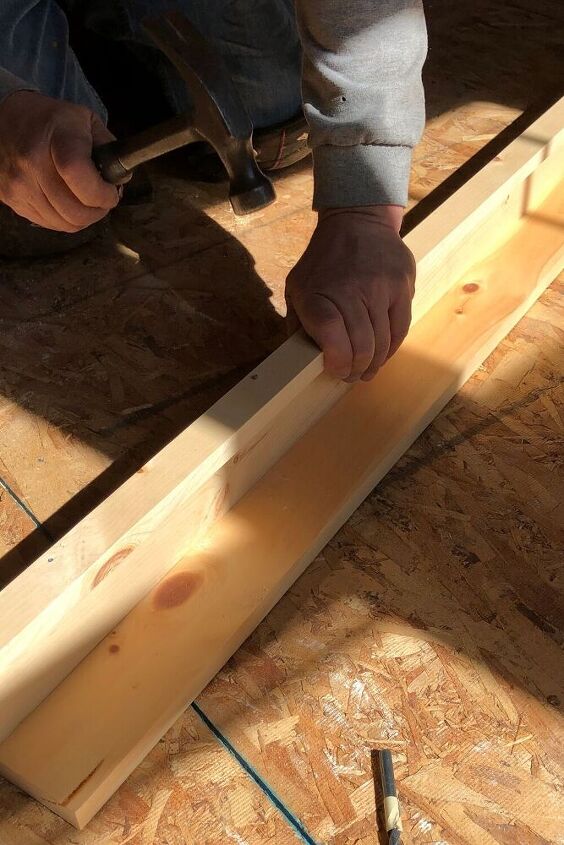
Then the front piece was glued to the bottom piece, secured with the clamp and then finish nails were used to secure the bottom and front pieces.
Once your diy photo ledges are made you will want to attach them to the wall by mounting them to the wall studs. Use a stud finder and mark with a pencil or tape where the studs are. Once the studs are located use a level to make sure the marks are all level and straight.
I waited until the ledges were attached to the wall before I added any wood putty to fill in the screw holes and any other imperfections.
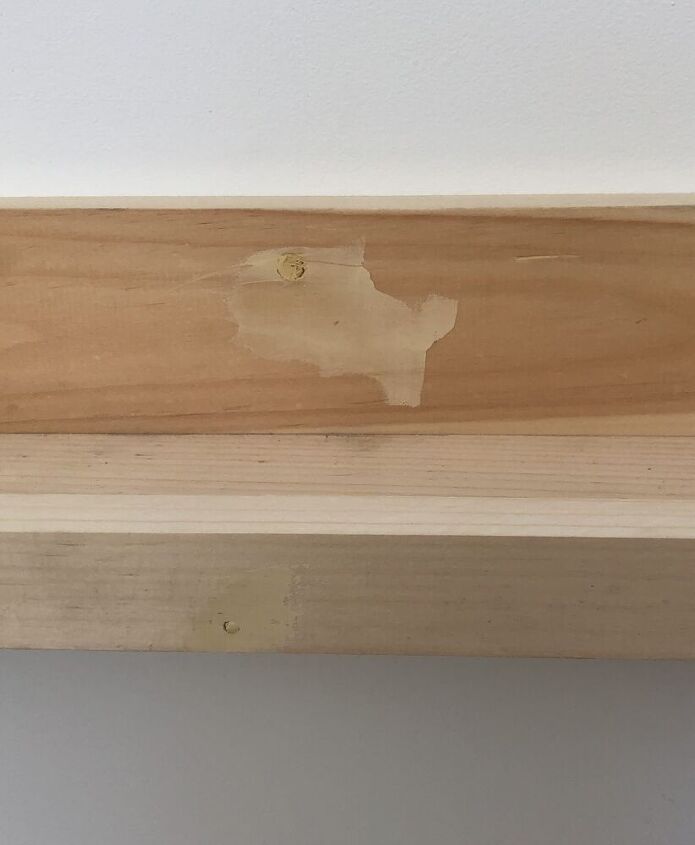
I decided to paint my diy photo ledges after they were attached to the wall. This is simply preference for me. I think you should finish them in a manner that is easier for you, before or after.
You will notice that my ledges are the same color as the wall. I did this because I wanted my diy photo ledges to blend in with the wall. You could paint or stain yours to be more of a feature with a contrasting color if preferred.
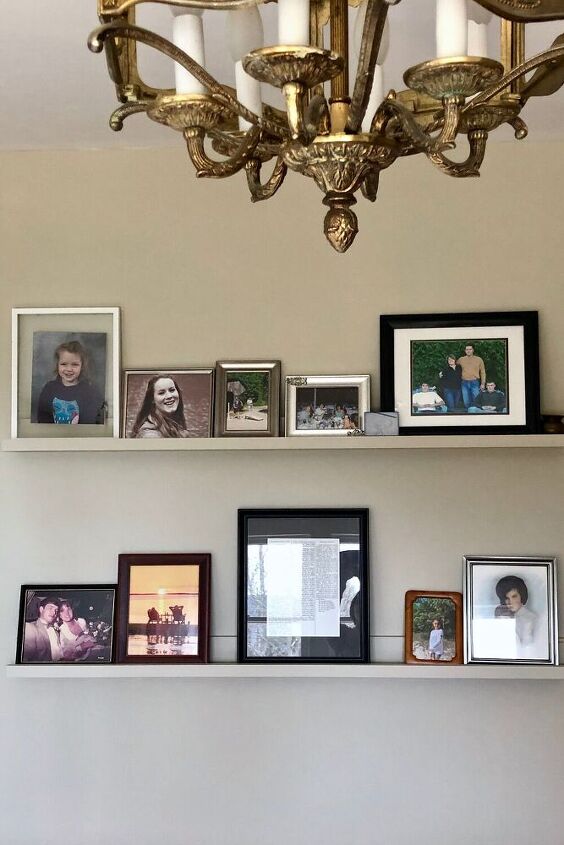
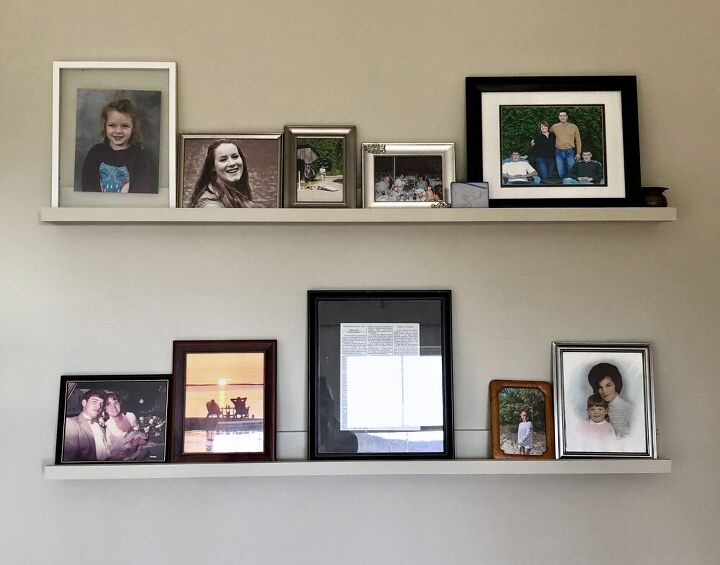
As you can clearly see, my diy photo ledges are displayed very casually with photos of varying sizes and frames. This is how we live.
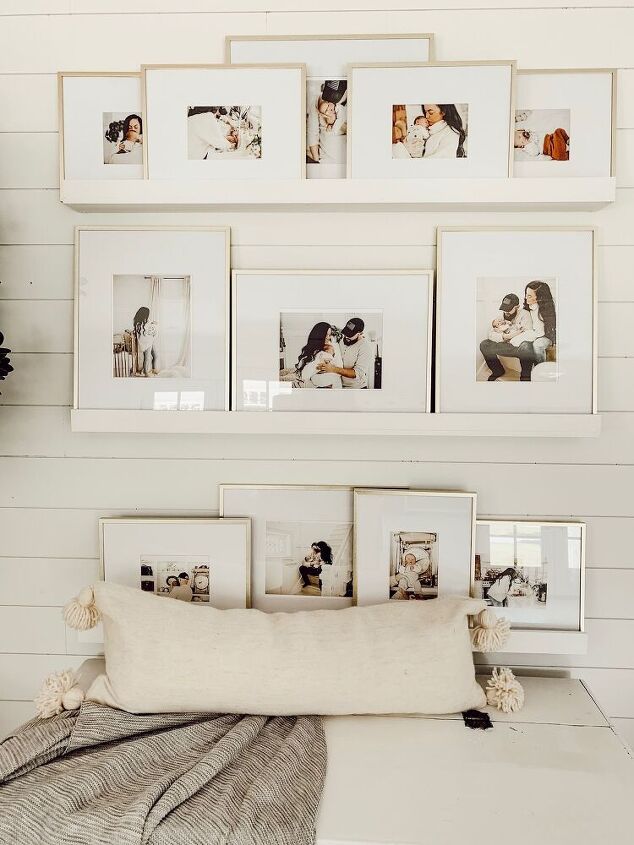
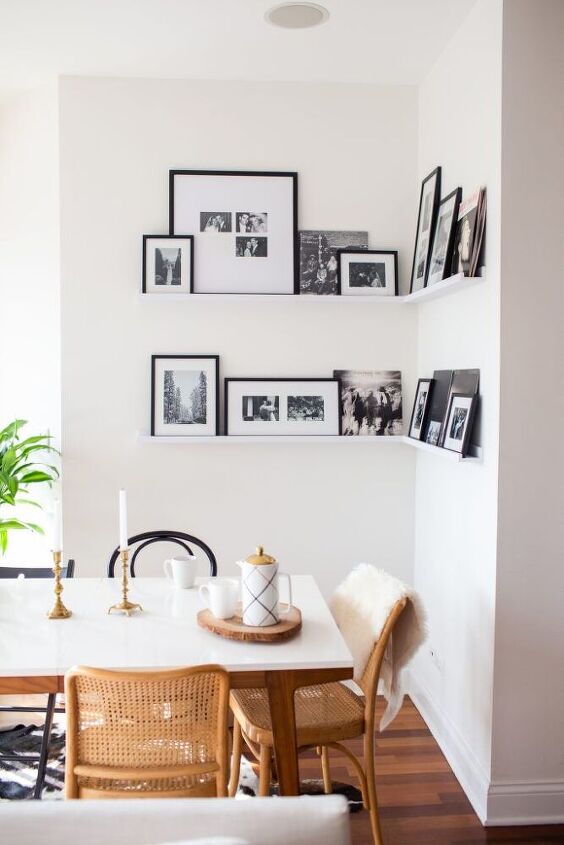
If you would like a more formal look just check out the photos below for some examples varying from casual and collected like mine to more formal displays.
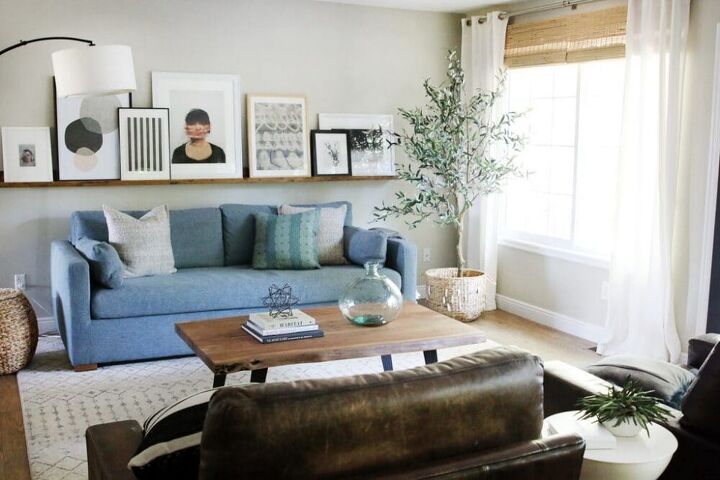
Lizmarie blog
Goldengirl blog
A diy photo ledge is an easy and inexpensive way to add character to any wall while eliminating the need for nails or hooks in the wall.
A photo ledge is also a great way to make use of a bare wall that you don’t know how to decorate. The diy photo ledge makes it to easy to create a gallery wall or a focal point in a room and can be made to fit any specific area making it versatile.
If you want a photo ledge or three and don’t want to or have the time to make them, I have provided links below so that your can just buy them:) please read my disclosure policy.
35″ driftwood photo ledge
set of 2, 48″ photo ledges
If you prefer a gallery wall to a photo ledge check out this post for some inspiration!
I hope you have found this tutorial to be useful and helpful, if so I would love it if you would share this post. Also, please sign up to receive posts directly to your in box so you don’t miss a thing:)
Now make yourself a photo ledge!!!!!
LET’S GET SOCIAL
PINTEREST – INSTAGRAM – FACEBOOK
Resources for this project:
See all materials


Comments
Join the conversation
-
you go girl!!!!!!!!
and good luck:)
-
Quick FYI for anyone saving this: The 1x4 at the lumber stores are actually 3.5", you'll need a 1x6 (5.5") to make the back. I'd probably just use another 1x4 for the wall mount.
I really like how it looks painted on that white wall : ) I've torn down my rustic gallery shelves (very similar to yours, just add barnwood etc) and may go with the hidden/painted look. TY


Frequently asked questions
Have a question about this project?