


How to Make FLOATING SHELVES the Easy Way

Ever wanted to make floating shelves? In this instructables I'm gone to show you one of the easiest methods to make your own. These shelves are easy to make and the best part you only need a few hand tools.
So whether you are looking to store your gear, decorating a room or just giving the bathroom a facelift, these shelves could be a quick fix. For around $10 you can gather the materials to build all three shelves.
By cutting down a dowel rod into small pieces you can cut the cost down by eliminating any brackets. With a few adjustments, this method can be tweaked to fit most applications. We let's dive into this build and ill see you in the next step.
Check out the video for more details.
YouTube Channel: https://www.youtube.com/c/DIYCreators
Instagram: https://www.instagram.com/Morediycreators/
View All my Plans: https://gumroad.com/diycreators
What do you need?
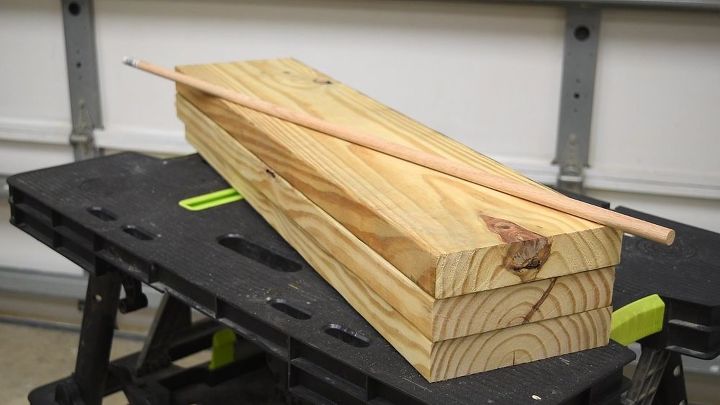
(1) Southern yellow pine: I used 8inX1.5inX96in
(1) 1/2in Oak Dowel, 36 in long
(6) 3-inch wood screws (two per shelf)
(3) 3/4 to 1-inch wood screws (one in each shelf) Safety
Other materials
Minwax Gel Stain
Pre- Stain Wood Conditioner
Spay on polyurethane
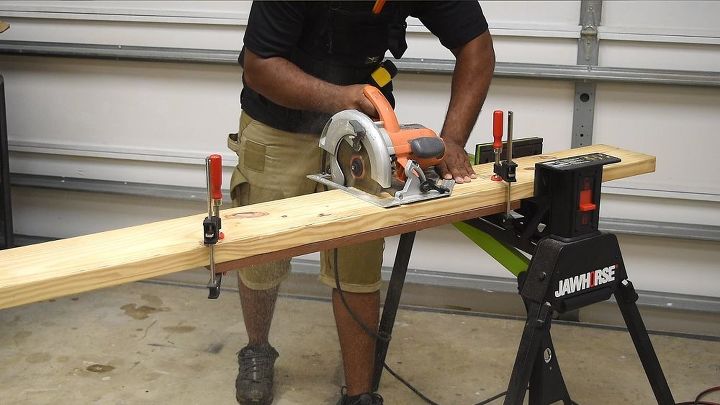
First thing, cut the lumber into 3 equal parts.
Cut the dowel
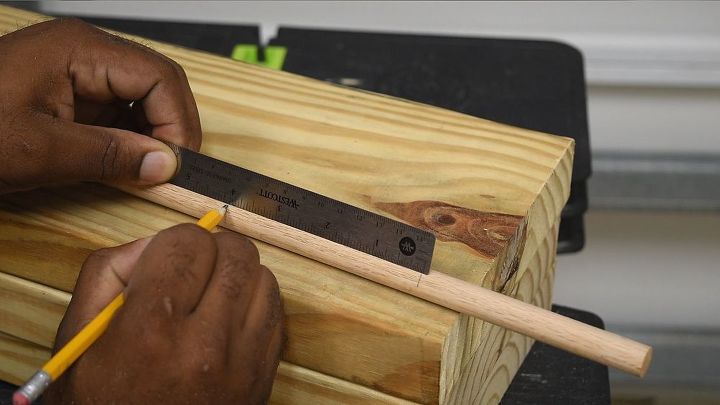
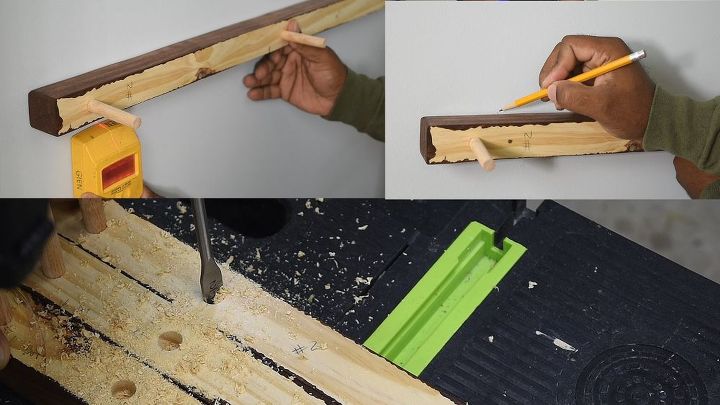
I am using a 36in oak dowel. At the 4 inches in length, they are very strong and takes a large amount of force to break. Starting from one end to the other, place a mark every 4 inches. Then, cut the dowels at the mark, you should end up with 9 pieces.
Back to the lumber
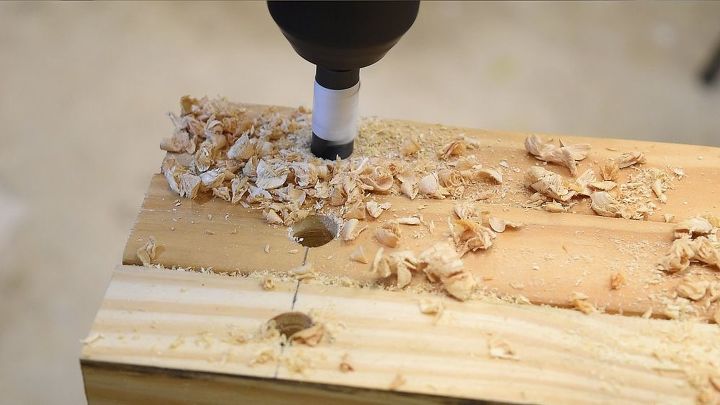
Place a mark 2 inches from each end, and then place another in the middle. Draw out a line, then make a center mark.
Drilling the hole
Add tape on the bit to set the depth of the dowel. Drill out the hole.
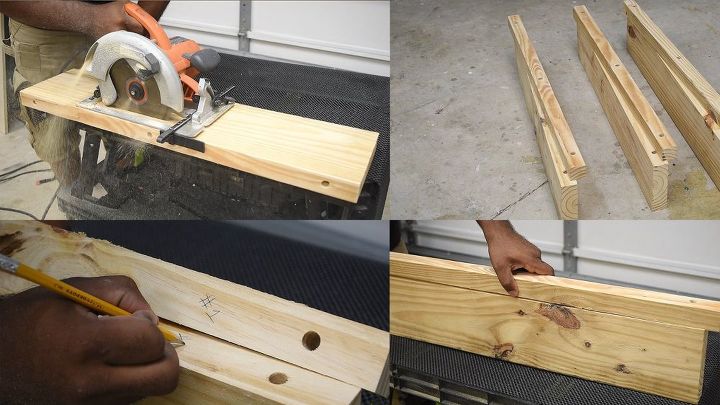
Although I used my circular saw, a table saw can be used to easily make these rips. I set the guides to make a rip depth of 1.5inch. Keep in mind the rip needs to be along the side with the holes "previously drilled".
During this process after each rip, I marked and numbered the parts so I knew which rip belong to each other.
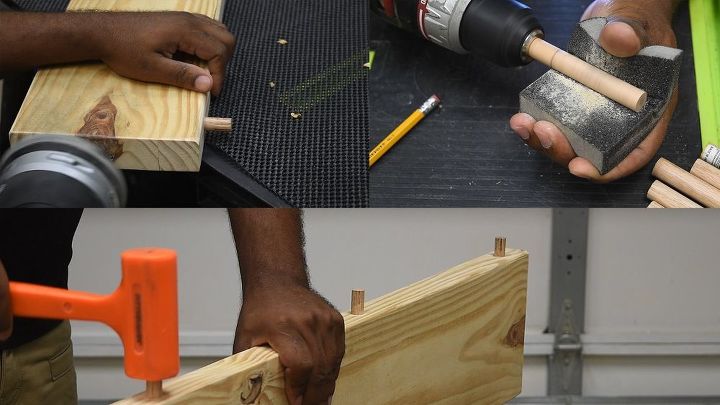
The trick to making this step successful is to sand down a portion of the dowel. A part of the dowel will pass through the back bracket of the shelf. This part can be left in-sanded, it will make for a tight fit. The rest of the dowel will need to be sand down. I find the easy to place the dowel in the chuck on my drill and spin it on the sandpaper. The main reason I didn't make a larger hole is simply, that I don't want the dowel rod to be loose. While your sanding at this point you can also sand down the remainder of the parts.
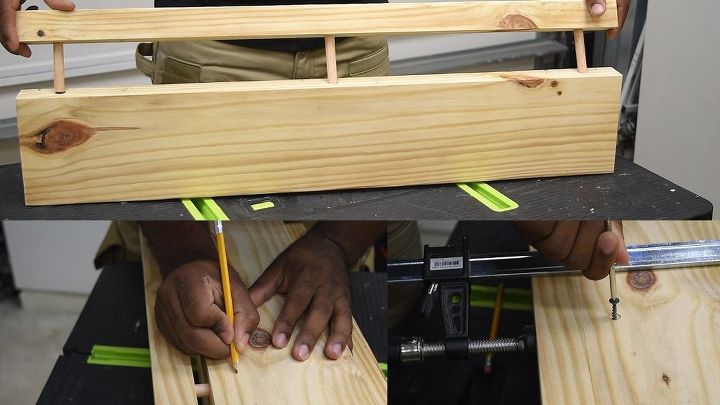
After confirming that each dowel pins fit easily. Hammer the dowels through both parts. They could come apart with minimum effort. Next, make a mark in the middle of the center dowel. Then place a clamp near the middle. Pre-drill and install a screw in this area. This will lock the shelf in place.
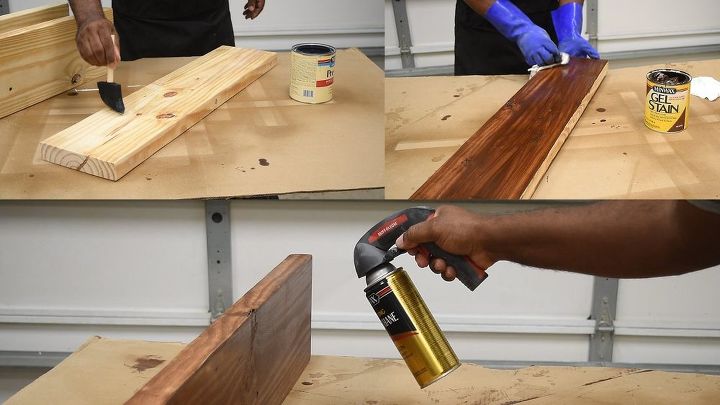
After everything has been sanded down. See below for how I finished the shelve. You can paint or apply any finish you like.
- I applied pre-stain condition (prevent blotchiness)
- One coat of Gel Stain
Two coats of Spray on Poly
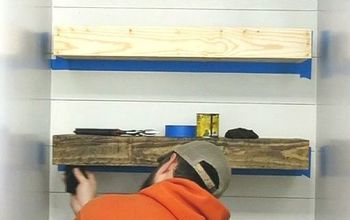
These shelves can be mounted on any wall. In my situation, I mounted them to drywall. There are other methods of mounting, but finding the stud in the wall would give more strength.
After finding the studs in the first stud wall using a stud finder. I looked for the second one, made a mark on the back bracket and the wall. Next, transfer the same marks to the other brackets and drill out a hole to sink the screw heads.
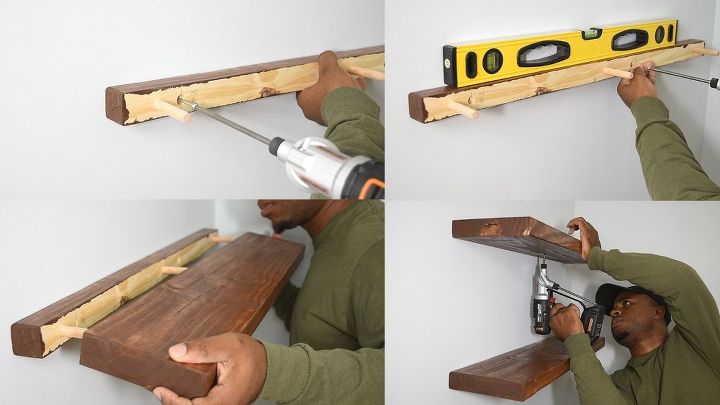
Simply screw the shelves in place and slide the shelves on to the dowel rods. Then add the security screw to finish up.
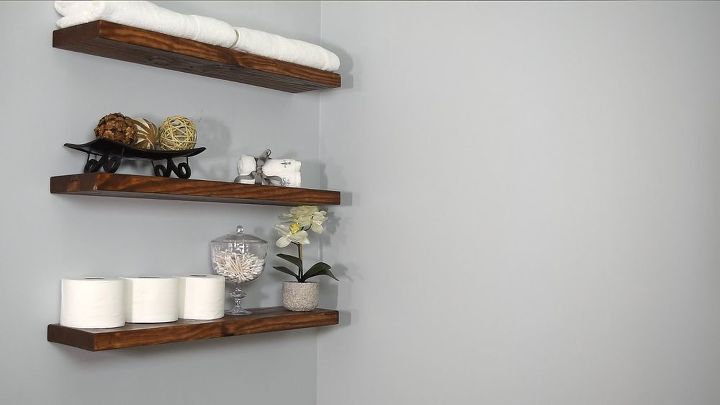
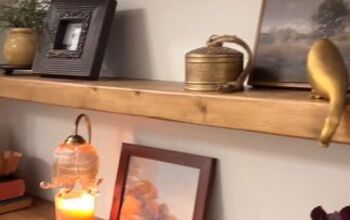
Need Shelves in the bathroom?
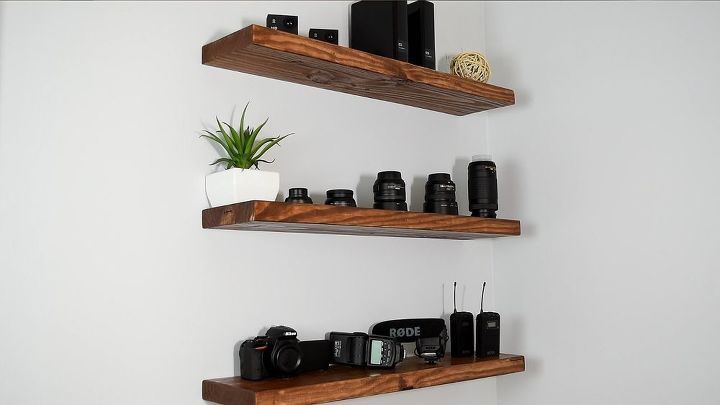
How about shelves to hold your important things?
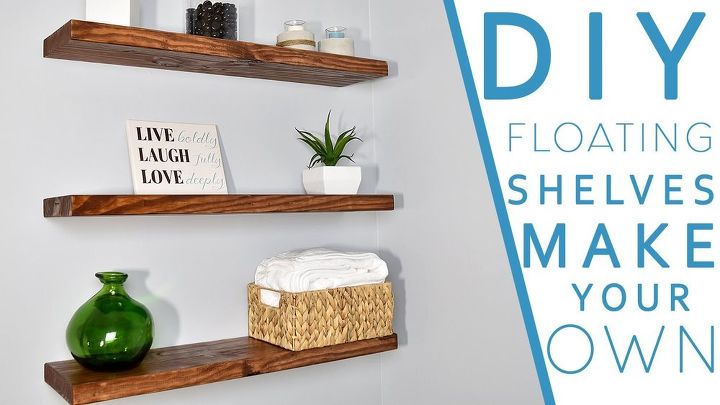
Maybe you just want to change things up in your bedroom or living room. Either way these are simple to make and most of all there are inexpensive. That's it for this one friends. I'll see you on the next one.
For more info checkout the video.
Want to see more cool projects ?
YouTube Channel: https://www.youtube.com/c/DIYCreators
Instagram: https://www.instagram.com/Morediycreators/
View All my Plans: https://gumroad.com/diycreators
Resources for this project:
See all materials


Comments
Join the conversation
-
Awesome tutorial, thanks!
-
Great tutorial. I'm an old lady but I understood where the safety screw went. People should concentrate😂


Frequently asked questions
Have a question about this project?
I was with you 100% until you said safety/security screw. I saw you put it through the bottom but what is it doing? Is it angled through both pieces? Is it through the dowel so the shelf can’t separate? I don’t see where it went or how it is used. It looks like a random screw into the board.
Can you explain more about the security screw? The picture shows you screwing from the bottom up. What are you securing it to? should it be screwed in at an angle to connect the two pieces of wood?
How much weight does the shelf holds?