


How to Clean Hardwood Floors Naturally and Without Damaging Them

By Hannah Twietmeyer
The hardwood flooring in your home is a high-value feature, which is why it can be so disappointing when it gets damaged or dirtied. Unlike a rug that you can vacuum or toss in the washer, your floors require a little more TLC to keep them durable and glossy over the years. Put back the harsh cleaning products, though, unless you want to risk damaging the finish on your floors. Some elbow grease and a handful of natural cleaning products are all you need to get started when cleaning your hardwood floors.
In this guide, we’ll teach you how to clean hardwood floors naturally so you can maintain the integrity and beauty of the floors. We’ll also include tips for removing stains from hardwood floors, and how to treat the flooring so it stays cleaner for longer and in good condition for years to come.
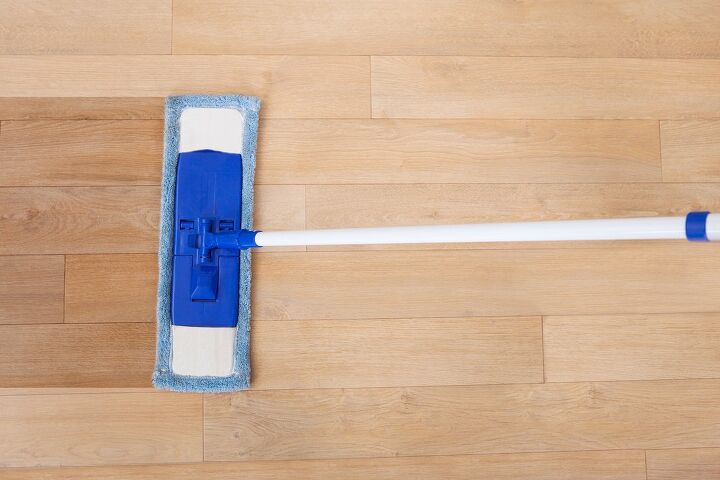
Photo via Shutterstock
How to Clean Hardwood Floors Naturally: Basic Cleaning
For days where you don’t have a large window of time to focus on cleaning, you can surface clean your floors in just a few quick steps. Keep in mind that these methods won’t deep clean your flooring, but they will help lift some dirt, dust, and other particles sitting on top of the wood for a quick refresh.
- Start sweeping. This simple method is perfect for when you’re short on time and is actually the first step in any hardwood floor cleaning process. No need for a utility or garage broom with dense bristles; your standard broom and dustpan or a dust mop should work just fine. From there, the process is straightforward — just sweep. Apply medium pressure and use a sweeping motion to move dust, dirt, and crumbs in one direction. Create a pile, or multiple piles, of debris on your floor, and carefully sweep it onto your dustpan to discard or suck up with a handheld vacuum cleaner.
- Use a vacuum. Brooms are an easy go-to when it comes to cleaning hardwood floors, but their bristles won’t pick up everything. For a more in-depth clean, plug in your vacuum after sweeping and go over the same areas. The vacuum will further collect any dust and debris lingering on the surface of your floors, and leave you free of any unwanted fragments. Here are some of our favorite vacuum cleaners of 2021.
Nix the Brush Roll
How to Clean Hardwood Floors Naturally: Deep Cleaning
Surface cleaning is a quick fix for hardwood floors, but to really lift ingrained dirt and grime, you’ll have to use a more heavy-duty method. Mopping is nothing crazy—you probably do it all the time—but there are definitely dos and don’ts when it comes to protecting your hardwood during the process.
Those “don’ts'' often come in the form of abrasive chemical cleaners like vinegar and ammonia. Vinegar, although a common and effective household cleaner, isn’t necessarily gentle on hardwood floors. Even when it’s diluted and used in small portions, vinegar is acidic and can wear down hardwood finish over time (via Alliance Flooring Directory).
As far as name-brand hardwood floor cleaners go, always do your research and read the details associated with the product; they should say whether or not the ingredients are appropriate for hardwood surfaces. Still, if natural cleansers are your thing, we recommend Dr. Bronner's Sal Suds Cleanser, which is a safe, natural solution to use on finished hardwood floors. It’s made with plant material and essential oils, and doesn’t interact with hard water as castile soap does. Therefore, no soap scum! If you’re in a pinch, you can still use castile soap, which is vegetable-based and environmentally friendly, according to Healthline, but it’s not recommended if you have hard water.
Here’s how to thoroughly deep clean your floors with them and avoid chemical agents altogether.
Tools and Materials Needed:
- Microfiber mop
- Spray bottle
- Dr. Bronner’s Sal Suds Biodegradable Cleanser
- Water
Step 1: Prep and Surface Clean Floors
Remove all rugs and moveable furniture from your hardwood area to start with a blank canvas. Using the tips we gave above, thoroughly sweep and vacuum your hardwood floors to remove surface-level dust, dirt, and debris. Clearing out this top layer will give your mop and soap better access to the areas that need it most.
Step 2: Create Cleaning Solution
Typically, mops are dunked in soapy water, wrung out, and slathered all over wood floors. In general, mops are better damp than soaked, as any excess water standing on your wood can damage it. The best way to avoid this is to opt for a spray bottle to coat your floors in the solution instead of a mop bucket.
In a spray bottle, mix ½ tablespoon of Dr. Bronner’s Sal Suds with one quart of warm water. Hint: Fill the spray bottle with water first; adding Sal Suds first will create a surplus of bubbles.
Step 3: Spray and Mop
Use your spray bottle to spritz some soapy water onto the surface of your floors, and then simply use your microfiber mop to scrub and soak up the liquid. If you notice the mop getting dirty, take it over to the sink and rinse out the grime with water, then wring it out well before using it again on your floor. Repeat the process on stubborn areas as needed.
Step 4: Help Your Floors Dry
Remember, water and wood don’t get along all that well. You can usually avoid any problems between the two by using a spray bottle instead of a mop bucket, but pop open some windows and turn on the ceiling fan to help speed up the drying process. Make sure your floor is completely dry before replacing rugs or furniture.
How to Naturally Remove Stains in Hardwood Floors
While castile soap isn’t the best option for mopping the entirety of your house, it can be used for stain and spot treatments on your floors (and clothes).
Castile soap is a natural, non-toxic, vegetable-based cleaning agent that is considered by many to be a miracle product. It’s derived from products like castor, coconut, and hemp oil, and, when combined with water, is an effective grease-grabber.
To remove food or dirt stains on your hardwood floors, apply a small amount of castile soap to the stained area and gently massage it in with a microfiber towel. Let it work for a few minutes before wiping it away with a damp cloth and letting it dry completely. If the stain is stubborn, repeat the process without letting it dry.
Avoid using lemon or vinegar on your hardwood floors, which both have acidic properties that can eat away at the finish on your flooring. On top of that, combining these with the alkaline nature of castile soap can leave behind a white film.
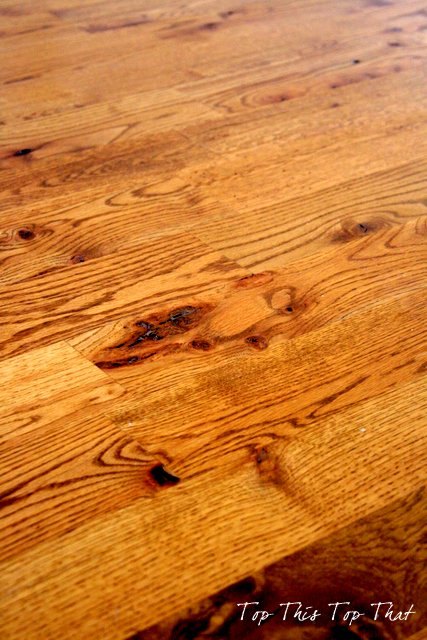
Photo via Duke Manor Farm
Tips for Keeping Hardwood Floors Clean
Dirty floors can lead to damage, as dirt and rocks can make their way into the grain of the wood and cause discoloration, abrasions, and scratches. Here are a few extra steps you can take to keep floors cleaner for longer.
- Stick to a schedule. The best way you can intervene with damage to your flooring is to maintain it regularly. Try to sweep and vacuum weekly to reduce any fragments that could scratch or blemish the wood. High-traffic areas like mudrooms and kitchens may need some additional care, like mopping, more frequently. Try to mop every other week if you can, but if you can’t get to the whole house, just make sure to address the areas that need it most.
- Lay down plenty of rugs. Rugs are just as much a floor protector as they are a decorative feature. Lay down durable rugs near entryways to protect dirt and mud from coming inside, and maybe even consider using a hallway rug for the busy areas in your kitchen. Area rugs are a must in living and sitting rooms with furniture; place them under heavy couches and coffee tables to protect the finish on your wood.
- Sand and refinish high traffic areas every few years. If it comes to it, sanding and refinishing the wood that has been worn down under chairs, furniture, and feet is almost always a cheaper alternative to replacing your floors entirely. A sander will strip away the finish on the wood, as well as the surface damage, and a coat of finish will give that high-gloss, good-as-new shine. The timing of this type of revitalization is up to you, the homeowner; according to Empire Today, it’s usually recommended to evaluate the situation about every 10 years and go from there. Thinking about installing new hardwood floors? Check out our list of DIY hardwood floor installation tips.
Do you have hardwood floors? How do you clean them? We’d love to hear in the comments below!
Comments
Join the conversation
-
I use Bona hardwood floor cleaner.


Frequently asked questions
Have a question about this project?