


Revamp Of A White's USA Brand Treadle Sewing Cabinet

by
Carole
6 Materials
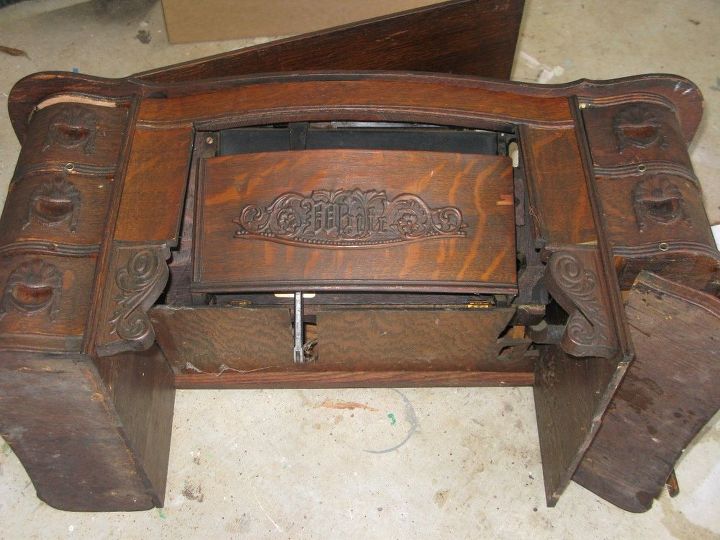
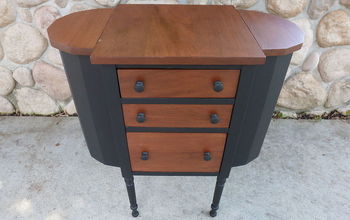
I scored a White's vintage/antique treadle sewing cabinet for about 80 dollars on ebay. it still had the machine inside but I don't think the machine was working and in any case, it was jammed in the cabinet and would not come out without dismantling the cabinet in order to do so. I decided to make it over in ASCP Emperor's Silk paint.
I would normally do a little sanding back on the decals on the drawers and front, but I think this colour looks better without it. More sophisticated than shabby chic. The front flap with the Whites name on it had to be glued in place as I had removed a lot of the guts of the mechanism that held the sewing machine in side.
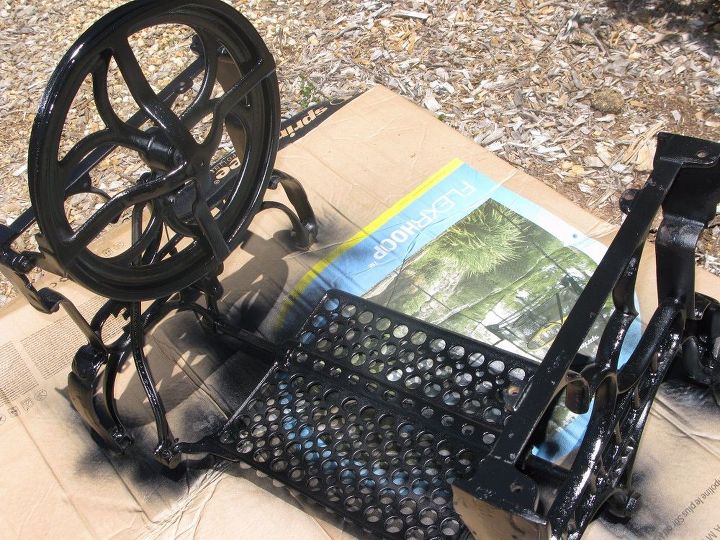
First I detached the cast iron frame from the cabinet. I cleaned it with a de-greasing agent (Sugar Soap) and spray painted it in black gloss. Then I started work on the repairs to the cabinet.
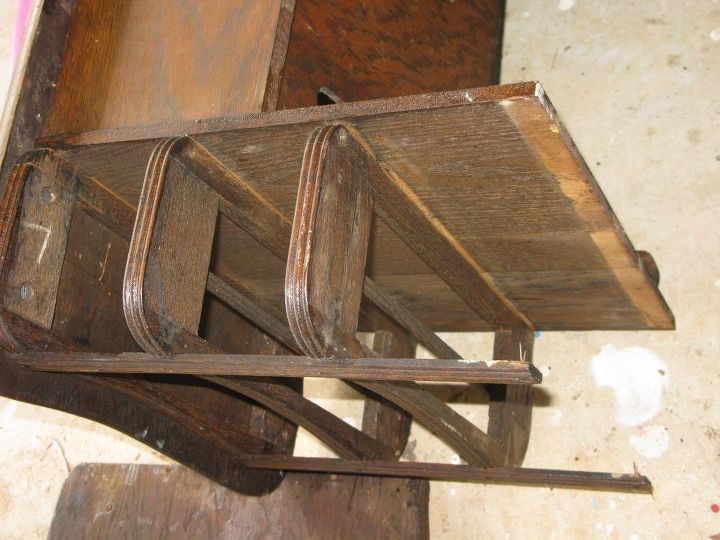
The base of the drawer frames on the right hand side had come away and needed gluing back. I used a timber glue, clamped it in place and once the glue dried, I nailed it to make sure it would not come adrift again.
Then I addressed the broken drawer itself.
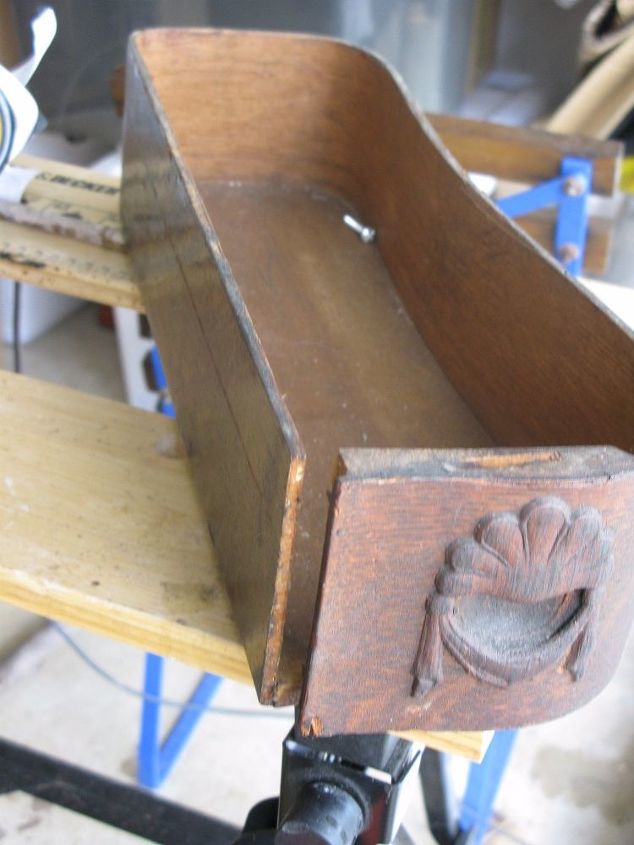
I glued all the way around the base of the drawer and clamped it and glued where you can see it had come away along the front edge.
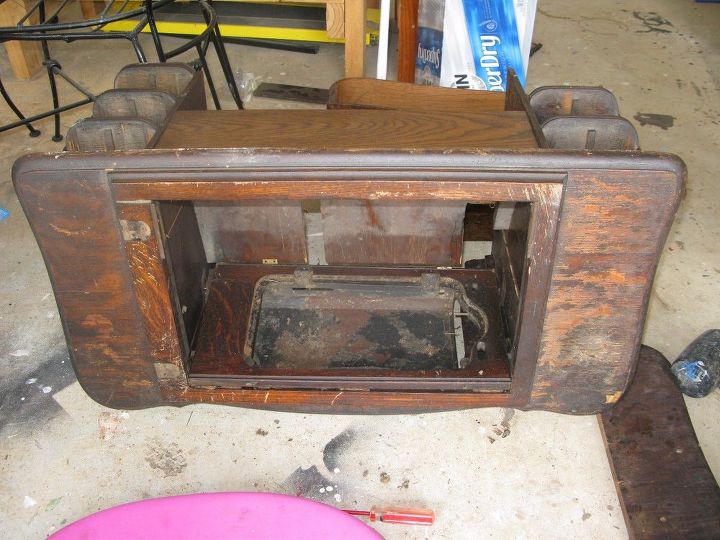
I removed the top flap. Then addressed the damage to the veneer on one side of the top of the cabinet. I slid a razor blade under the damaged veneer, where it was loose, I pulled it off and then filled the patch with paintable wood filler. There were a few other spots that needed filling, so I patched them too. Once the filler had dried (the next day) I sanded it smooth. I also then gave a light sand to the whole cabinet. It had a little borer damage so I used Mineral Turpentine and rubbed that over the cabinet to ensure no live borer and no further damage, prior to painting.
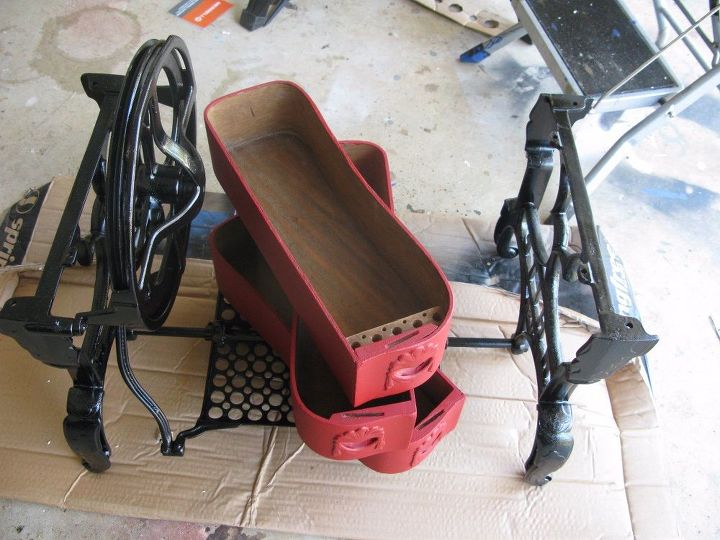
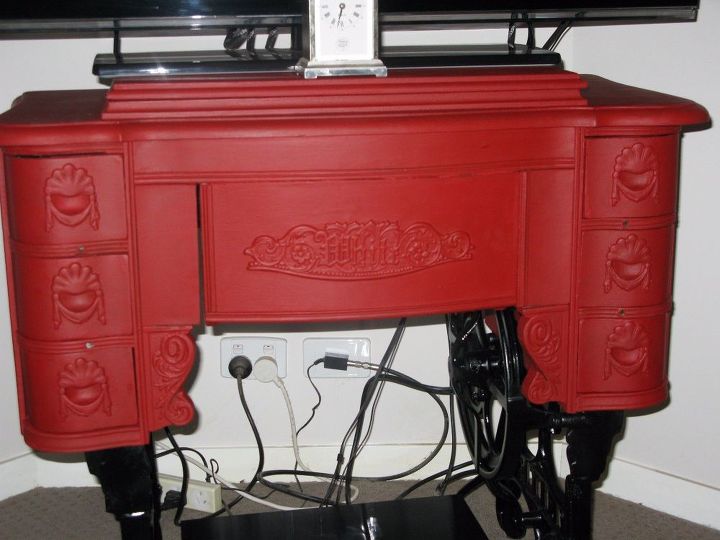
Starting with the drawers, I did two coats of the ASCP chalk paint in Emperor's Silk. Once it was dry, I did a coat of clear wax, then a coat of dark wax. The colour looks like fire engine red when you first apply it which is quite alarming but dries to a much darker colour.
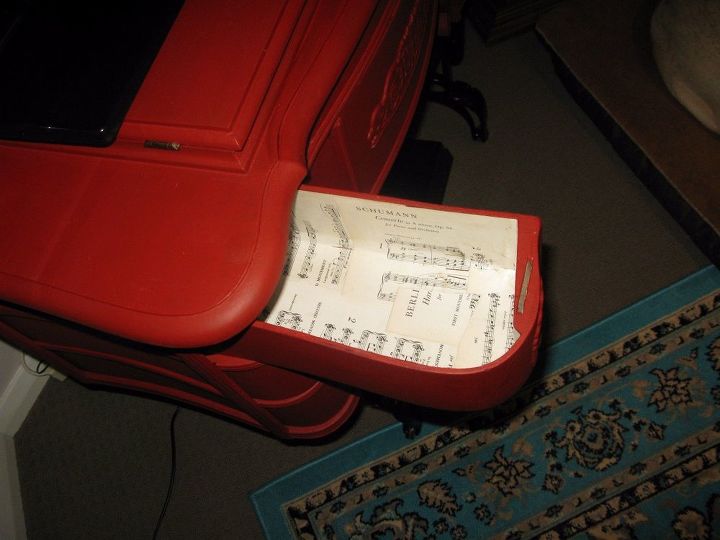
I decoupaged the insides of each drawer and also the metal plate under the top flap (where the machine usually goes) with classical music sheets from a book. Glued them with artists glue medium and then a coat of polycrylic over the top to ensure that any musty smells were smothered and trapped and that the paper would stay put and protected.
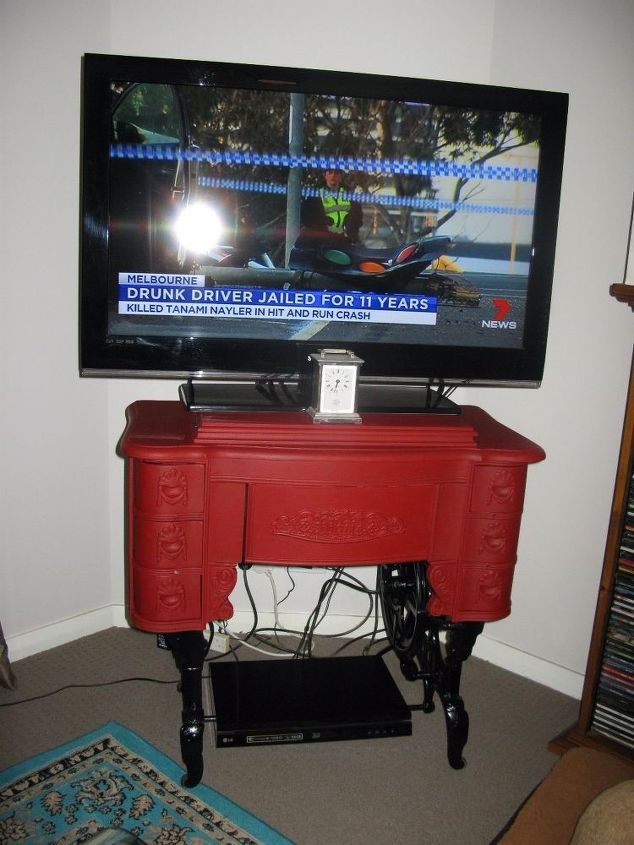
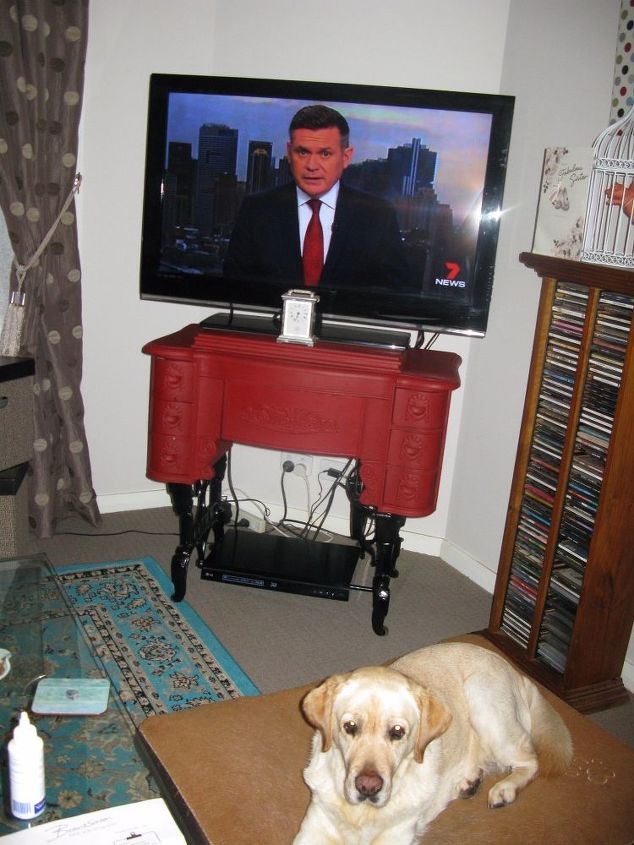
Here is the table, now being used as a TV table in our lounge. The DVD recorder sits on the treadle peddle below the cabinet. We could do more to hide the cables from the TV and recorder to tidy it up a bit.
Comments
Join the conversation
4 comments
-
It's gorgeous!!!! Red was a genious color idea!
-
Beautiful transformation! and cute dog


Frequently asked questions
Have a question about this project?
Why didn't you refinish it? The next person like myself who comes along is going to end up spending days getting the paint off. But that's restorable, more importantly why did you patch the wood instead of gluing the laminate back down? It's just as easy and patching a new piece in later that matches will be next to impossible. A little wood glue will fix it easy. But yes, the machine is and was very restorable. Thank you for not tearing it apart. Holden