


DIY Easter Wands – Three Daughters Home

**To see my original post, which includes the free printable for this project, please visit my blog site HERE. Also, be sure to subscribe for more fun DIY + home decor projects! As a thank you, I'll send you my Top 10 Tips for Refreshing Any Space!
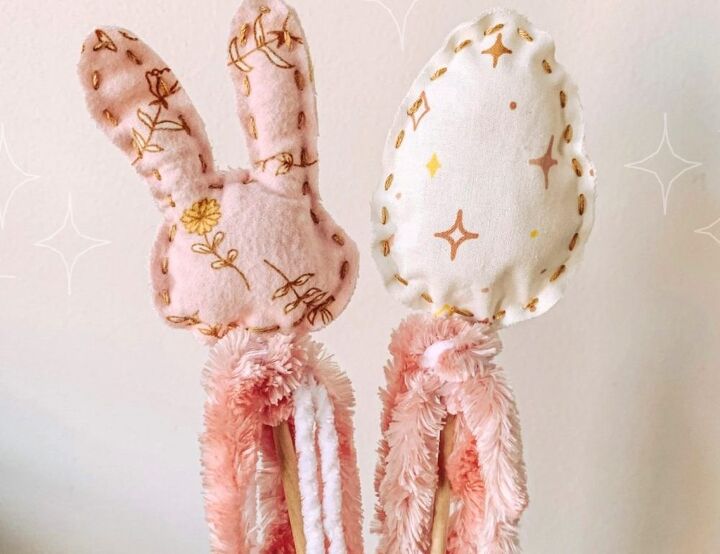
Abra Cadabra! 。・:*˚:✧ Add a little magic this Easter with one of these DIY Easter wands, inspired by @dropsofjuniperco! Keep reading, and I’ll walk you through how I made mine!
What You’ll Need:
- Fabric (I got mine at Joann’s, but there’s also cute patterns on Amazon)
- Scissors (I recommend fabric scissors)
- Embroidery Thread & Needle
- **If you don’t want to stich your wands, you could alternately use Fabric glue
- Wooden dowels (I used 3/16 in.)
- Polyfil
- Hot glue gun
- Ribbons/Chunky yarn
- Paper or cardstock
- Stencil: **I have created a printable to make it easier for you!**
How To:
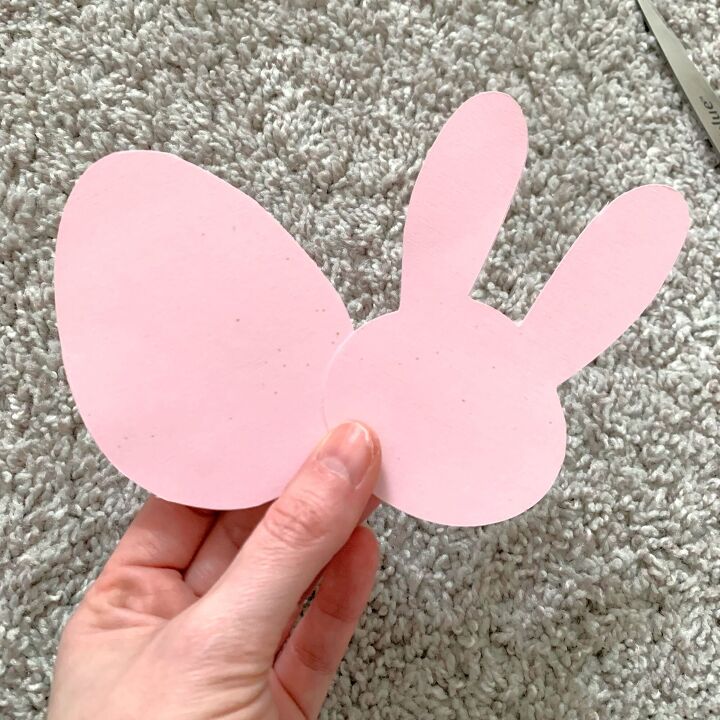
Step 1: First, you’ll want to create your stencil. I used my Silhouette cutting machine, but you could also print and cut out your stencil using my printable template.
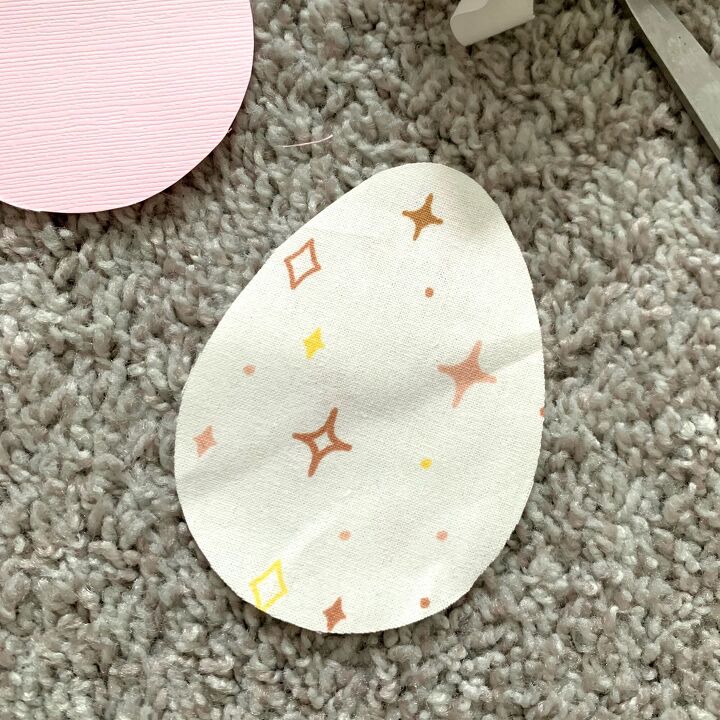
Step 2: Once you have your stencil made, you’ll want to cut out two pieces of fabric so you have two eggs and/or bunnies. Don’t worry about making it perfect – You can always trim afterwards.
+ PRO TIP: Before cutting your fabric, first decide what part of the pattern you want to use. I played with my stencil to make sure I chose a selection of fabric with the most design on it.
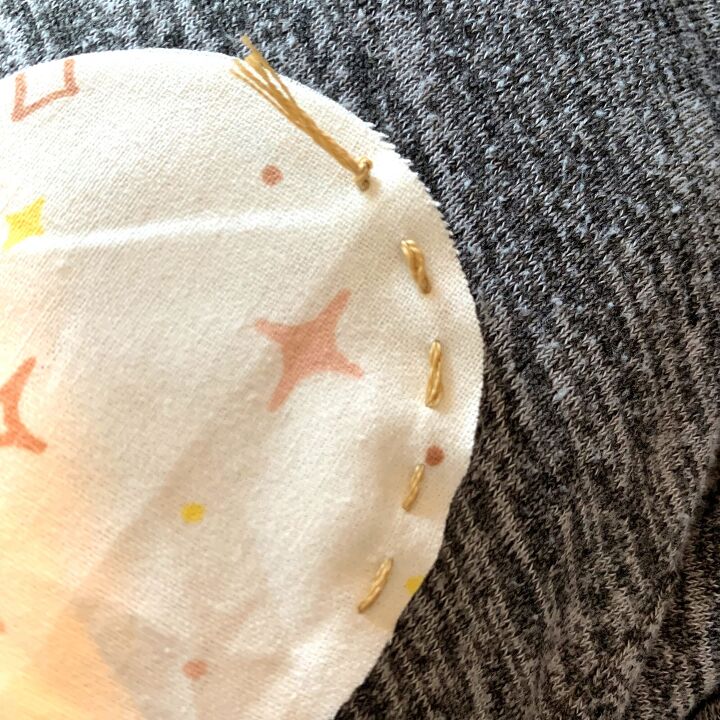
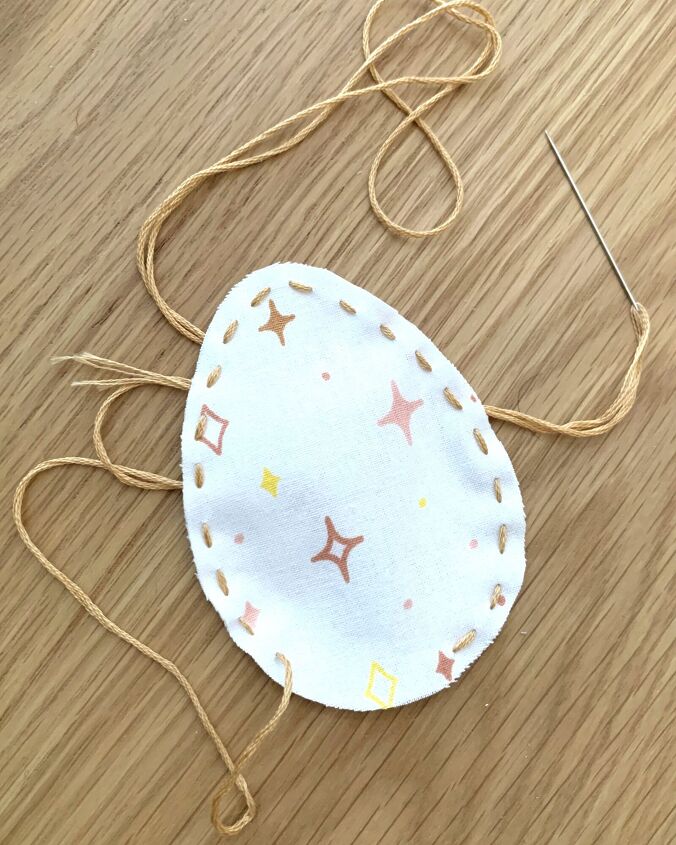
Step 3: Make sure your two pieces are flush together with the pattern facing out. Using your embroidery needle and thread, (or fabric glue if you want to forgo the sewing part) stich around the edge leaving an opening in the bottom to add Polyfil and your dowel.
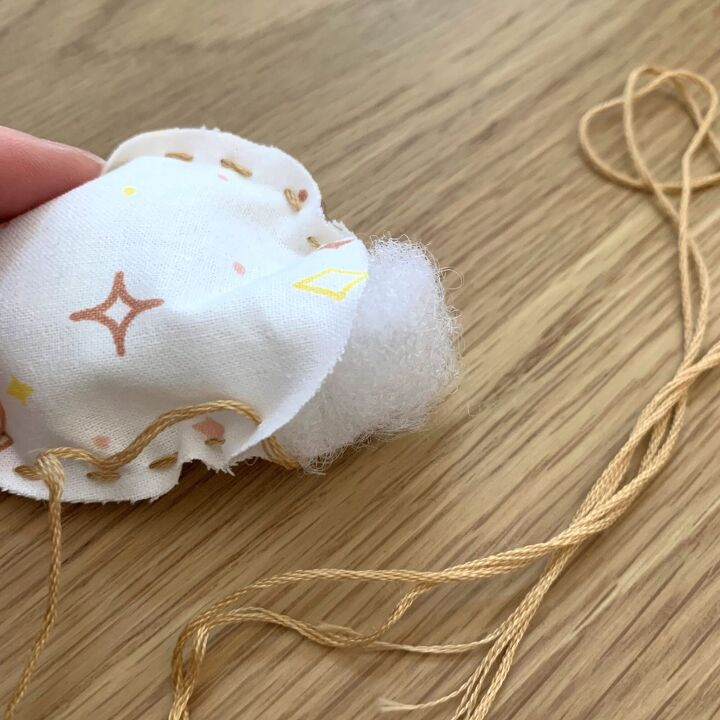
Step 4: Stuff a small amount of poly filling, using your finger or wood dowel to fill the ears (if you’re making the bunny). Then, I actually added one more stich after stuffing before adding my dowel.
Step 5: Insert your wooden dowel and secure by adding a small drop of hot glue on the inside of your egg or bunny. It was hard to snap a photo of me doing this; but basically, I stuck the tip of my hot glue gun inside and dabbed glue on both sides of the dowel to keep it from wiggling around.
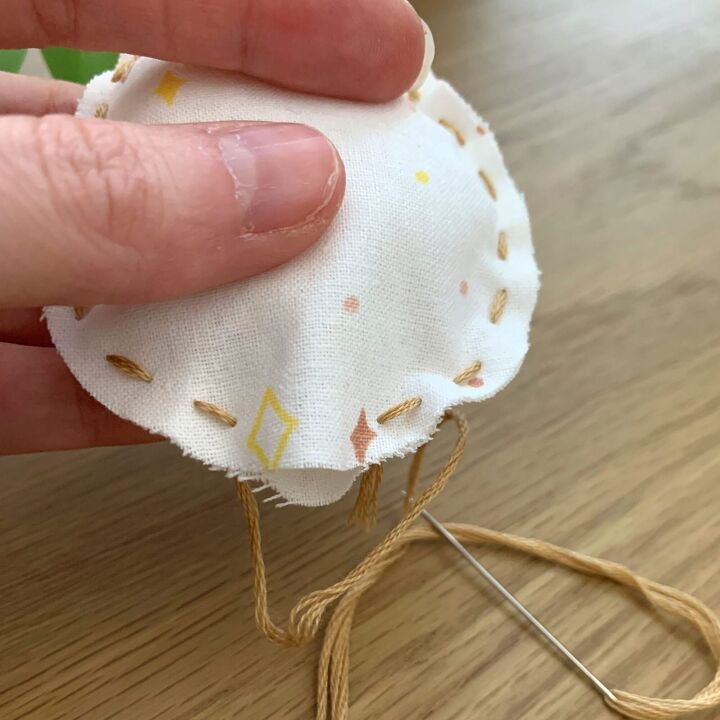

Step 6: Once the glue is dry, finish stitching your shape and tie off your thread.
Step 7: Add fun ribbons or yarn and your DIY Easter wand is done!
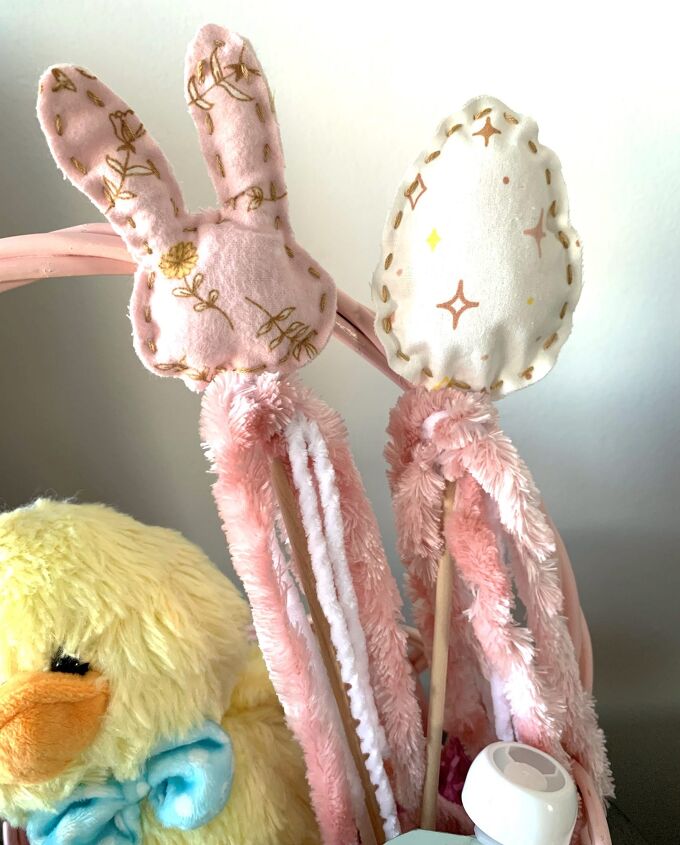
Add these cuties to an Easter basket or vase and sprinkle a little Easter magic! 。・:*˚:✧ I would be willing to bet this is the first thing my girls grab from their basket Easter morning. If you make these for your little bunnies, please tag me (@threedaughtershome), or send me pics so I can see your creations!
And for more Easter fun, check out the Easter Baskets I put together for my favorite chickies! (On my Blog site) --
**To see my original post, which includes the free printable for this project, please visit my blog site HERE. Also, be sure to subscribe for more fun DIY + home decor projects! As a thank you, I'll send you my Top 10 Tips for Refreshing Any Space!
FOLLOW ON THE GRAM + PINTEREST: @threedaughtershome
Resources for this project:
See all materials


Frequently asked questions
Have a question about this project?