


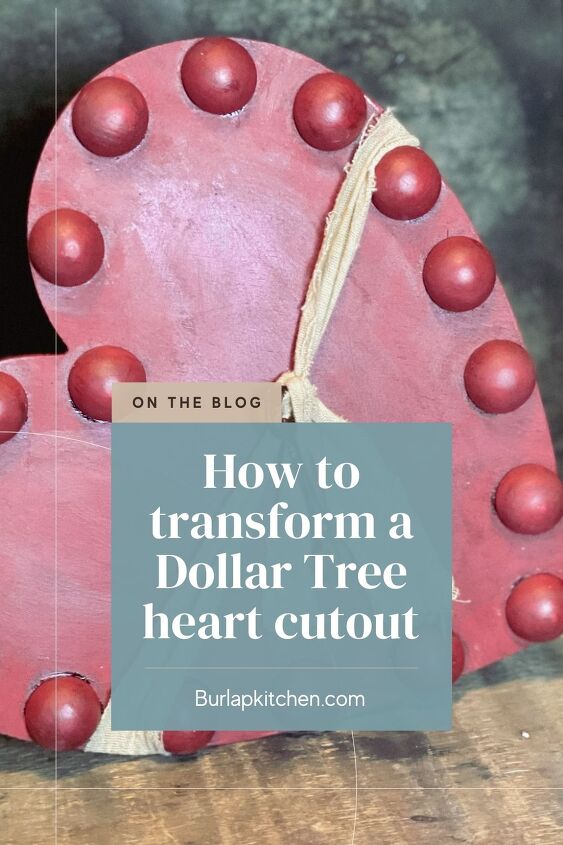
DIY Rustic Heart for Valentine’s Décor: Dollar Tree Makeover
Here's a fun way to transform a Dollar Tree wood cutout.
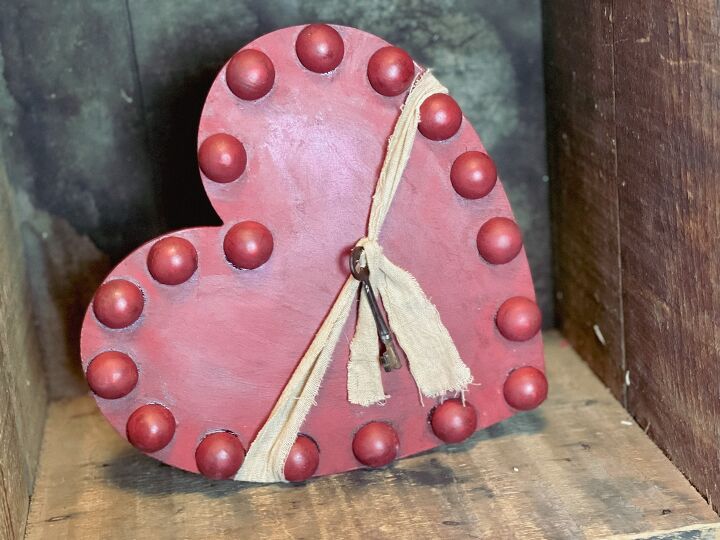
Friends, you will have so much fun transforming this Dollar Tree wood heart into a beautiful, rustic Valentine’s Day décor. I love Dollar Tree makeovers because they can transform into some of the most beautiful, budget-friendly DIYs. Dollar Tree transformations, such as this rustic wood heart DIY, will have your friends thinking you purchased this at a high-end craft store! Wouldn’t this farmhouse style DIY heart decoration make a cute shelf sitter? This Dollar Tree makeover rustic DIY heart would also make a special Valentine’s Day gift for your loved ones!
- Wood heart cutout from Dollar Tree
- large half wood beads
- 4 – 6 tumbling tower blocks from dollar tree
- red chalk paint
- paint brush
- stain – I used Minwax brand in Dark walnut
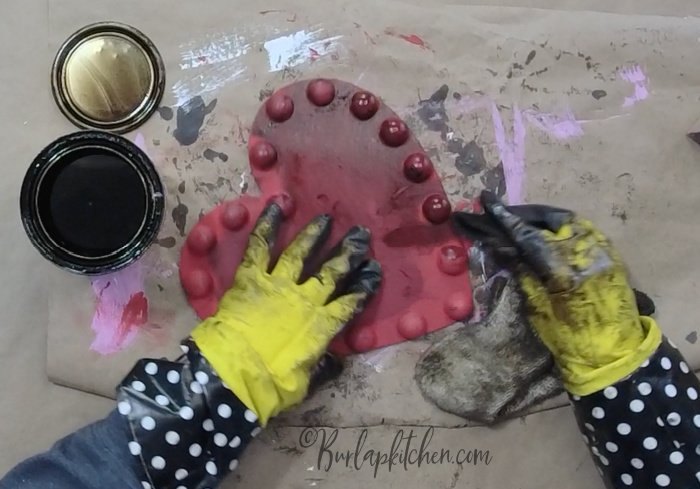
- old rag & gloves for staining
- sand paper
- ribbon for center of heart – I used a coffee dyed flour sack
- old key – optional
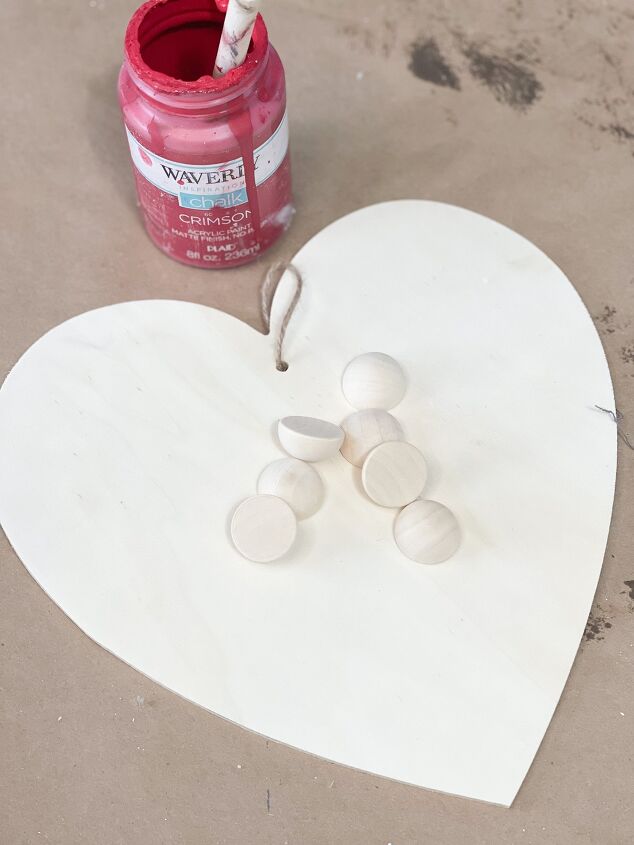
Step 1. Purchase a wood heart cutout from Dollar Tree.
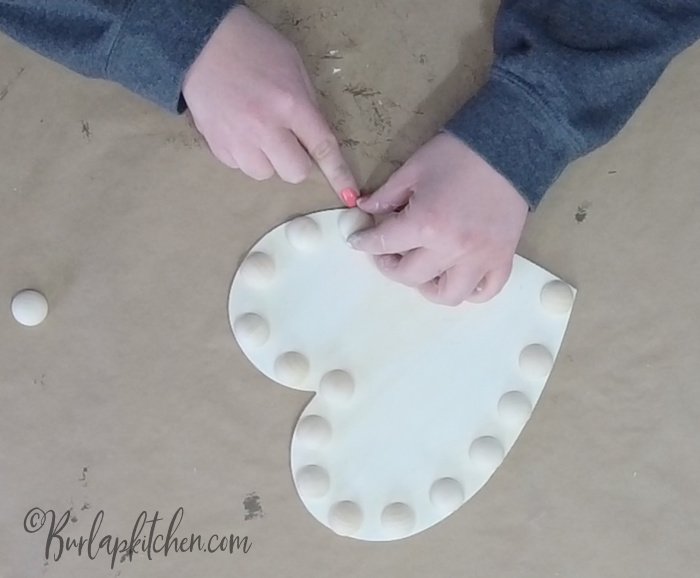
Step 2. Using some half wood beads, hot glue one half wood bead at the top point/middle of the heart, and then hot glue another half wood bead at the bottom point of the heart. I do this first as it will help to evenly space the rest of your half wood beads around the perimeter of the wood heart. Once you have your half wood beads evenly spaced around the outer edges of the heart, hot glue them into place. Allow to dry.
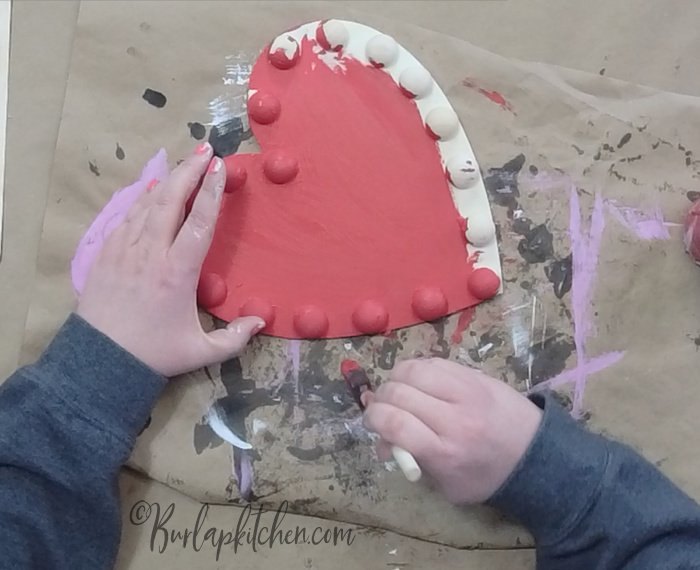
Step 3. Use Waverly chalk paint in the color “crimson,” and paint the front and sides of your heart, including the half wood beads, with this red chalk paint. I use a cheap chip brush for this. Allow the front to dry. Then, paint the back of the heart the same way. Allow to dry.
Step 4. Take a sanding block and gently sand over the front and back of the heart. This will give the heart a more rustic appearance.
Step 5. Dip an old cloth into some Minwax stain in the color “dark walnut,” and wipe the stain over the front of your heart, as well as going over each bead. Then, wipe the stain off. Allow to dry. *Always be careful when staining, use old cloths and dispose of them after each use. Also, remember to wear gloves and old clothes when working with stains.
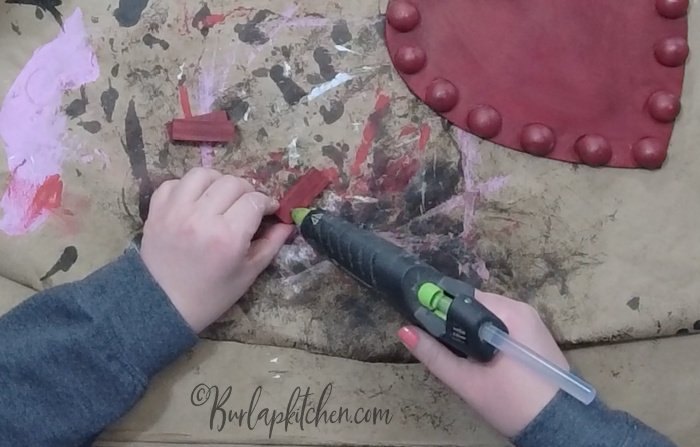
Step 6. Take 3 Jenga blocks, (you may want to use a 2×4 piece of wood for this project as this was almost too heavy for the Jenga blocks), and use a chip brush to paint the blocks, or 2×4, with Waverly chalk paint in the color “crimson.” Allow to dry.
Step 7. Use Minwax stain in the color “dark walnut,” and rub stain over the red chalk painted blocks, or the 2×4, and then wipe the stain off. Allow to dry.
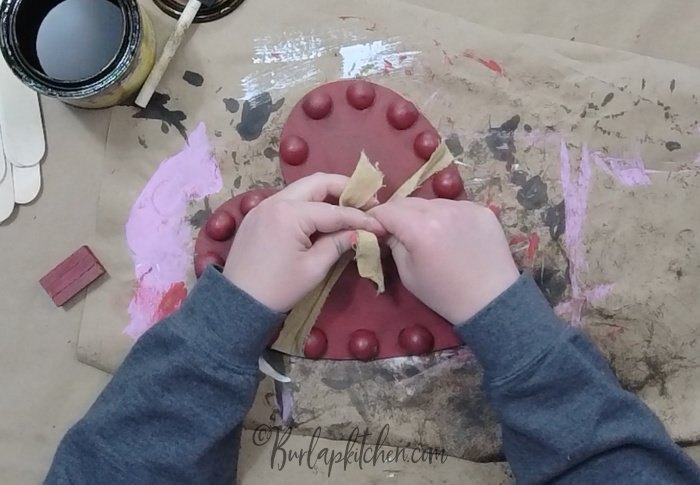
Step 8. Cut a strip from a flour sack that is long enough to tie around the heart and is about an inch or so in thickness, and coffee dye it. To coffee dye the flour sack strip, simply soak it in some coffee for about 5-10 minutes, and then allow it to dry.
Step 9. Place the coffee dyed flour sack strip so it goes around the heart, and then tie on an old skeleton key, or any rustic looking key of your liking, onto the front center of the heart using the coffee dyed flour sack to loop the key though. Trim away any of the excess flour sack strip that may be hanging from each side of the knot from tying on the key.
Step 10. Take the Jenga blocks, or the 2×4, and hot glue them/it to the back of the heart at one side towards the bottom so that the heart will stand on its’ side. Allow to dry and enjoy!


Frequently asked questions
Have a question about this project?