


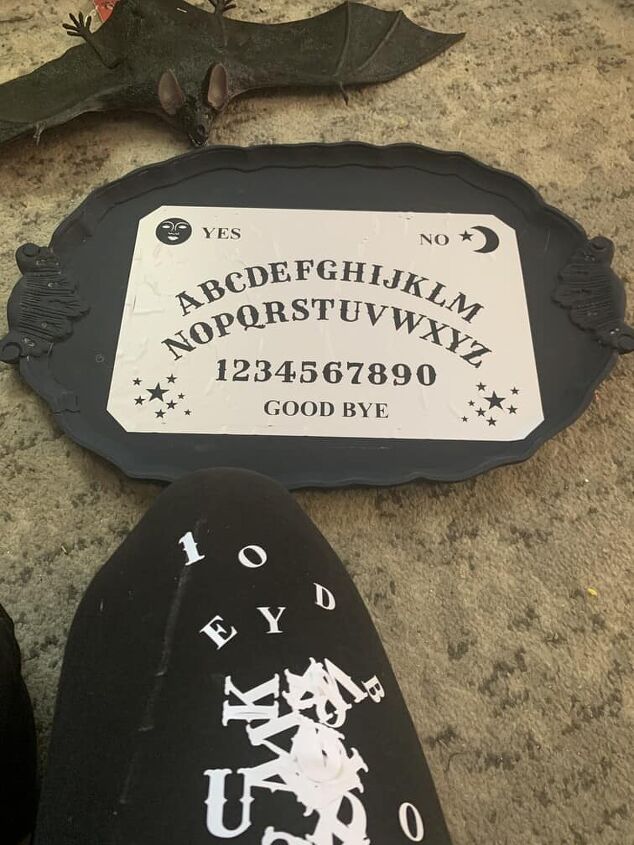
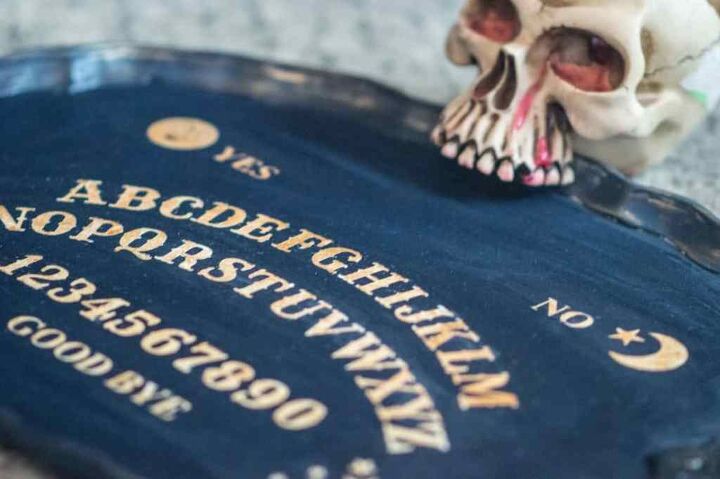
Turn a Serving Tray Into a Halloween Ouija Board

Halloween is such a fun time of year. It is a time where anything goes. A time where you can really get your creative juices flowing. This Halloween Ouija board craft is the perfect Halloween decoration and it is so much fun to create. Here is how I created a unique Halloween Ouija board out of a thrift store tray. See more DIY Halloween Cricut ideas.
What you need to make a Halloween Ouija board tray
- A wood serving tray
- Chalk paint (I used Country Chick Peacoat)
- Dixie Belle Gold Gilding Wax
- A cricut and permanent vinyl Or a ouija stencil
- Poly to seal
- Paint brushes
- An old smooth rag
- Gold Acrylic Paint
How to make a thrift store Ouija board
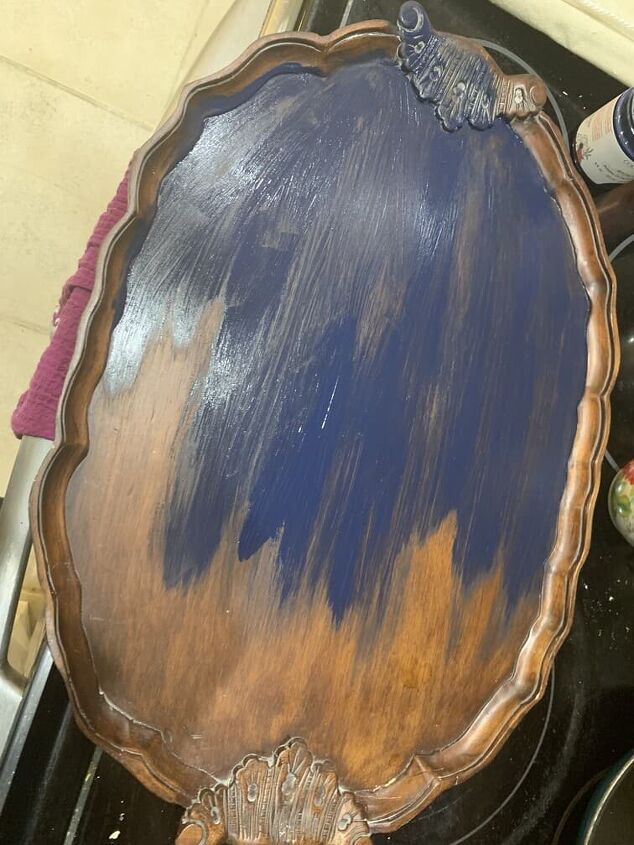
Search thrift stores for a unique tray that you can use for the base. Look for something smooth that can be easily painted. I found this amazing wood tray for only a few dollars.
Clean and prep your tray
Clean your tray so there is no dirt or bumps. Sand any gouges so the surface is completely smooth.
Print out your stencil
I purchased an svg from Etsy to use for this project. You can print it on oracal stencil material or just regular permanent vinyl. I used regular since the Oracle local tends to be a little strong for me.
Weed out all of the letters so that the stencil ready to apply.

I used Country Chic Peacoat chalk paint. Chalk paint covers great and it dries smooth and clean.
Add another coat to make sure the tray is sufficiently covered.
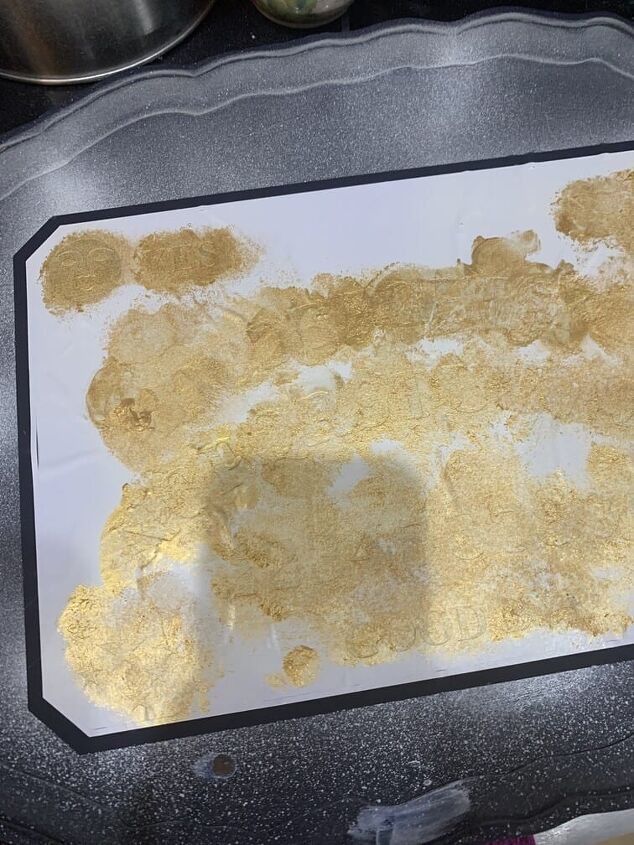
Once the tray is dry, use transfer tape to place the stencil on the tray.
I used a white primer to seal the stencil edges and then used a stencil brush to dab gold paint over the primer. Painting gold on a white base really helped it to pop.
Carefully peel off the stencil once the paint has had a chance to set.
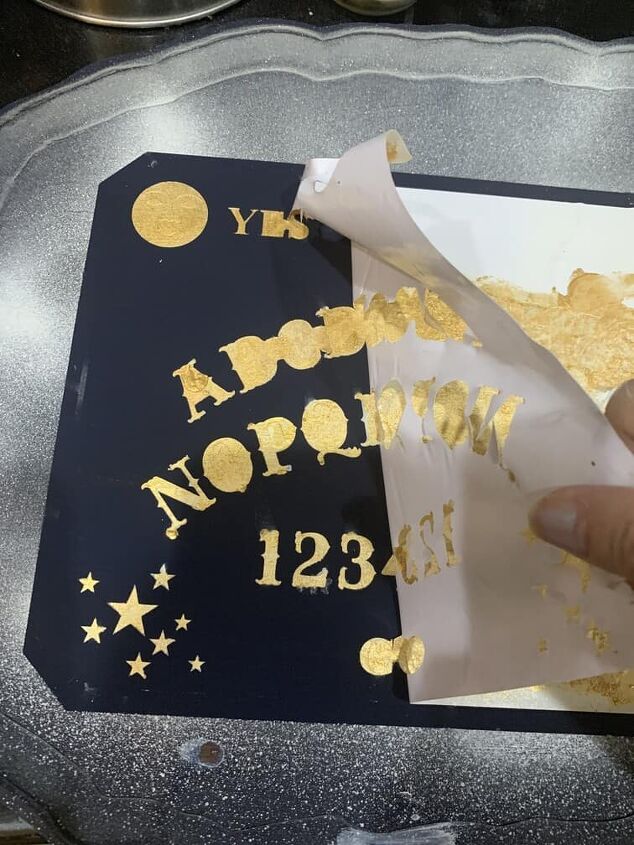
This is my favorite part. Dip your finger in Dixie belle gold guiding wax and rub some gold highlights on the edges and anyway you would like to add interest.
Once everything is dry, use a soft towel to wipe on some polyethylene. This will seal and protect your tray. This beautiful tray is for decorative use, if you are planning to use it for food purposes, please be sure to research food safe products.
Comments
Join the conversation
-
I've never called a Ouija board cute before... but there's a first time for everything! So creative!


Frequently asked questions
Have a question about this project?