


DIY Dog Feeding Station From an Old Coffee Table
{Disclosure: This is a sponsored post from Prima Marketing but the opinions and projects are mine all mine!} Fellow dog moms and dads! Tired of buying ugly plastic dog feeders that stick out like a sore thumb? Thanks to Prima Stick & Style Stencils we’re taking an old coffee table and turning it in to a beautiful dog feeding station that you’ll be proud to show off!
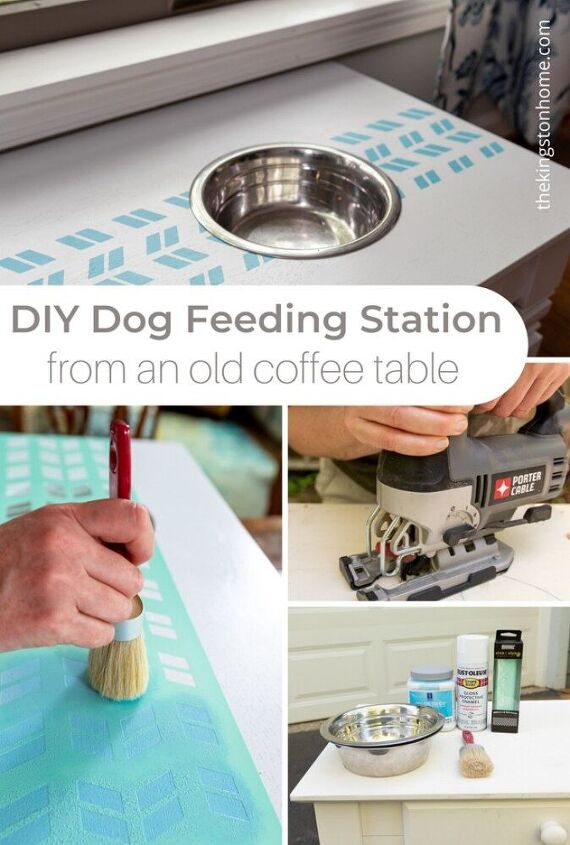
We have had dogs our entire marriage (18 years and counting!) and have probably gone through dozens of cheap plastic dog feeders. Some were too short, some were too flimsy, some got chewed on by the dogs - but ALL of them...let’s be real...were ugly. We’ve always had our dog bowls in the kitchen and they always just seemed out of place. Something to be stepped around when friends came over. So last weekend when we discovered this old coffee table we’d been storing in our garage we had an ah-ha moment. Why not turn it in to a dog feeding station that we actually wanted to look at? Why not turn one piece of useful furniture in to another piece of useful furniture! I’d just received these Stick & Style Stencils from Prima and this was the perfect opportunity to try them out.

SUPPLIES NEEDED:
- coffee table or sofa table
- metal dog bowls
- measuring tape
- pencil
- center rule
- compass
- drill with wood boring bit
- jig saw
- spray paint
- acrylic or latex paint
- stencil brush
- Prima Redesign Stick & Style Stencil Roll
- brayer and/or scraper
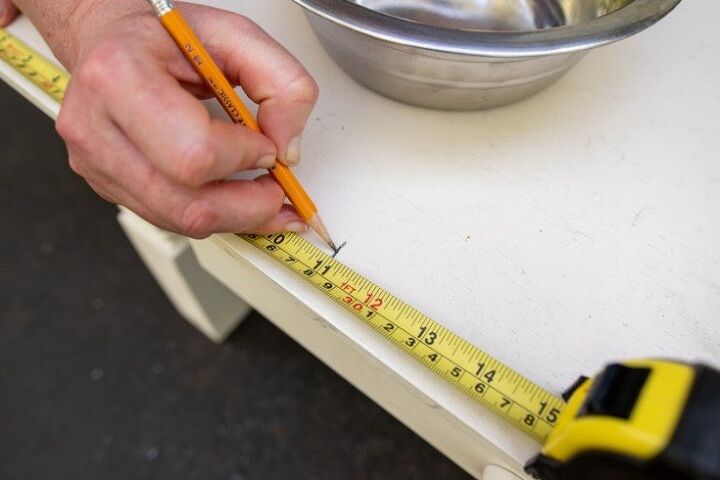
Decide how far from the side you want your dog bowls to sit. Measure in from the edge of the table and make a mark in line with the center of the bowl. Repeat measurement along the back edge of the table.
Draw a line between those two marks.
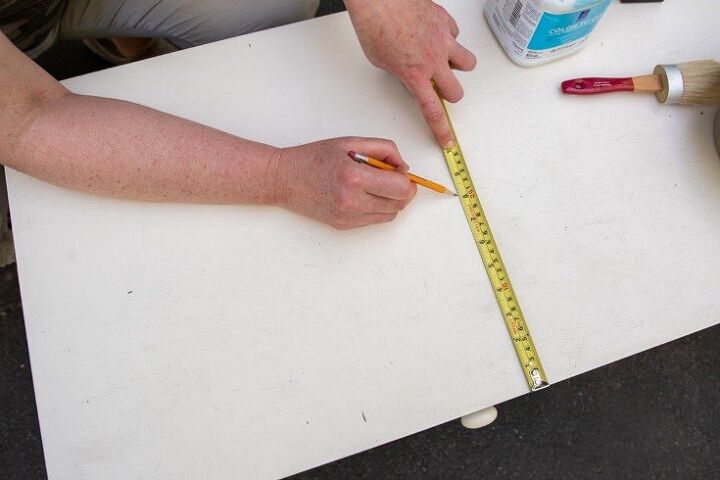
Then decide how far from the front you want the dog bowls to sit.. Measure from the front edge of the table to the center of the bowl and make a mark, then repeat - measuring from the back edge of the table.
Draw a line between those two marks (it should intersect with your first line).
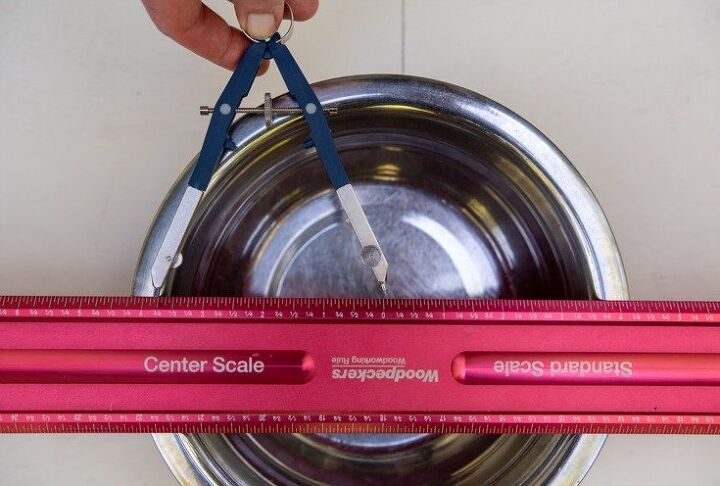
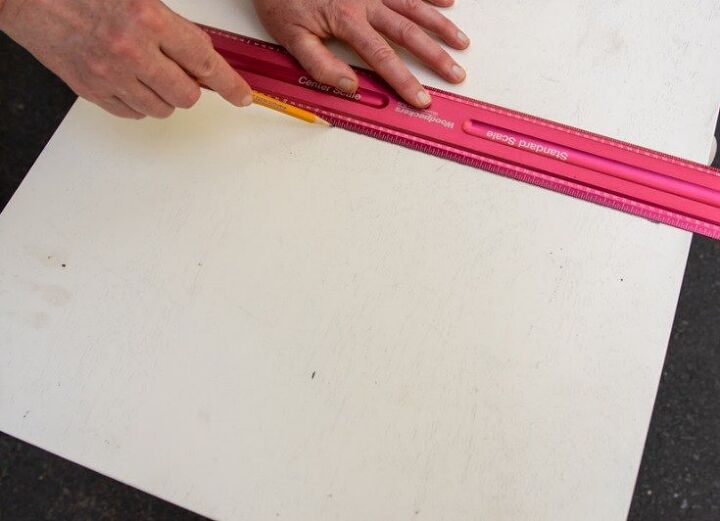
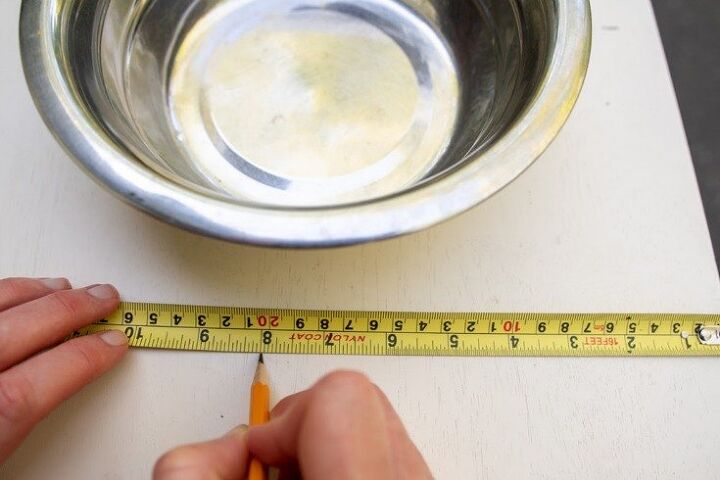
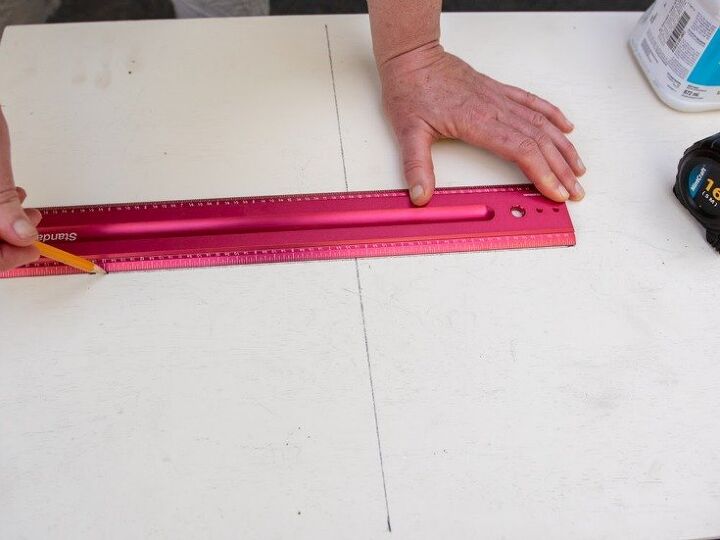
Use a center rule to measure the radius of your bowl. The lip of the bowl is going to be what holds it in to the table, so make sure your measurement is inside the lip of the bowl. For example - the radius of our bowl was 4.25, so we measured to 3.75.
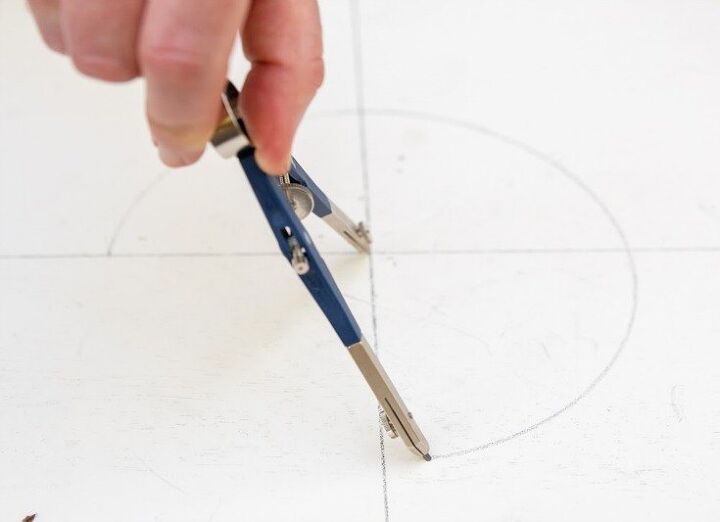
Adjust your compass to the desired radius. Place the compass where your lines intersect and draw a circle.

Drill a hole inside of the circle - we used a wood boring drill bit. This will create an opening for you to insert your jig saw blade and start your cut.
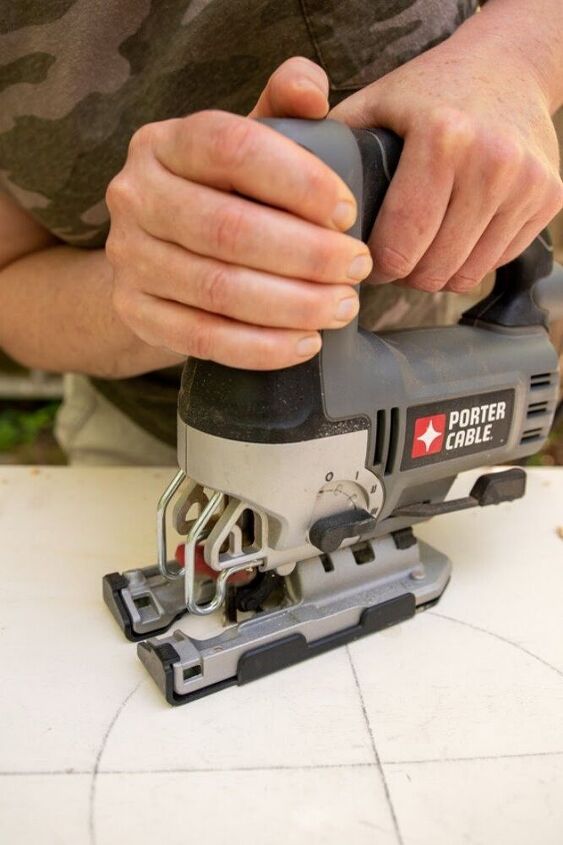
Use the jig saw to cut along the circle you drew. New to using a jig saw? This is a great project to try! The circle will be covered by the dog bowl so the appearance does not have to be perfect.
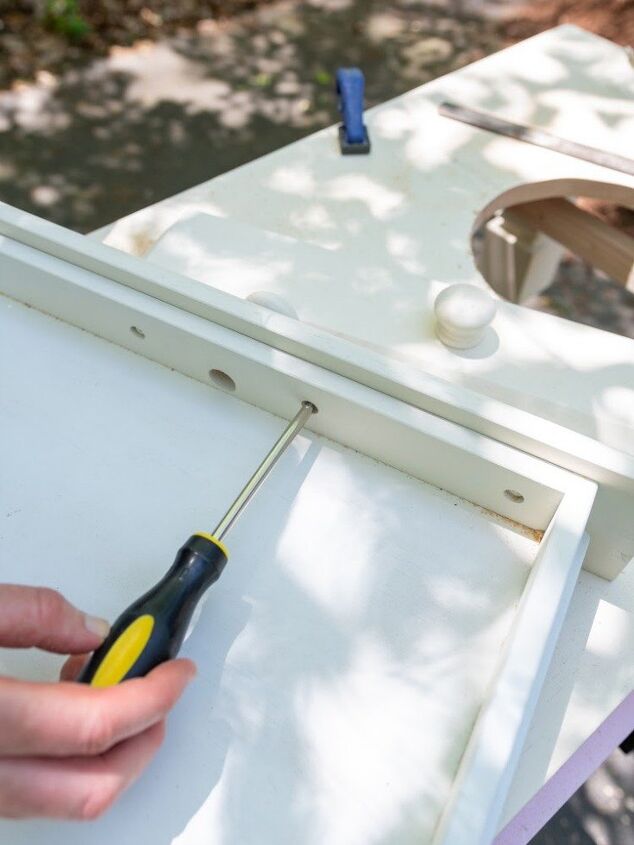
TIP: if you have drawers in your table that you need to remove to cut the holes you can disassemble the drawer and reattach the drawer front with a nail gun to maintain the appearance of the table.
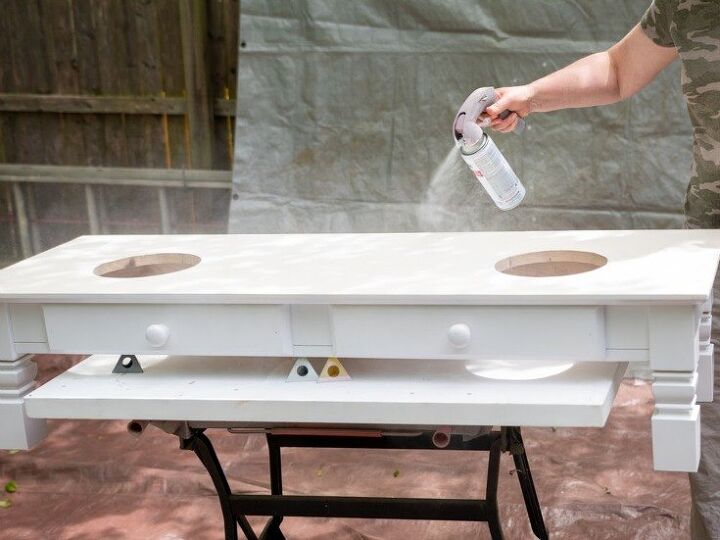
Paint surface and sides of table. If you’ve still got pencil marks from your bowl measurements don’t worry! They will be covered by the paint. Allow plenty of time to dry.
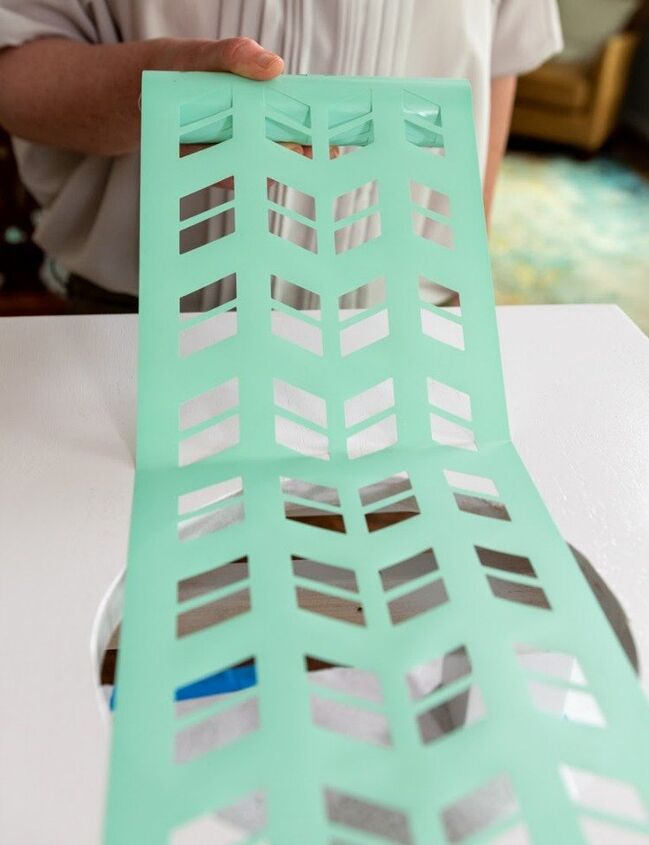
These Prima Stick & Style Stencil Rolls are GENIUS!! My biggest complaint about stencils was that they generally only came in 12” or 18” squares so when you wanted to do big projects you had to lay down the stencil, paint, wait for the stencil to dry, lift it up, place it in another spot, paint, wait for it to dry, and over and over. It was so time consuming! Their 6” stencil designs come in three-yard rolls (their smaller stencils are 15 yards!) which allowed us to do the entire tabletop in one fell swoop! Added bonus...IT IS ALREADY STICKY ON THE BACK!!! This made placement SO easy (and fast) and the stencil is reusable so once you’ve cleaned it off you can just roll it back up and save it for another project. I am in love!
If you are working on a big project (like this table) a few tips. Determine where you want your stencil to go and make light pencil marks at a few points across the table to make sure your placement is straight. This was definitely a two person job so get someone to help you!
Unroll the stencil and apply to the tabletop. The adhesive on the back is very forgiving - you can pick it up and put it back down to get the perfect placement!
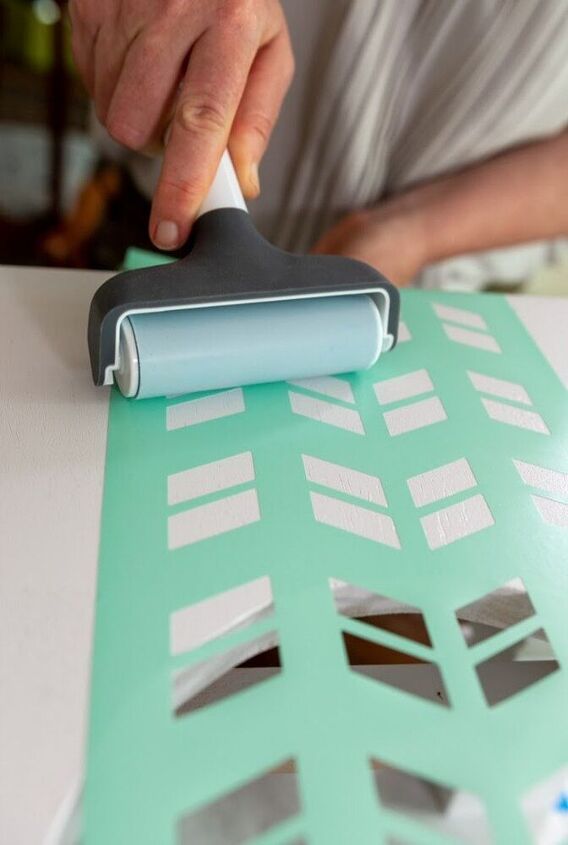
Use a brayer or scraper to burnish the stencil to the table. Make sure you’ve removed any bubbles or gaps. This step is important if you want crisp clean lines!

Put some acrylic or latex paint (we just used some leftover paint from another project!) on a paper plate and dab stencil brush in paint. TIP: make sure you tap off any excess paint from the brush before you start painting the table. Better to have to do another coat than to have too much paint on your brush that leaks under the stencil.
To paint the stencil daub the stencil brush straight up and down on the table over the stencil pattern. Do not brush side to side (like you would with a regular brush) - the up and down motion of the brush helps you get a clean image from the stencil.
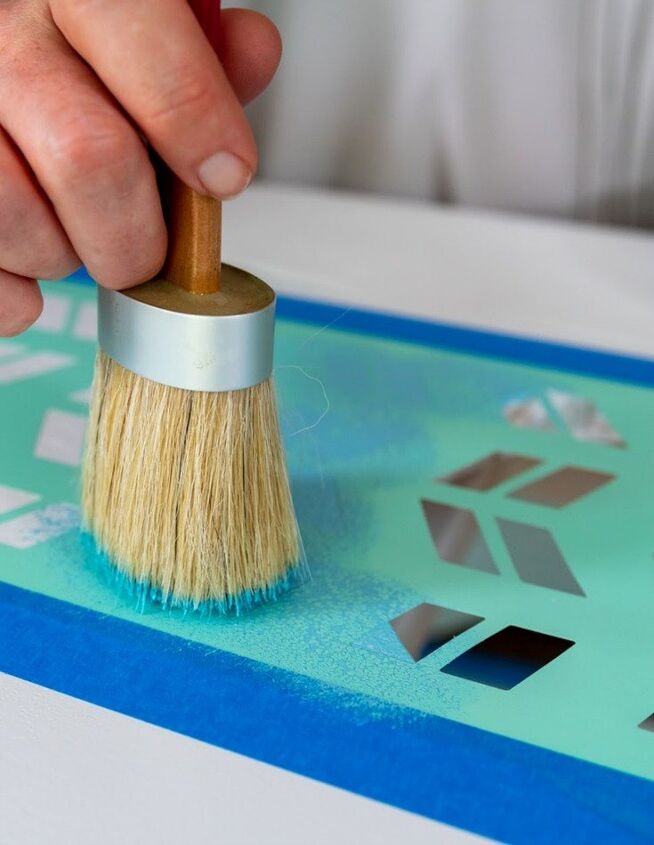
TIP: If you are new to stenciling (or are using a big brush) you can also add painters tape to the stencil edges to prevent excess paint from getting on the table.

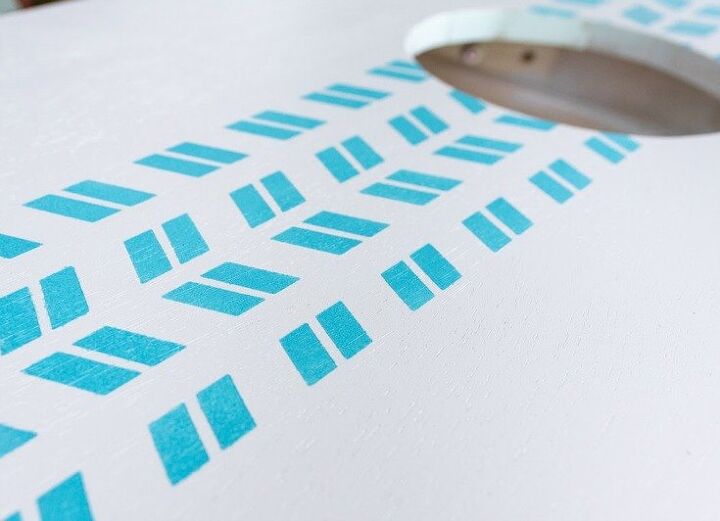
While paint is still wet - immediately after painting if possible - remove the stencil by gently pulling up on one side. If you want to reuse the stencil (which you will because they are so awesome!) set aside to clean. We used latex paint so were able to wipe the stencil clean with a damp paper towel!
The adhesive on this stencil was so good that out of a four foot table we only had one small rectangle that we had to touch up with white paint and a qtip. I was SO impressed with the quality of these and can’t wait to stencil all the things!
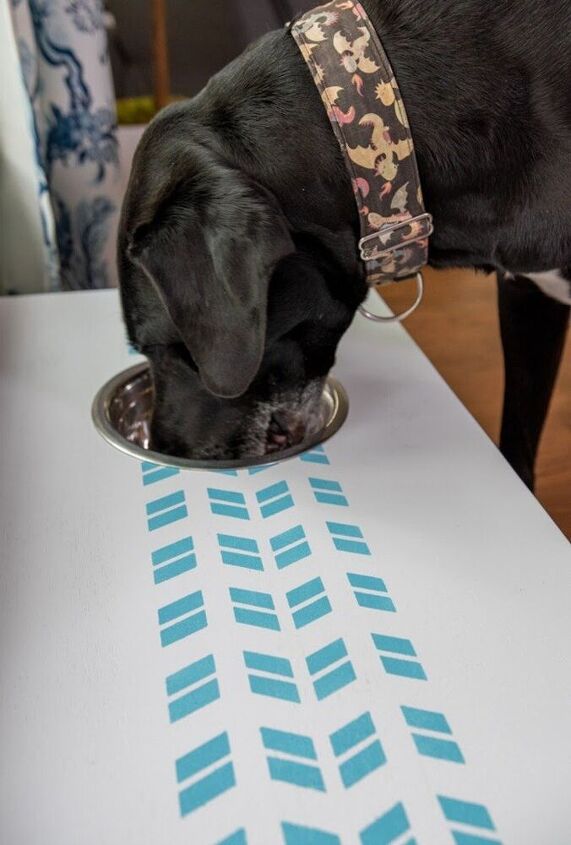
Because stenciling uses such small amounts of paint the table was completely dry in less than 15 minutes. If you want to add a protective top coat of polyurethane you could - otherwise your new dog feeding station ready to go! As you can see it was a big hit with our big boy!

These Prima Stick & Style Stencils are a game changer for those of us who like to work on big projects! It saves time in every step of the process: from applying the stencil to your surface, to how big of an area you can cover, to ease of clean up, even to cost savings since you can use it over and over. They’ve got a new fan and I can’t wait to use them again!
To get more project inspiration for every area of your home, stop by my blog!
Resources for this project:
See all materials


Frequently asked questions
Have a question about this project?