


Flamingo Wreath With Dollar Tree Products

One of my favorite things to do is unexpectedly remind my friends and family that I love them and think of them. Sometimes it's simple and free, like leaving a silly note for them to find inside a sock, shirt or drawer. I also send cards out often, I think It's in part because I love to get mail (except junk and bills) but also because the recipients enjoy them too. Packages.... Is there anything better than getting a random package? I tend to think not!
Tracey and I have been best friends for about 33 years, she lives in PA and I in Fl . Unfortunately we don't see each other as often as we'd like which, is probably good for the environment since we find or make trouble where ever we go . She's been a Flamingo (or "Mingo" as she calls them) fanatic for as long as I can remember, therefore it is the mission of all who know her to gift her items with "mingos" whenever possible.
When I went to Dollar Tree and saw the plastic Flamingos I knew I had to get one make something really tacky for Tracey and surprise her. While I was aiming for tacky, the artist and perfectionist in me had to modify the Flamingo so that all of the holes were covered and the coloring matched that of a real flamingo. I realize this created a lot more work for myself but that's how I roll.
I used the beautiful American Flamingo images on the Smithsonian National Zoo website as a reference. You can view them here: https://nationalzoo.si.edu/animals/american-flamingo

Closeup of his funny face while I'm at Dollar Tree
I wanted to paint this for several reasons.
- the holes
- the beak
- the eyes.
Ugh. Not correct and it bugs me.
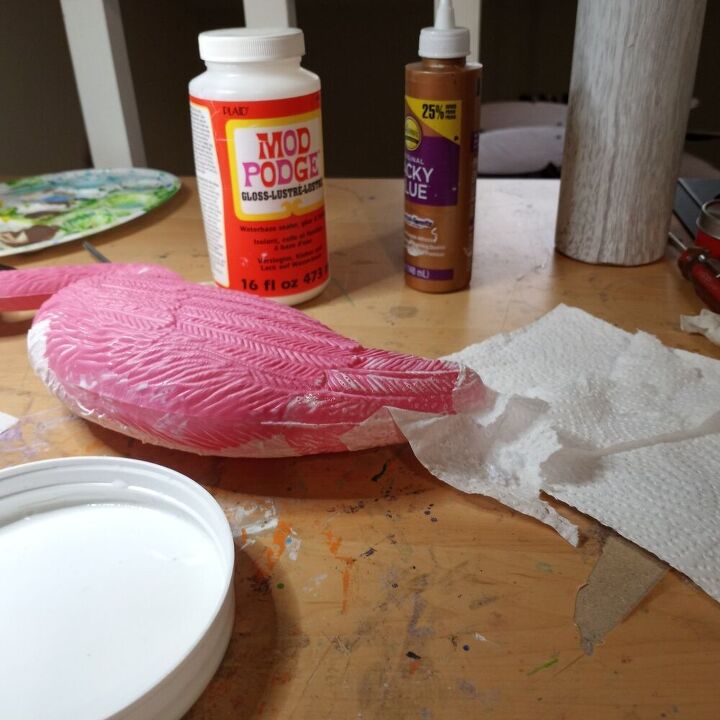
The flamingo from Dollar Tree had numerous holes along the seams & they bugged me so I plugged them with paper towel soaked in mod podge
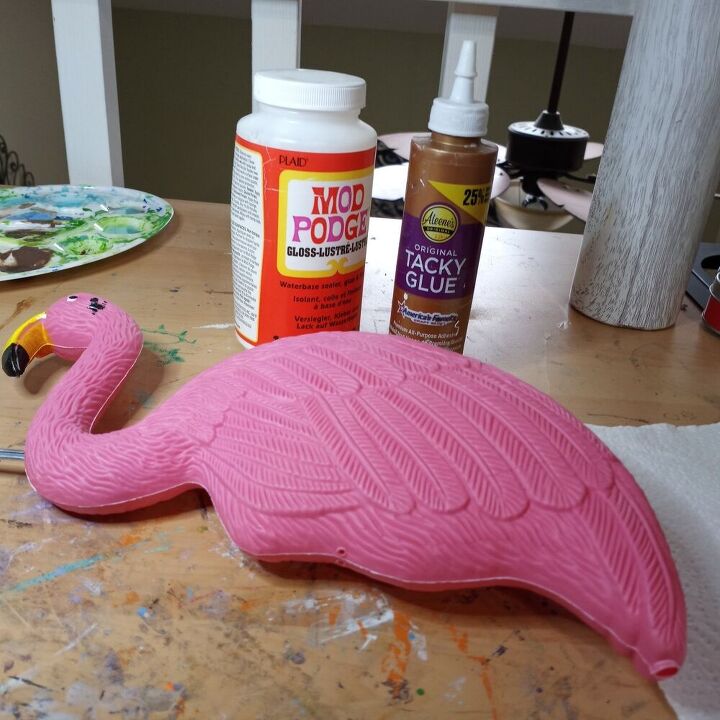
I find that Mod Podge is very thick and tends to make the decoupage clumpy so I put a bunch into an old Tacky Glue bottle and add water. It works great so i can also use just what I need.
As a note, I find that Tacky Glue also works very well for decoupage and is generally not as thick as Mod Podge so it doesn't require water. In this instance I had Mod Podge on hand
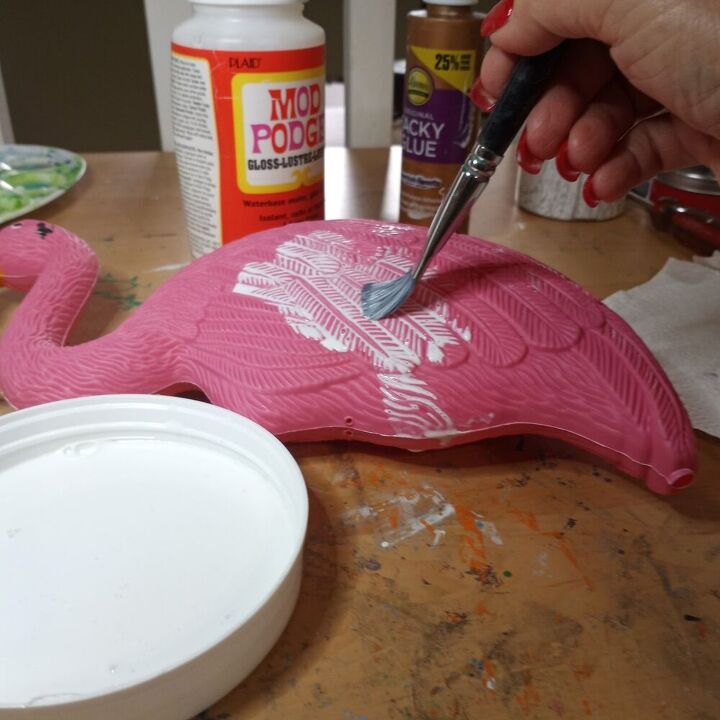
With a medium paint brush I applied mod podge liberally over a small area of the "mingo"
- Apply paper towel to the area with mod podge
- Smooth paper towel out with paint brush, pushing paper towel into the grooves. Add more mod podge as needed
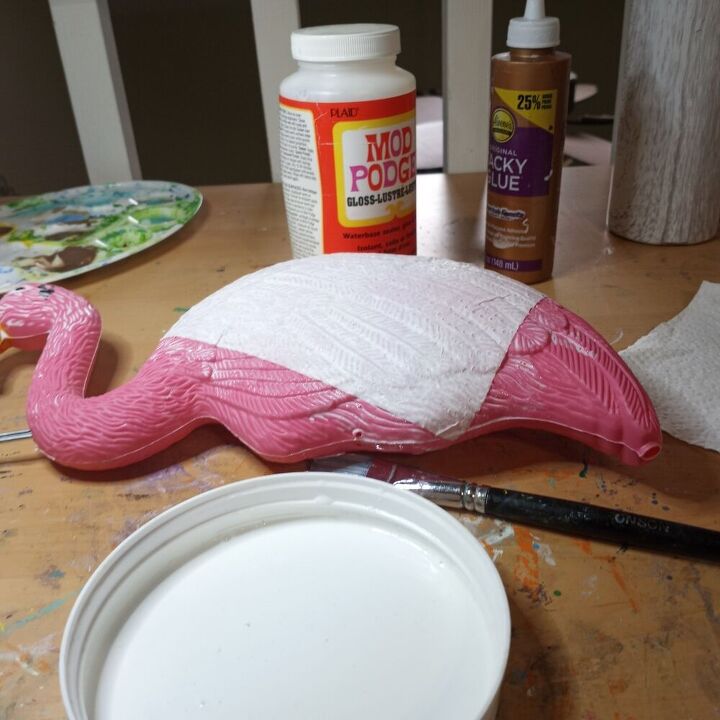
- First side of decoupage done, starting side two.
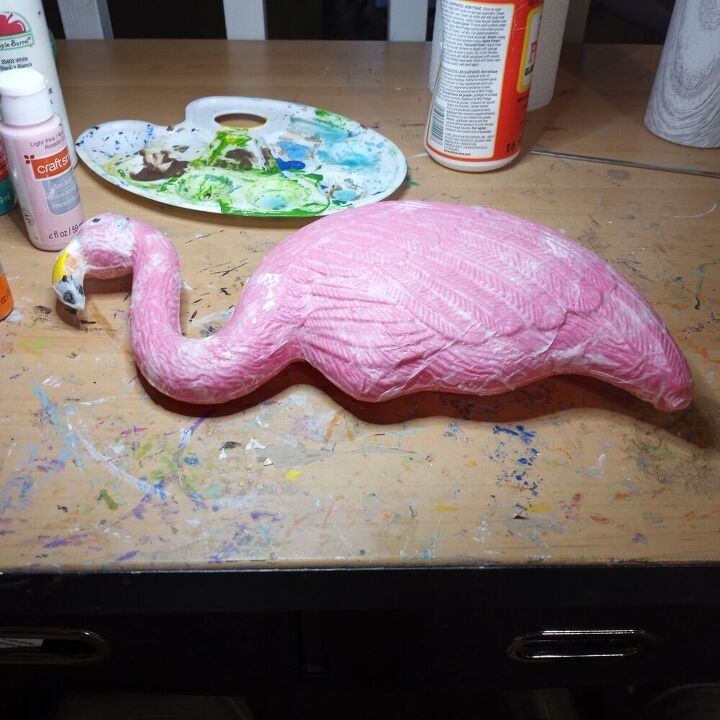
- Allow to dry then apply paint
I started with "Ballerina" by Americana which is a line by DecoArt I picked this up on a clearance rack (probably Michaels) and really like it. It's a multi surface satin and very subtle. Not sure if it's still available, hence the clearance.
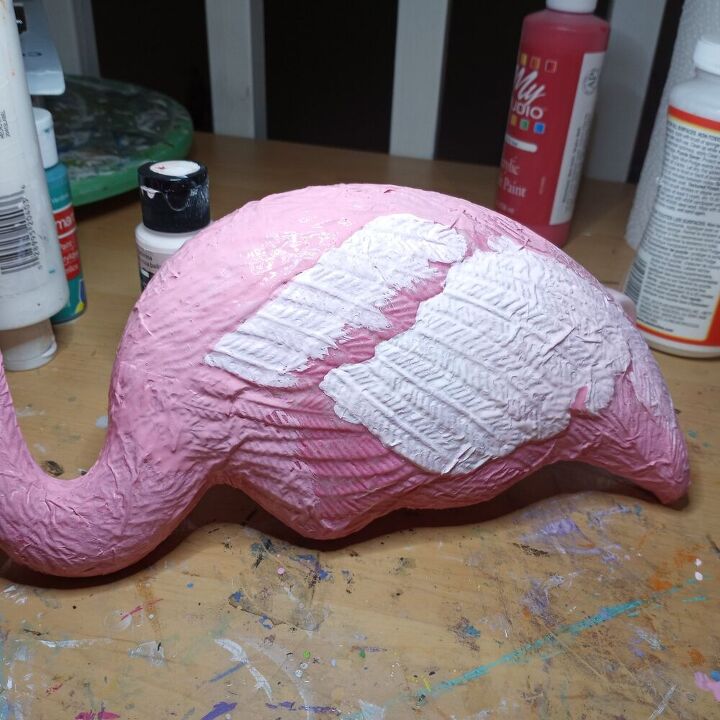
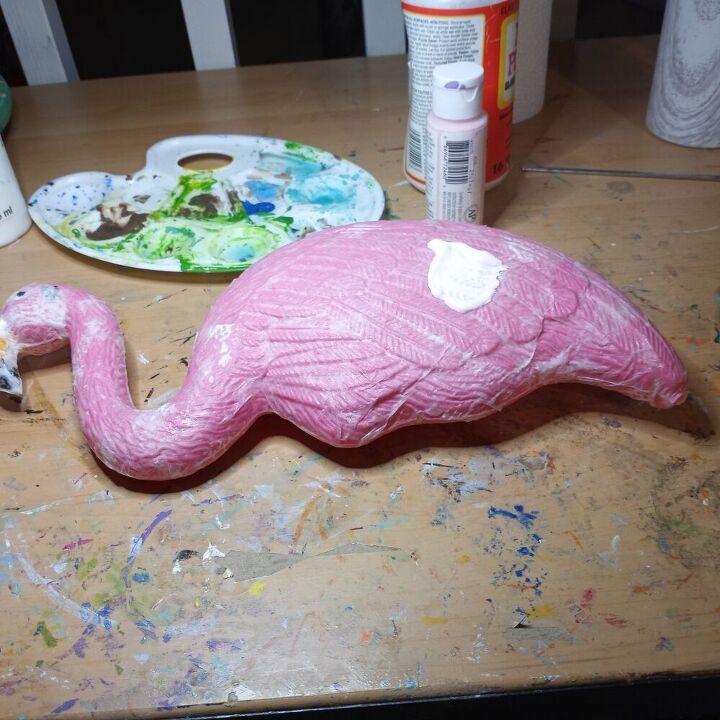
The top portion is the Ballerina by Americana
The white helps to differentiate the feathers is by My Studio AC Moore (Is AC Moore still around anywhere?)
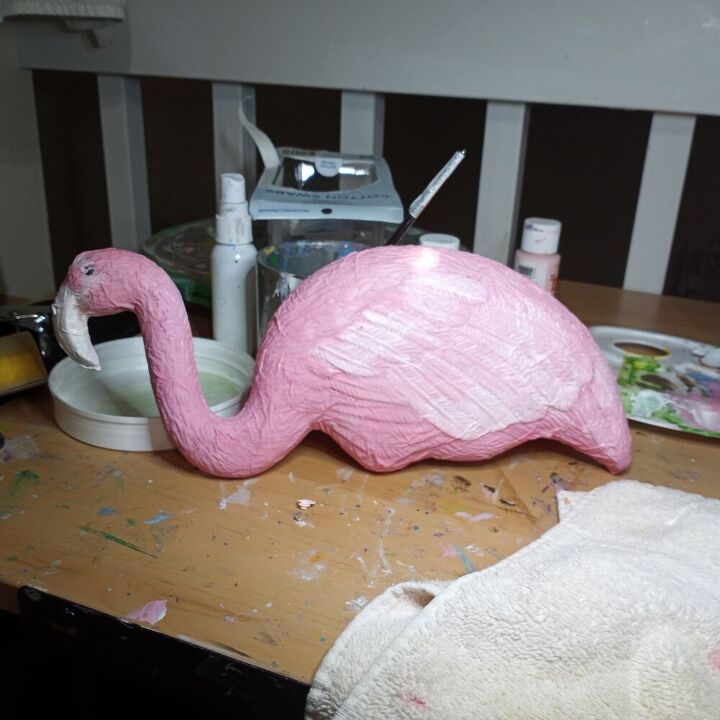
I used a combination of Ballerina Americana , Orange & Light Pink Craft Smart, White & Red My Studio AC Moore blended them together then dry brushed with white.
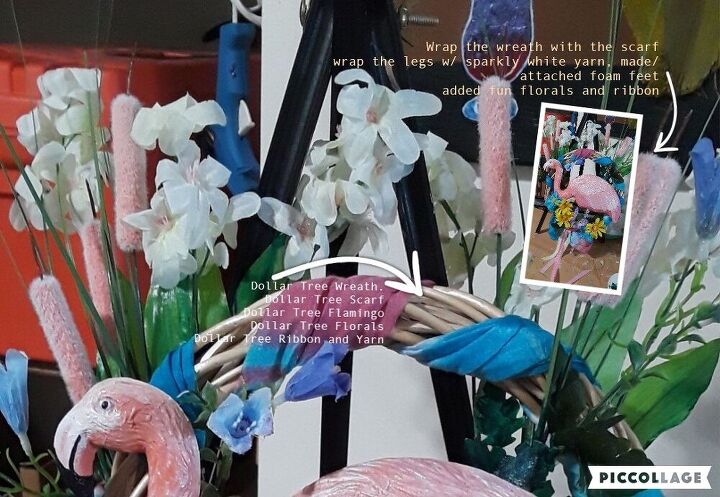
I bought a large braided wooden wreath, which I forgot to take a before picture of and colorful scarf from Dollar Tree. I folded the scarf long ways numerous times then twisted it a bit before wrapping it around the wreath form. As I wrapped the scarf I tacked it in place with hot glue. When I got to the bottom I tied it in a bow allowing the ends to hang down.

This is the scarf from Dollar Tree I used to wrap around the wreath.

This is the sparkle yarn (that's what I'm calling it anyway) that I used to wrap around the legs. Like the scarf, I tacked the yarn down with hot glue as I wrapped it around the legs.
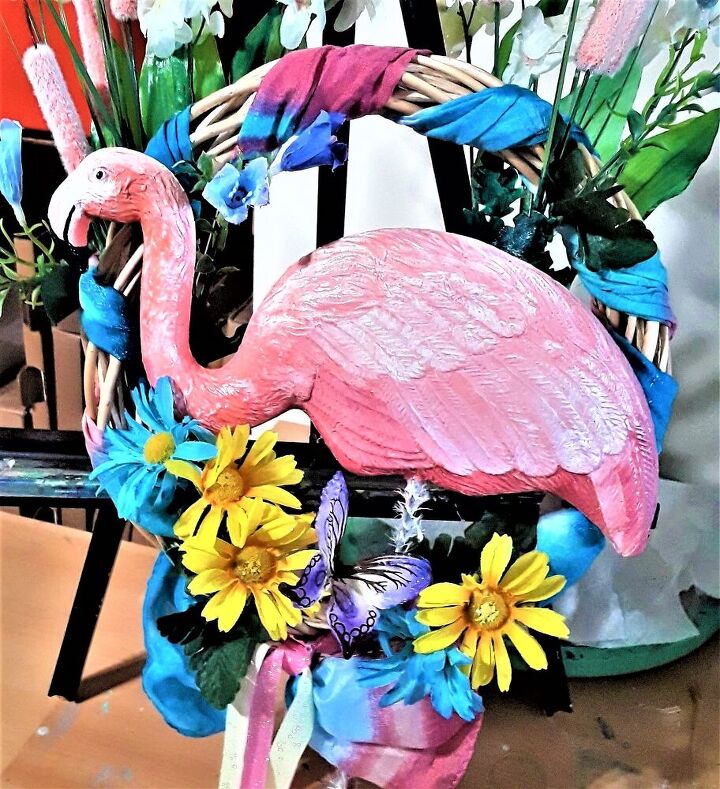
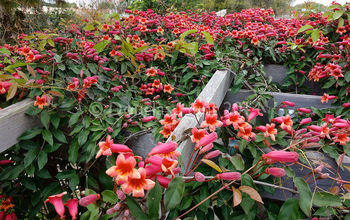
Also from Dollar Tree, I purchased a lot of bright flowers (I forgot to take pictures of them before I was done) that matched the scarf.
I cut them to fit then hot glued them around the wreath.
I wrapped each leg with sparkle yarn from Dollar Tree and tacked it in place with hot glue, then hot glued the two legs in place so they wouldn't fall out or move. If you look closely at the picture you can see them.
Additionally I created and attached goofy feet that I cut out of foam flowers (from the Dollar Tree craft area) and glued to the ends of the metal legs.

I hung it on my wall for safe keeping until I could package it up and ship it to Tracey. It was a pleasant surprise for her AND she thought I purchased the wreath. When I told her I made it just for her she was over the moon (and impressed). 
Comments
Join the conversation
-
He! He! He!😍
-
🤍l🦩🦩🦩 wreath is flamazing, downright flamingulous.. 🦩🦩🦩🦩


Frequently asked questions
Have a question about this project?