


Spring Wreath DIY Update Idea
Y’all I was looking for a new Spring Wreath DIY but had a light bulb moment in which I decided to update an existing magnolia wreath with these DIY Spring Wreath Ideas instead.
Therefore, instead of purchasing a new wreath or making one from scratch, I decided to add to an older wreath and save a lot of money.
Here are the easy steps to create a new wreath by adding just a few items. There are so many different possibilities but I hope you like my update.
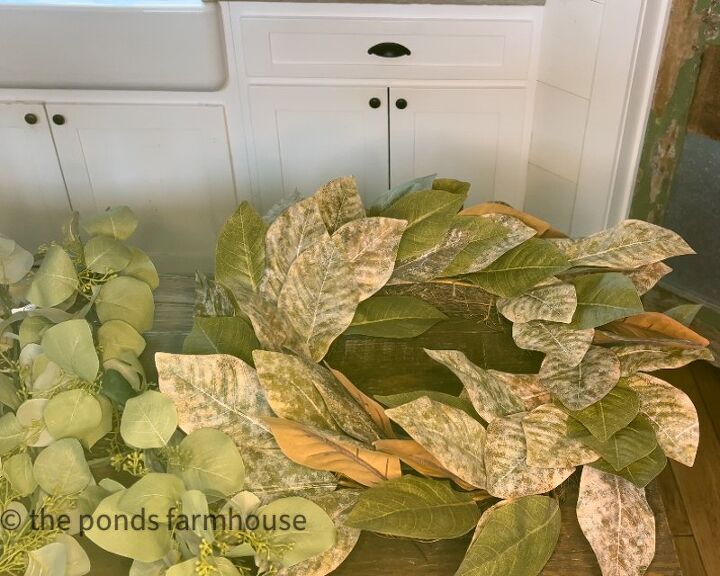
Spring Wreath DIY To begin this project you need a wreath. I have a magnolia wreath that I’ve used for several years. It’s still in great shape and I still like to use it especially during the holidays.
However, I’d like to have a wreath that has a more spring like feel.
You can use any existing wreath for this project. If you don’t have one, check with thrift stores and consignment shops because they usually have great deals on old wreaths.
Don’t let existing ornaments on an old wreath scare you! They are usually easy to remove and if the base of the wreath is good, you’ll save a lot of money. See more thrift store tips here.
To begin, I needed some additional greenery and thought I’d add some individual stems.
However, once I saw the garland was on sale and realized it would be easier to work with, I purchased a eucalyptus garland at Hobby Lobby. Here is a similar silver dollar eucalyptus garland that would work as well.
It has the benefit of lush greenery as well as tiny buds for additional fullness.

Update Magnolia Wreath
The process of adding the garland was so simple and much easier than adding individual stems.
Just weave the garland in and around the existing magnolia leaves by lifting the leaves and securing the garland around the existing stems.
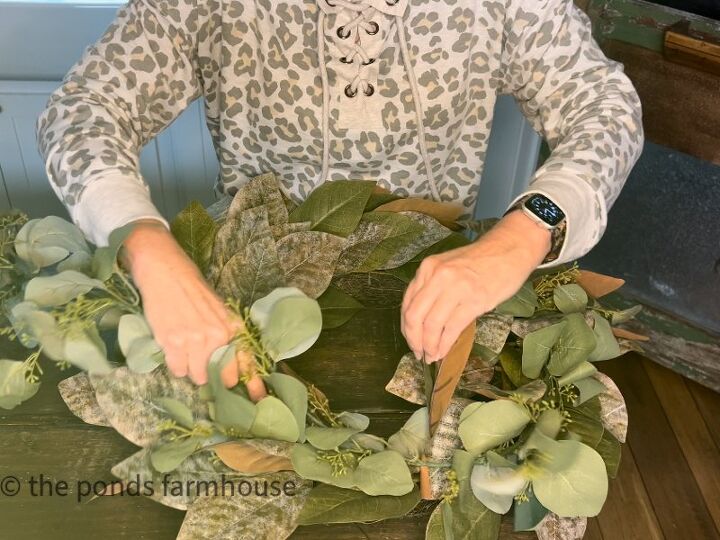
The garland was actually longer than the diameter of the wreath and I considered cutting the excess off. However, in the end, I just continued around the wreath until all the garland was attached.
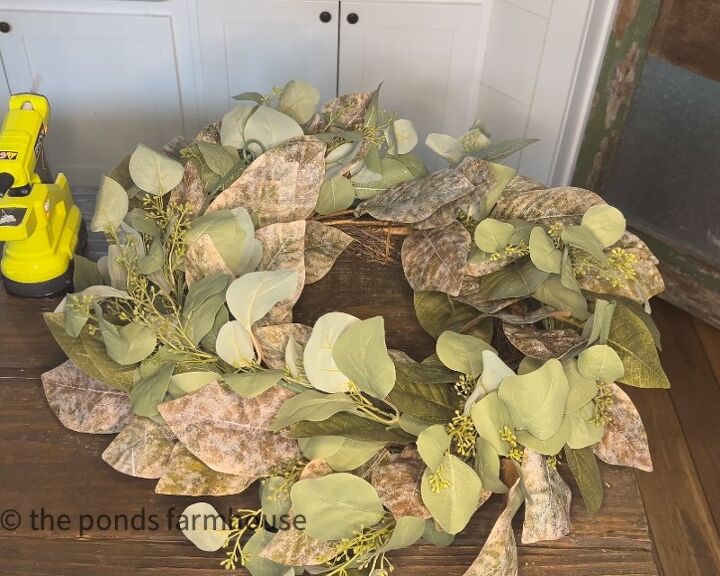
I love how full and fresh the wreath looks already.
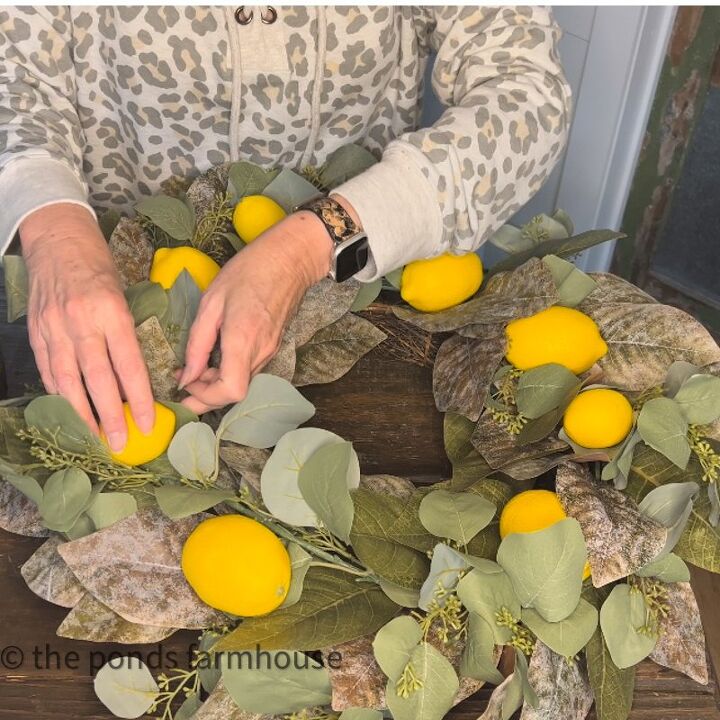
Note: If you plan to add weight to the garland by adding lemons or other heavy items, you will need to secure the garland more firmly to the wreath base. I recommend using twine or twist ties to tie the garland securely.
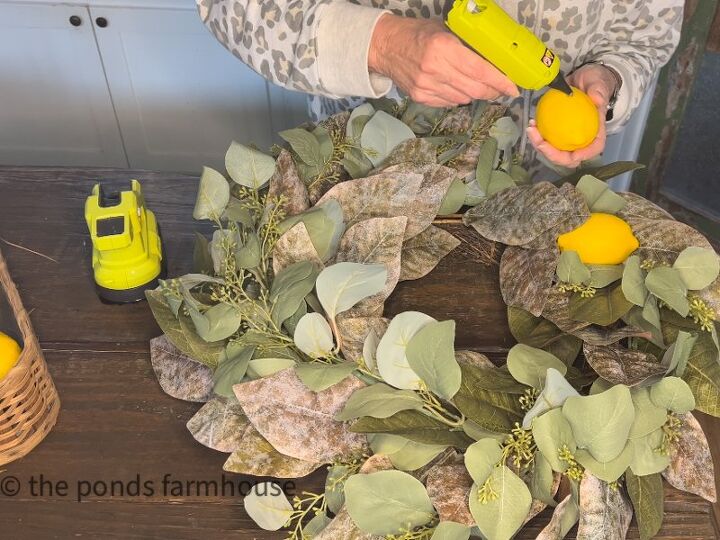
Next, I added several faux lemons to the wreath.
As I mentioned before, I didn’t want to damage the original wreath because I like using it as it is.
Therefore, I used a hot glue gun to attach the faux lemons to the garland but not to the magnolia leaves.
This was such an easy and inexpensive DIY Spring Wreath Idea.
Keep in mind that you can substitute the lemons for flowers or other fruit choices. Get creative with your repurposed wreath.
The additional items cost only $14.00 as they were on sale. Plus, I can remove the fruit and garland after the summer and still use the original wreath as it was intended.
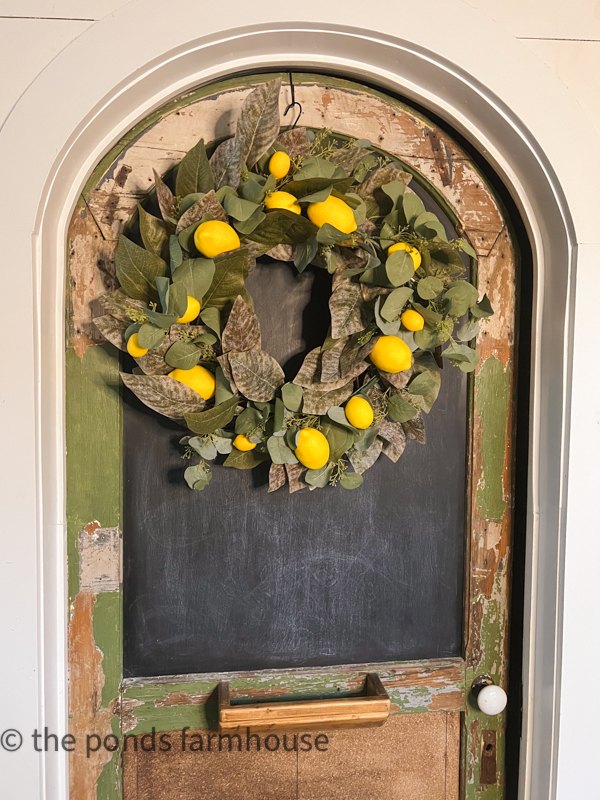
In addition, it only took about 10 minutes to update for a new Spring Wreath.
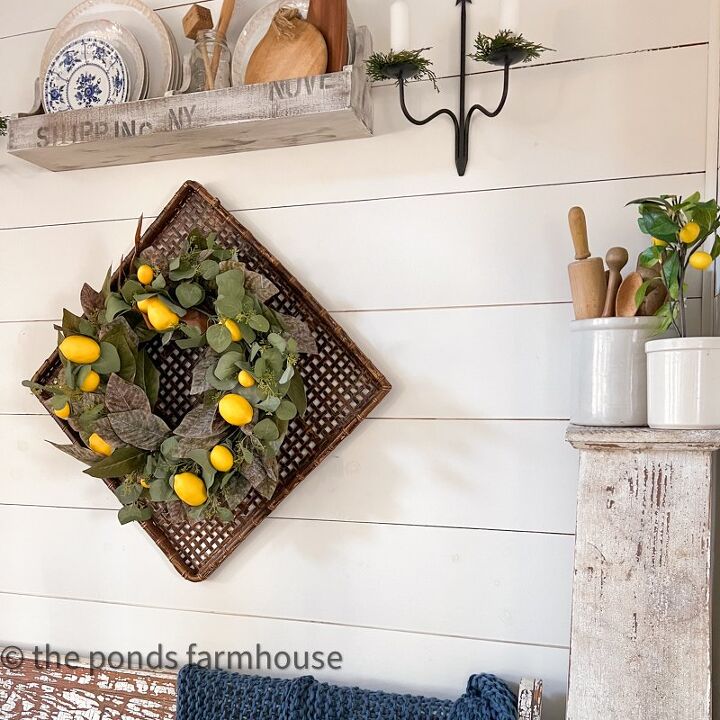
Here I’ve added the Spring DIY Wreath Update to a flat woven basket behind my dining table.
You can see how I use the new wreath to compliment this Italian table setting.
Thanks so much for joining me today. I look forward to sharing my next adventure with you.

Comments
Join the conversation
-
It's a very clever makeover, so fresh and colorful! Well done!


Frequently asked questions
Have a question about this project?