


DIY Fall Ribbon & Burlap Wreath
You guys, I got sucked into the “Make Your Own Ribbon Wreath” rabbit hole last week while I was decorating my front porch for fall. And let me tell you, that wreath rabbit hole is deep. There are literally thousands of incredible ribbon wreath creations on Pinterest, Etsy, You Tube, blogs….even Amazon. I’ve seen so many adorable ribbon wreaths for sale, but they can be a bit pricey, because they do require a good deal of ribbon, burlap and other supplies that can add up quickly.
So, what’s a girl to do when she covets something, but doesn’t want to fork out the dollars? DIY obviously. Plus, you then get the added benefit of being able to customize it the way you like.
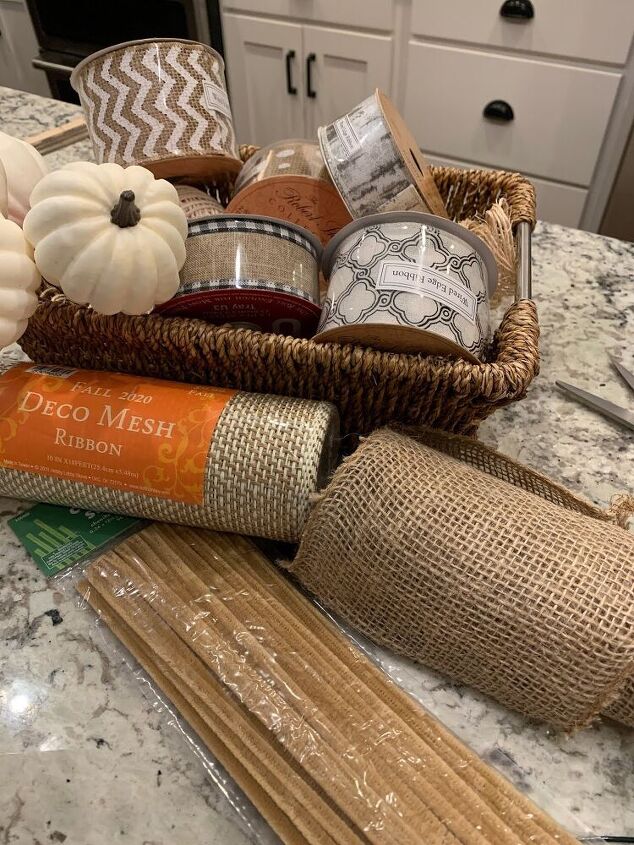
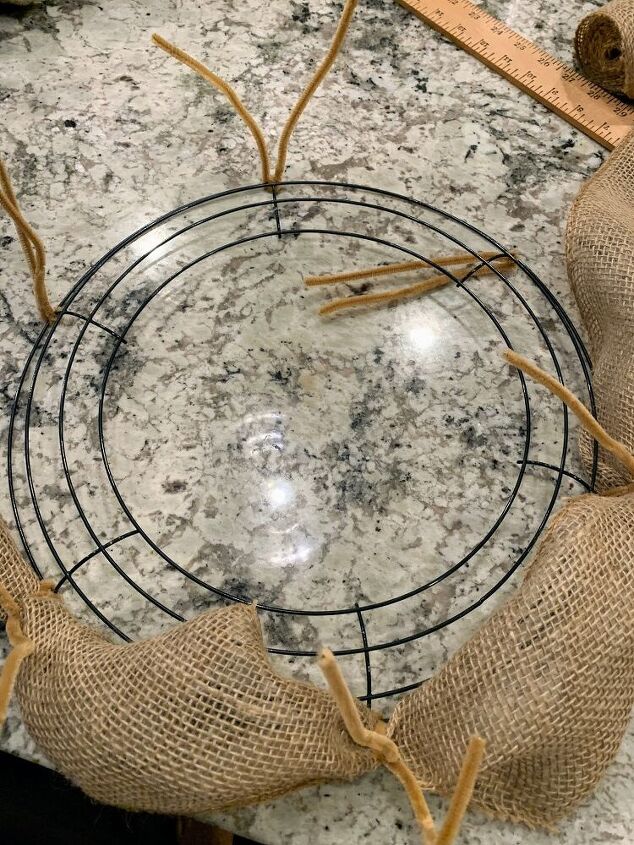
I bought my wreath frame at the Dollar Tree, and everything else at Hobby Lobby. All of the fall and Christmas crafting supplies were 40% off, and regular ribbon from the floral department was 50% off, so that helped make this more affordable.
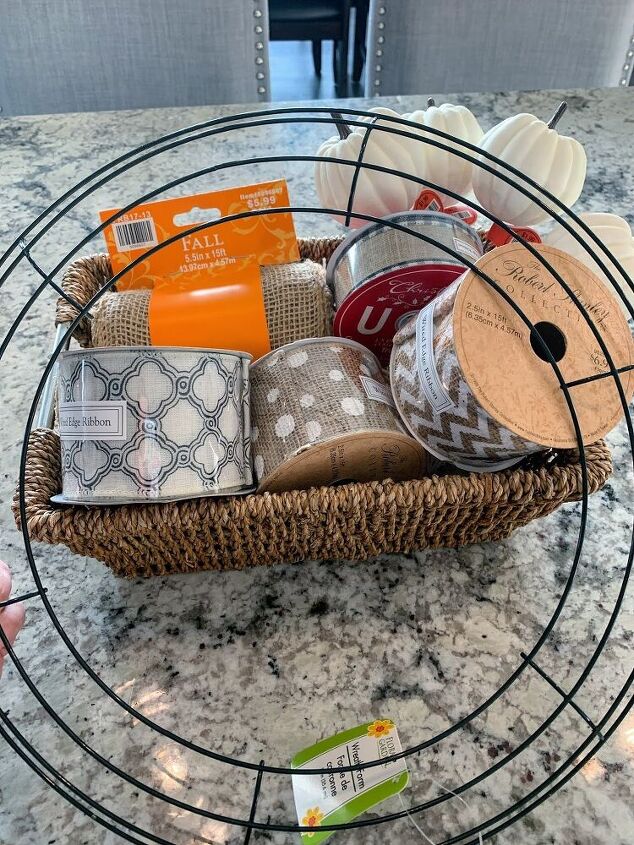
Choose coordinating colors of ribbon, in various patterns and widths. I like the wire kind best, because it's easier to shape and fill the wreath out.
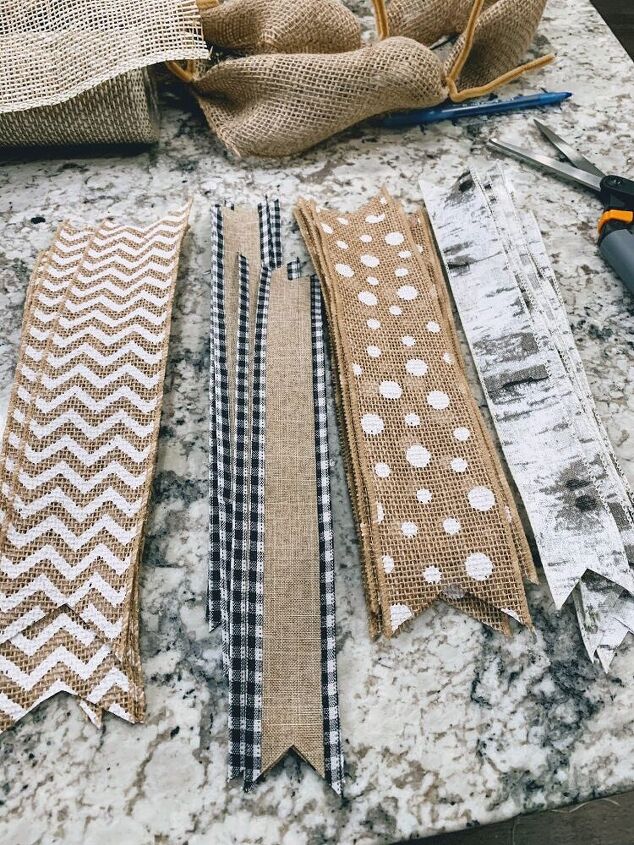
Cut the ribbons in 12-inch lengths. You will want 2 ribbons for each crossbar on the wire frame. My frame had 6 on the inside circle and 6 on the outside, so I needed 24 total pieces of ribbon, 6 of each pattern.
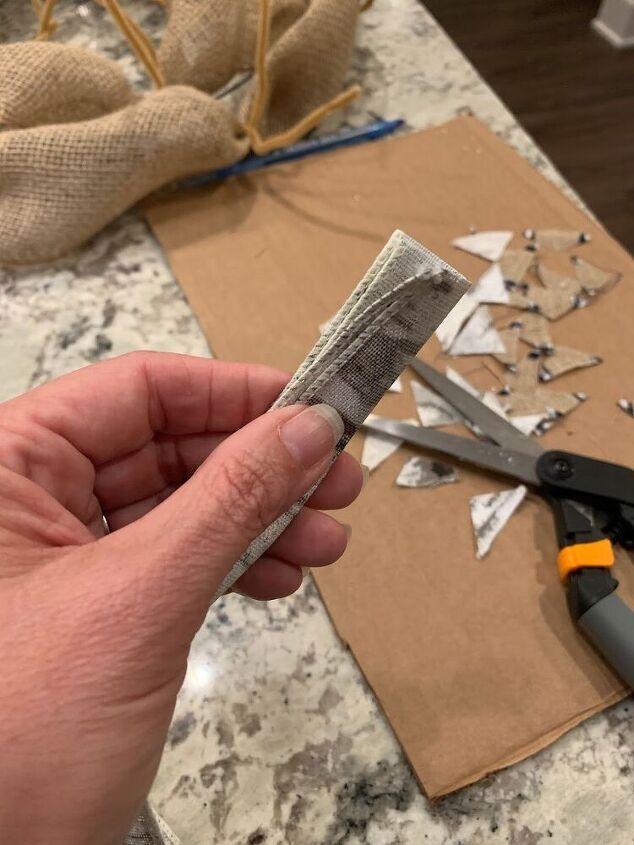
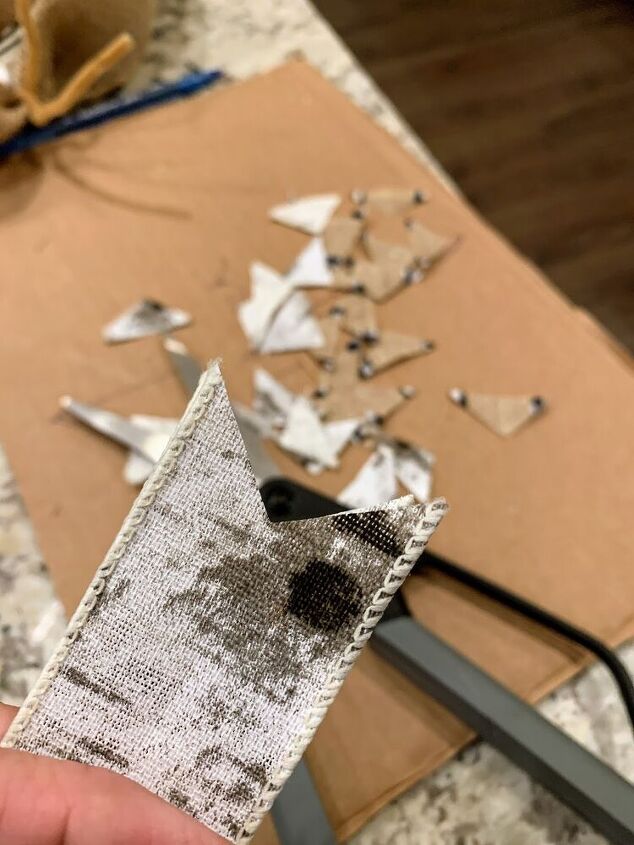
To make an easy dovetail on each ribbon end, fold the ribbon in half, and then cut on an angle from the loose corner edge, to the fold.
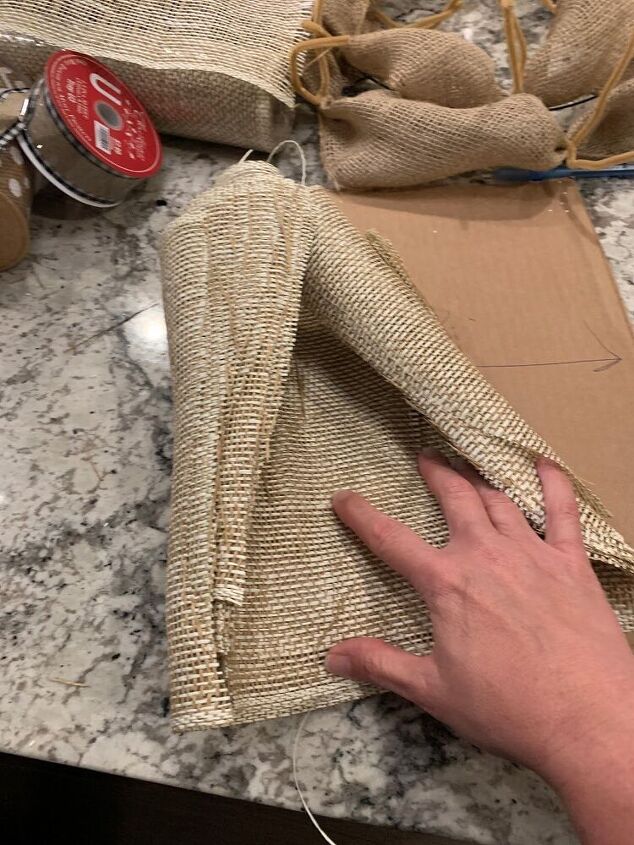
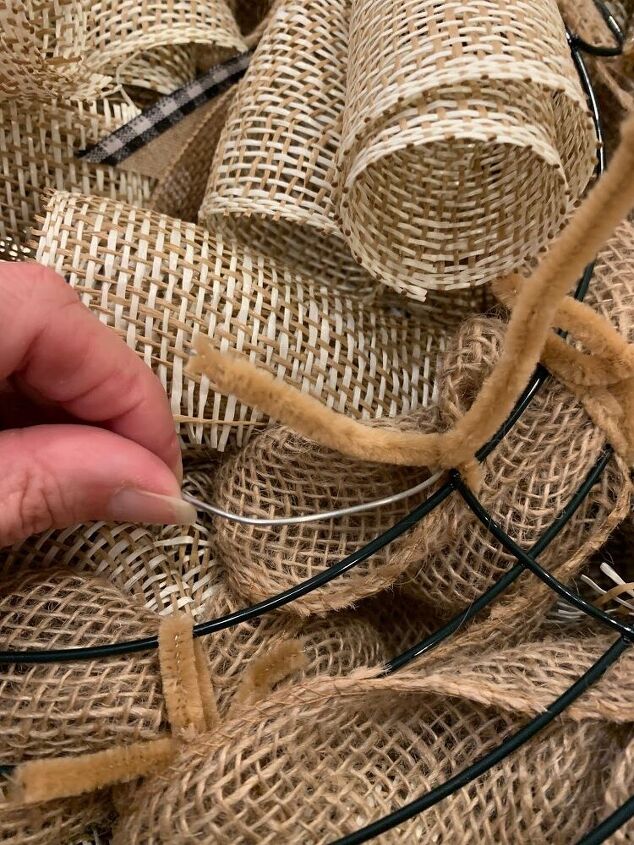
Go around the wreath twice (once on the inside circle, and once on the outside circle) with the roll of burlap, attaching it to the metal frame at each cross bar with a pipe cleaner. Make little "poofs" of burlap between each pipe cleaner.
Twist the pipe cleaner loosely, because you will be opening it up again to add mesh and ribbon in the next steps.
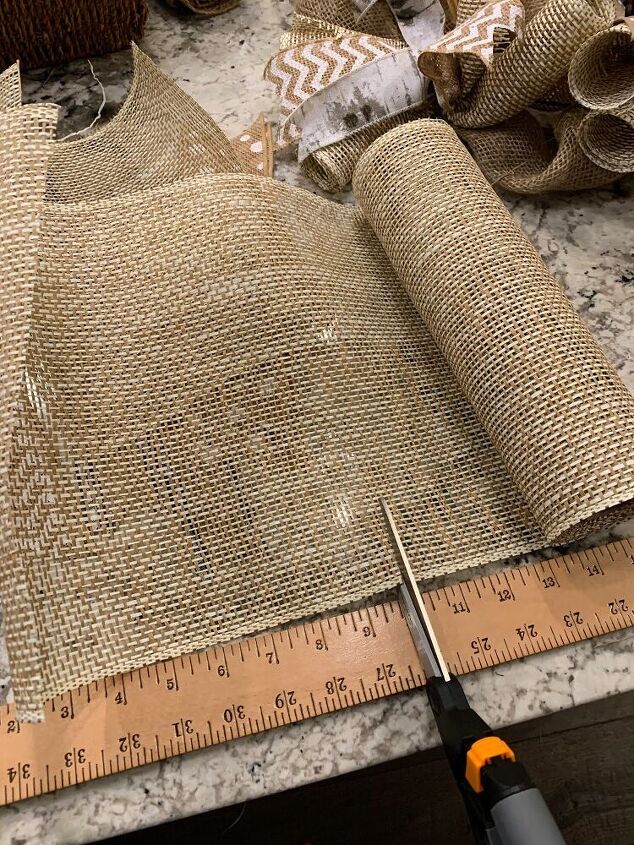
You want 10-inch strips of Deco Mesh. You will need two per cross bar on your frame, so for this wreath, 24 total.
Take 2 pieces of your 10-inch squares of Deco Mesh and roll each one loosely. They will want to roll naturally. In your hand, criss-cross the 2 rolled pieces over each other like an "X".
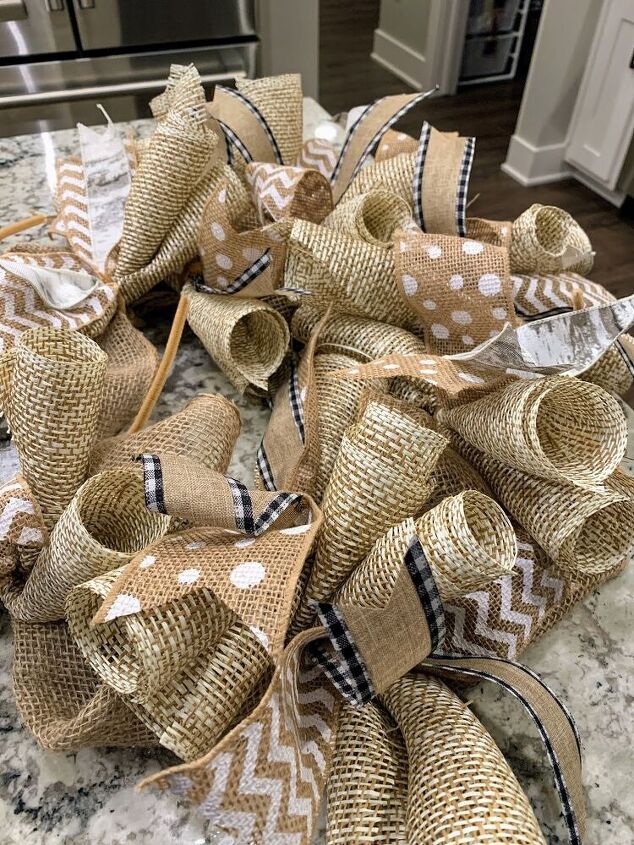
Choose 2 different ribbon patterns and lay them across the two rolled pieces of Deco Mesh, holding all 4 pieces together in your hand, pinching them in the center.
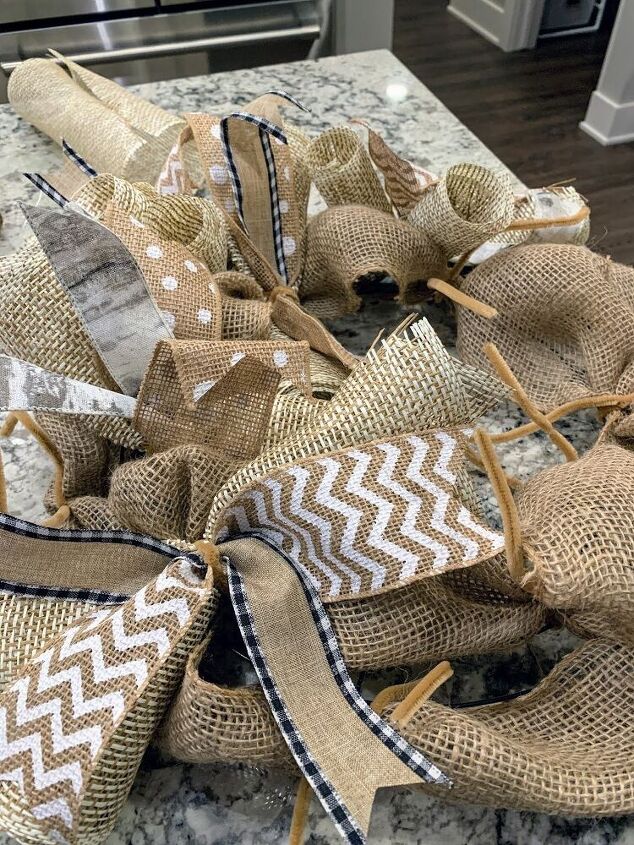
Carefully untwist each pipe cleaner that is holding down a section of burlap, and insert this stack of Deco Mesh rolls and ribbons into the pipe cleaner, before twisting tightly to hold it all together.
Each crossbar on your wreath frame should have one pipe cleaner that holds a burlap "poof" + 2 Deco Mesh rolls + 2 ribbons.
Repeat this process, alternating ribbon patterns, on all 12 crossbar sections of your wreath.
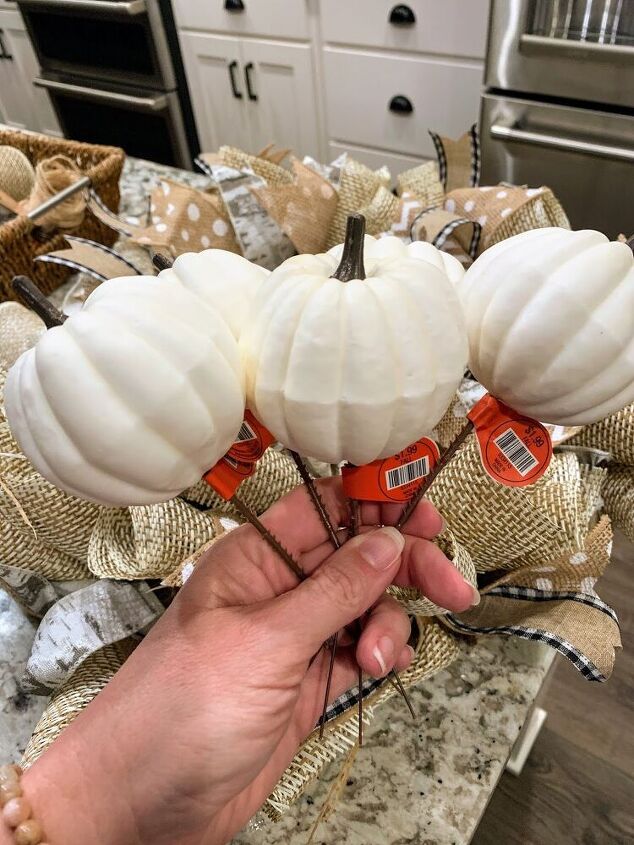
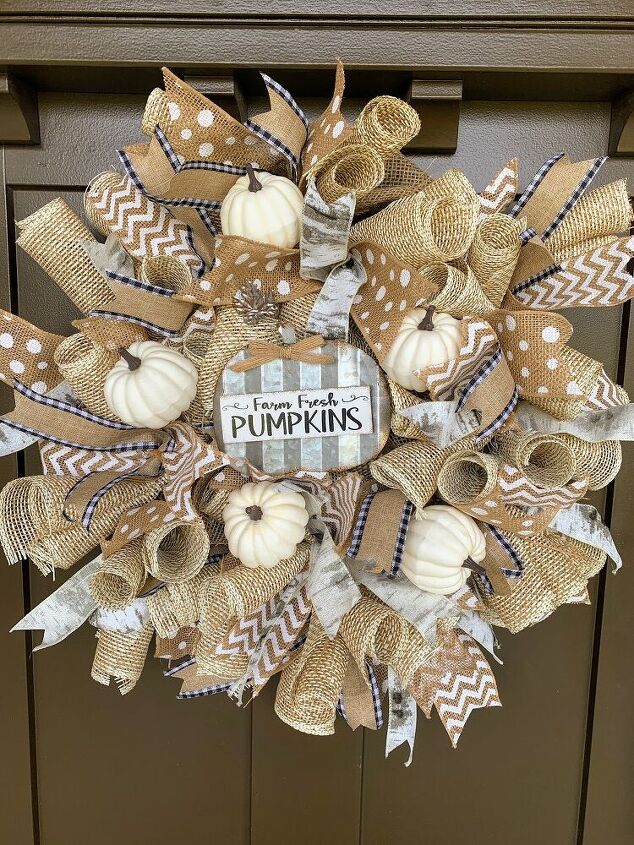
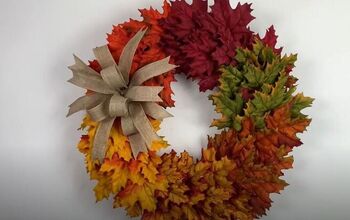
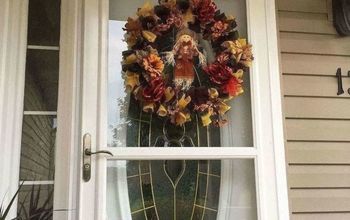
I chose 5 white pumpkin picks and a farmhouse pumpkin sign for the center for this fall wreath.

One thing I love about this wreath is that since everything is held on by pipe cleaners, and the wreath itself is neautral colors, you can take the embellishments off easily, and swap them out for different seasonal embellishments on the same basic burlap & ribbon wreath.
I pulled the wire hanger from the metal pumpkin through to the back, and attached it with another pipe cleaner.
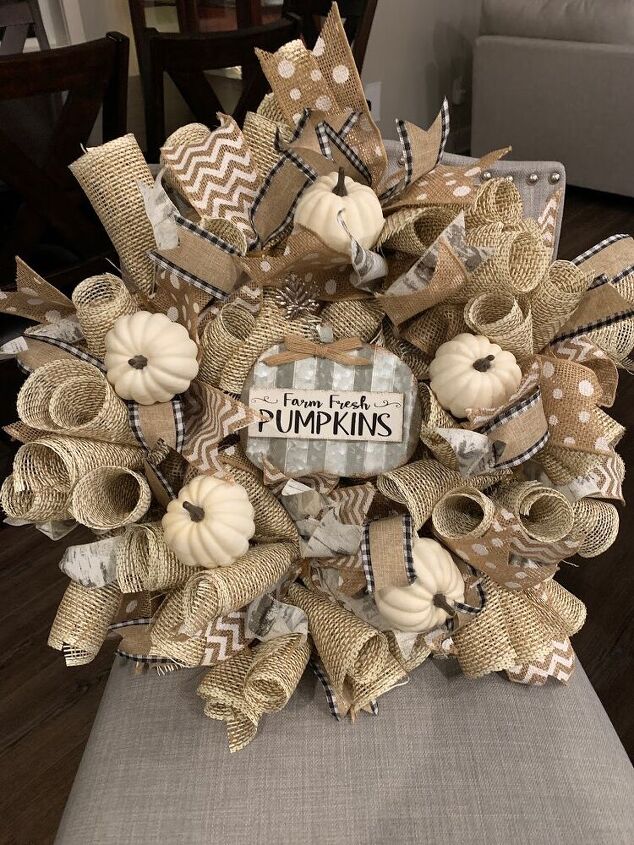
Finally, just work with your ribbons and mesh to fluff, separate and arrange pieces until any gaps are covered and it looks full and filled out, and all loose pipe cleaner ends are tucked through to the back.
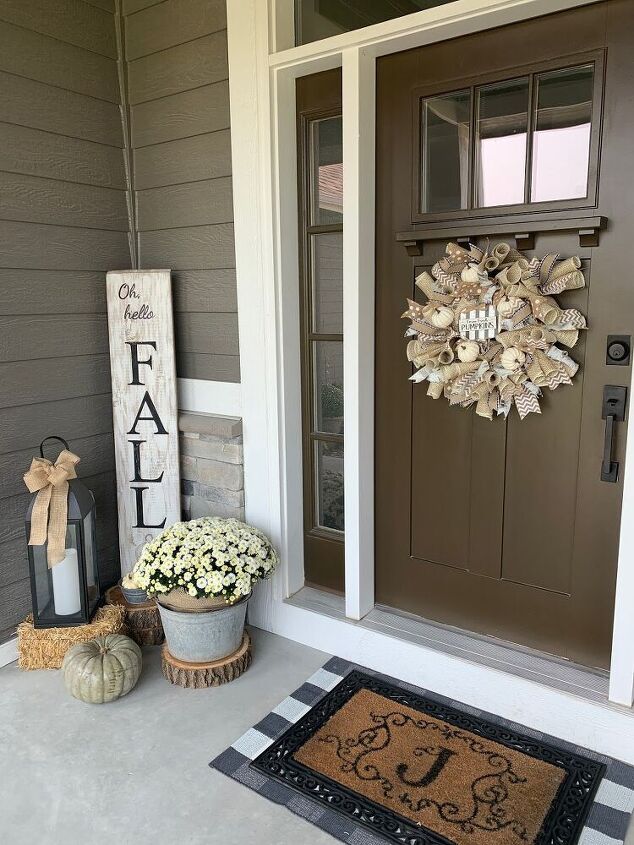
Look how cute it is on the front door! And you guys, you will save big money by doing it yourself, plus you get to choose your own colors and embellishments. 😍 That's a win!
Happy Fall Decorating,
-Niky @ The House on Silverado
PS. Visit my blog to see how to make your own Fall Front Porch Sign (as pictured), too.
Resources for this project:
See all materials


Comments
Join the conversation
-
Thank you, Karen. I do sometimes sell my wreaths. Contact me if you're interested. :-)
-
Beautiful!


Frequently asked questions
Have a question about this project?
How much deco mesh?
How many yards of each ribbon did you end up using?
I am about to try this and want it to be successful, so I am double checking to make sure I do it right! You run the poufs around the outer and inner rings and then add the two rolls and two ribbon pieces to the pipe cleaner holding the poufs. So you are not attaching anything to the two inner rings, is that right? I hope to have my wreath be as gorgeous as yours. Thanks for the post.