


How to Make an Adorable DIY Fall Gnome Wreath in a Few Simple Steps
Get ready to add a touch of fall magic to your home with this fun and easy DIY project! I'll show you how to make an adorable DIY fall gnome wreath, step by step. Whether you're a crafting pro or just starting out, this simple project is easy to recreate and sure to bring smiles to the faces of visitors to your home this season. Let's get crafting!
This post was transcribed by a member of the Hometalk editorial team from the original HometalkTV episode.
Steps
- 1. Wrap burlap around a grapevine cone
- 2. Secure the burlap with florist wire
- 3. Secure the brim of the hat
- 4. Hide the wire with hot glue
- 5. Trim the ends of the leaf stems
- 6. Glue the stems inside the hat
- 7. Add greenery to the hat
- 8. Add ribbon patches
- 9. Attach the gnome's nose
- 10. Make the hanger
Tools and materials
- Burlap
- Grapevine cone
- Florist wire
- Hot glue
- Faux fall leaves
- Stem cutters
- Greenery
- Ribbon patches
- Ornament
- Pipe cleaner
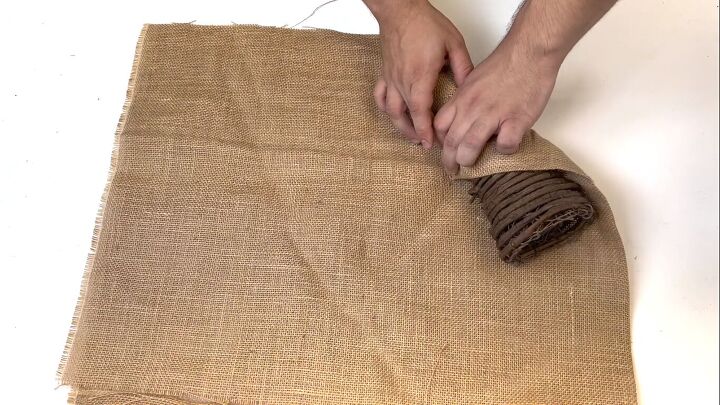
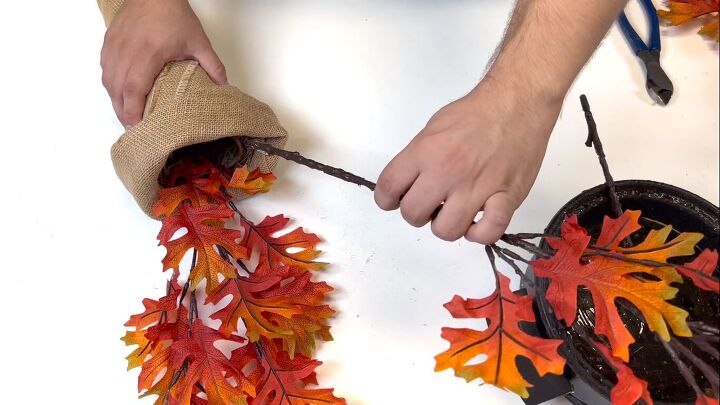
1. Wrap burlap around a grapevine cone.
Here we just have some leftover burlap fabric. You can pick this up for a few dollars per yard at any store that sells fabric. We also have a twelve-inch grapevine cone, also known as a Christmas tree. We're going to place the cone in the corner and wrap it really tightly in the burlap.
2. Secure the burlap with florist wire
Here we have the backside of the cone that we just wrapped. I'm going to take a little bit of 22-gauge florist wire (also known as paddle wire), though you could use beige pipe cleaners instead. Feed that through and temporarily secure it. We are going to come back in with hot glue, but this will just keep it in place for the time being.

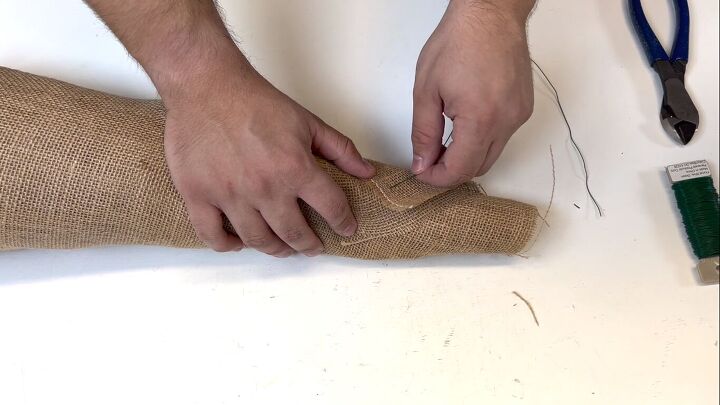
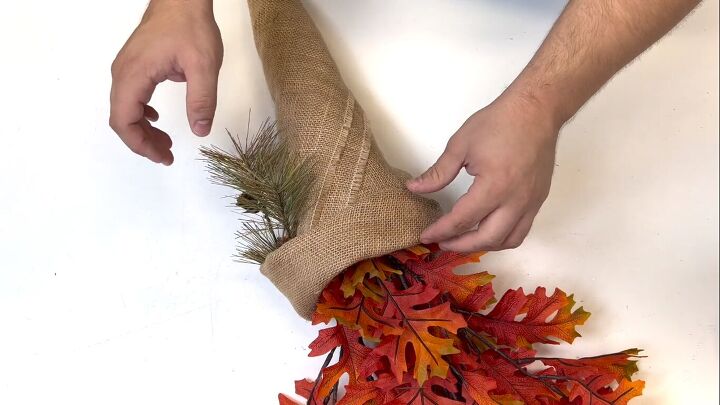
3. Secure the brim of the hat
We can fold the larger end of the hat over so it looks like a brim. Keep in mind that we're creating a scarecrow-like gnome, so it doesn't have to be perfect. When I think of scarecrows, I think of them just being scrap fabric and leftovers, so I'm not too concerned.
Like we did up top, we're going to secure it in place with a piece of wire. However, towards the bottom of the cone, we actually are able to feed our hands through it, so it makes life a little bit easier. That way you can actually secure it with just a piece of wire and not have to come back in with hot glue.
This is actually being fed through the grapevine or the cone. Make sure you have a long enough piece of wire so you can twist it and poke it right back into whatever you're designing.
Whether it be a wreath or a swag, you always want to cover your mechanics and the sharp edge. If we kept that wire towards the surface, we pose the risk of scratching ourselves or the door as well.
Now that piece is really secure, so we don't have to come back in with hot glue there.
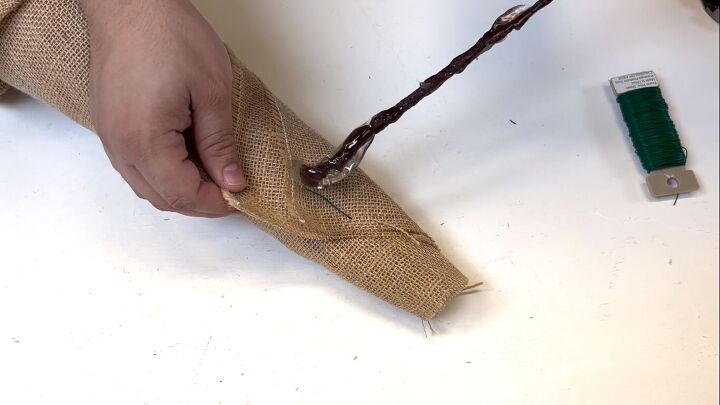
4. Hide the wire with hot glue
However, we will use hot glue for the upper part of the hat. I'm using my glue skillet. I'll place a bit of hot glue on the flaps to cover the wires, then we'll just hold that for a minute or two.
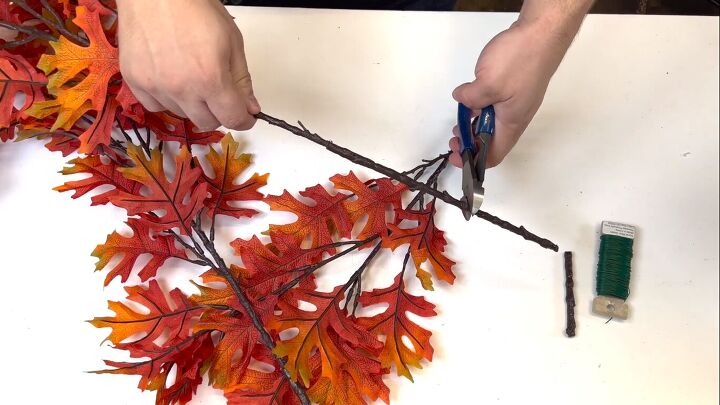
5. Trim the ends of the leaf stems
To create the beard of your gnome, we're going to use some faux oak leaves. Feel free to use maple leaves as well. We're going to snip about two or three inches off of each stem. That way they're short enough to poke into the cone.
6. Glue the stems inside the hat
Apply some hot glue to keep the stems stable against the grapevine. We're going to just dip our stems in our glue skillet. Work it in with a generous amount of hot glue and make sure you feel that contact with the cone. That's what's going to keep these in place; you want to make sure that you can feel it. Pull on the grapevine so it stabilizes.
I'm using three pieces, and going in a bit shorter with the last one.
Tip: once you're sick of the gnome, you can always take these and use them in another arrangement or wreath.
7. Add greenery to the hat
Before we add the signature touch, which is going to be the nose, I do have a little bit of leftover greenery. So, we're going to use this to enhance the top of our hat. I'll just dip the ends in my glue skillet, lift up the fabric, and tuck the pieces in. I think that added a perfect little touch above the hat.
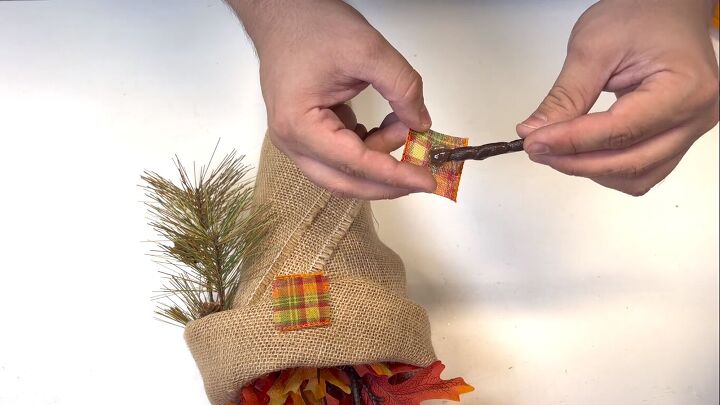
8. Add ribbon patches
Here I have some ribbon, so I'm just going to cut it into a little piece and create a little patch. I love scarecrows with patches. Take a little bit of hot glue using a scrap stem, and we'll just put a little patch on him.
I like when patches are layered, so we are going to come back in with another little patch. The more torn and worn out you can make this, I think the better the effect.
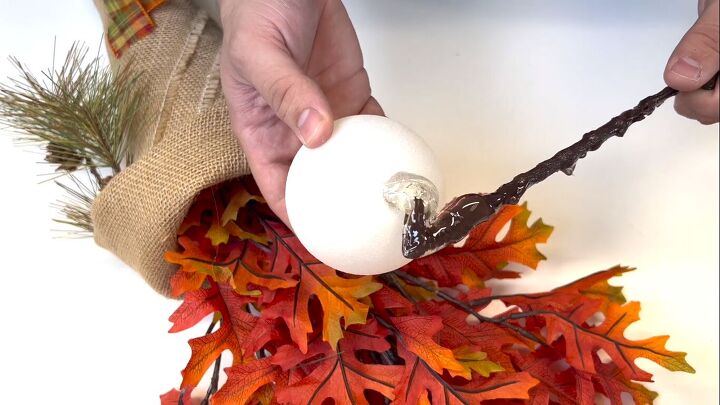
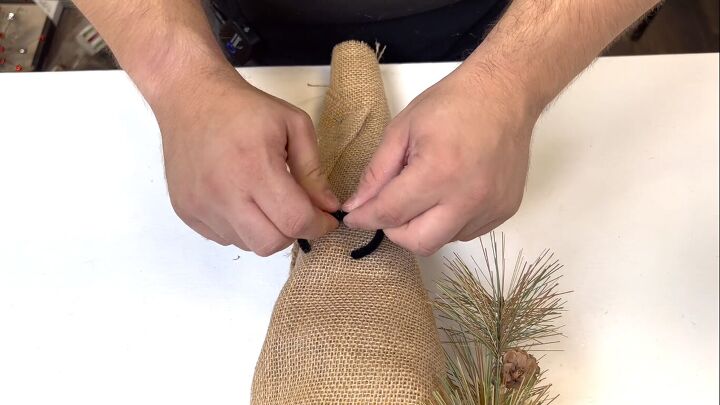
9. Attach the gnome's nose
Now it's time to come back in with the nose. For the nose, we're going to use an iridescent white ornament. You could also take a styrofoam ball and paint it, or even a wooden bead, depending on the size of your project.
I think gnomes are really cute when the nose is just sticking out from underneath. So, I'll glue his nose slightly underneath the hat.
10. Make the hanger
To create a hanger, flip the decoration over. We're going to take a pipe cleaner, and since our fabric is secured, we're just going to feed this through. I actually just went through the grapevine there, which is going to make it even more sturdy.
Snip off the excess. You don't really need too much, you just need half a pipe cleaner.
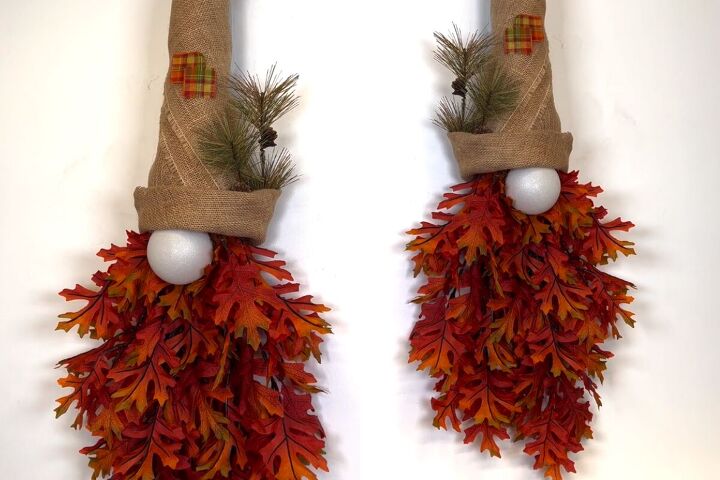
DIY fall gnome wreath
Here is how the DIY fall gnome wreath turned out. I think this fall gnome is so adorable.
This was very inexpensive to create. We used three oak leaf sprays, one ornament, a little bit of leftover burlap fabric, a twelve-inch grapevine cone, a little leftover ribbon, and a tiny little piece of leftover greenery that would have wound up in the trash anyway.
Think outside the box when you create yours. This one is designed for fall, but instead of using oak leaves, you could always use Christmas pine for the holidays. For spring, you could be using tulips. The possibilities are truly endless.
What do you think of this DIY fall gnome wreath? Let us know in the comments below.
DIY fall gnomes
For more creative autumnal decor projects, discover Hometalk's best DIY fall gnome ideas, fall leaf decor, burlap craft ideas, and other fall crafts here.

Comments
Join the conversation
-
Personally, gnomes creep me out since ya can't see their faces!! But, still, this IS a super cute idea!!😉
-
I love Gnomes. I make them out of Christmas trees also and give them as gifts. This is a nice alternative to a wreath. Thank you for sharing.


Frequently asked questions
Have a question about this project?