


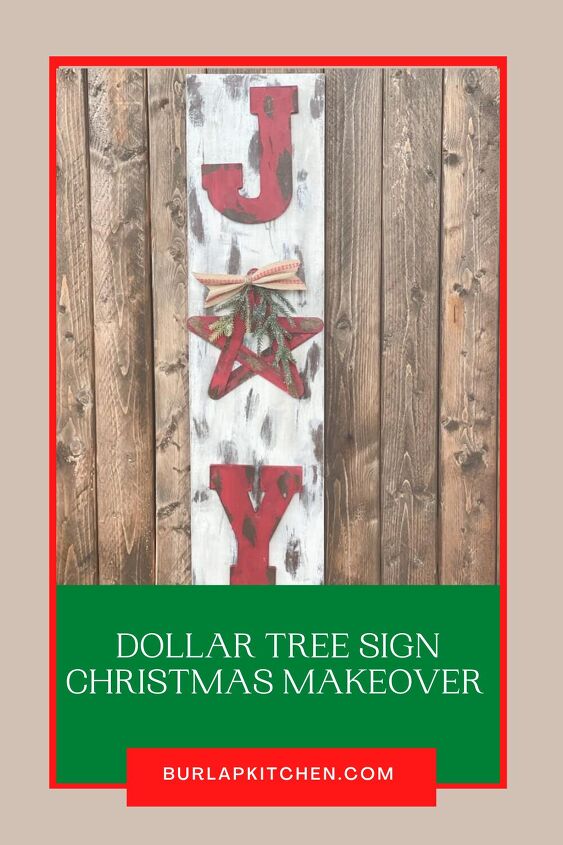
DIY Farmhouse Christmas Sign
Create this budget friendly, farmhouse style Christmas sign using a sign from Dollar Tree.
Today, I am so happy to share with you how to make DIY farmhouse Christmas sign using a Dollar Tree sign. This beautiful farmhouse inspired Christmas décor sign is such a simple Christmas DIY to make, and very budget-friendly. No one will believe you transformed a sign from the Dollar Tree into this cute joy sign for the Christmas season. This Dollar Tree makeover sign could also make for some creative Christmas presents for your friends and family!
- Dollar Tree sign
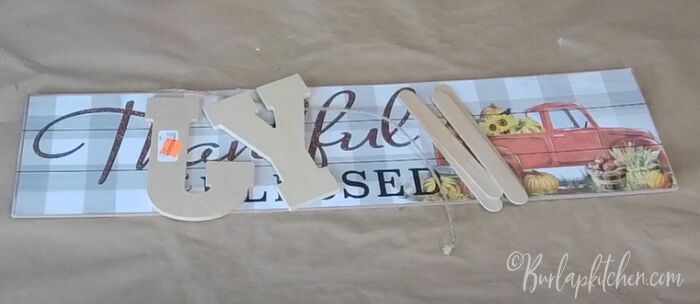
- Letters J & Y
- Popsicle sticks
- Stain – min wax, dark walnut
- White chalk paint
- red chalk paint
- vasaline
- Putty knife
- pine pick
- ribbon
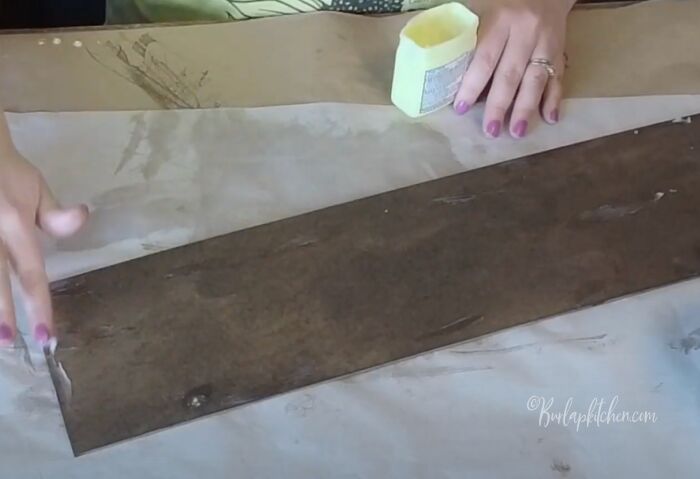
Step 1. I took a fall/Thanksgiving Dollar Tree sign I had and removed the staples, and then used some patching plaster and patched up over the holes where the staples were. For this sign makeover, I used the back of the Dollar Tree sign.
Step 2. Be sure to were gloves, and take some stain and rub over the sign. I use Minwax stain in the color “Dark Walnut.” Allow to dry.
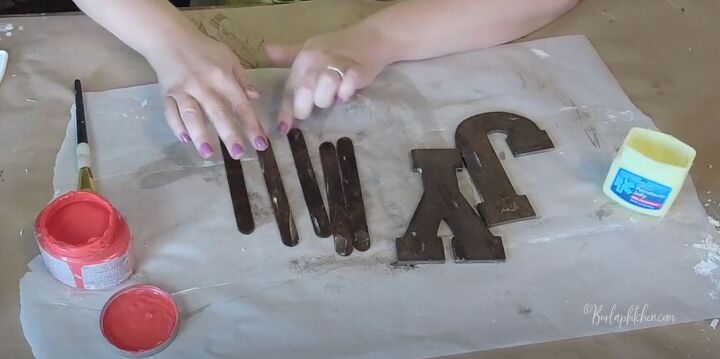
Step 3. Take 5 popsicle sticks and stain all of those as well. Allow to dry, and set aside for now.
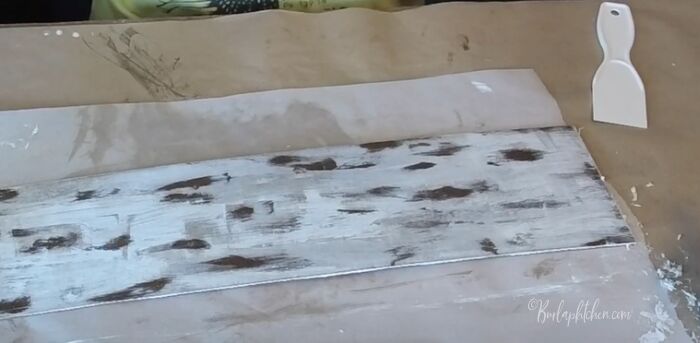
Step 4. Take some petroleum jelly and rub it in random places all over your stained board. Next, paint the board using white chalk paint. Dry slightly with a heat gun. Then use a scraper and gently scrape off some of the white chalk paint. This will allow some of the stain to show through the board, creating a farmhouse style look. Allow to dry.
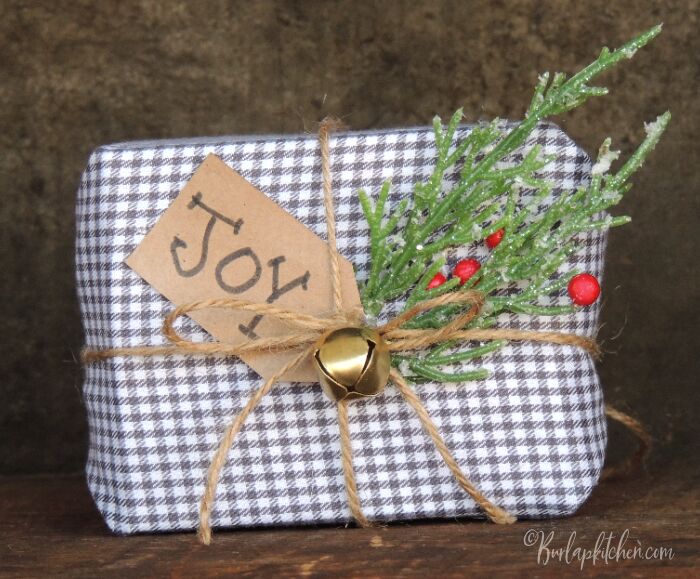
Step 5. I used letters I found on clearance at Hobby Lobby to spell out “JOY.” I did not have the letter “O,” so I am going to use the popsicle sticks for that. I rubbed the Minwax stain in the color “Dark Walnut” over the letters, and then wiped it off. Allow all of the letters to dry.
Step 6. Next, rub petroleum jelly over all of the letters, and the popsicle sticks. Then, paint red chalk paint over top of the letters and the popsicle sticks. You may need to add 2 more coats of the red chalk paint to the letters and popsicle sticks. Dry everything slightly, then gently use a scraper to go over the letters and popsicle sticks so that some of the stain shows through the red chalk paint. Do this process to your liking, if you feel like you want to see more of the red, then add more red chalk paint, etc. Allow everything to dry.
Step 7. I gave my board a second coat of petroleum jelly and white chalk paint and then used the scraper just to make the white paint a bit more prominent, but this is optional. This is simply your preference. Allow to dry.
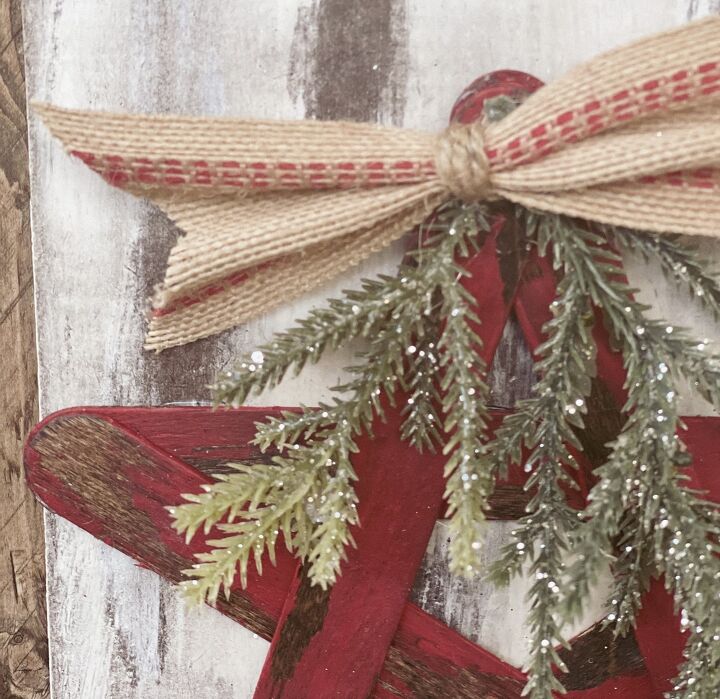
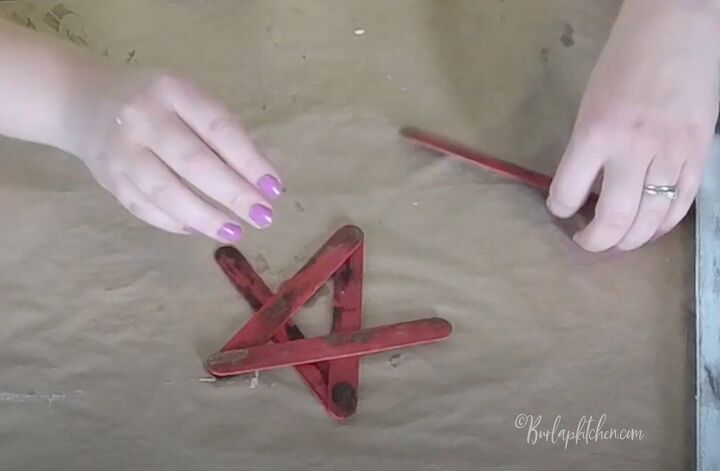
Step 8. For the letter “O,” take your popsicle sticks and make a star. Hot glue the popsicle sticks to one another once you have the shape of the star. Allow to dry.
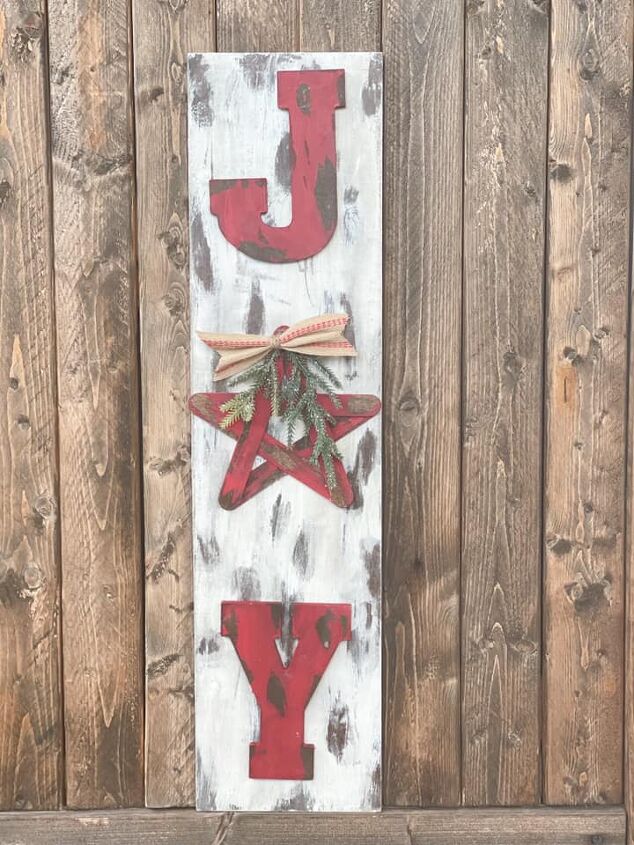
Step 9. Next, I preferred to make my “JOY” sign vertical, but you could make yours horizontal or vertical, place your letters down on the sign/board so that they are all even and have equal spacing in between them. Once you have the letters where you want them, hot glue them down onto your sign/board. Allow to dry.
Step 11. Using a small piece of ribbon of your liking, cut it, and make a small bow. I used twine to wrap around the bow. Then, dove tail cut each end of your ribbon bow, and hot glue your small bow over top of the garland pieces you placed over your star/letter “O.” Enjoy!

Tags: Christmas, Christmas decor, Christmas-present, Christmas-season, Christmas-sign, Creative, DIY Gifts, Dollar Tree, Dollar-Tree-makeover, farmhouse-inspired, farmhouse-style, Gift-ideas, Joy

Comments
Join the conversation
-
Sweet! Lovely easy project ❤️
-
Terrific ideas! See another trip to Dollar Tree in my future. FYI. I go so much to my local DT that I tell them I should be on the payroll! Not kidding! 🤪


Frequently asked questions
Have a question about this project?