


How to Make an Easy Christmas Bow

Grab your favorite wired ribbon and learn how to make an easy Christmas bow in minutes with our step by step directions.
For more simple and budget-friendly DIY project ideas, be sure to follow us on HomeTalk and visit our blog!
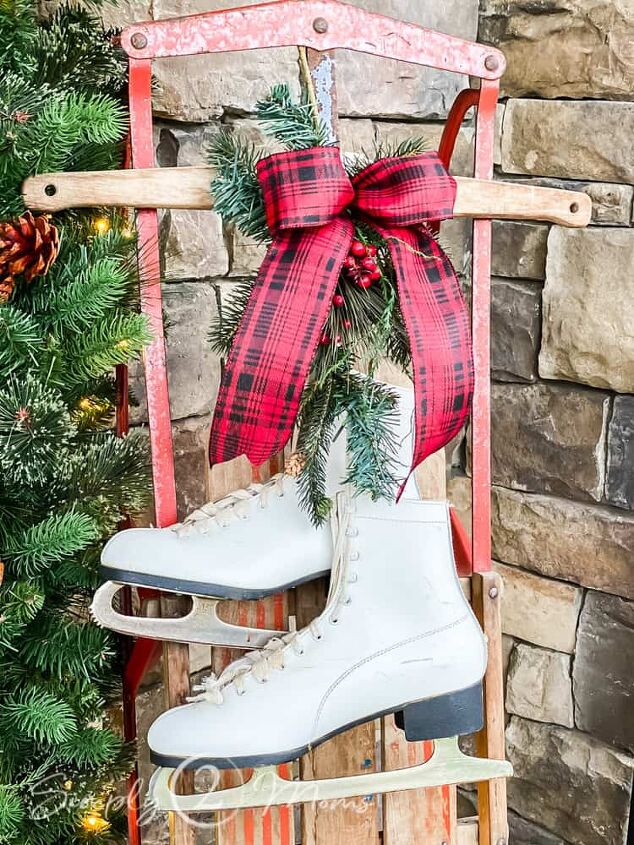
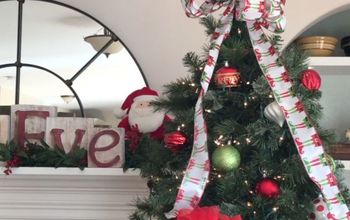
Do you love the look of ribbons & bows on your Christmas home décor?
Me too!
Especially on my greenery like wreaths and garlands.
Both Anne & I love to decorate our homes with greenery during the holidays.
I like to change up the bows on some of my Christmas decorations every couple of years but buying new pre-made bows can get super expensive.
So…what’s a girl to do?
Well, just grab a roll of your favorite wired ribbon and follow these simple steps to make an easy Christmas bow.
What Supplies Do I Need
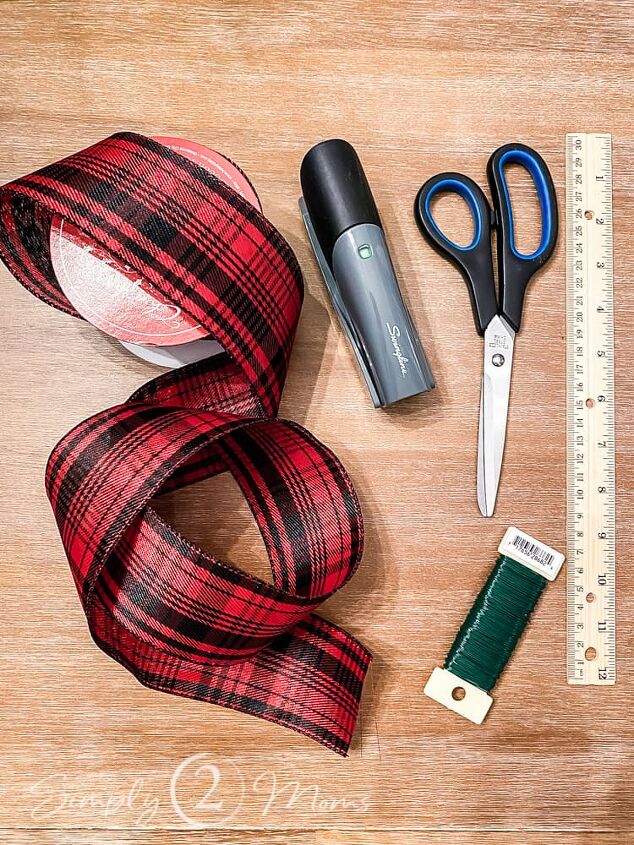
There are just a few craft supplies you will need to make these super easy Christmas bows.
And most of these you probably have at home already.
- 2.5″ wired ribbon
- floral wire
- ruler
- scissors
- stapler
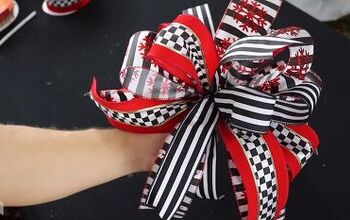
Let’s Make an Easy Christmas Bow
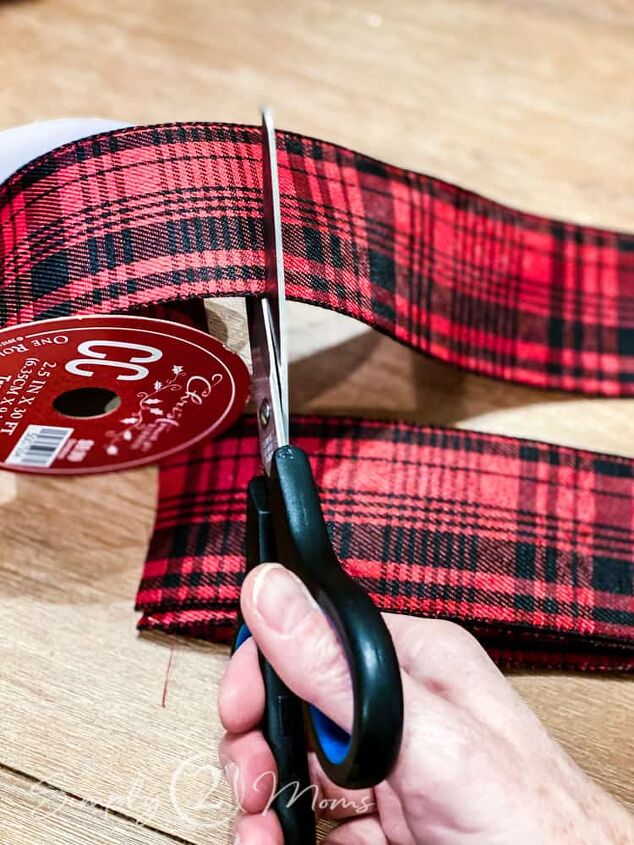
Using your ruler measure your choice of 2.5″ wide wired ribbon and cut into a 16″ length.
This will be the loop of your bow.
Then do the same in a 24″ length for the tails of your bow.
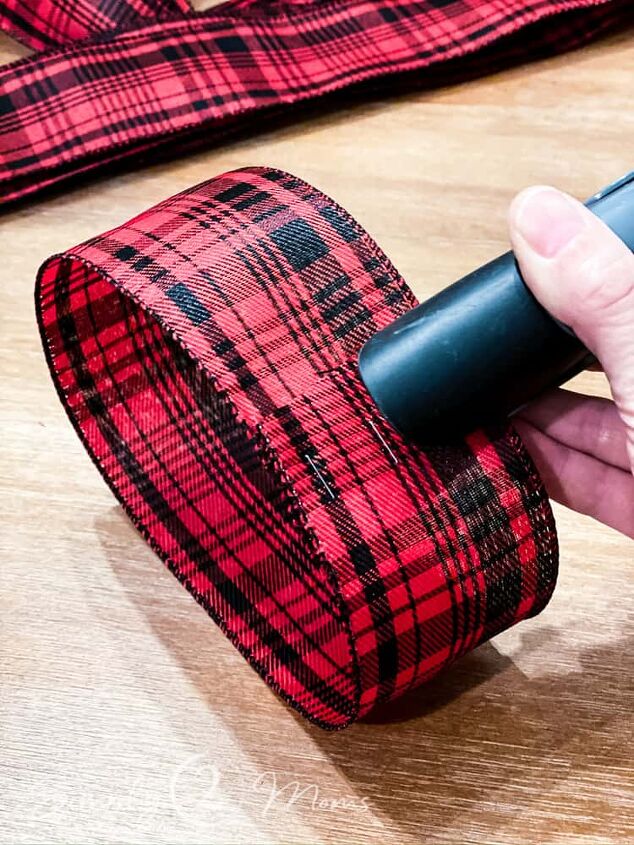
Next you will want to create the loop of your bow.
To do this just staple the two ends of your 16″ piece of ribbon together.
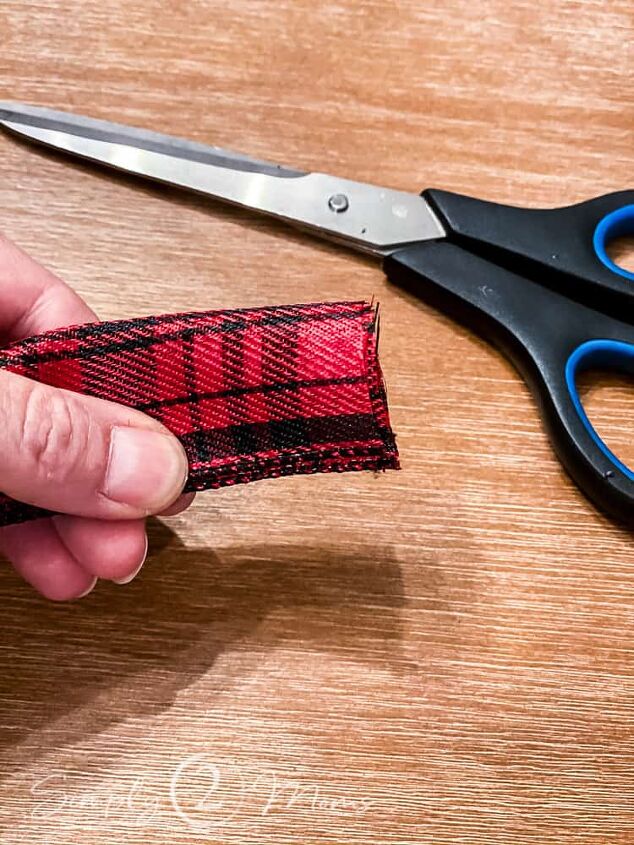
Then fold the end of the 24″ ribbon and cut on an angle to create a notched out finished end to your ribbon tails.
Do this on both ends of your 24″ ribbon.
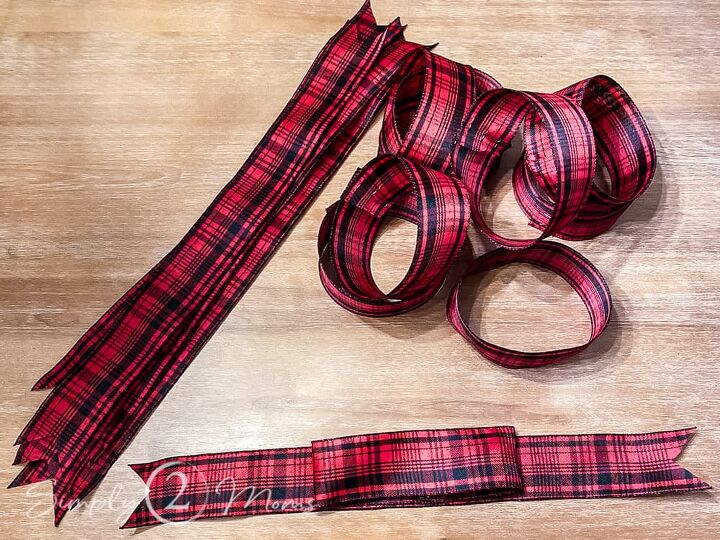
You could also just cut the end of your ribbon on an angle without folding to create a different edge.
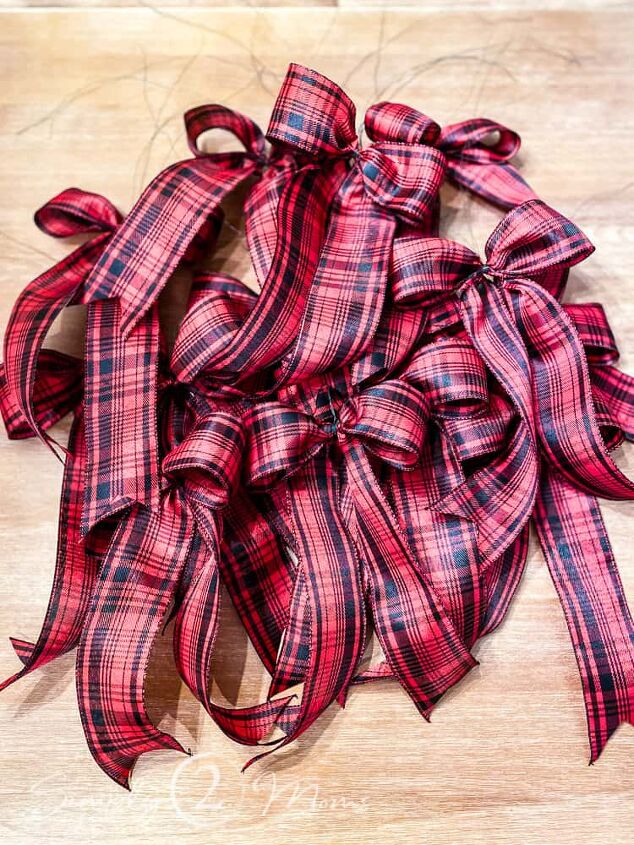
I was making several bows so I completed the above steps to prepare for putting together a bunch of these easy Christmas bows.
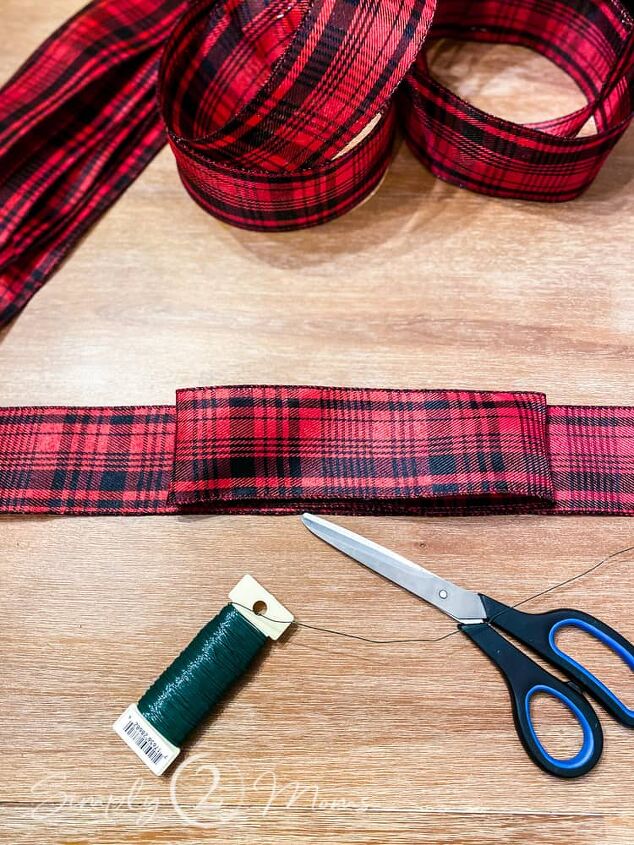
Once I had all my long ribbons cut to make finished ends and my short ribbons stapled together I got my floral wire and scissors ready.
Next take your stapled short 16″ loop and place on the middle of your long 24″ ribbon.
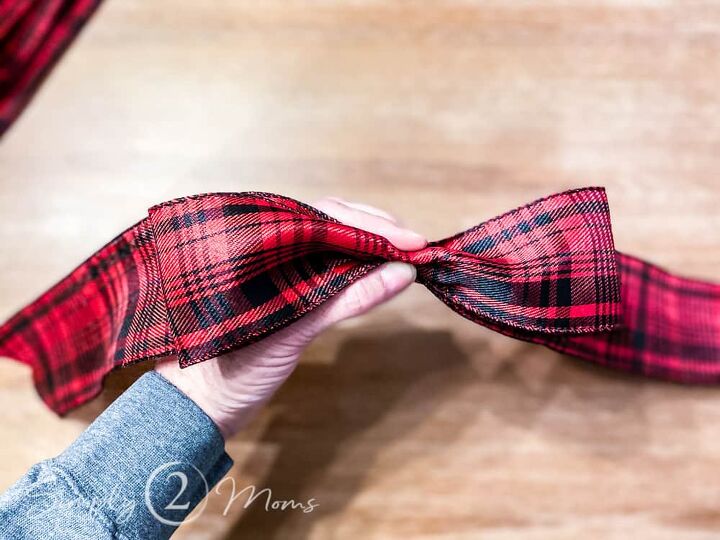
Then pinch the middle of both the loop and straight ribbon pieces together in between your fingers.
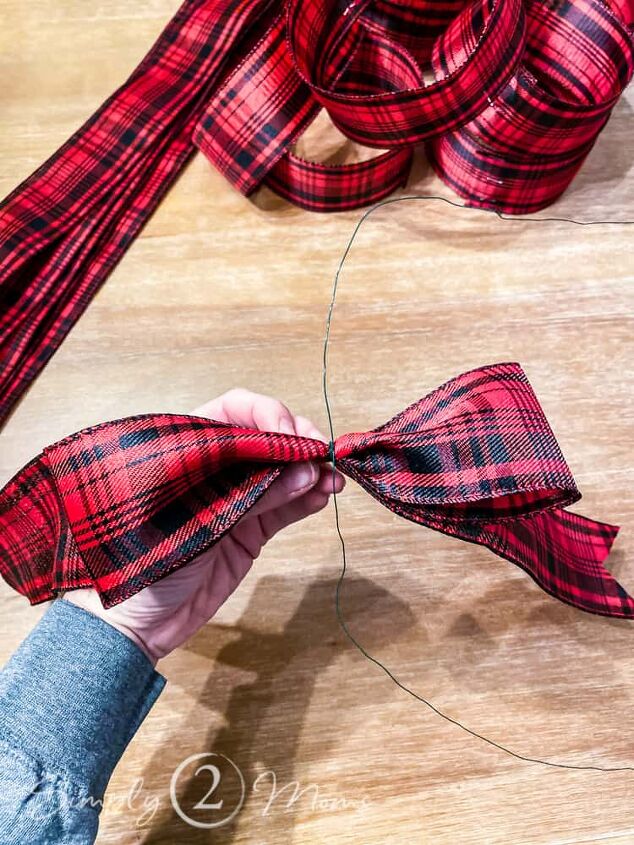
Cut a piece of your floral wire and wrap around the middle of the ribbon several times to create a bow.
I like to cut the wire extra long so that I have plenty to attach to whatever Christmas decoration I’m using the bow on.
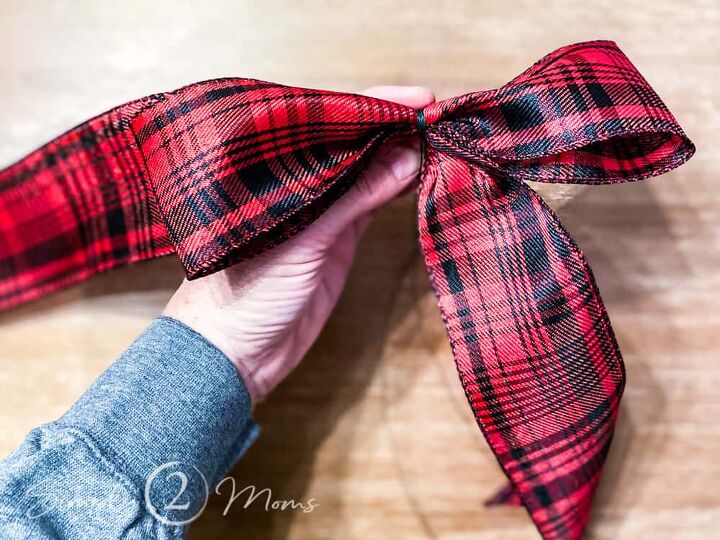
Once it’s all put together just twist the long ends of your ribbon down and fluff your super easy-to-make Christmas bow.
Using wired ribbon allows you to get the exact look you want with your bow.
You can keep the tails straight or curl them a bit if you’d like.
Simple and Budget-Friendly

Now I’m all ready to update my holiday decor with brand new Christmas bows.
Yay!!
And all it cost me was $10 for 2 spools of wired ribbon to make 15 bows.
I love an easy DIY project!
Don’t you?
And now my outdoor Christmas decorations have a fresh new look.
Where will you use your new Christmas bows?
DIY Christmas Decorations
Resources for this project:
See all materials


Comments
Join the conversation
-
I’ve made similar in past. This way looks easy too. As I get older I appreciate the simplicity of this style that packs a visual punch. Even if you have an oops 100% better than those bags of bows you stick on.
-
Finally, a bow I can make that looks good! I seem to have a problem when it comes to making good looking bows. Thank you for sharing this.


Frequently asked questions
Have a question about this project?