


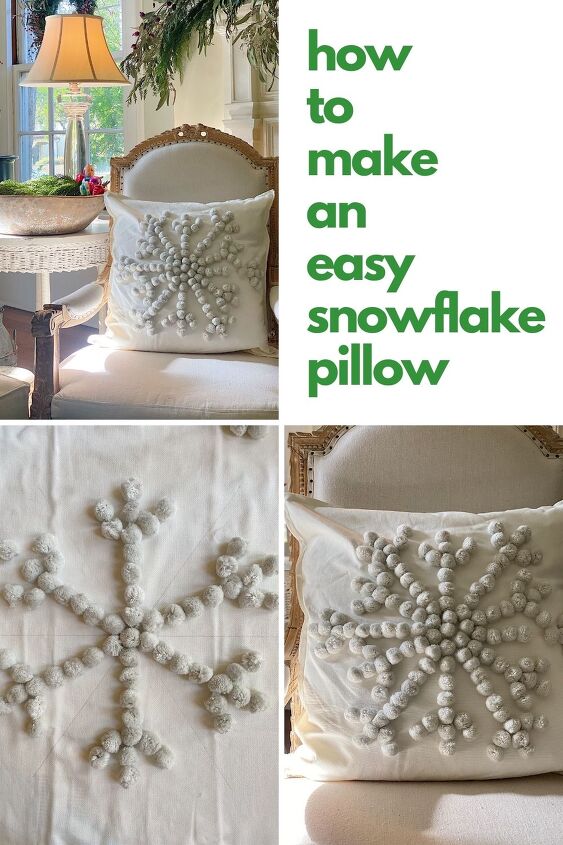
DIY Christmas Pillow
I loved making this DIY Christmas pillow. With a glue gun in hand and lots of pom poms, I made the entire pillow in about ninety minutes!
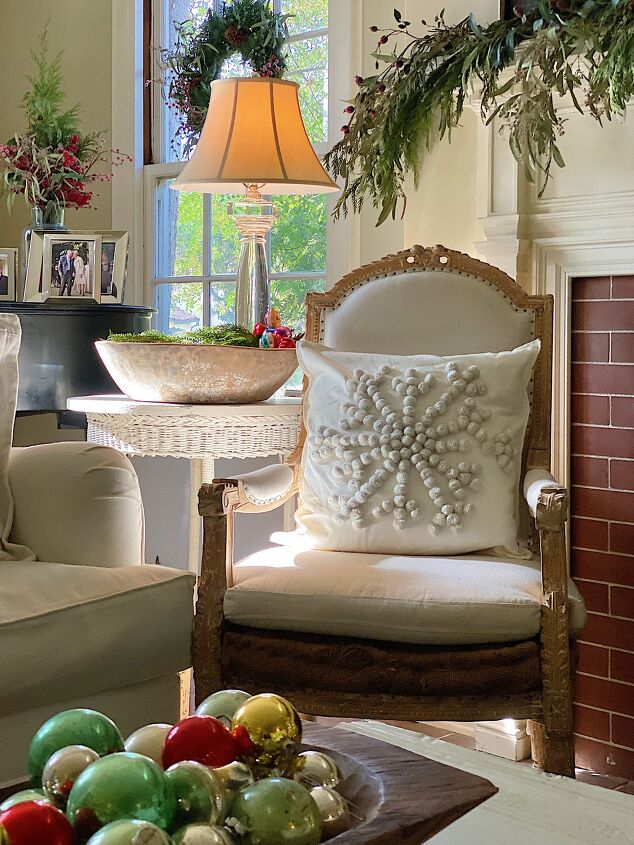
Pom poms are such a fun crafting item and I loved making this DIY Christmas pillow. I saw a similar one a few years ago at either Anthropologie or Pottery Barn and I have known ever since I wanted to make one. I tried it and I absolutely love the end result. I put together a complete DIY in this blog post.
Welcome to Day Nine of Ten Days of Christmas Crafts.
You can check out my previous crafts here for Ten Days of Christmas Crafting here.
Day one – Mercury Glass Christmas Lights Ornaments
Day two – Crystal Snowflakes
Day Three – How to Style Your Front Porch
Day Four – Painted Glasses
Day Five – Christmas Crafts with Buttons
Day Six – White Christmas Wreath Craft
Day Seven – Christmas Kitchen Towels DIY
Day Eight – Creative Ideas for Gift Wrapping
Watch My DIY Tutorial
I loved making this snowflake pillow and I shared an even easier version of it today on a live tutorial.
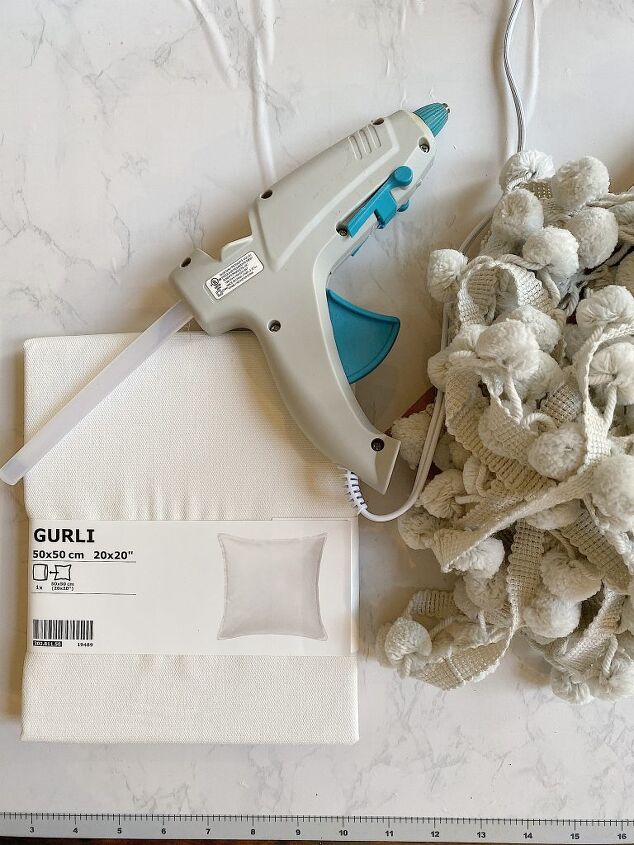
What You Need to Make a Snowflake Pom Pom Christmas Pillow
Pillow cover (I used a GURLI cover from Ikea which measures 20″ x 20″.)
6 yards of 3/4″ pom-pom trim or 145 pom poms (based on a 20″ square cover. Adjust for a smaller or larger pillow.)
(I like these 1″ pom poms, or these or these.
Glue gun and glue sticks
How to Make the Snowflake DIY Pillow
Find a photo of a snowflake you want to use. If you want to make a pillow like mine, then just use the same size pillow cover and the instructions below.
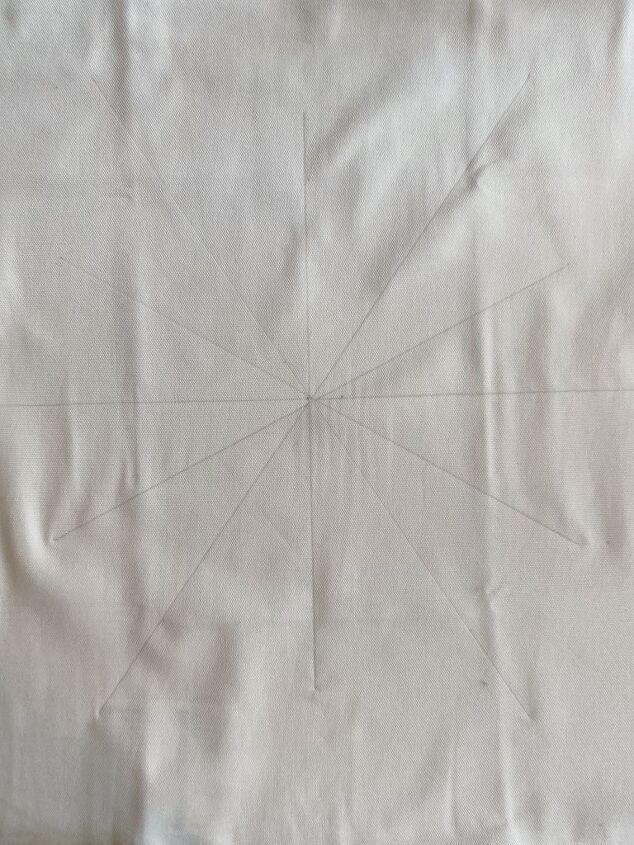
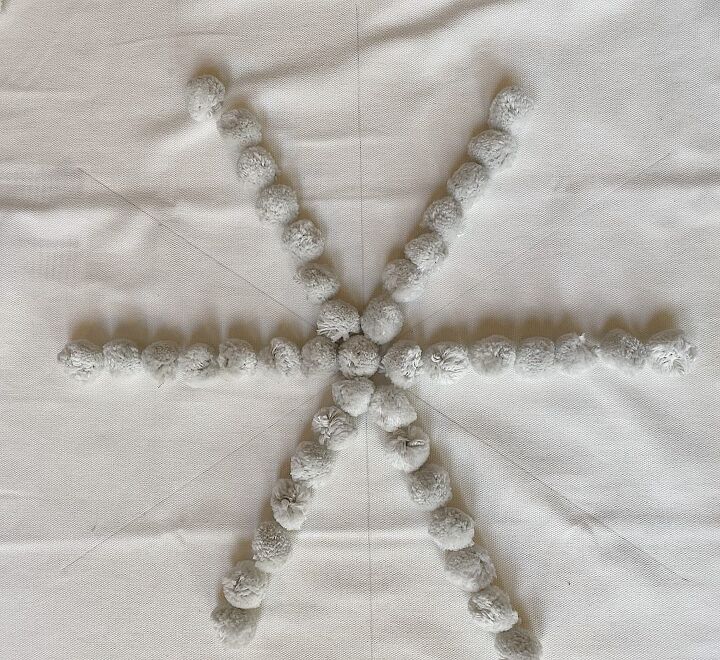
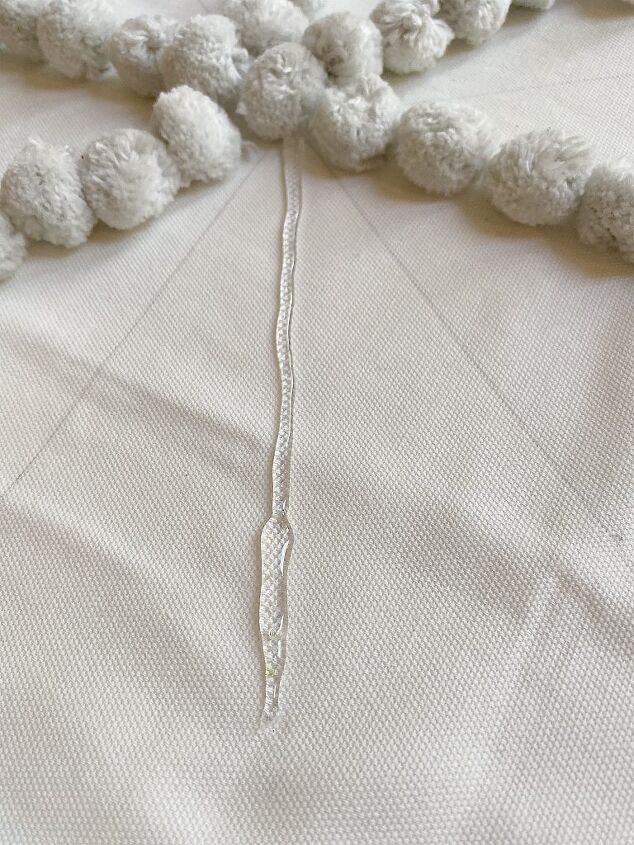
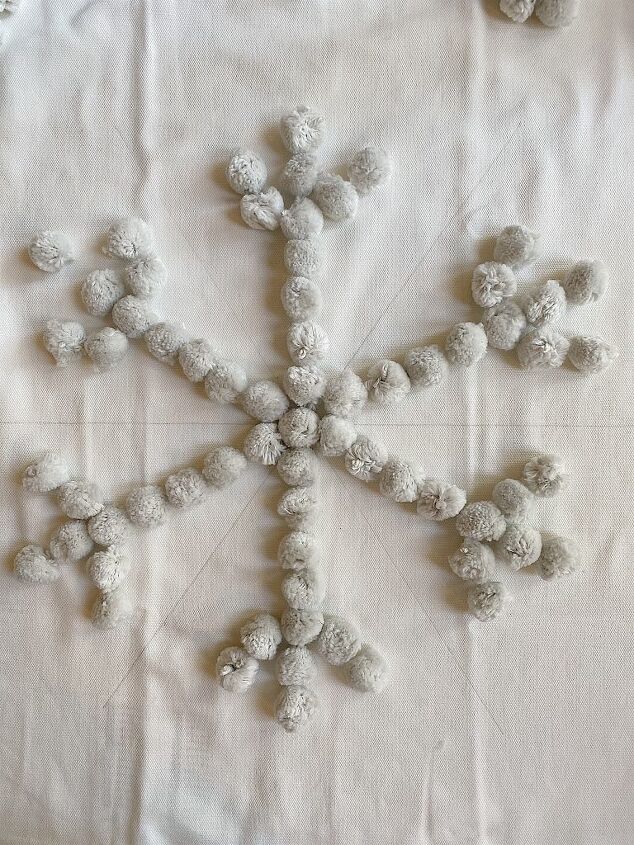
Measure and mark the center point of your pillow as seen in the photo below. With a pencil, lightly draw a center vertical line 12″ long (intersecting the center at 6″). Draw a center horizontal line 16″ long (intersecting at 8″ in the center). Add two more lines in between the vertical and horizontal lines alternating the length between 12″ and 16″.
The Experimental Phase
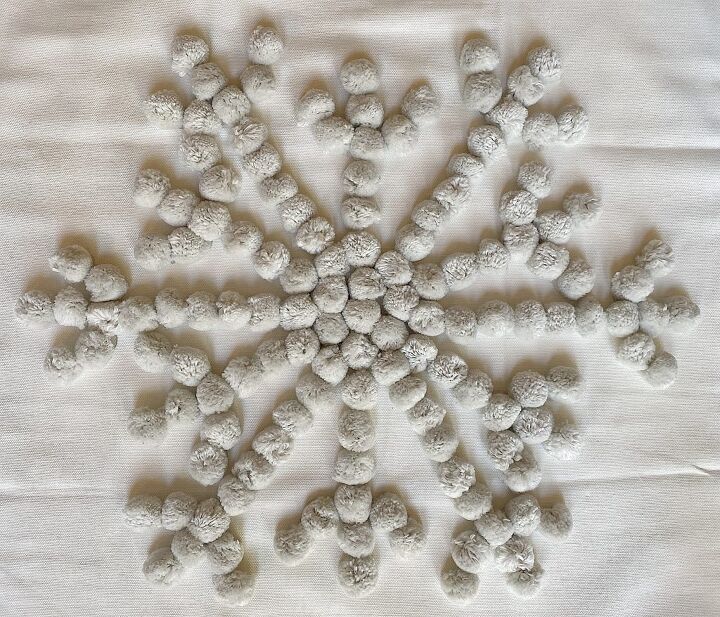
My next step was the “experimental phase” as I had no idea exactly how the design was going to work nor did I know how many pom poms I needed. I laid out all of the pom-poms (without using glue) first to figure it out. You might want to do the same before you start gluing.
For the 12″ line, I placed one pom-pom in the center and then added 7 pom poms on each side of the center one. Repeat the same for all of the 12″ (shorter) lines.
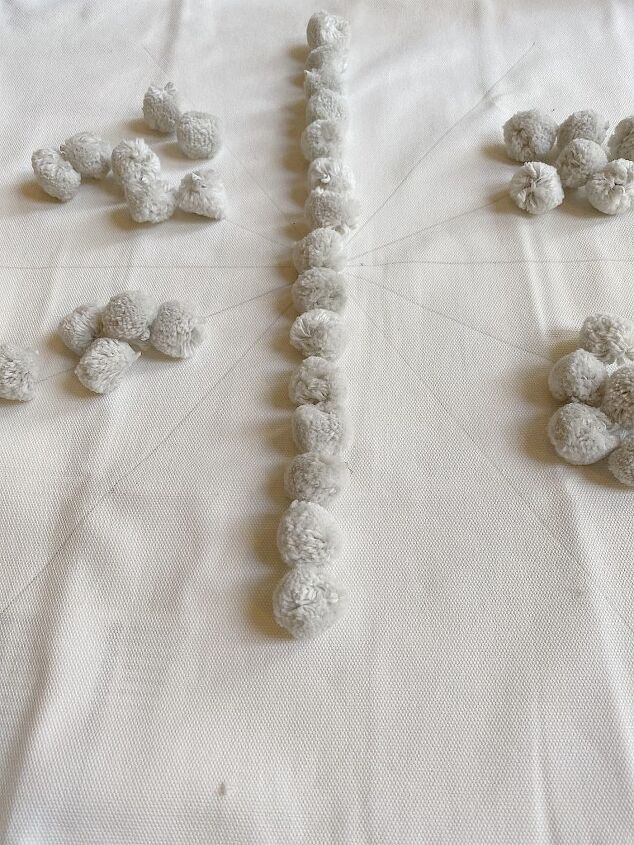
For the 16″ long line I added 9 pom poms on each side of the center pom-pom. Repeat the same for all of the 16″ (longer) lines.
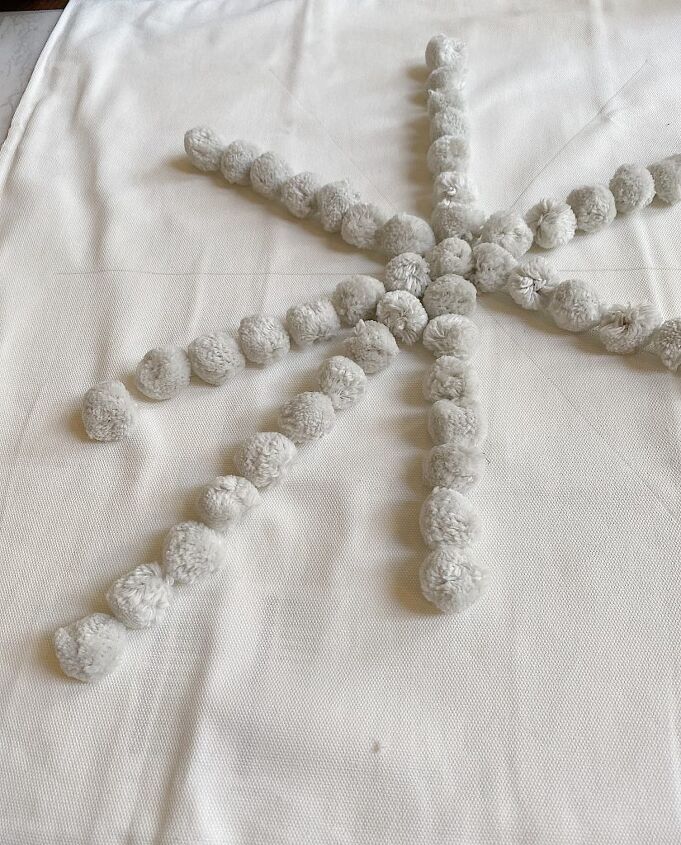
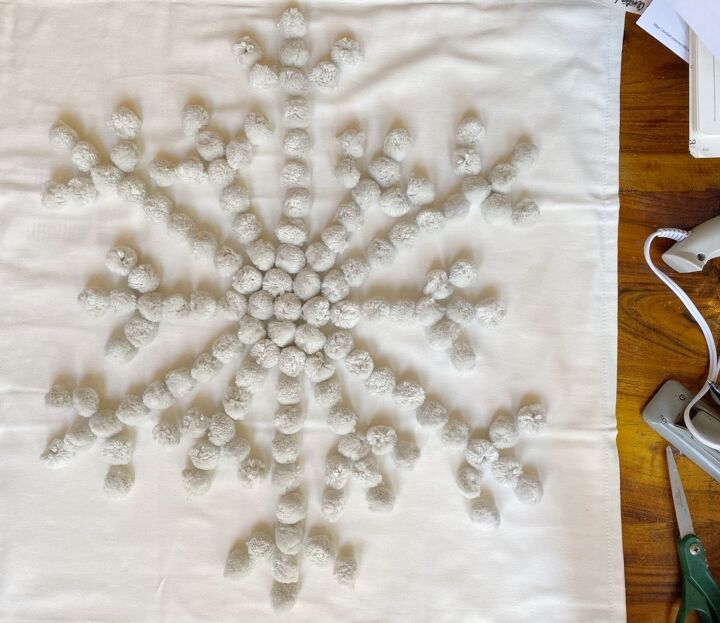
Continue filling in the pom-poms along the drawn lines.
Next, add the accent pom poms on each line as seen below.
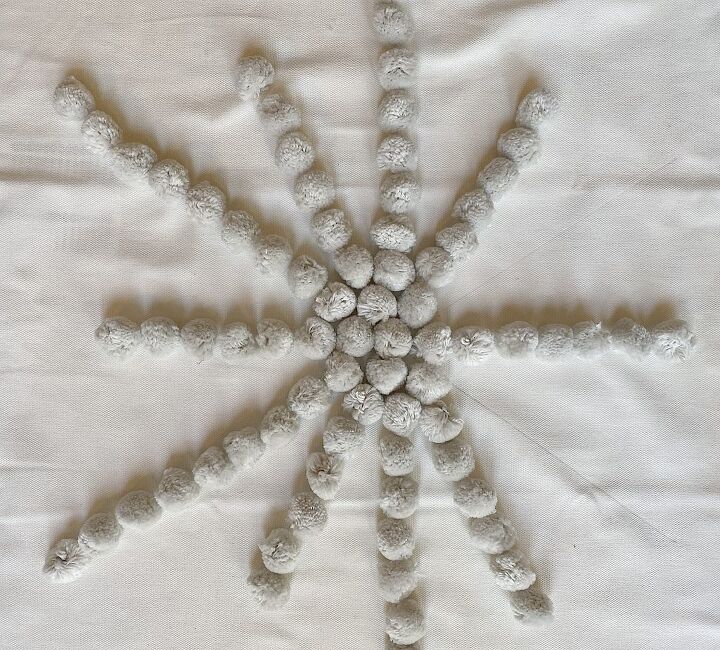
It looks like these pom poms are going to work!
Gluing The Pom Poms to the Pillow Cover
Now that you know your design, and you are sure you have enough pom-poms, remove them from your pillow. Glue the center pom-pom to the pillow. Then glue all of the 12″ lines by adding seven pom poms on each side of the center pom-pom.
Gluing the pom poms should be an easy task as long as you place the glue on the pillow cover and just place the pom-poms on top.
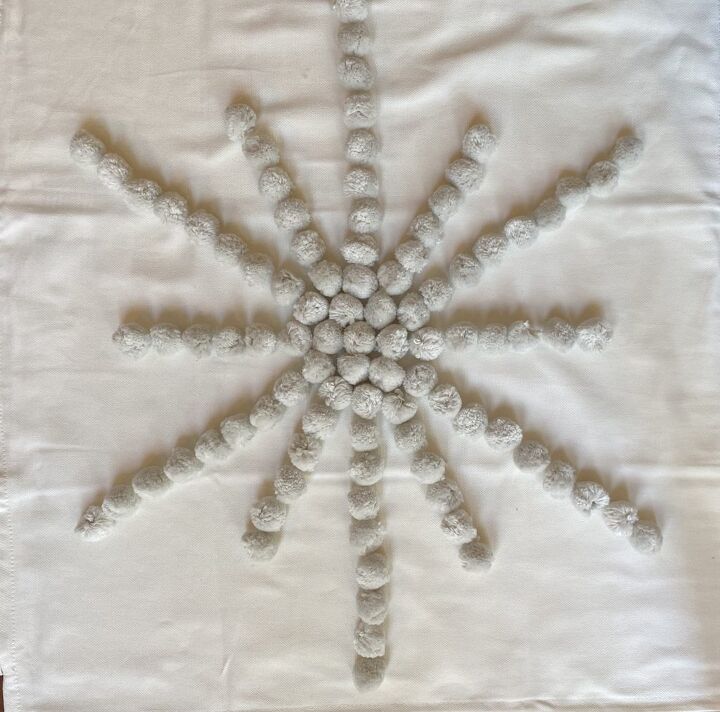
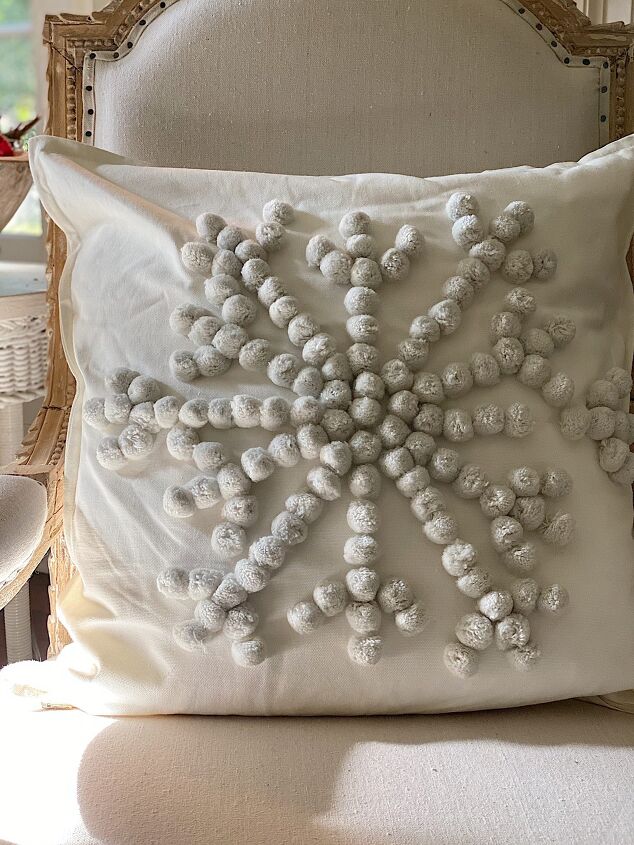
Once you are done gluing the pom poms on the 12″ lines, glue the accent pom-poms as seen in the photo below.
Next, glue the pom poms on the 16″ sides by adding 9 pom-poms on each side of the center pom-pom.
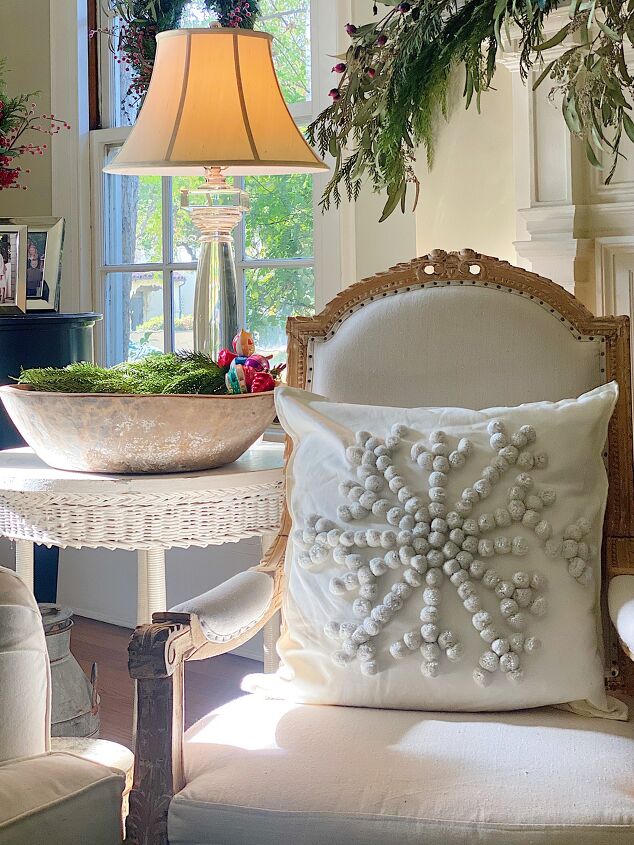
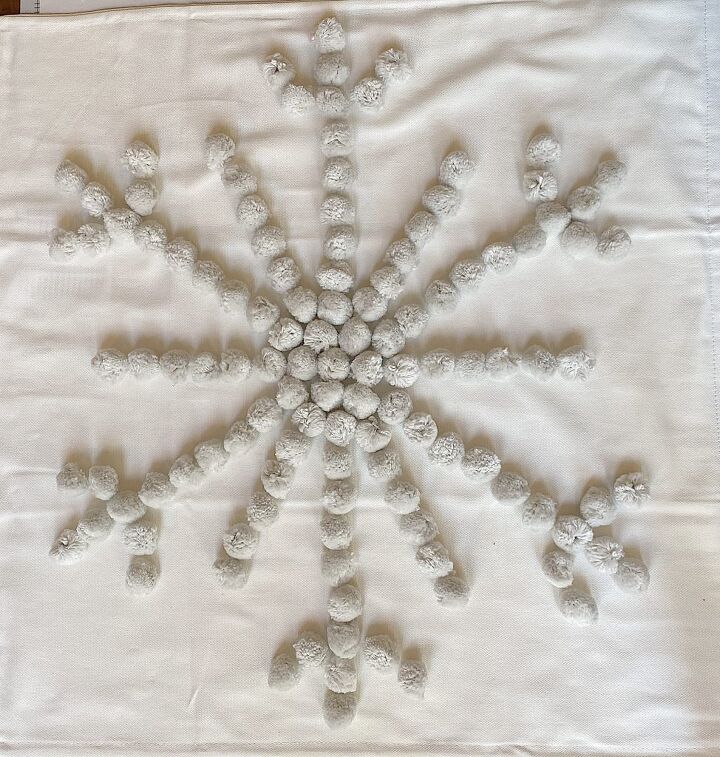
Doesn’t this look fabulous! I absolutely love how it came out.
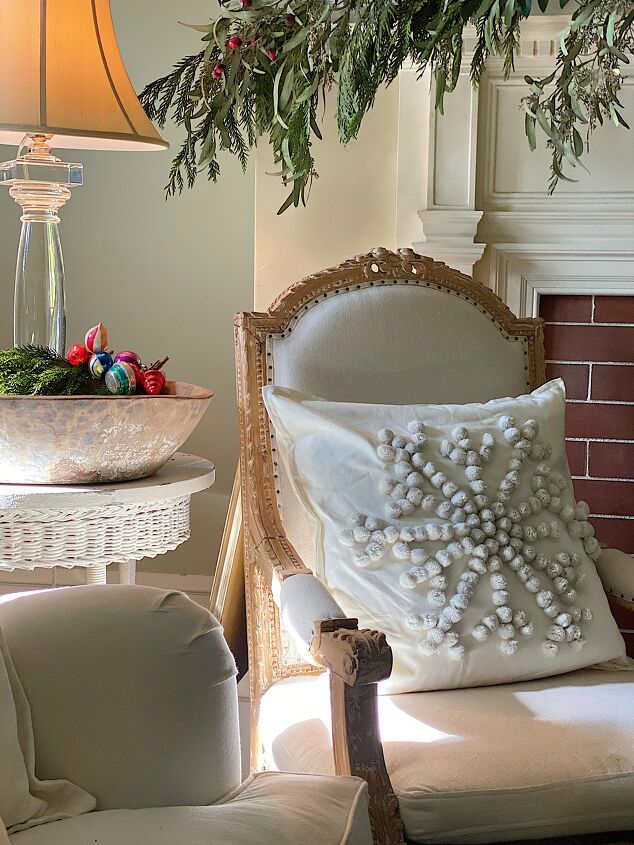
I also think this would make a great gift. And once you have made the first one, the rest are really easy!
Pin the image below to your Craft or Christmas decor boards on Pinterest (just click the Pin button in the top left corner). You can also follow along with me on Pinterest!
For more real-time updates, follow me on Instagram @My100YearOldHome

ABOUT LESLIE
Welcome to My 100 Year Old Home. I started my blog so I could share my passion for entertaining, décor, cooking, and crafts. You will find all this and more right here. Read more…
Resources for this project:


Comments
Join the conversation
-
Leslie, I just have to say, your home certainly doesn’t look to be 100 years old. I was admiring your decorating near your fireplace, and the home looks newer. Great job, Leslie!
-
As it is a seasonal decorative pillow, not intended for functional use, I would not forsee the need to wash it often.
To help prevent accidental stains, I would recommend spraying the cover with Scotchguard before setting out on display. Storing it in a jumbo Ziploc bag should keep it clean, dry, and new looking for many years to come.


Frequently asked questions
Have a question about this project?
Eventually you’ll have to wash it… I guess it would have to be turned inside out, but will the pom poms stay on?