


Chicken Wire Ribbon Pumpkins

The variety of Fall pumpkin decorations are so pretty and you can find one to meet anyone’s style and home fashion. After seeing metal pumpkin at my son’s house, I was inspired to create my own version of a chicken wire ribbon pumpkin.
I am currently on a quest to use up my craft supply stash as much as possible.
Such as these spools of chicken wire ribbon in gold and silver.
The inspiration for this project came from a open form metal pumpkin I saw at my son and daughter-in-law's house. It reminded me that I had chicken wire ribbon in my craft stash I could use to make a similar pumpkin.
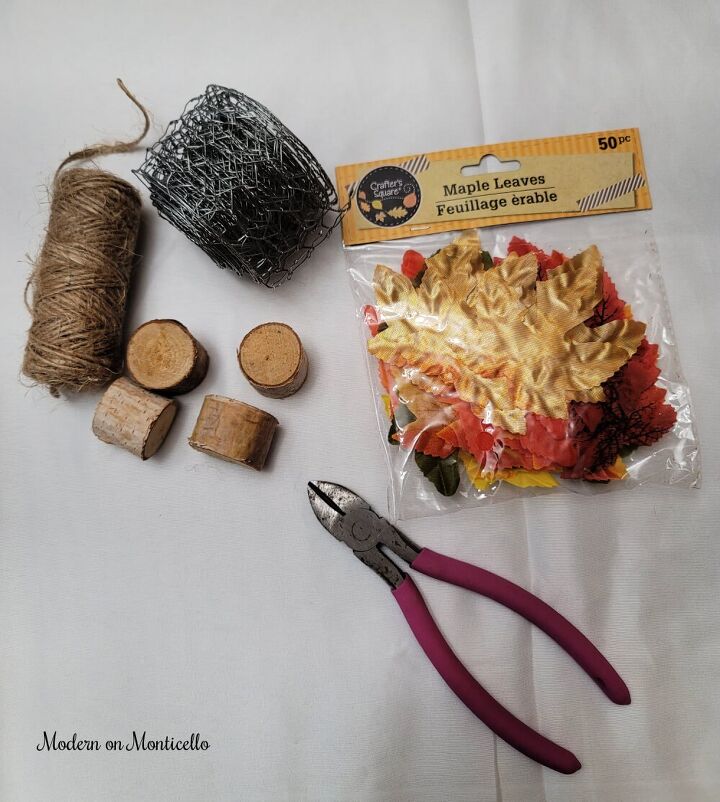
For this project you will need:
- Chicken Wire Ribbon that is about 2 inches wide
- Wire cutters
- Decorative faux leaves from Dollar Tree
- Wood cut pieces from Dollar Tree – or sticks from the yard
- Hot glue
- Jute twine
However, my version is so easy to make!
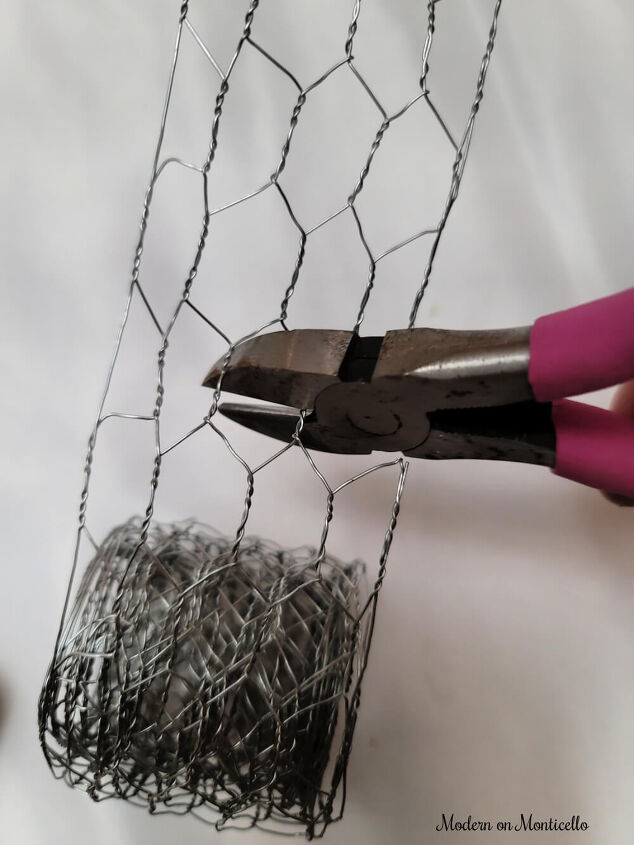
First, cut 3 equal strips of the chicken wire ribbon using the wire cutters.
I didn’t measure my cuts to an exact length at the time. Just whatever made a good size loop. The second and third cuts were just measured and cut based on the size of my first cut piece.
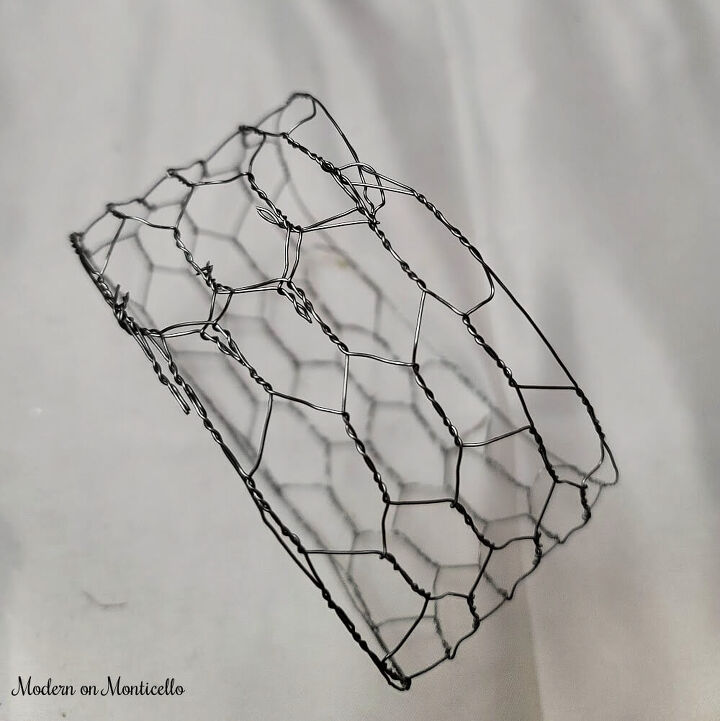
Roll the first cut length of chicken wire ribbon in a loop with the two cut ends meeting up. Twist together the cut ends of the chicken wire ribbon to secure them in place.
Place the second cut of ribbon in a different direction around the first loop and secure the ends together again by twisting them in to the sections of the first ribbon loop.
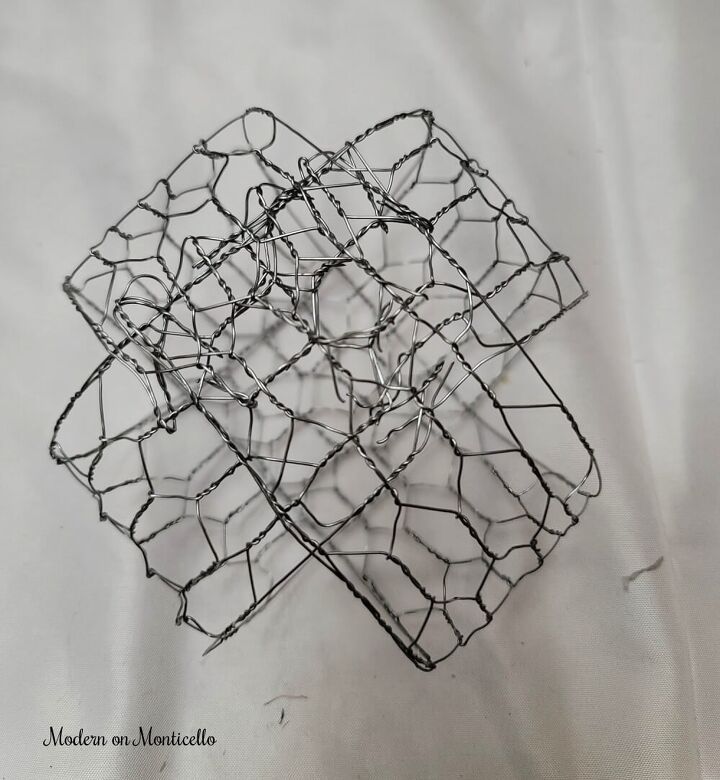
Take the last cut piece of wire ribbon and lay it opposite both of the first two ribbons as seen below.
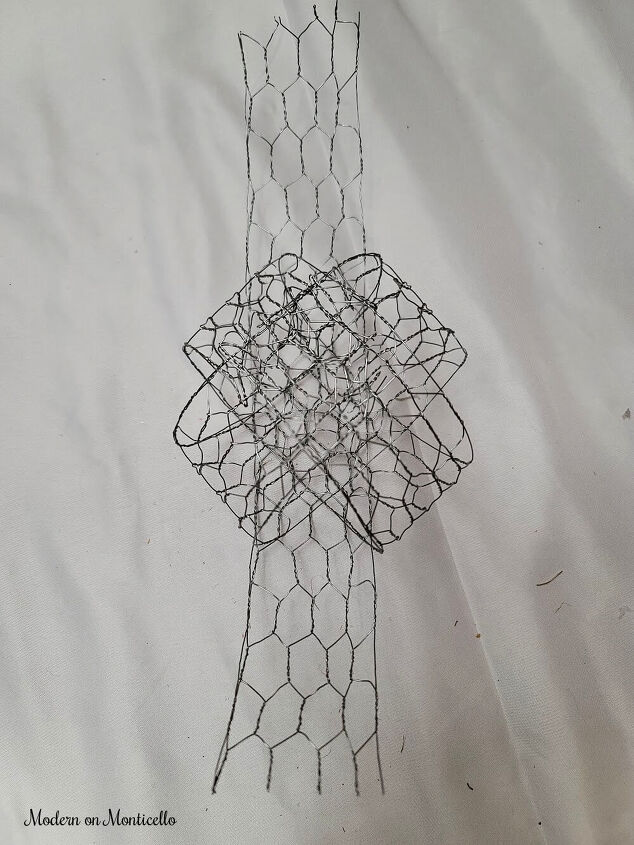
3 loops of chicken wire ribbon twisted together make for a unique pumpkin for Fall decorations.
Loop it around the first two loops and secure them all together by twisting the wire edges intertwined with the first two sets of wire ribbon.
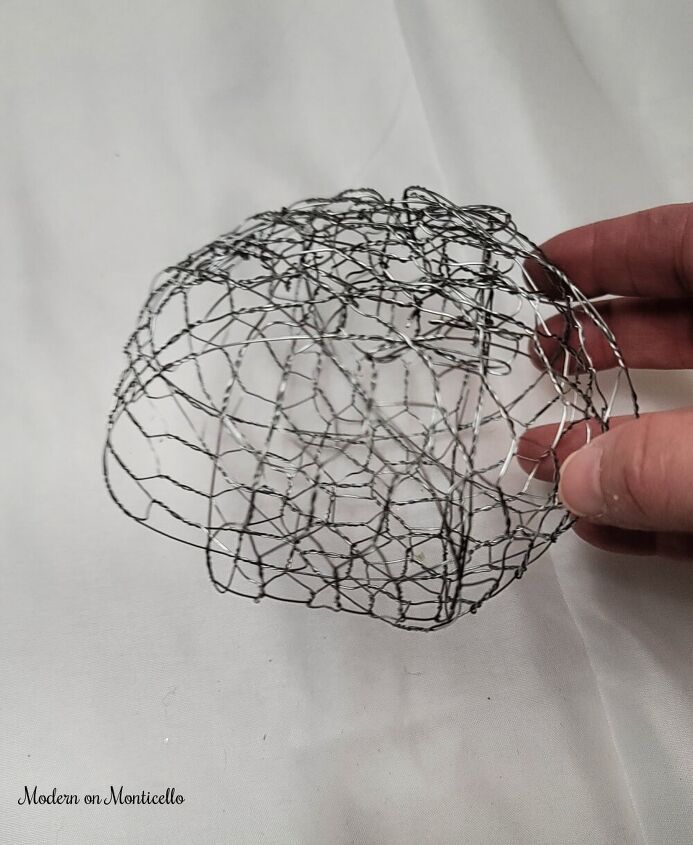
These steps created the pumpkin shape with all three cut sections of chicken wire ribbon woven together at the top. Since it is made of flexible wire, you can shape the pumpkin as needed and to flatten the bottom so it will sit upright.
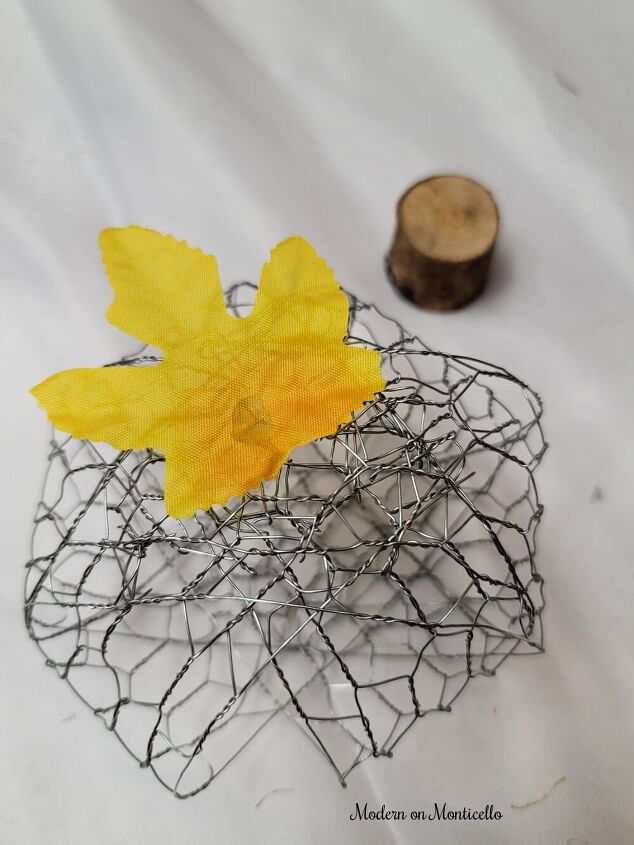
Using a hot glue gun, or whatever glue you prefer to use, add on the decorative leaves and cut wood pieces for the top decorations.
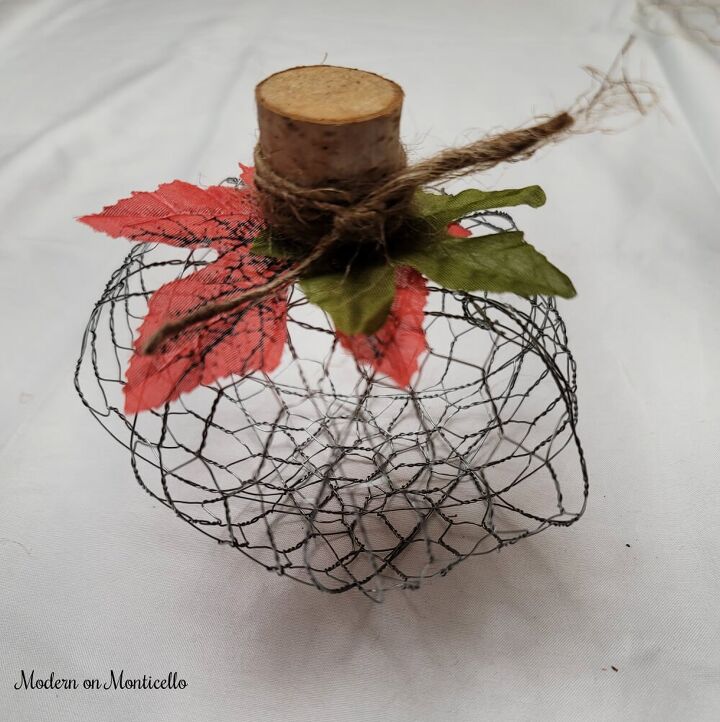
The top of the chicken wire pumpkin will not be level because of the twist and ties of the wire edges. So the little wood cut piece did not lay flush with the leaves.
To hide that gap, I glued on some jute twine around the base of the wood cut and tied another section of jute twine on as a ribbon.
It gives it a bit of rustic detail and hides the gap between the wood and the chicken wire.
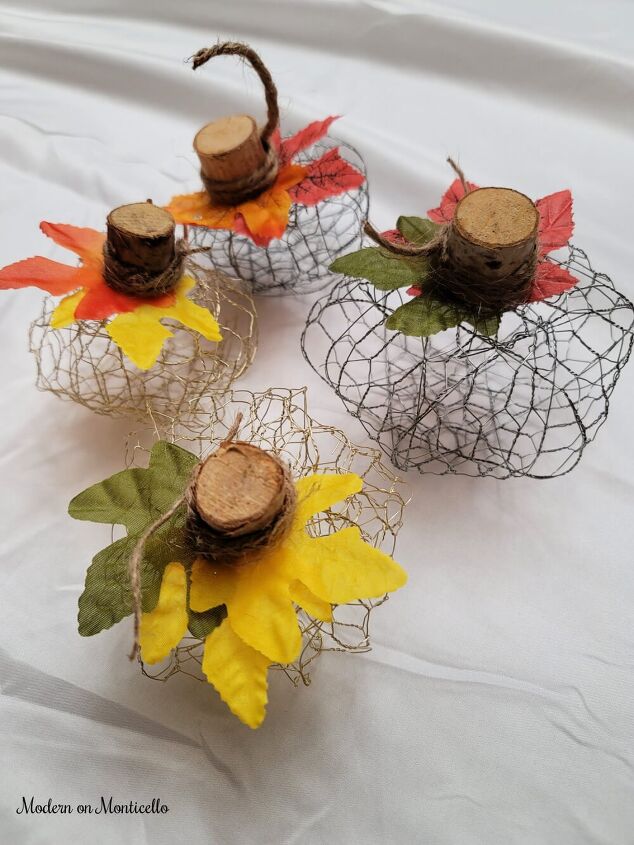
I had both silver and gold chicken wire ribbon for this project so I made several of these pumpkins to use up the supplies.
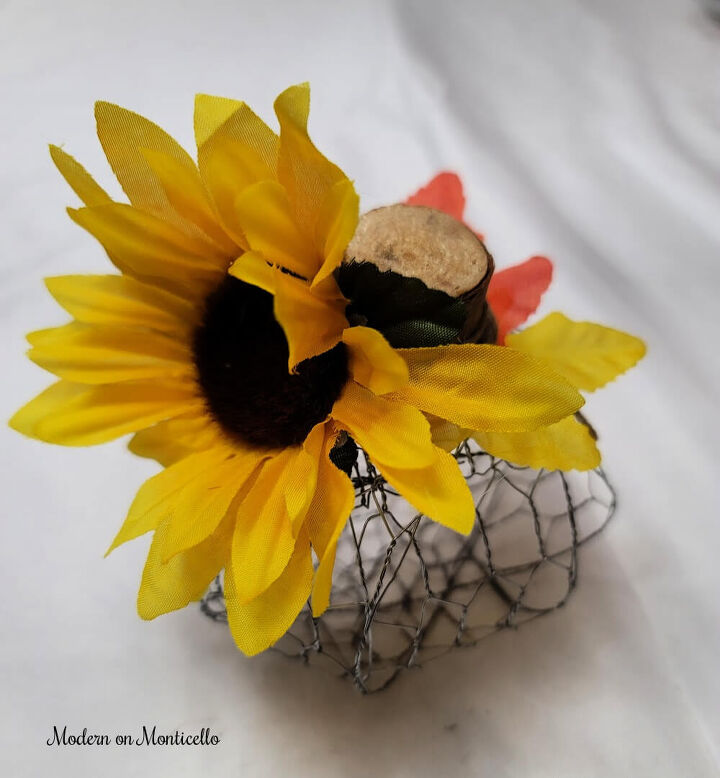
On a few of them I added a faux sunflower for a little something extra.
I found the ribbon at Hobby Lobby but you can purchase it on Amazon as well.
I hope you try out this project for yourself!
Donna
Resources for this project:
See all materials


Comments
Join the conversation
-
You should put fake mulch inside the chicken wire… very creative!
-
That's brilliant thanks for a beautiful 😍 idea


Frequently asked questions
Have a question about this project?