


How to Make Adorable Yarn Pumpkins
Want to make your home look beautiful and feel cozy this Fall? Learn how to make these adorable yarn pumpkins to add to your decor!
Have you ever bought something, and then wanted more of it?? Well, that's what happened after I bought a cute fuzzy pumpkin from Walmart. I loved it so much, I thought it needed some companions. Rather than buy more, I decided to make them myself! I can't wait to show you how to make these adorable yarn pumpkins!
Gather
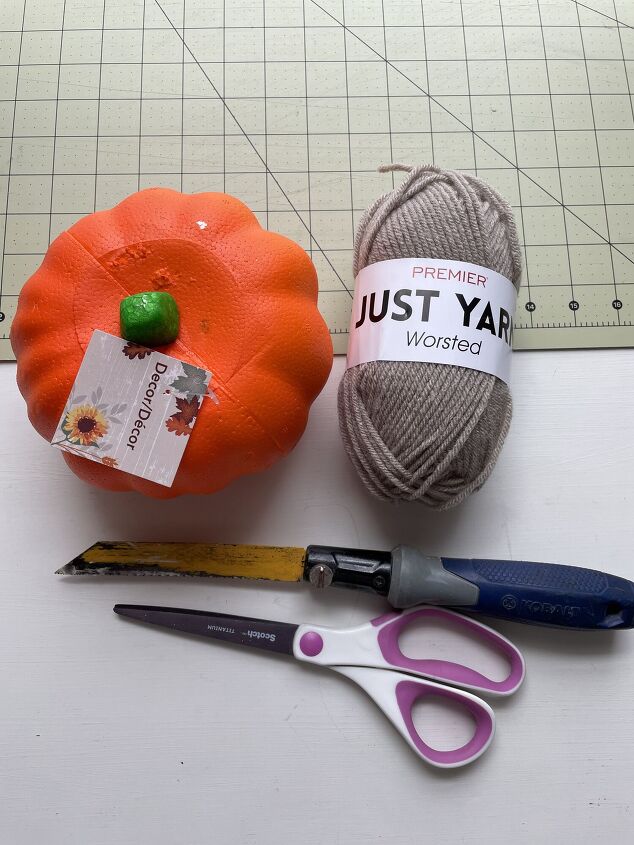
Gather the following materials:
- Faux pumpkins
- Yarn
- Scissors
- Craft knife
- Ruler
- Glue gun
- Craft paper
- Jute twine
- Paint- you will need paint that matches your yarn
- Paintbrush
Prep
We need to do a little prep for the pumpkins before we wrap them in yarn! First, remove any tags and the stem.
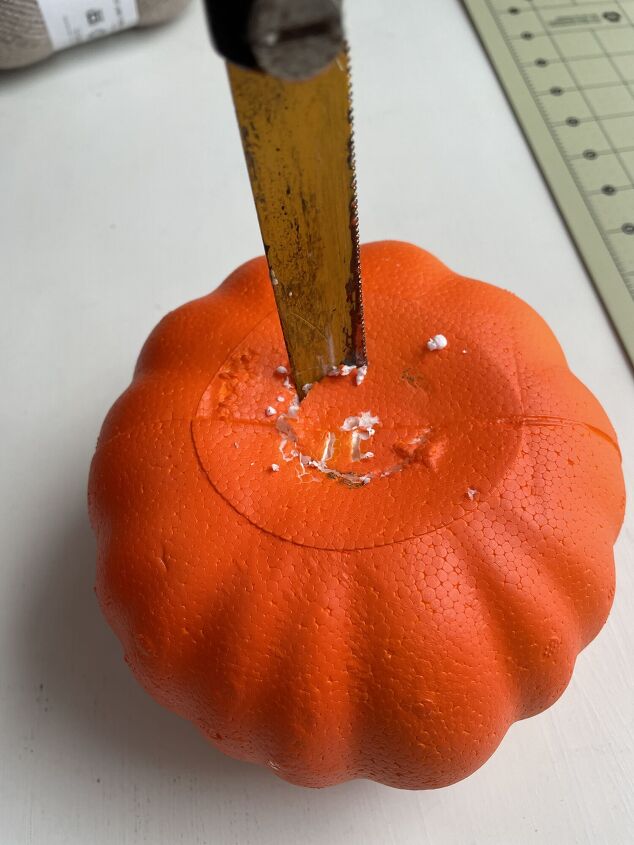
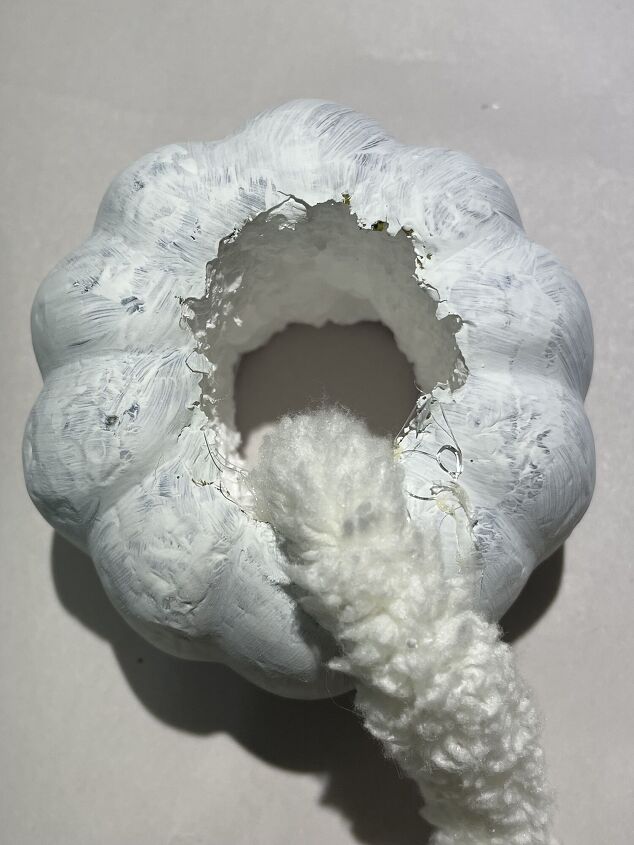
Using a craft knife, cut a hole in the top and bottom of the pumpkin. The hole will be between one and two inches, depending on the type of yarn you use. If you are using chunky yarn, you will need to make a larger hole. You'll understand when you see the examples below!
You may be tempted to skip this step, but don't!! Paint the pumpkin the same color as the yarn. You want it to be a close match so you don't notice the color of the pumpkin peeking through the yarn. You may even need two coats.
How to Make Adorable Yarn Pumpkins
I am going to show you how to make several different types of yarn pumpkins. I'll start with the easiest and quickest one first.
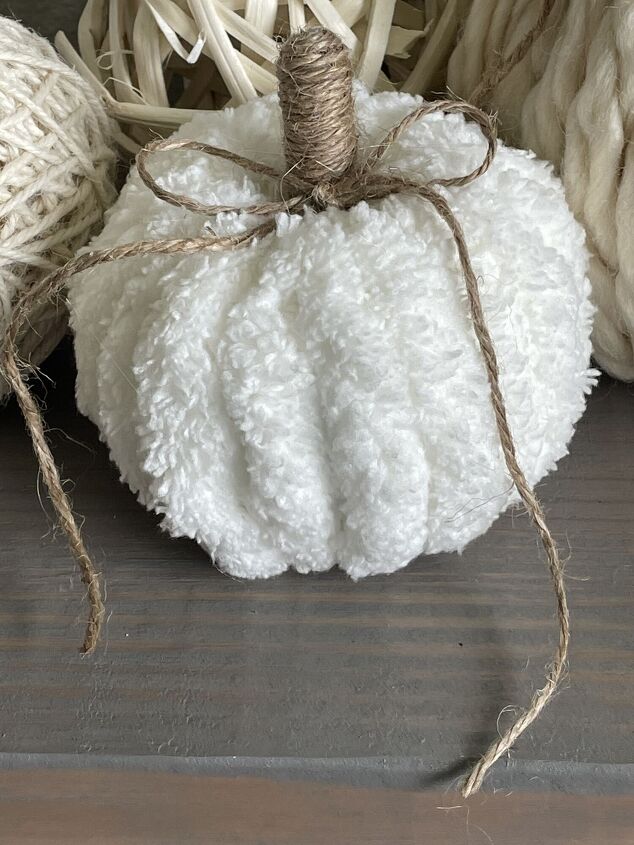
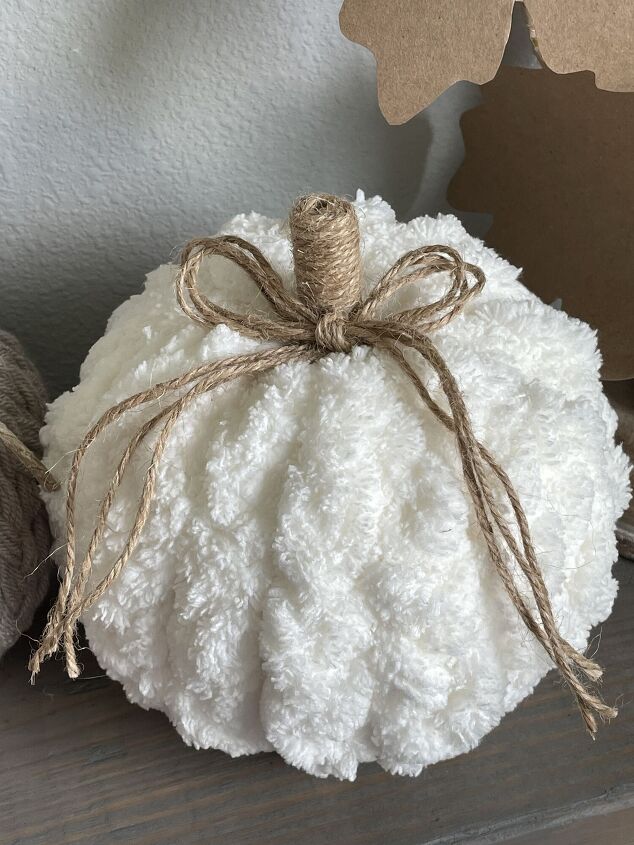
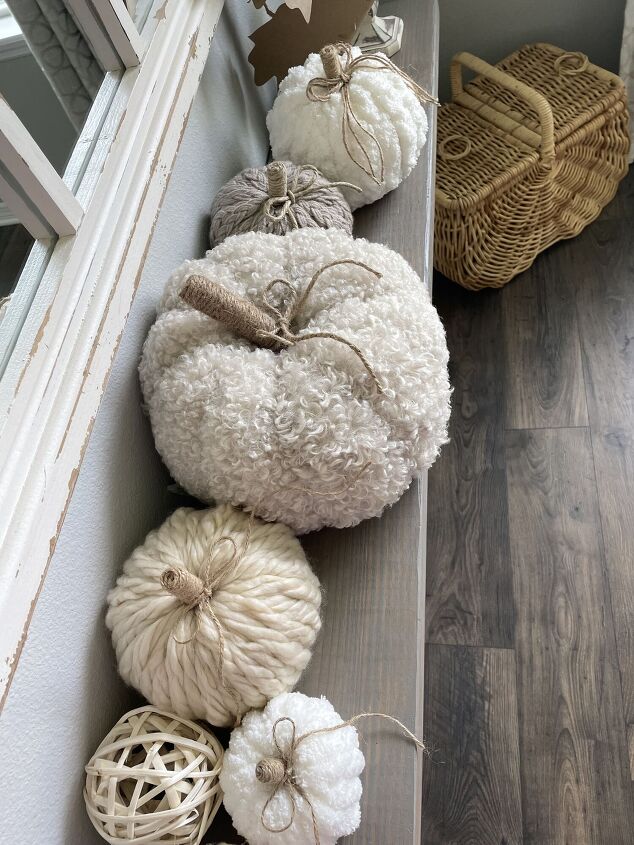
Small white with chenille
This cutie is made with white chenille yarn and a small pumpkin I purchased at Walmart.
Begin by cutting a 1-1/2 inch hole in the top and bottom of the pumpkin. I know the hole looks huge, but the yarn will fill it in! Paint the pumpkin white. Cut a piece of chenille yarn in a 6-foot strip.
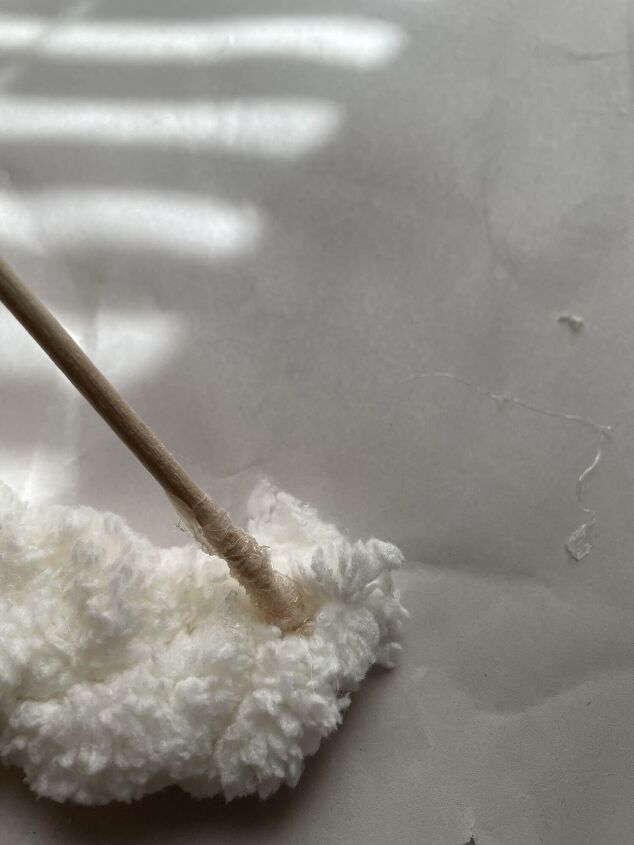
Hot glue the chenille yarn to the inside top of the pumpkin.
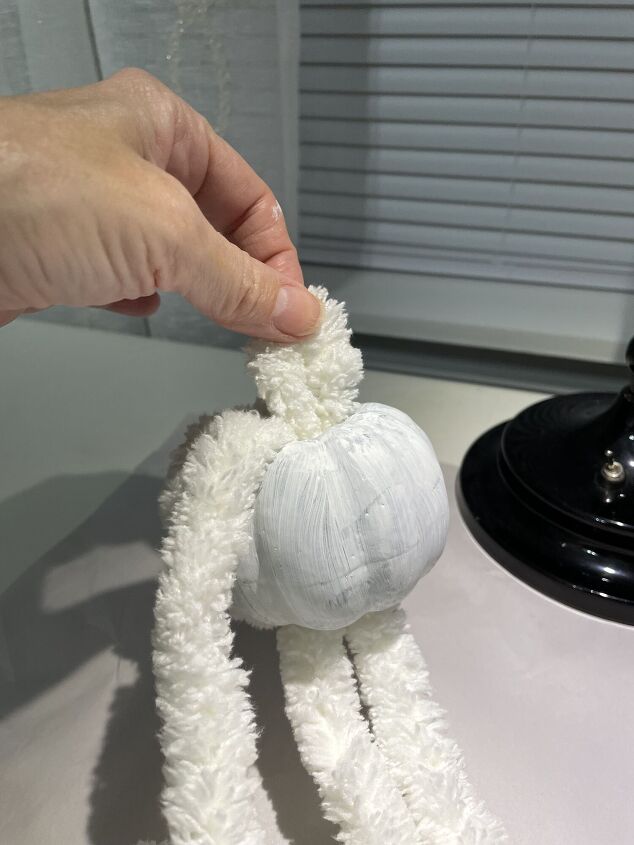
Wrap the yarn around the pumpkin and pull it up through the bottom hole.
Continue to wrap the yarn around the pumpkin and bring it up through the bottom hole until the entire pumpkin is covered.
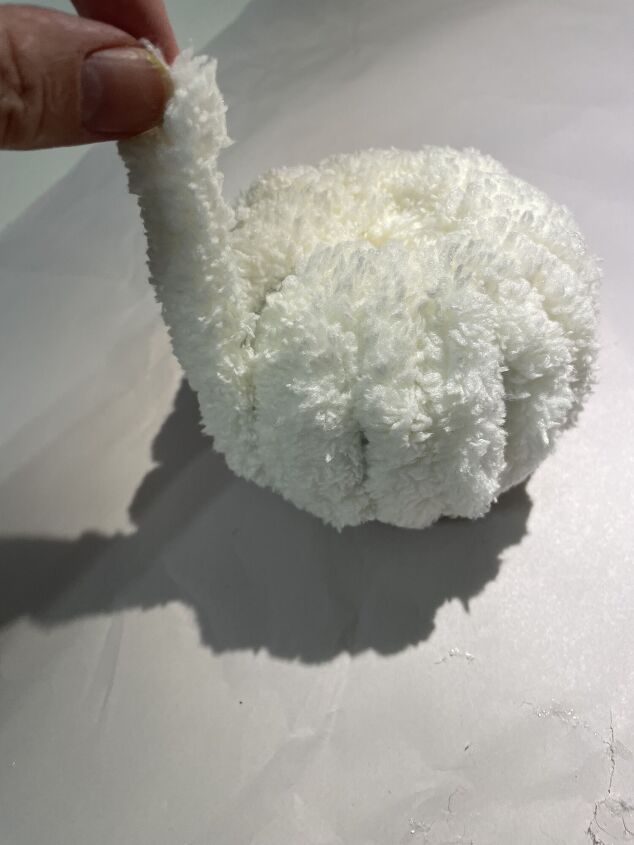
Securely tuck the last bit of yarn into the hole.
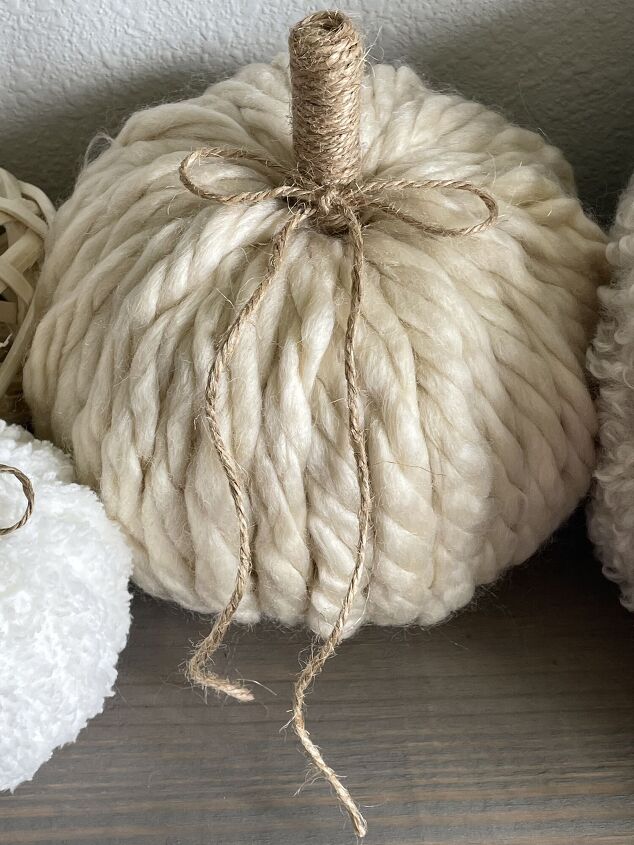
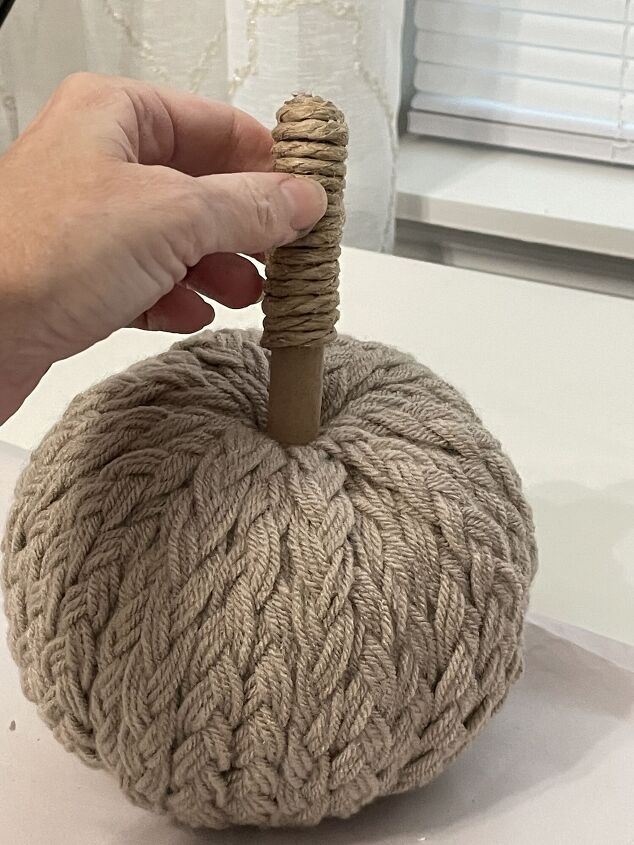
Medium Tan with Chunky Twist Yarn
You can make this pumpkin exactly like the one I showed you above, but it's bigger and therefore wastes a lot of the yarn on the inside of the pumpkin. So rather than wrapping a long strand of yarn, I cut individual pieces. If you have more money than time, do it like the small white chenille example above. If you want to use less yarn, follow my instructions below!
This pumpkin was made with a medium styrofoam pumpkin from Dollar Tree and tan chunky twist yarn from Michaels.
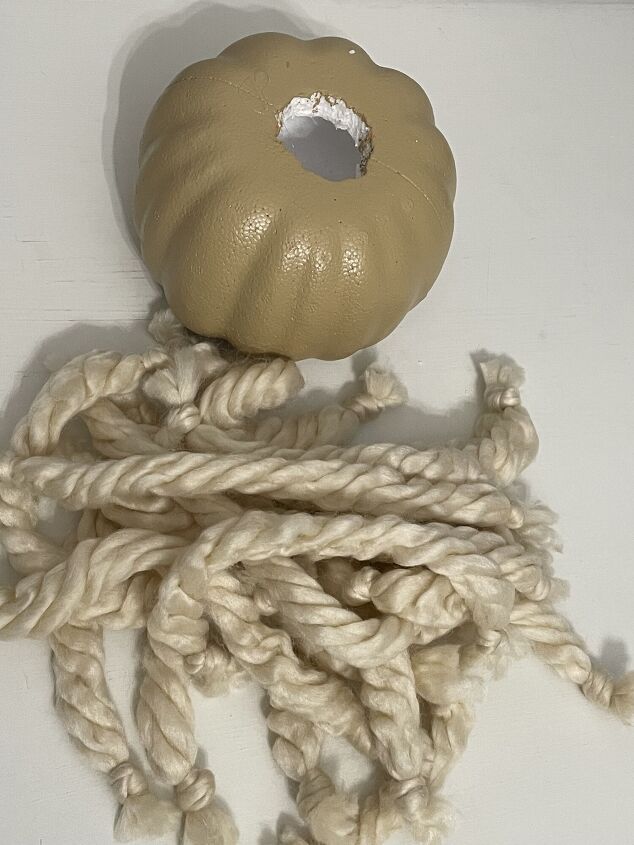
Paint the pumpkin and while it's drying cut a piece of yarn 13 inches long. Tie a knot at each end of the yarn. Repeat 31 more times, you will need 32 strands of yarn!
Put hot glue on the inside edge of the pumpkin and attach the yarn to it. BE CAREFUL! Do not touch the glue with your finger it is very hot. I use a wooden stick to push the yarn into the glue.
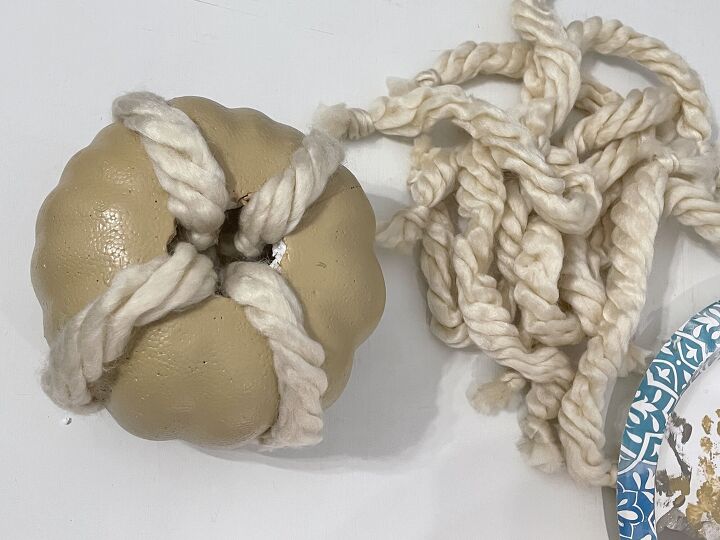
Wrap the yarn around the pumpkin and glue it inside the bottom hole. I only hot glue the first four strands. You will not need to glue anymore after that!
Continue to tuck strands into the top and bottom of the pumpkin until it is completely covered!
Medium White with Braided Chenille
To make this pumpkin look even chunkier, I decide to braid the chenille strands!
I started with a medium styrofoam pumpkin from Dollar tree and chunky chenille yarn from Walmart.
Cut a piece of yarn to 13 inches. Repeat two more times for a total of threes strands.
Use hot-glue to adhere the three strands together at one end.
Do not touch hot glue!!!
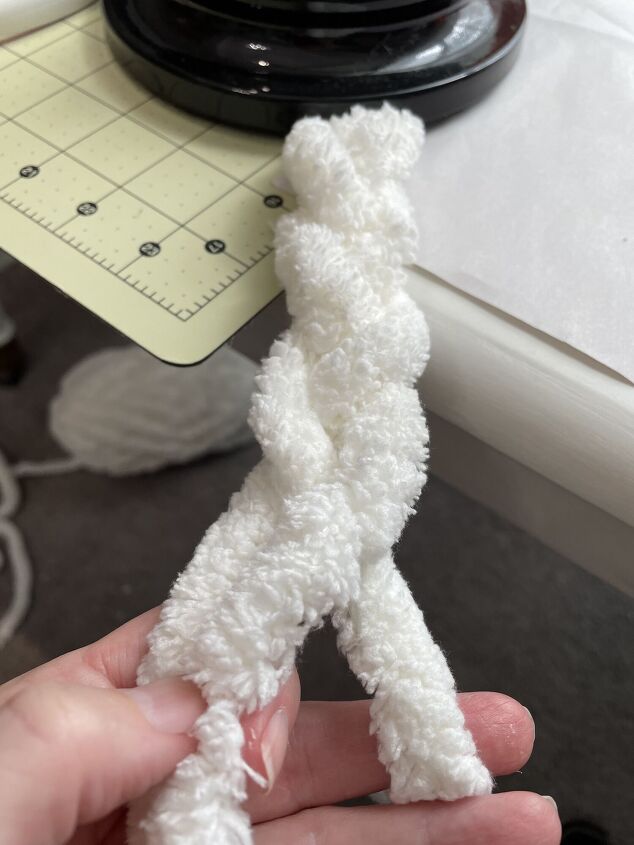
When the glue has dried and is no longer hot, place the glued end under a table lamp and braid the three strands together. Glue the end of the braid together.
You will need 16 braided strands to go around the pumpkin.
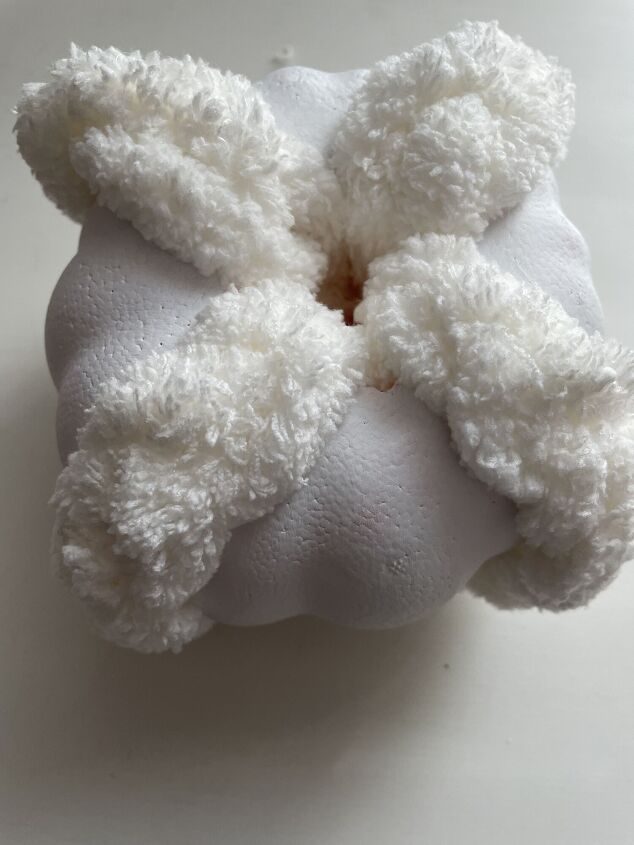
Hot glue the first four strands to the inside of the pumpkin at the top and bottom.
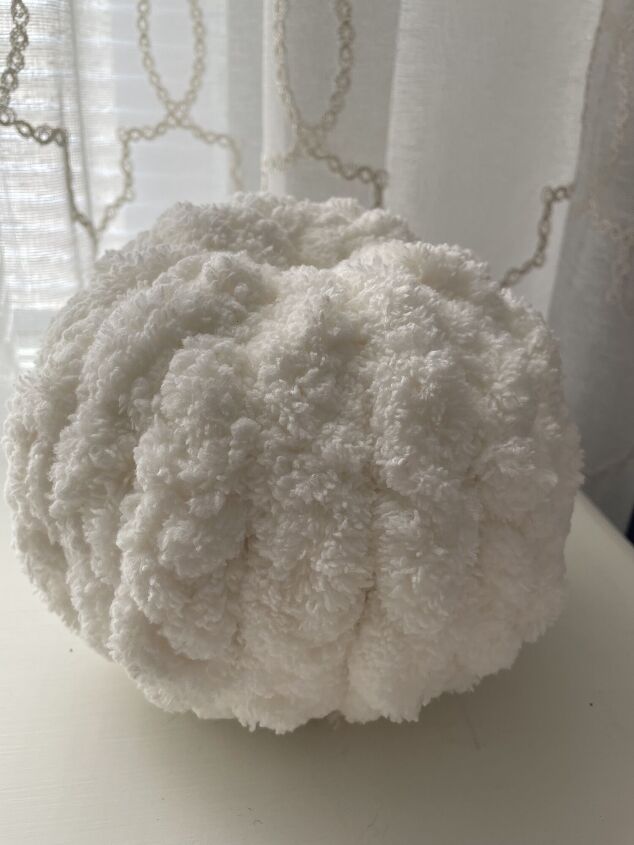
Continue tucking in the braided strands until the pumpkin is covered!
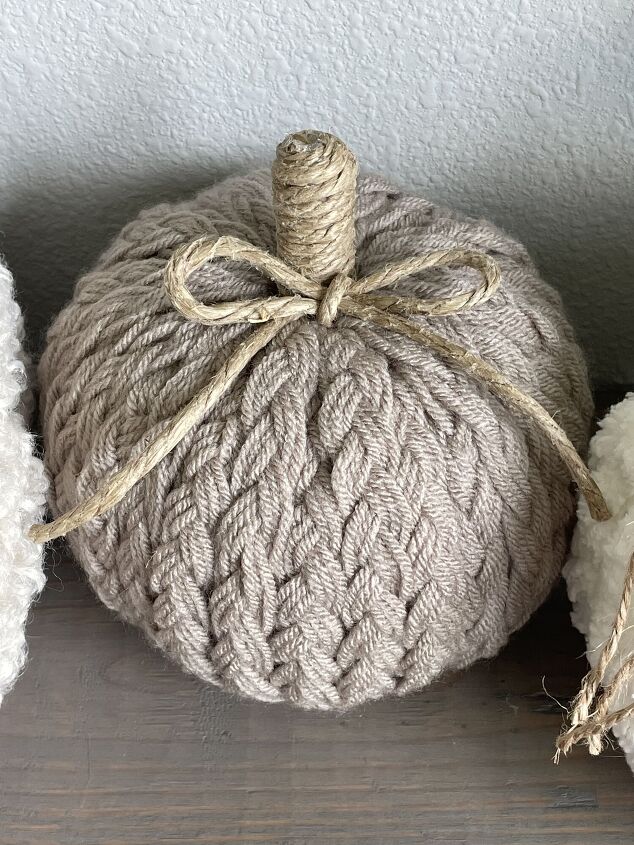
Medium Tan with Braided Yarn
I saved this one for last because it is the most time-consuming of the bunch. I think it was definitely worth the time I put into it!! Here's a tip- work on it while binge-watching your favorite TV show!
Cut a piece of yarn 13 inches long. Repeat eight more times, so you have 9 pieces of yarn. Tie one end together.
Repeat that step 31 more times so you have a total of 32 tied strands.
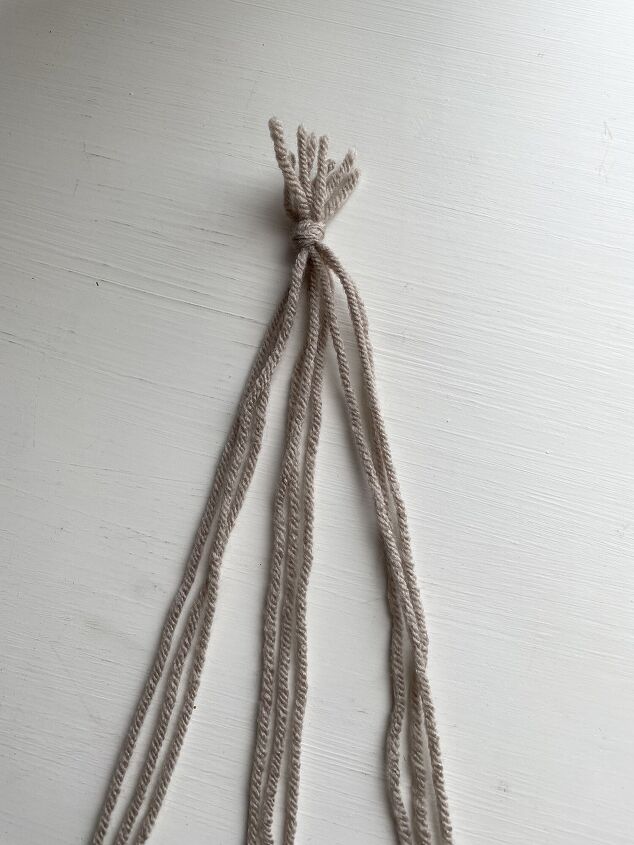
Divide the stand into three sections.
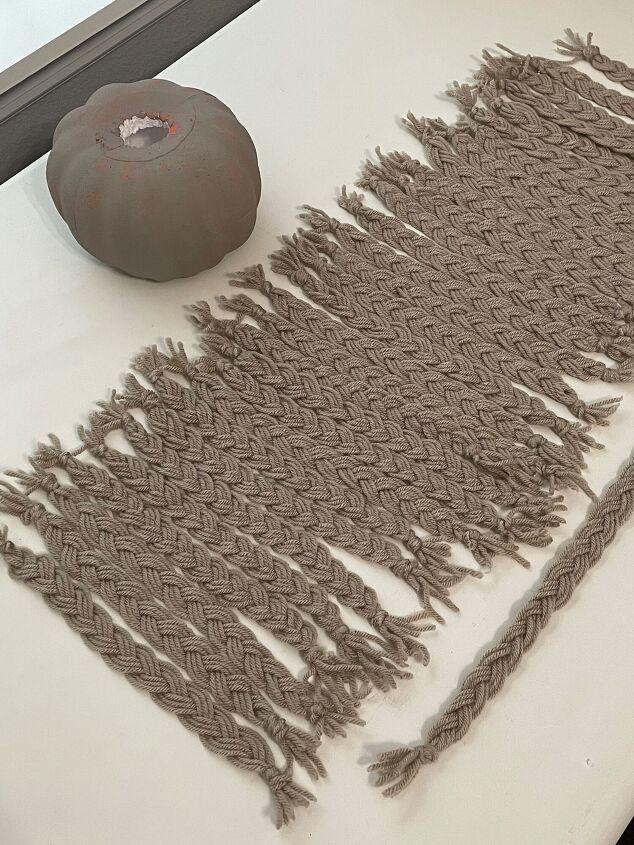
Braid the strand. Try to keep the strands as flat as possible. I put the tied end of my strand underneath my desk lamp which made braiding much easier! You should have a painted pumpkin and 32 braided strands.

Glue one end of the braid inside the top hole of the pumpkin. Next glue the bottom of the braid inside the bottom hole of the pumpkin. Adhere the next three braids with hot glue.
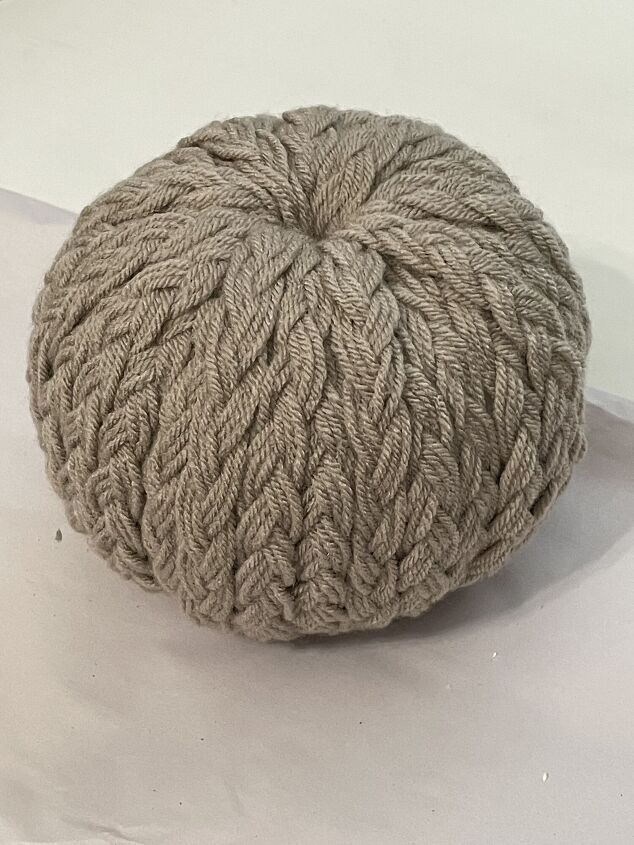
Continue to add braids around the pumpkin until it is completely covered.
How to Make Stems for Adorable Yarn Pumpkins
Now it's time to make the stems for our yarn pumpkins!
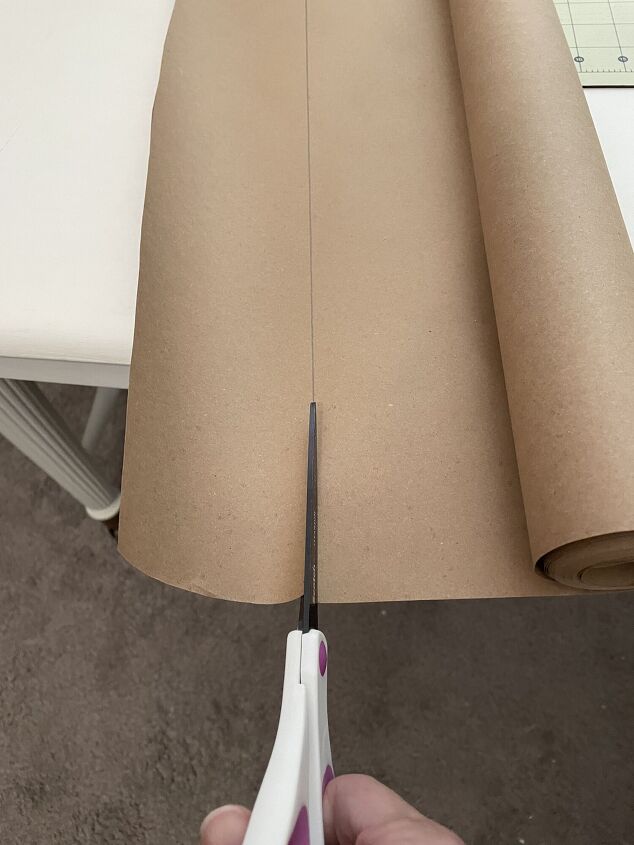
Take a roll of craft paper and cut a 3-inch wide strip.
Fold the end over and roll up the entire strip of craft paper.
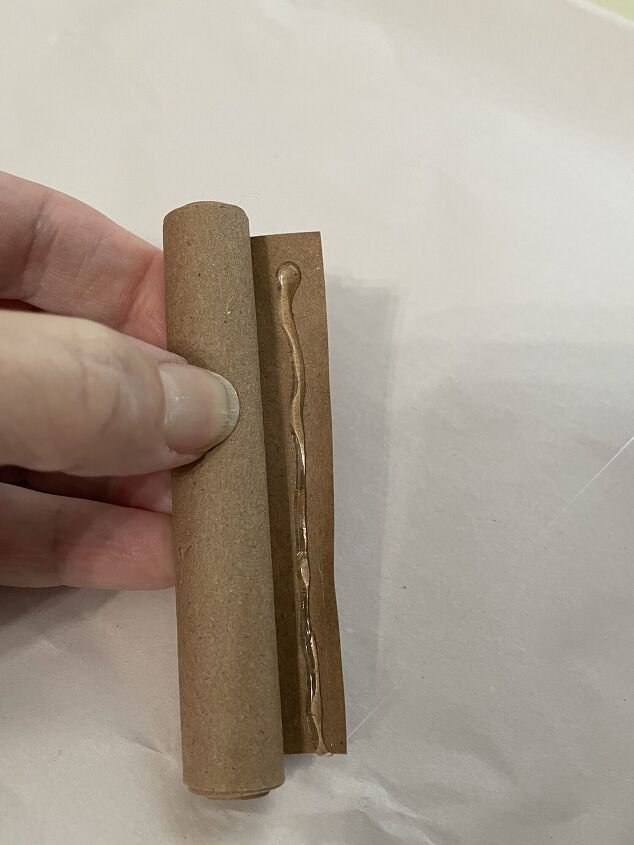
Hot glue the edge together.
Attach twine to the top of the roll with hot glue.
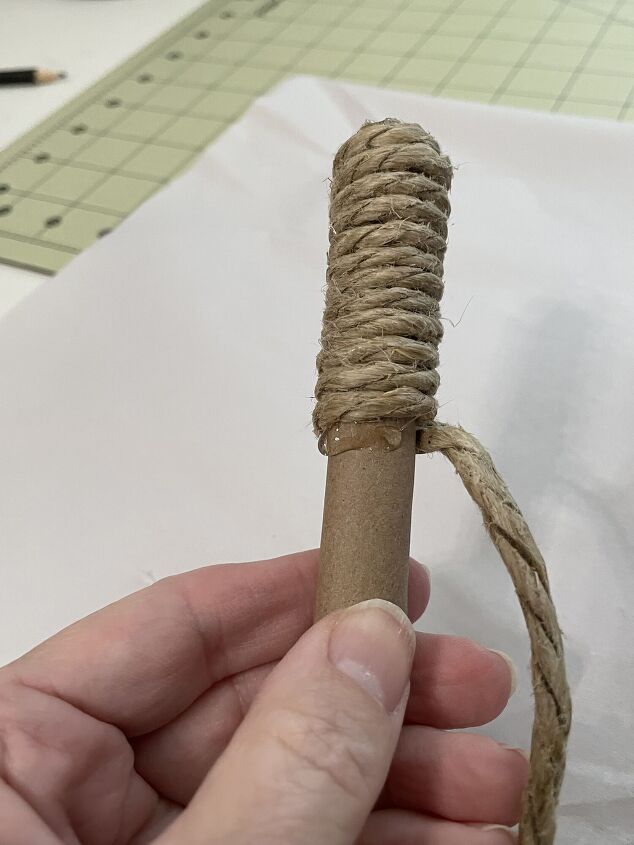
Wrap the twine around the roll, covering 2/3rd of the stem. Cut the twine and secure it with hot glue.
Push the stem into the top hole of the pumpkin. It should fit securely but you can use hot glue if you want.
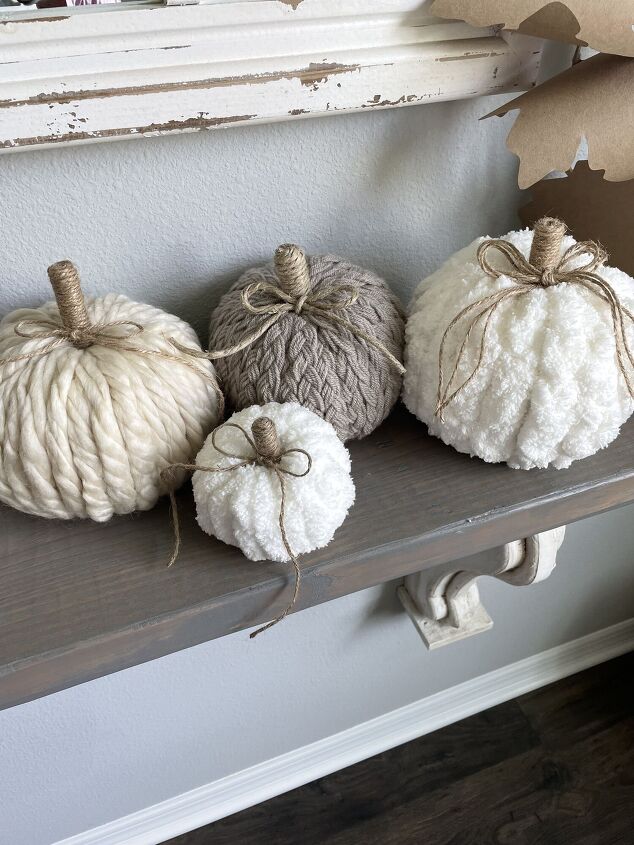
How to Style Your Pumpkins
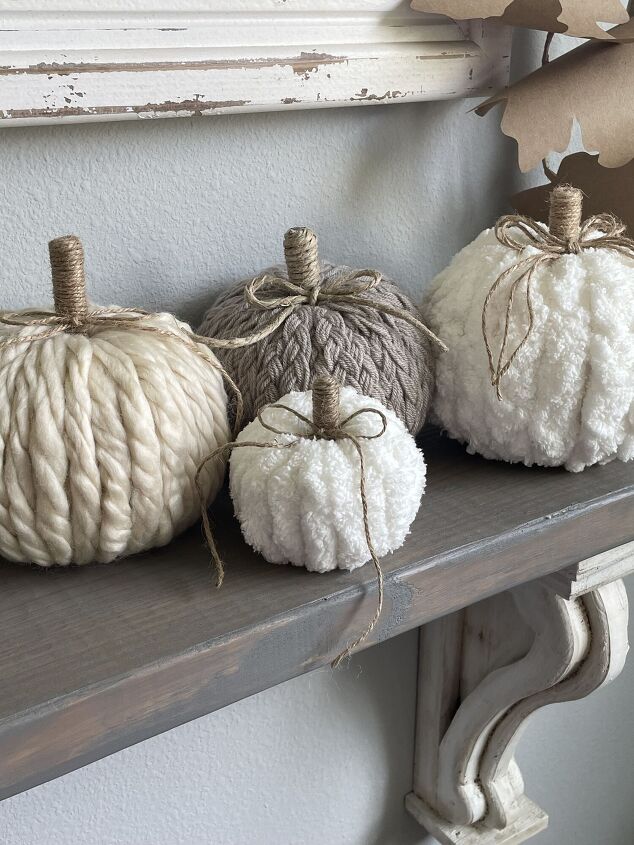
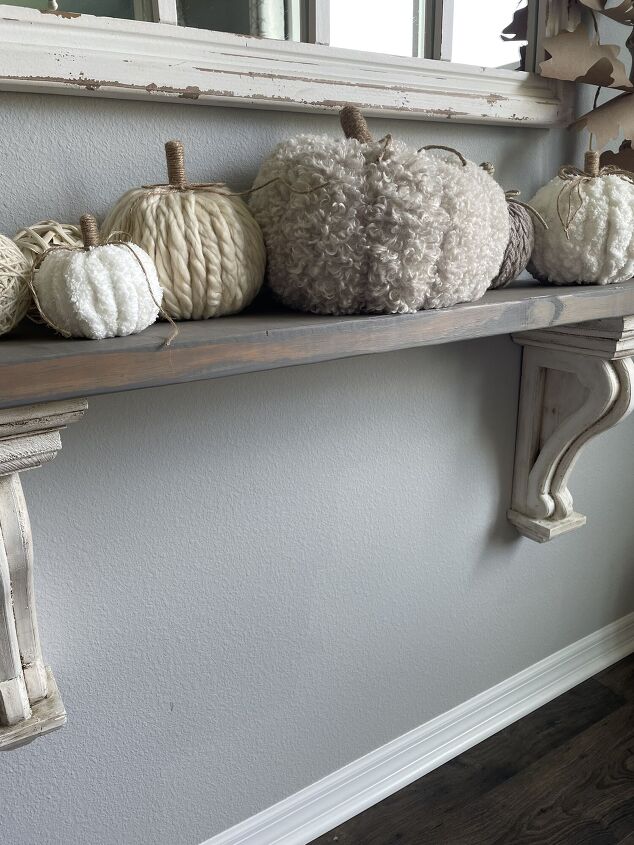
I am so thrilled with how these pumpkins turned out! I think they look beautiful and give a warm cozy vibe to the house! Now that you know how easy it is to make these adorable yarn pumpkins are you going to give it a try?
For more DIY Inspiration from simple crafts to whole room makeovers click HERE!
Resources for this project:
See all materials


Comments
Join the conversation
-
THIS is the reason I come to this site. Something innovative, clever and adorable. ♥️ Hats off to you, OP!!
-
So pretty. Nice job


Frequently asked questions
Have a question about this project?
They are really beautiful, I hadn't thought of wrapping a paper stalk with string, good idea and. I love the braided pumpkin best