


Make a Scarecrow From a Dollar Tree Wastebasket!
You can make a cute scarecrow from a Dollar Tree Wastebasket!
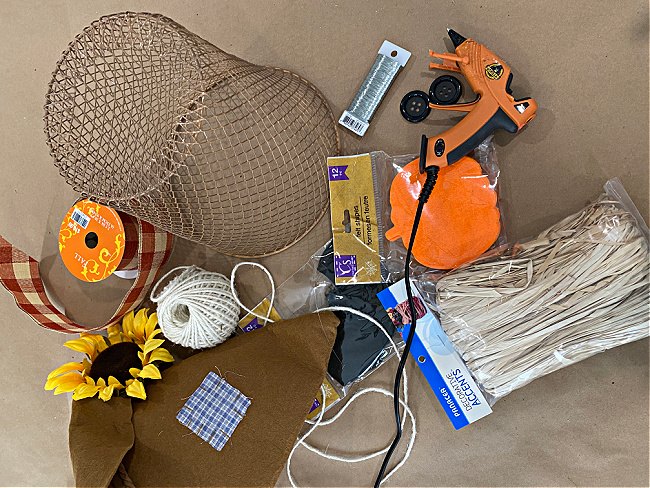
I had a few things on hand, but most of these items came from my local Dollar Tree!
Supplies:
Dollar Tree Waste paper basket
Dollar Tree large black buttons (came in a pack of six)
Dollar Tree Black Felt bat shapes
Dollar Tree Orange jack o’lantern shapes
florist wire (I ended up using pipe cleaners instead, they are always gentler to my fingers.)
raffia
Scarecrow hat
Fall Ribbon (I had some on hand but you can find this at Dollar Tree, too.)
Spray paint
Your glue gun and some hot glue!
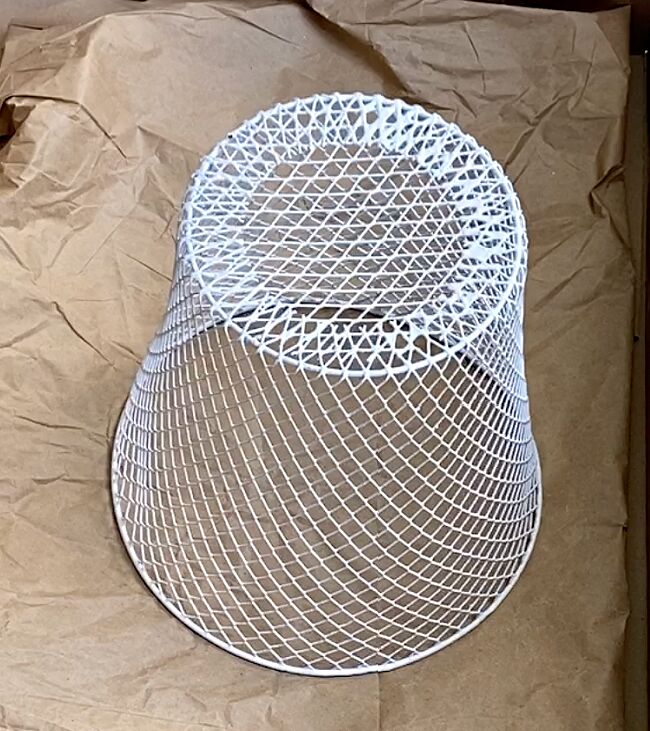
These little waste paper paper baskets at Dollar tree come in both black and white. It doesn’t matter which color you get.
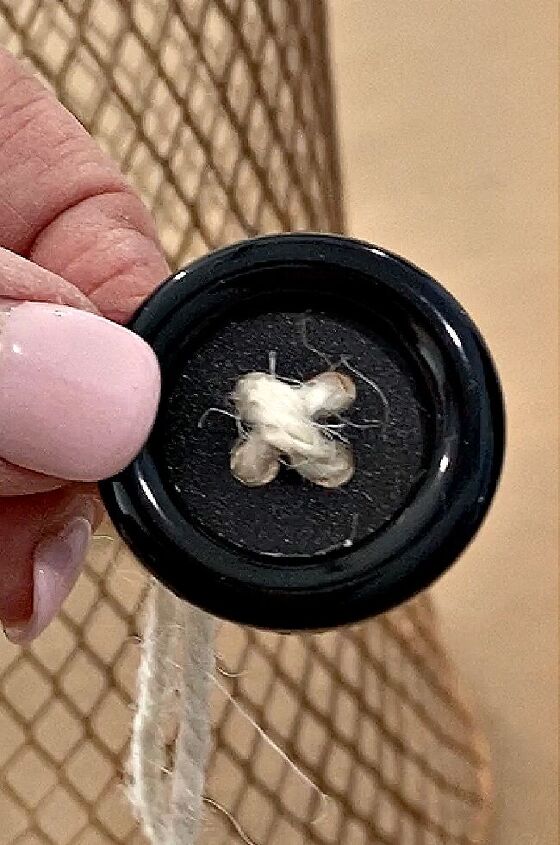
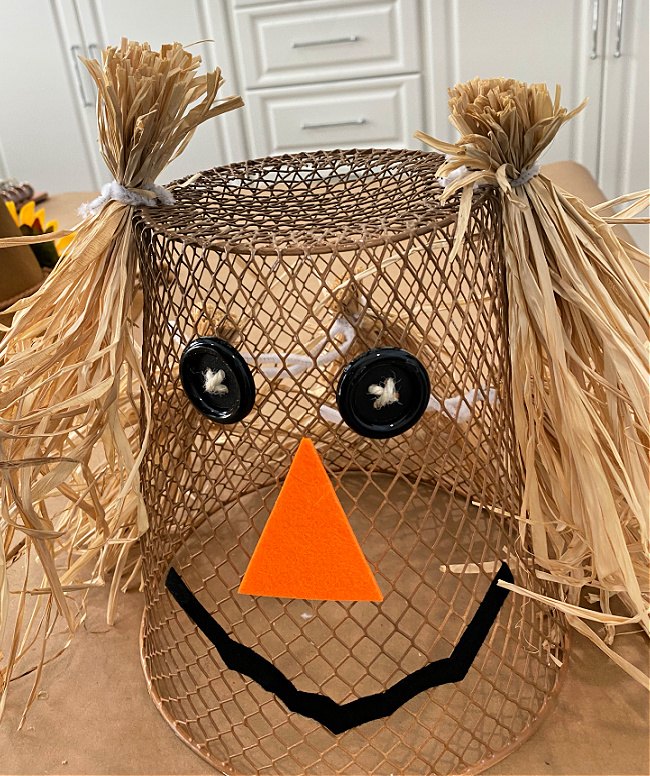
Use twine or a thick string to thread the buttons so that you get an “X” pattern on the face of the buttons.
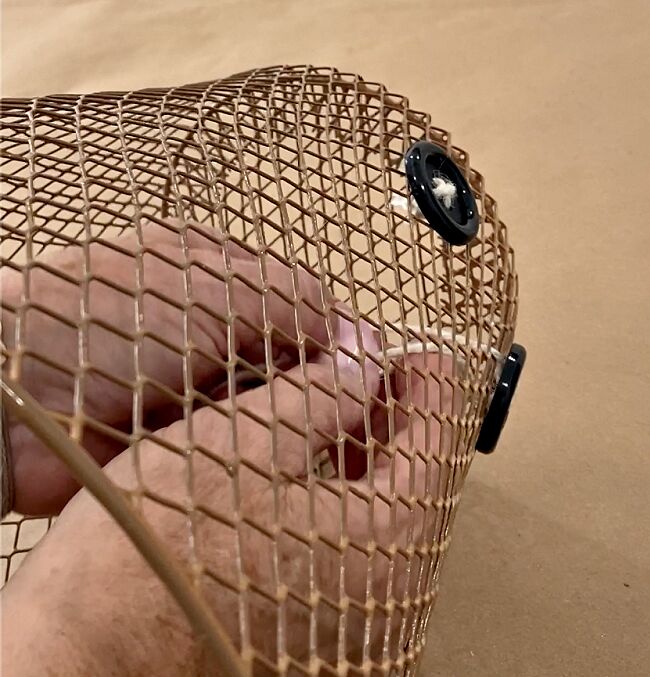
Reach through the wastebasket and tie the strings through the wire mesh, knotting the strings to hold your button eyes on snugly.
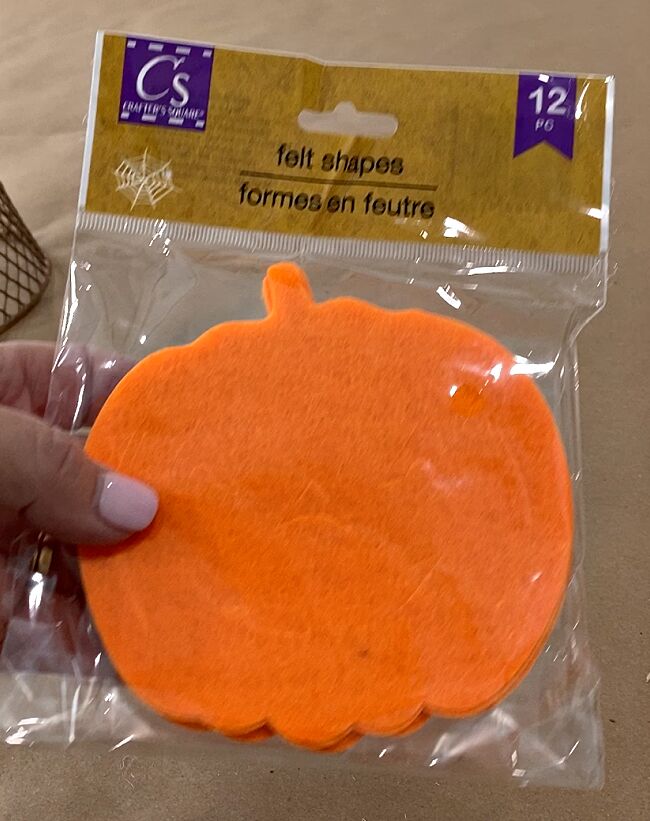
Grab a package of Jack O’ Lantern felt cut outs from Dollar Tree. (or any piece of stiff orange felt)
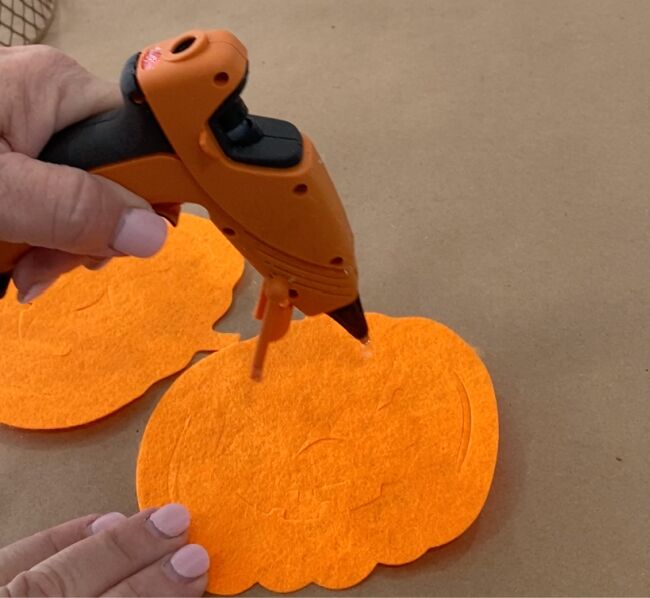
Without punching out the Jack O’Lantern faces, glue two of the pumpkin faces to one another. Use a generous amount of hot glue so that none of the pieces come out.
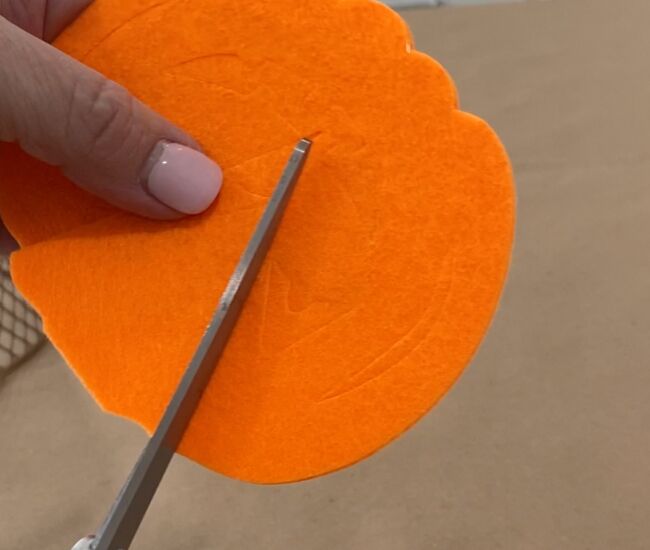
Cut out a triangle shape from the double layer of stiff orange felt after the glue has dried and cooled completely.
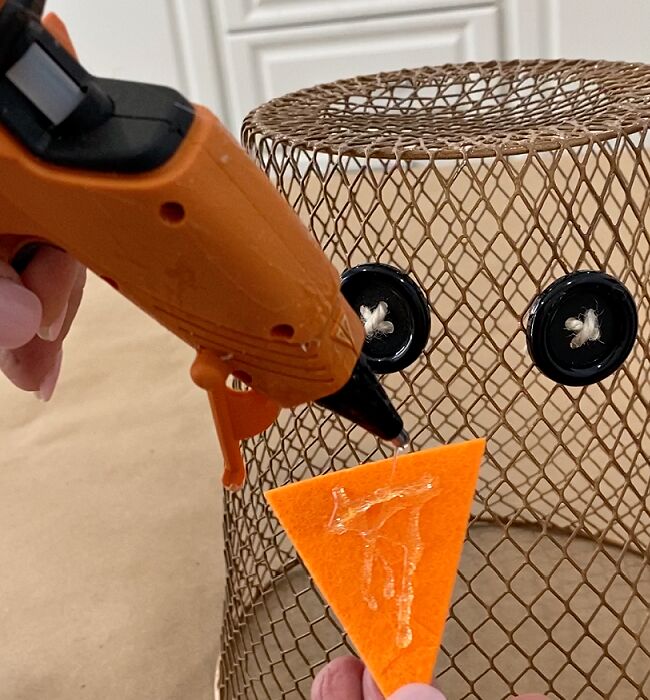
Apply a generous amount of hot glue to the trimmed triangle of felt. You only have the open weave of the wastebasket for the felt to stick to, so make sure you have enough glue that it will stick.
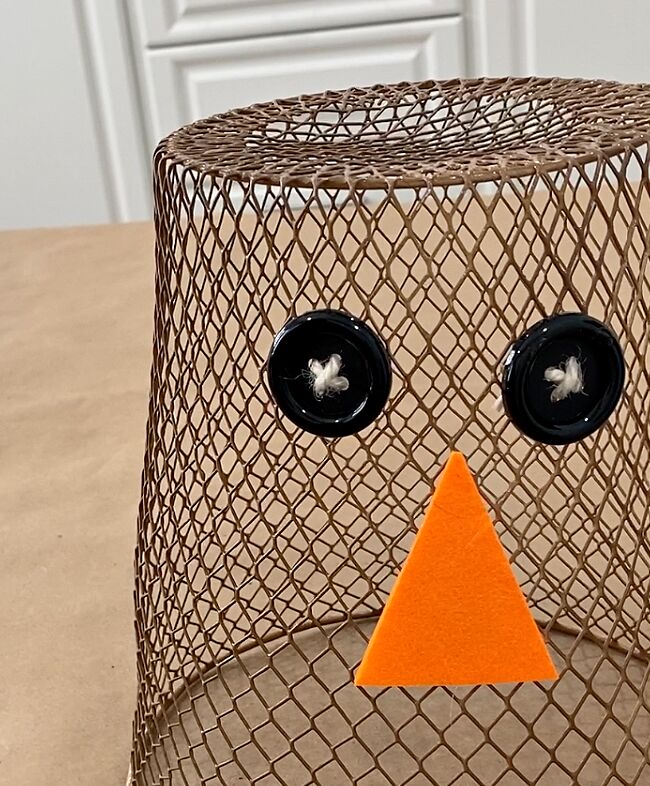
He is starting to get some personality and turn into an adorable craft now!
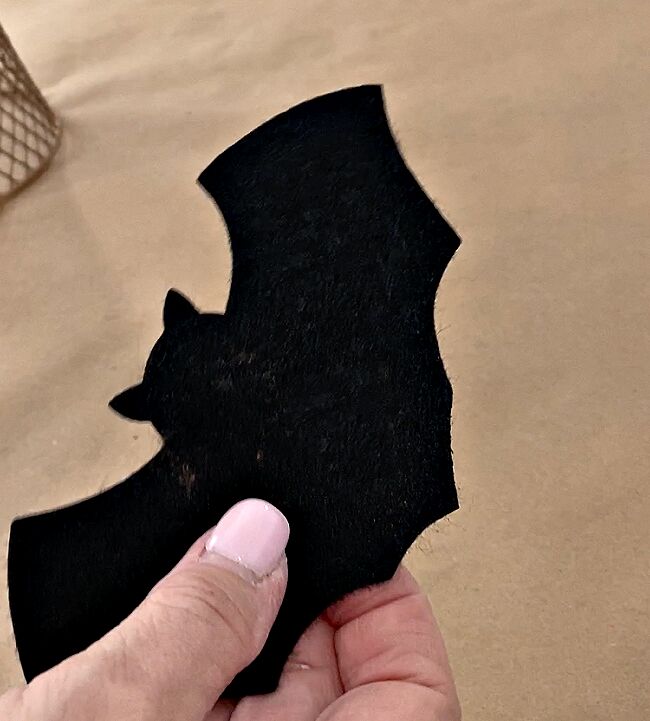
Take one of the felt bats from a package of bat shapes from Dollar Tree.

With your scissors trim a 1/2″ piece all along the edge of the bottom the bat following the shape of the bat wings.
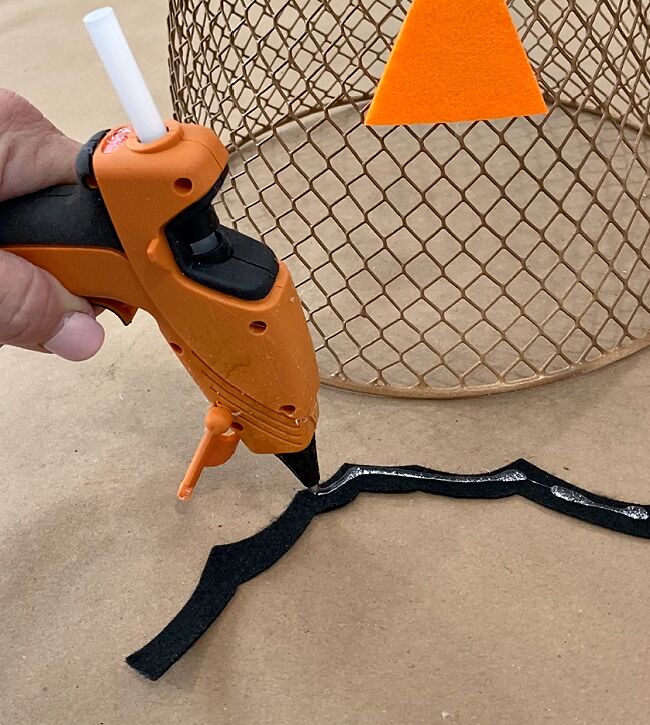
Add a generous amount of hot glue to that strip of felt.
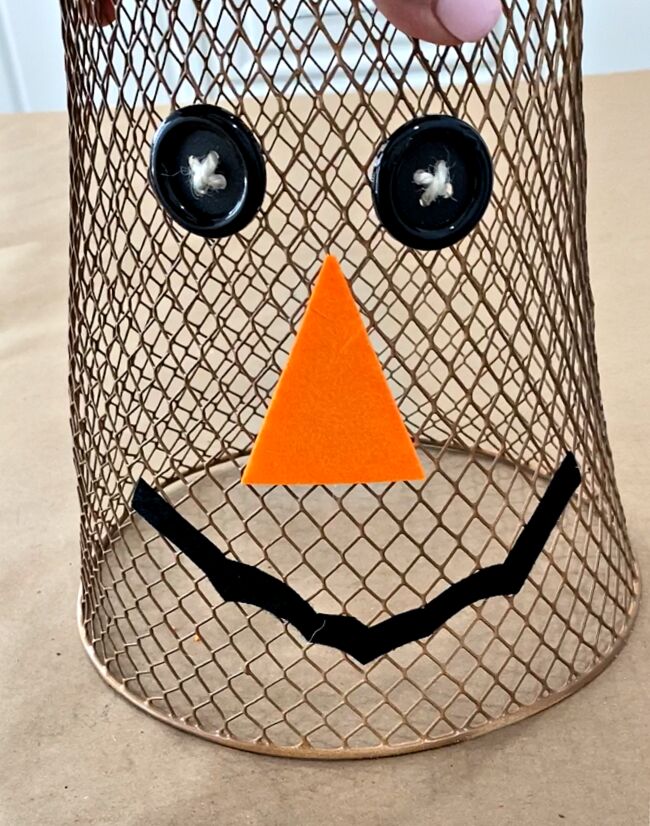
Stick your smile on the wastebasket and your scarecrow has a face.
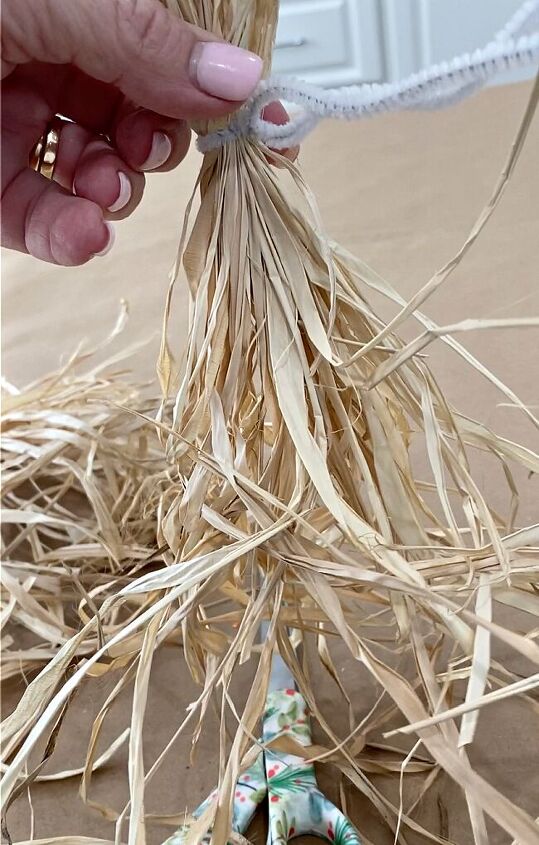
A small package of raffia is all that is needed to add a straw look to your scarecrow. Sort it out and secure five bundles of the raffia with pipe cleaners. You can also secure each bundle with a little floral wire if you prefer.
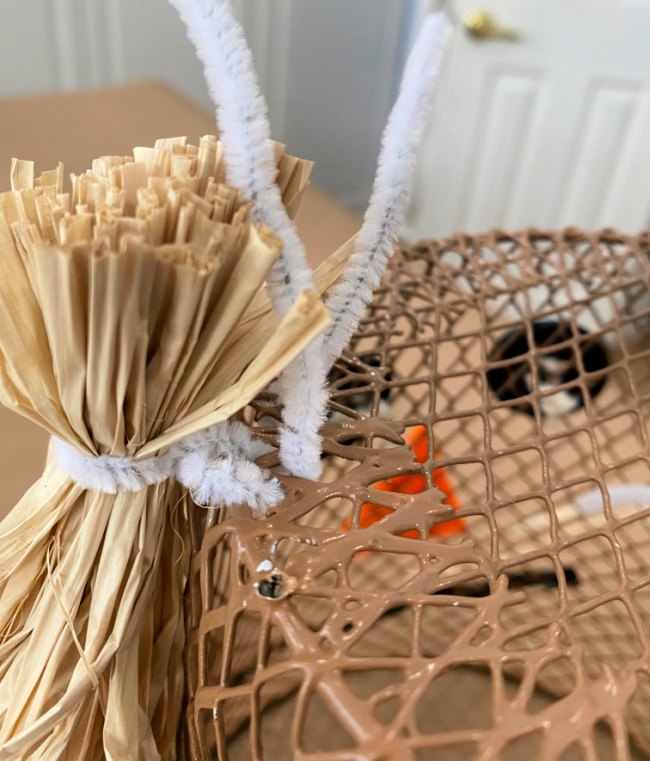
Use the wire to attach a bundle of raffia to each side of the head of the scarecrow as shown above and below.
Add the additional three bundles of raffia around the back of your scarecrow’s head.
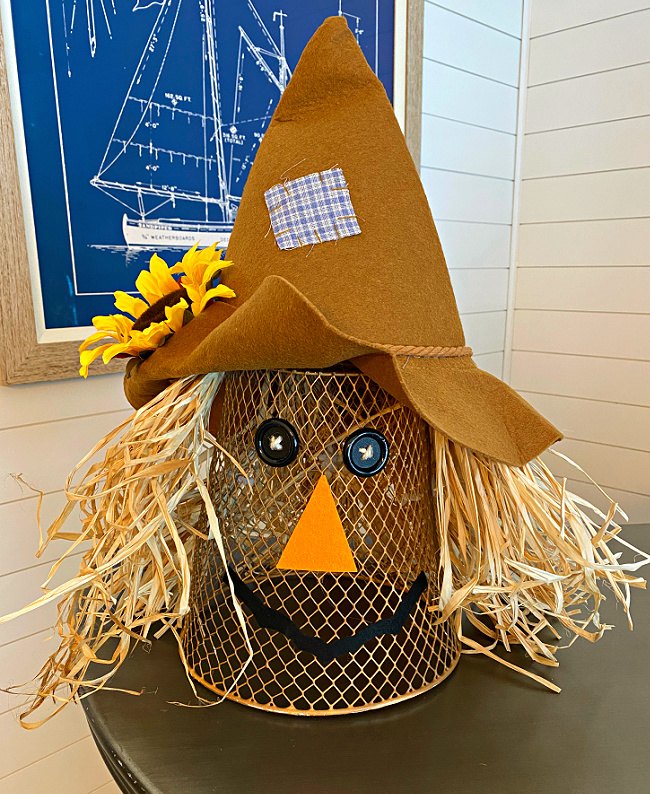
I hope you are liking your scarecrow at this point, and he isn’t yet, quite finished! I added a hat that I purchased on Amazon.
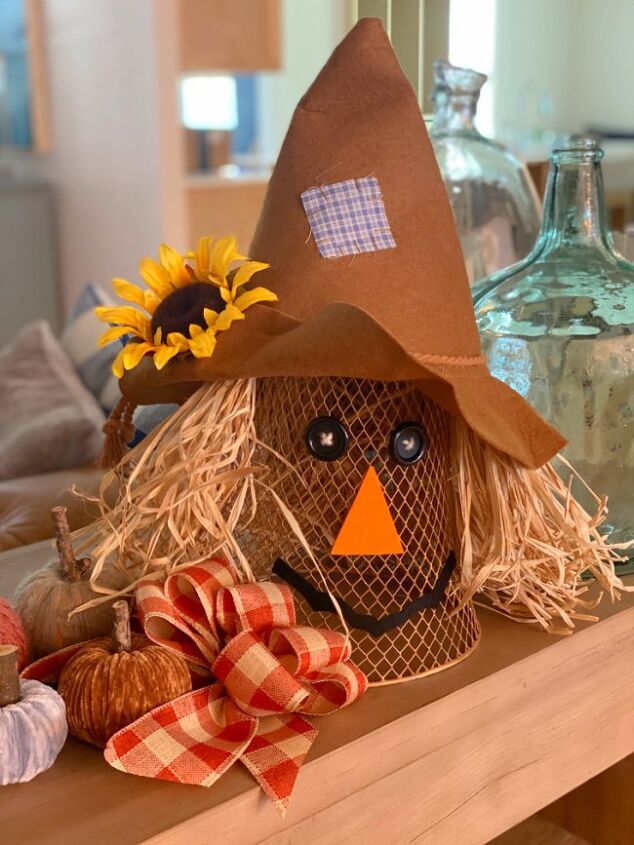
This is a great way to get ready for the fall season with some cute scarecrow home decor! I added a small bow of fall ribbon and some yarn pumpkins for the finishing touches to my little fellow!
DIY fall ideas
Resources for this project:
See all materials


Comments
Join the conversation
-
Cute, quick project. I would add a battery candle with timer for night. Happy Haunting! Carolyn
-
I love scarecrows and this one is so cute. I gotta try to make one. Thanks.


Frequently asked questions
Have a question about this project?
Where else can you get those wastebaskets?? Dollar Tree's now are only about 8-9" high!! I guess you could make a mini scarecrow!