


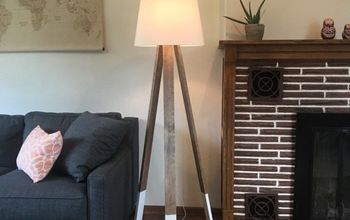
DIY Car Parts Lamp
3 Materials
$25
2 Hours
Medium
When we found out the gender of our new little one, I was super excited. Not only because of knowing what sex they are, but also because that means we can FINALLY start decorating the kids rooms! This project would also look great in a man cave!
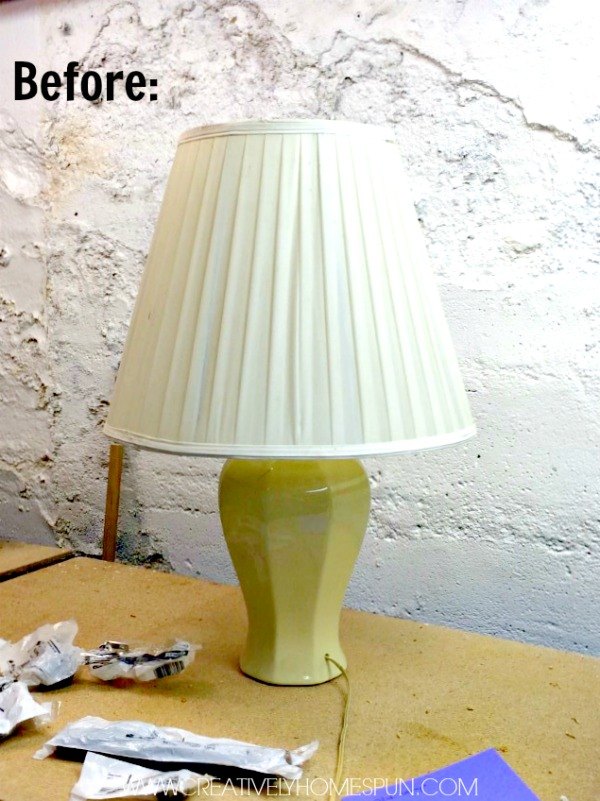
First we broke open the old lamp and took the guts to use. (Socket Shell, Insulation Sleeve, Socket, Switch, Underwriters Knot, Base, Threaded Tube and Wires) Basically we reused everything except for what makes the lamp "pretty". For the shade we saved, the Harp and snipped off the cross-bar to attach the shade to the lamp.
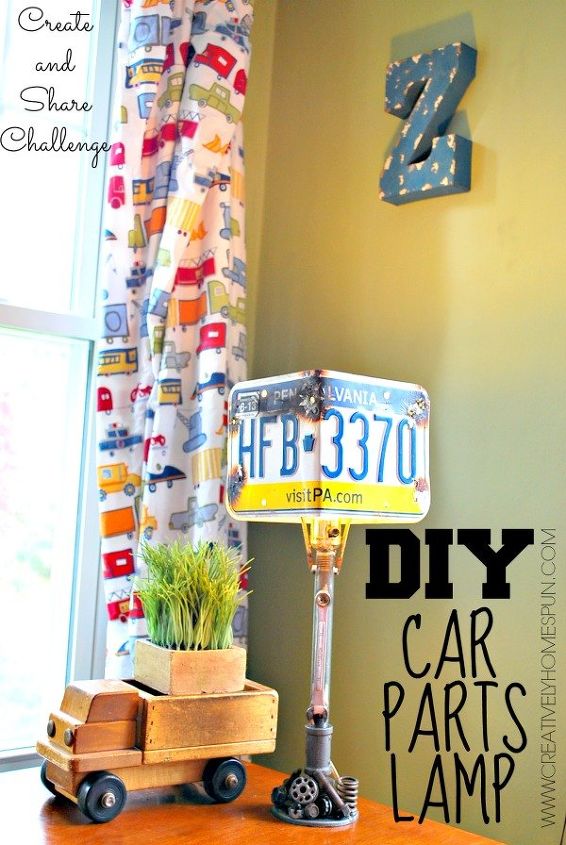
The how to is pretty easy, but is also VERY forgiving! You can create this lamp, or one like it, pretty much however you choose. So don't be afraid to branch out and use different mediums, or play it safe and create with something you're comfortable with. I love the details in this lamp. I dug thru my husband's car parts stash and fell in love with some of the unique shapes and textures that I found!
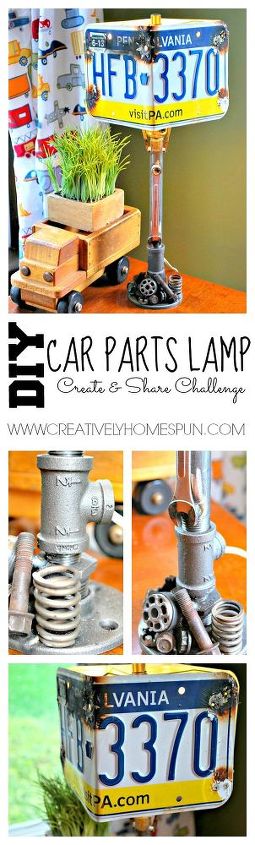
Luckily I have a hubby who likes to weld and help with my projects. So I placed the pieces where I wanted them and he welded them together. We also reassembled the "guts" of the lamp.

My son is super ecstatic that his room is coming together! And this post is the first sneak peek at how things are turning out! If you want to see more, check out this post and others on my blog!

Want more details about this and other DIY projects? Check out my blog post!
Comments
Join the conversation
2 of 4 comments
-
So much creativity. Love this cart parts lamp!
-
It has so much personality!!


Frequently asked questions
Have a question about this project?