


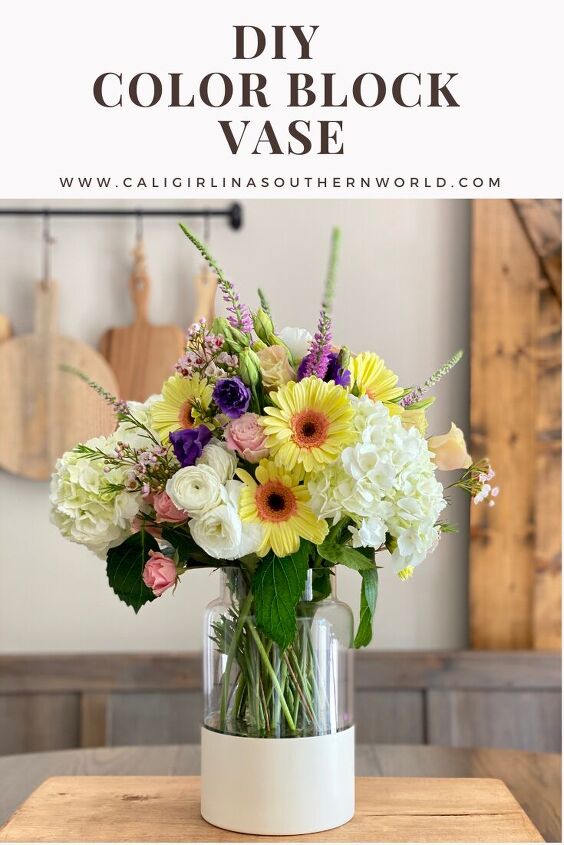
DIY Color Block Vase
Decor, DIY, How-Tos This DIY color block vase is the perfect project for a beginner to advanced DIYer. Like I say about all of my easy DIYs, “If I can do it, anyone can!”
This post contains some affiliate links for your convenience. Click here to read my full disclosure policy. Thank you for supporting my blog.
With the arrival of Spring, I was so excited about bringing fresh flowers back into the farmhouse. I recently fell in love with the beautiful and simple design of the color block vase. Although I loved the look of these vases, as I thumbed through home decor catalogs that came in the mail from stores like Serena & Lily, Pottery Barn, etúHOME, I couldn’t believe how much they cost. Talk about sticker shock! Many of the color block vases I was seeing were over $100! Was this a joke!?
It was then that I decided to make my own color block vase. Not only was I sure that it would be equally beautiful, but I was also sure I could make it for a fraction of what many stores are selling them for. Discount decor and a beautiful piece to use for displaying flowers in the farmhouse, win-win.
I am so pleased with how this DIY color block vase turned out and it could not have been easier.
Making a DIY color block vase is easy as 1, 2, 3.
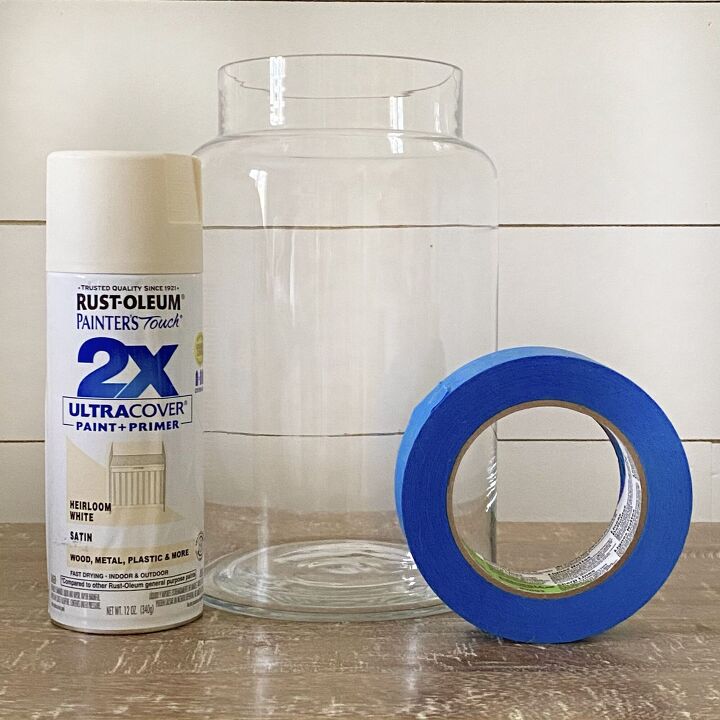
For this simple project, all that’s needed are three things:
- Glass vase
- Painter’s tape
- Spray paint (the color of your choosing)
In a matter of minutes, you can make a beautiful color block vase for your home or you can give it to someone as a gift. (Mother’s Day is just around the corner… Hint, hint!)
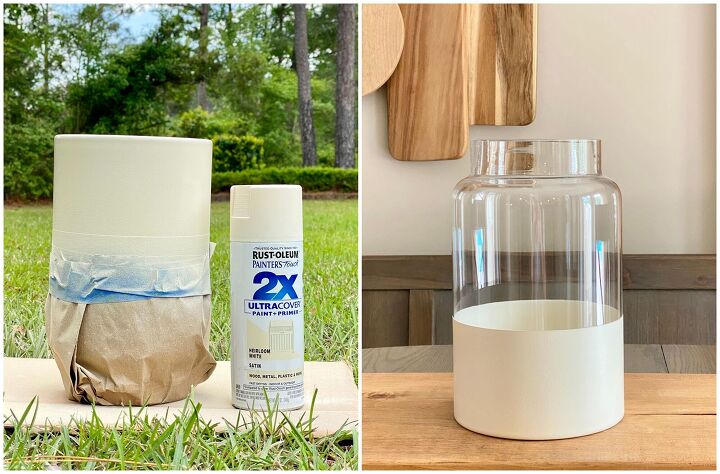
I found my glass vase at a local craft store, but you can also find them at Goodwill for around $2. Unfortunately, I was unable to find the size I was looking for at my Goodwill. Any old glass vase you may have sitting in the cabinet will do too.
The painter’s tape ensures that the line on the vase is straight and clean. I used blue tape for ultra-sharp lines. It worked perfectly.
Finally, spray paint is where creativity can run wild. Use an old can that may be leftover from another project (it’s also budget-friendly) or chose a fun new color for the season. Some seasonal color suggestions include, pink or green for Spring, yellow or blue for Summer, brown or orange for Fall, and red or green for Winter. (Since I’m boring, I chose to color block my vase with an off-white color, good for every season.)
The finish of the paint is also a fun choice. I chose a satin finish for this project, but a glossy and matte finish will look great too. Choose what fits best with your style. Rest assured, whatever choice you make, the vase is sure to be beautiful.
Did I say it’s as easy as 1, 2, 3?
Ah yes, yes I did. You not only need three things to make a DIY color block vase, but it also only takes three simple steps to make one. It doesn’t get any easier than this, y’all! Here is what you do:
1. Determine where to color block the vase and tape it off.
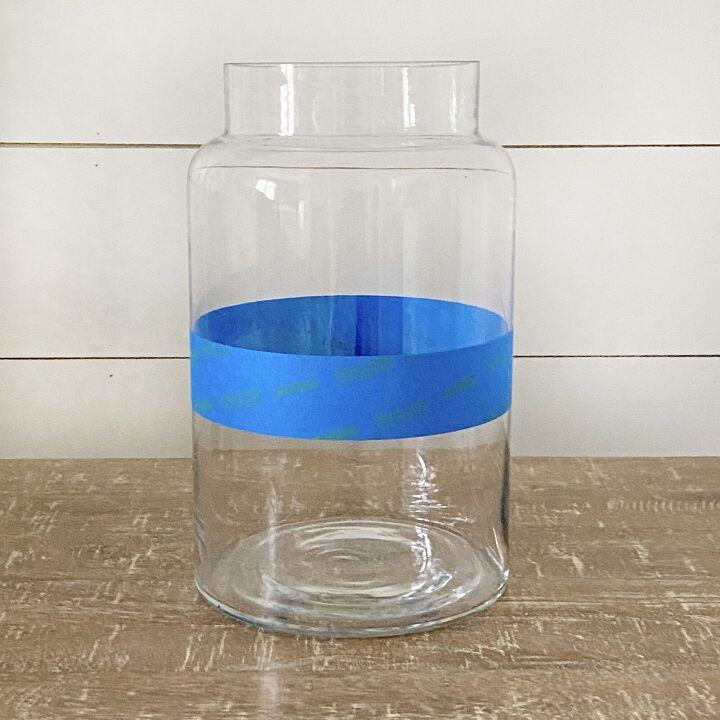
As a precaution and to ensure the best bond between the vase and the tape, wash the vase with soap and water and dry it off thoroughly. Decide whether you want the paint on the top or the bottom of the color block vase. I chose to paint the bottom of my vase because I like that it hides the ends of the stems and debris that sometimes collects at the bottom of the vessel. I think painting the bottom is a cleaner look, but it’s all personal preference. As I always say, “Make it your own.”
2. Paint the vase.
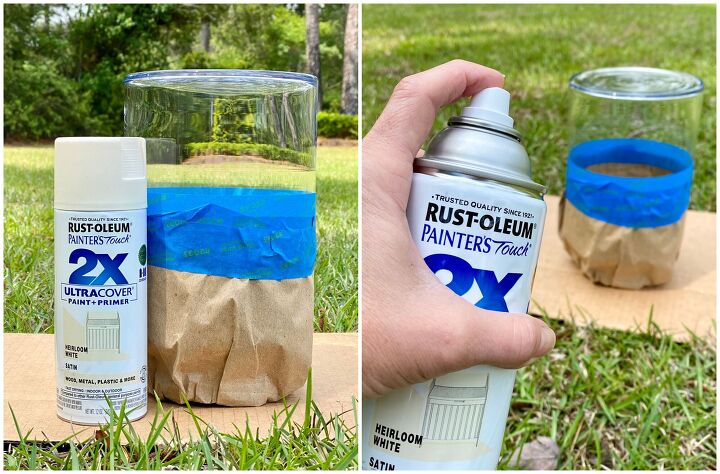
Once the vase is taped, cover the side of the vase that is not being painted with a plastic or paper bag to protect it from the overspray. Spray the vase with two coats of paint allowing the paint to dry in between coats. Be sure to follow the directions on the paint can to get even coverage and avoid drips. Side note: I painted the bottom of my vase. It was easier and it’s also a cleaner look.
3. Allow the paint to dry and then remove the tape.
After the paint has dried completely, remove the tape, and marvel at the beautiful job you did. Now comes the fun part!
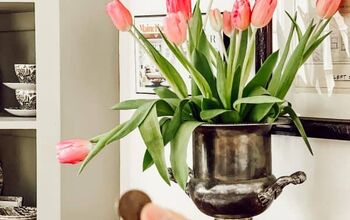
Finish it off with flowers.
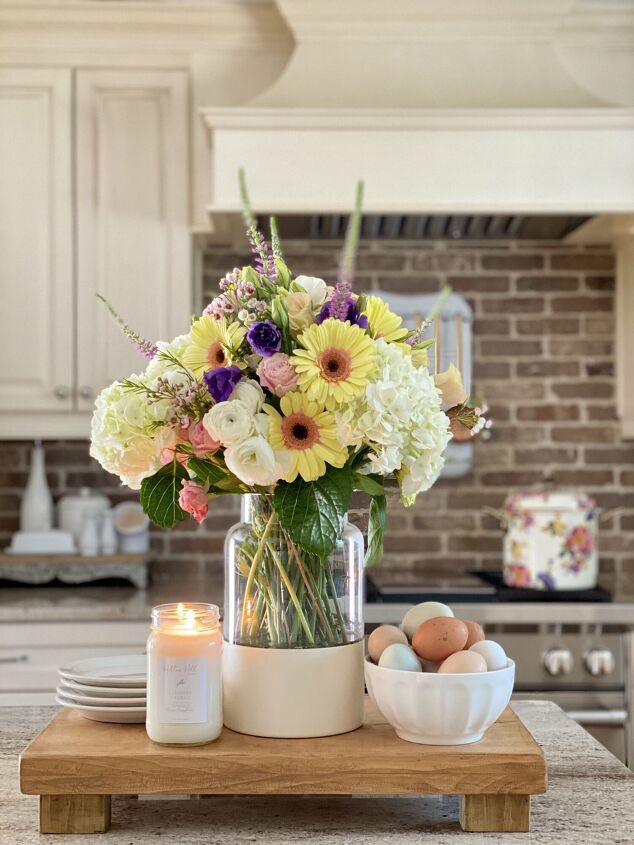
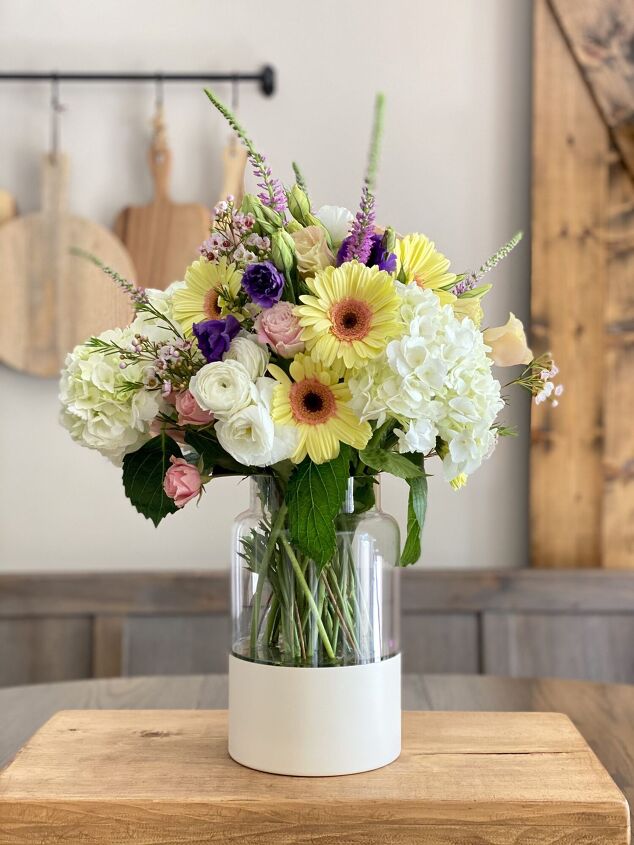
With the color block vase complete, it’s time to fill it with flowers. I love to use fresh flowers in the farmhouse whenever possible, but faux flowers are beautiful too. You can even mix and match fresh with faux. The sky’s the limit!
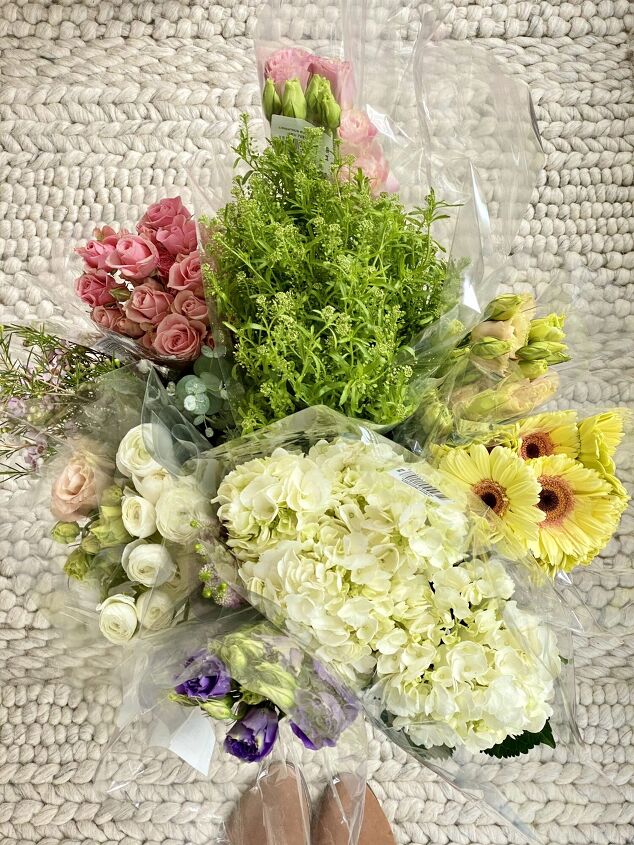
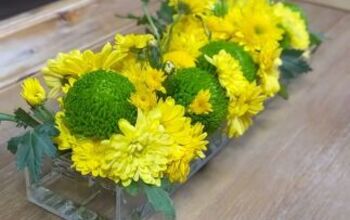
My go-to for fresh flowers is our local Trader Joe’s. I always load up on lots of seasonal blooms in varying colors and sizes. Some of my favorite Spring blooms are ranunculus, hydrangeas, tulips, and daisies… Just to name a few.
I filled my color block vase with water until the waterline met the top of my color blocking. (I don’t typically use a floral frog in my arrangements, but some people find them helpful. I’m just lazy.)
When arranging flowers, start with the biggest and strongest blooms first. Strong meaning the flowers with the heartiest stems. They typically do the best standing straight for the longest period of time in an arrangement. After the tallest and strongest blooms are in the water, begin filling in the gaps with the rest of the blooms until you have a full and beautiful arrangement.
Now, it’s time to find the perfect spot to show off your amazing DIY skills. Find a special spot to display your new color block vase in your home. This vase looks perfect on a kitchen island, a coffee table, a sofa table, a nightstand or anywhere in the home, quite frankly.
Ready for more easy DIYs?
I hope you enjoyed this quick, easy, and beautiful home decor DIY. I would love to see your DIY color block vase if you make one. Please share it with me on Instagram. If you are looking for more affordable and achievable DIYs you may want to check these great projects out too:
- DIY Wood Riser
- DIY Wood Farmhouse Tray
- 4 Ways of Using Cutting Boards in Decor
If you love this project, save and Pin it for later!


Comments
Join the conversation
-
Congratulations 👏
Nice & easy project
Very Pretty arrangement 😉
I love flowers 🌷🌸💐🌺🌻🌼🌹
Thank you for sharing 👍️
-
Thank you so much for sharing, it turned out gorgeous, will definitely be doing this project.


Frequently asked questions
Have a question about this project?
Great idea! Did you prime at all first? Thank you!