


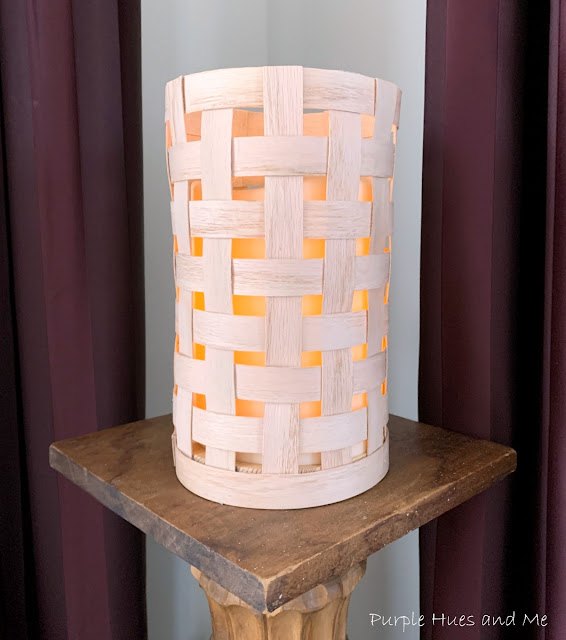
Handwoven Wood Veneer Candleholder
Do you ever get excited about working with a special craft material? Well right now my new found craft material is wood veneer edging! You can find quite a few wood veneer edging crafts on Pinterest. Unlike working with regular lumber wood, you don't need any special woodworking skills! Wood veneer edging is thin - making it easy to work with in creating lots of cool items like lanterns, pendant lights, lamp shades, etc.
I started using wood veneer edging while making some Christmas crafts last year! I created a "Christmas Star" which I thought was really cool and very easy to make! Then recently, while going through my craft stash, I came across what was left of my wood veneer edging roll and decided to make something interesting with it! It's always fun when you don't have to spend any money to create a fabulous item!
I came up with creating a handwoven wood veneer candleholder - something that can be used any time of the year, for any occasion - indoors and out! Woven accents are very trendy and popular - and can be used with any style, too! Just look around! Woven accents work in a variety of decors - giving off a different set of decorative vibes that includes modern, rustic, vintage and tropical.
So let's get started with creating a handwoven wood veneer candleholder!
Materials
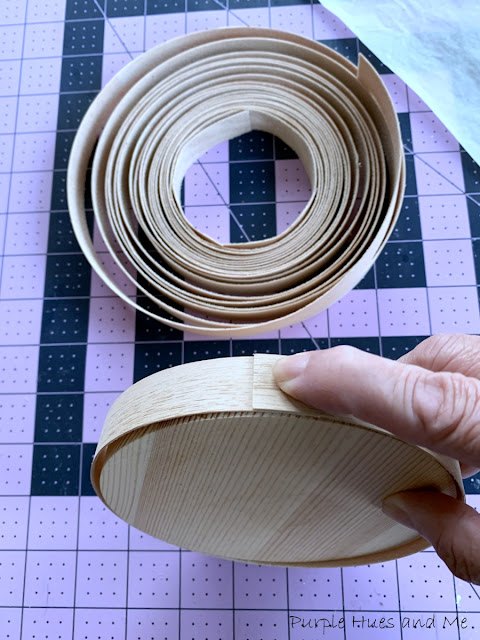
- Real Wood Veneer Edging
- Wood Disc - 5" wide
- Hot Glue/Scissors
- Ruler
- Clothespins/Clamps
- Candle/Light base with remote
How to
First, measure the circumference or distance around the disk with the wood veneer edging (17") and cut off.
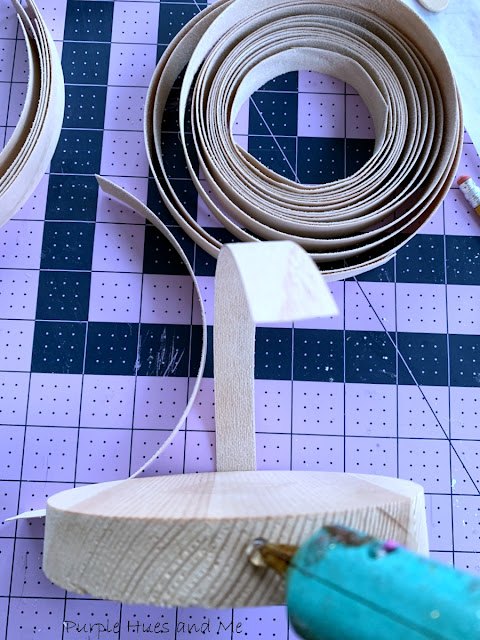
Determine how high you want the candleholder to be - in this case, between 8-9" and cut four 9" strips. Hot glue one strip on the middle edge of the disc at the 12 o'clock position.
Then hot glue another strip on the opposite side - "6" position.
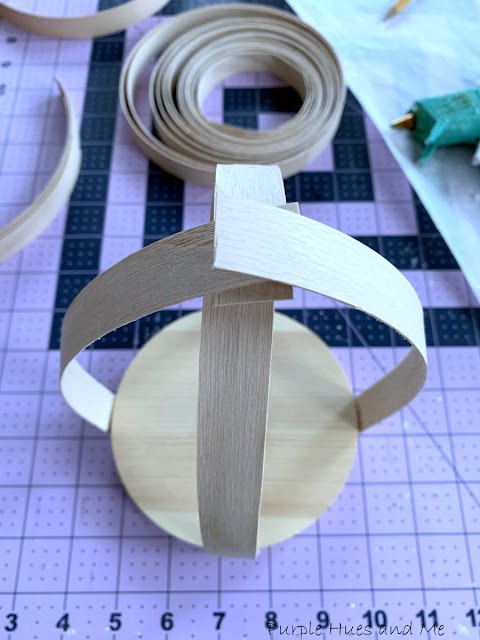
Continue gluing on the two remaining strips on the opposite sides in the 3 & 9 position.
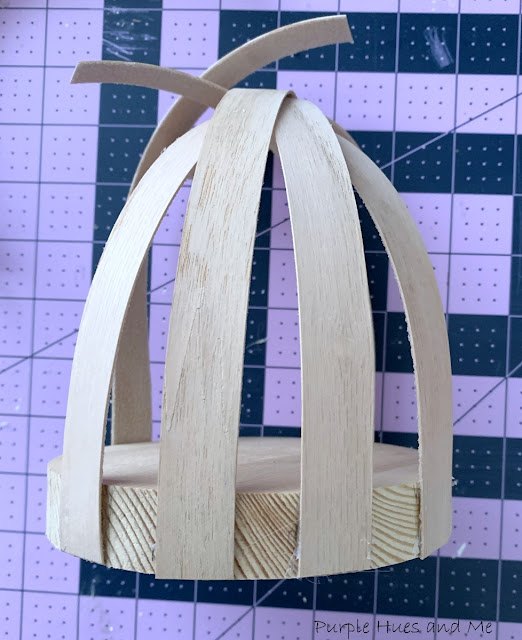
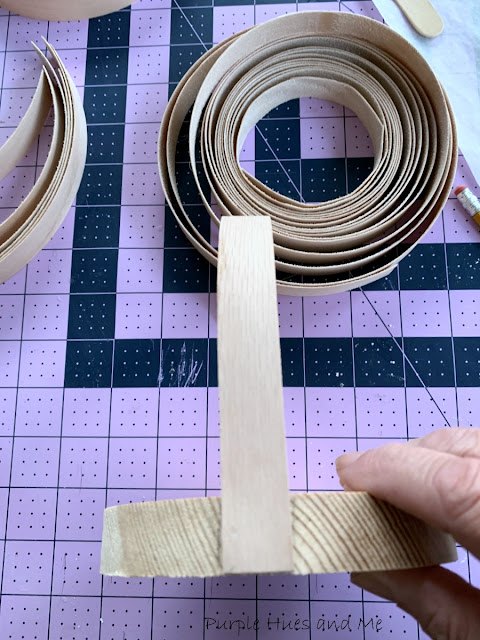
Cut eight more 9" strips and glue on two strips equally between the four strips.
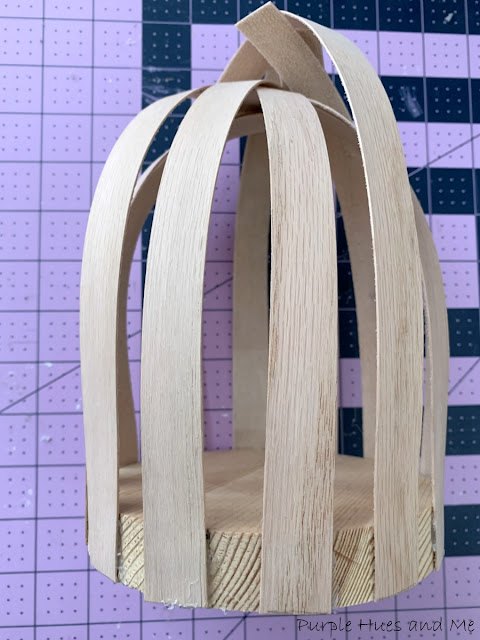
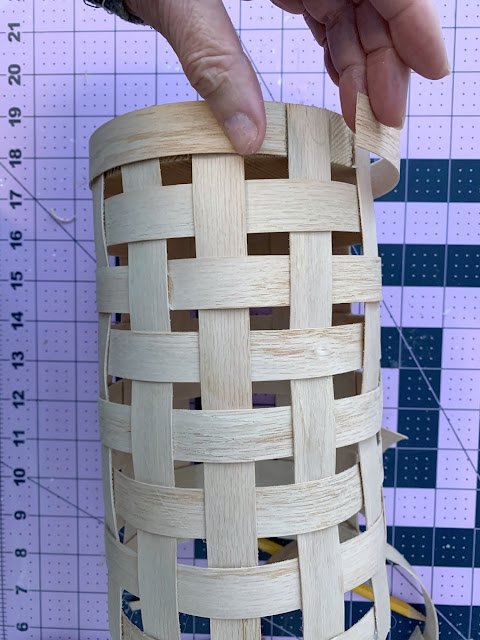
Once all the vertical strips are glued on . . .
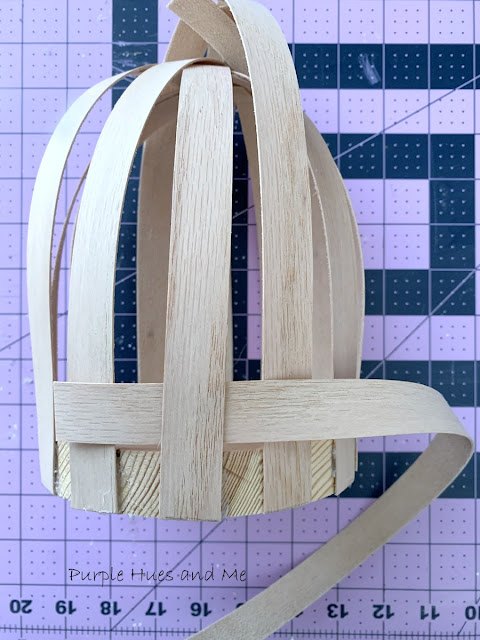
begin weaving the 17" strip over and under the vertical strips.
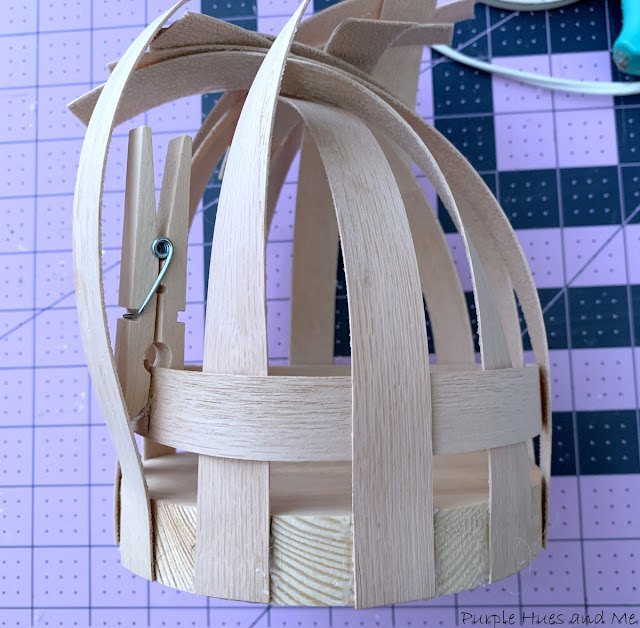
Reaching the opposite end, overlap the horizontal strips just enough to hide under a vertical strip and glue together. Clamp together until dry.
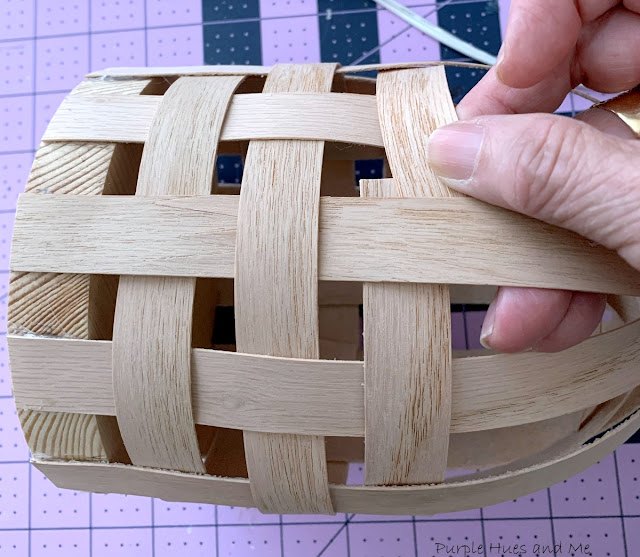
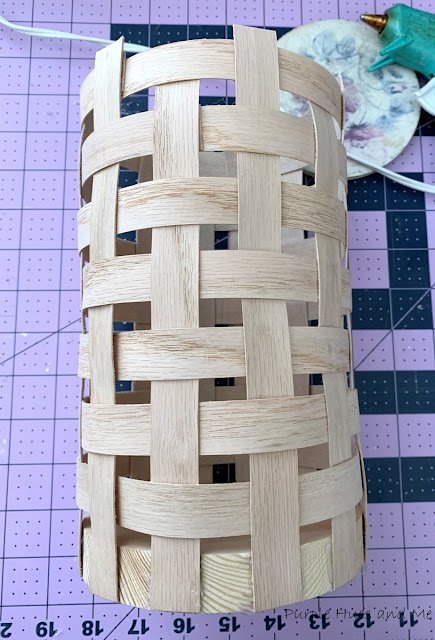
Cut a few more 17" horizontal strips and continue weaving additional rows over and under, gluing the overlapped ends together.
Continue weaving the horizontal strips over, under and gluing together until . . .

you can't weave any more rows on the vertical strips.
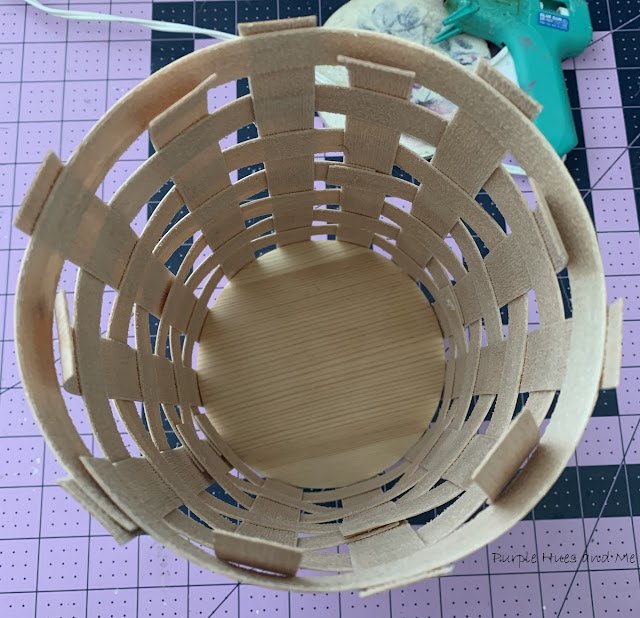
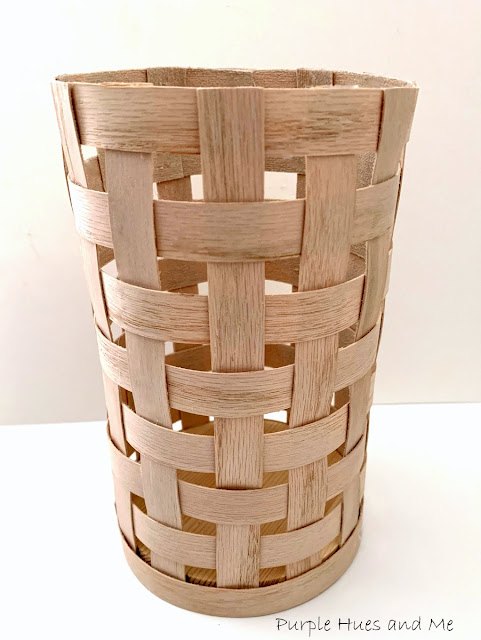
Since just the horizontal ends are glued together, the strips can be equally spaced between rows.
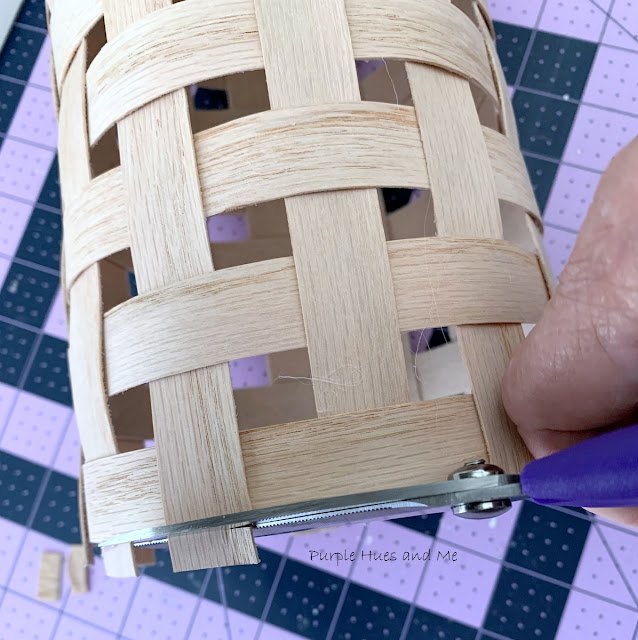
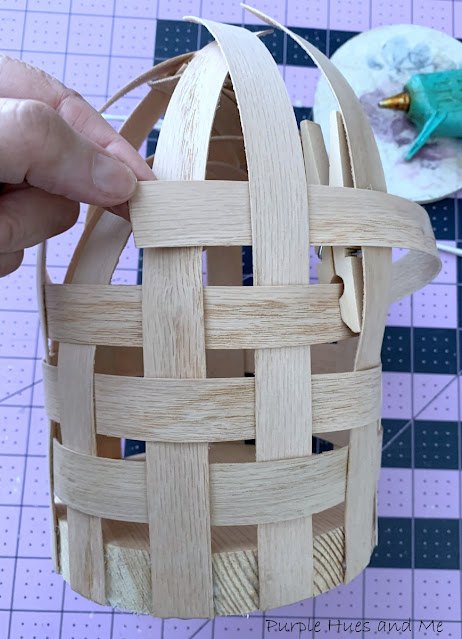
After spacing the strips, glue the vertical end strips together with the horizontal strips on the top row and cut off the excess wood veneer.
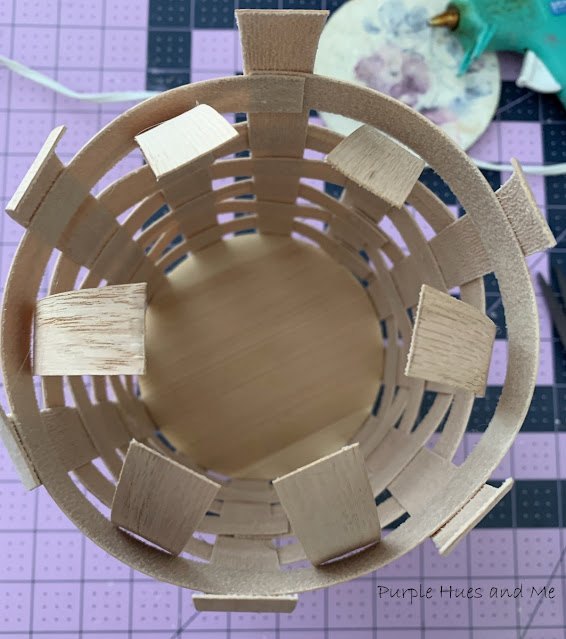
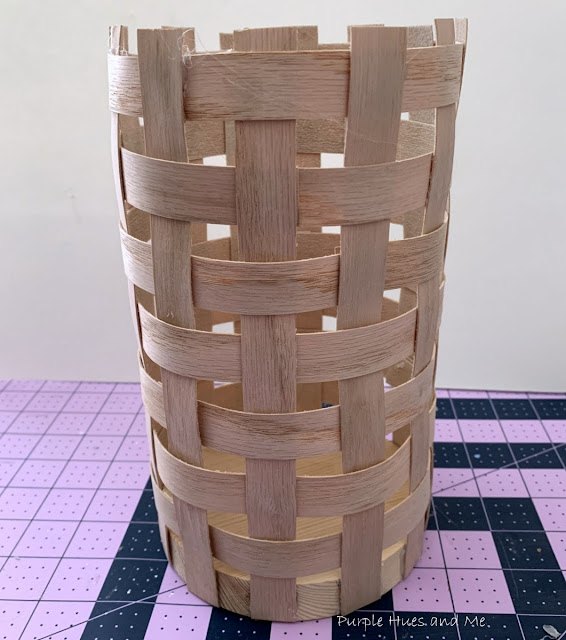
And finally, add a wood veneer strip over the bottom row matching the end edges and gluing in place for a finishing look (candleholder is upside down in photo).
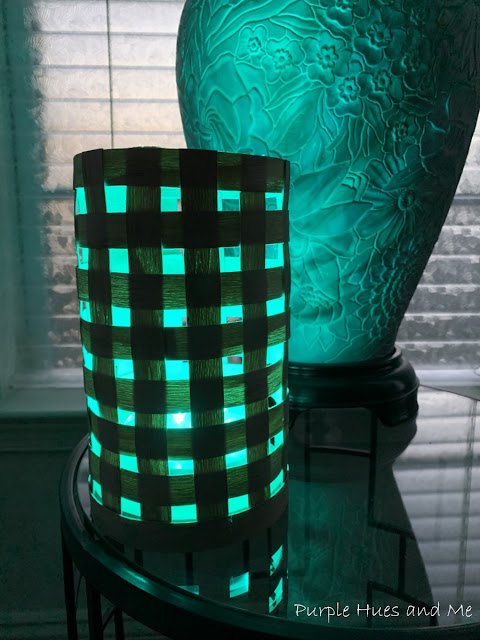
The finished piece is 5"x8.5"tall.
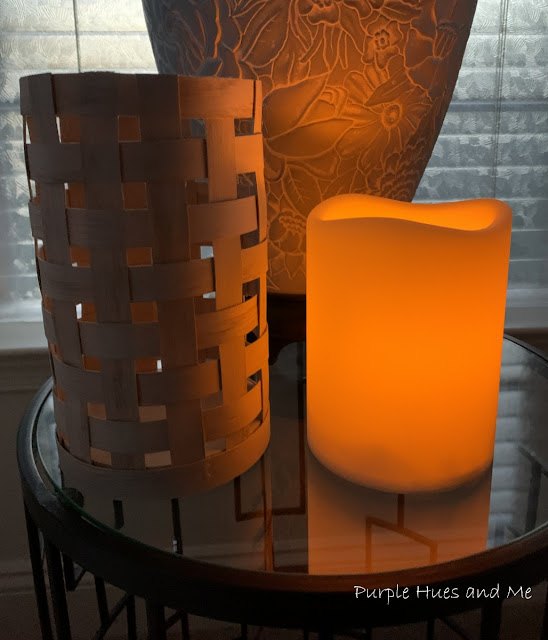
The open weave allows light to pass through for ambient lighting!
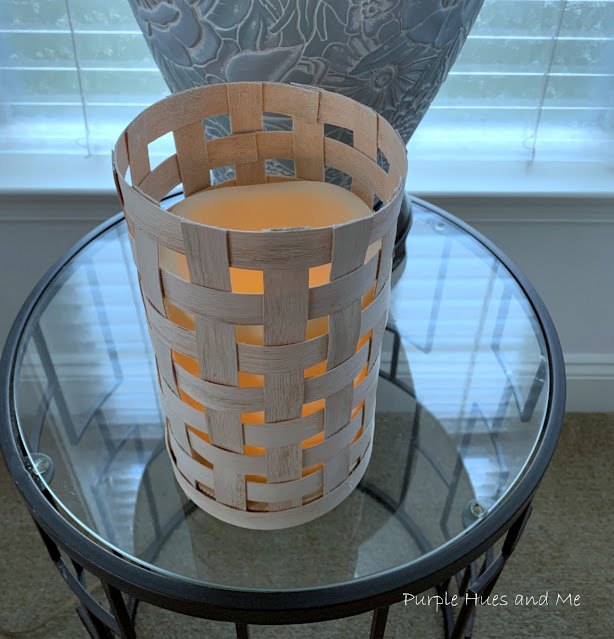
And even though this candle holder is designed for a single pillar candle -
the fun thing about its' use is that you can also use a light display
base . . .
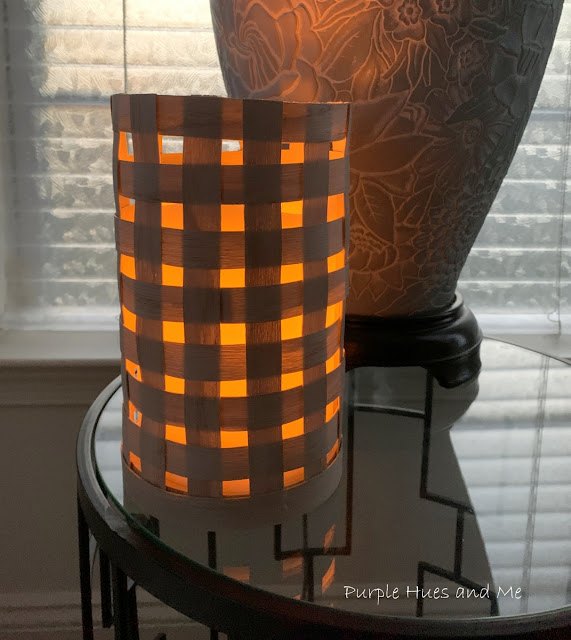
that's perfect for vase and mood lighting with . . .
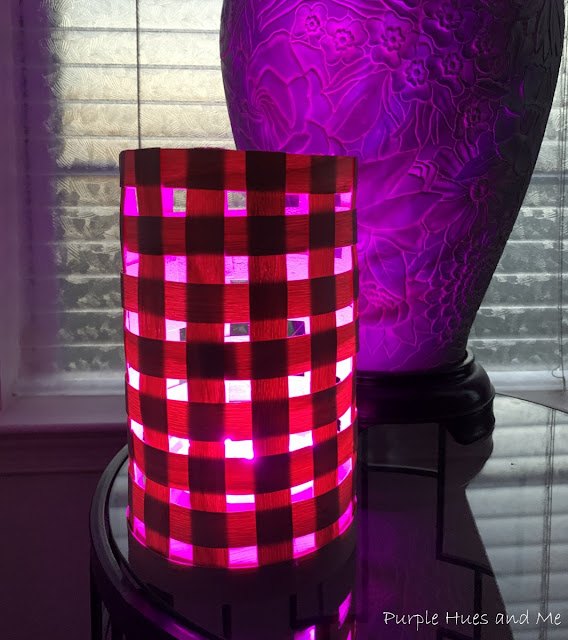
multiple colors and modes. How cool is that!
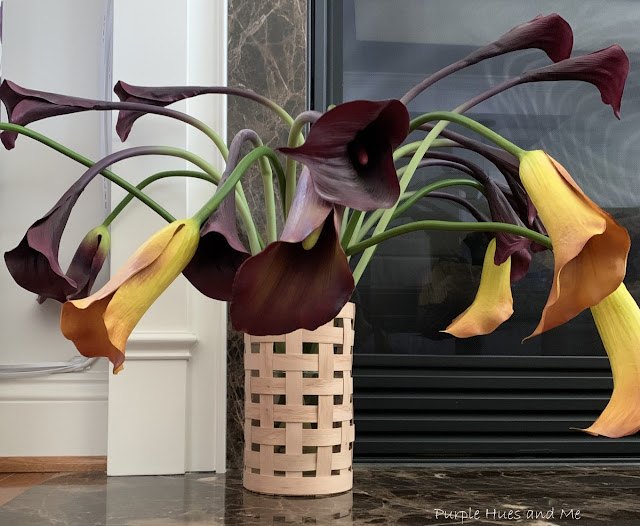
And it can also be used with a glass container or vase to show off pretty seasonal flowers, too!


Comments
Join the conversation
-
Love this! Great DIY and gift idea!!


Frequently asked questions
Have a question about this project?
Do you have a source for a light fixture that can be used in this? What kind of light has the multi-colors? I love this project!
Could you do a basket weave chair seat with this material ?
I have only seen this edging come pre-glued. Is that what you used? Or is it available with no glue in the U S?