


How I Hid My Ugly Electrical Panel

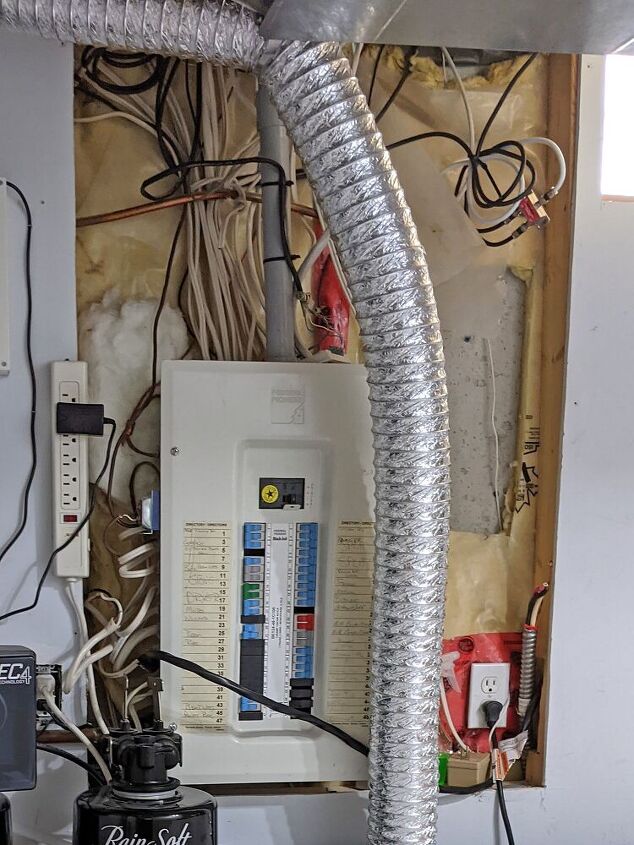
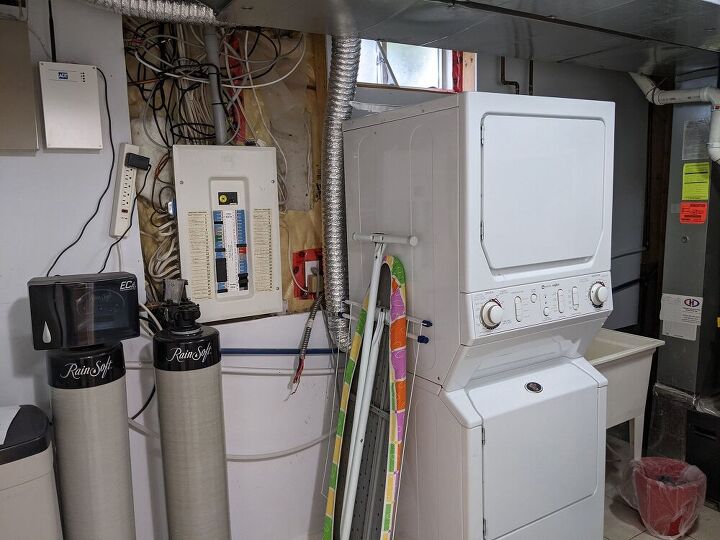
I’ve always had ugly laundry rooms, every single one, but the current one would have won the prize for ugliest yet! The biggest eyesore of all was the electrical panel and all the exposed wiring, so I constructed a cover to hide it.
After repairing my old washer and dryer several times, I recently decided I’m done paying for repairs and bought a new set. Once my spankin’ new set arrived, I thought this would be the perfect time to tackle the big eyesore around my electrical panel.
Figuring out my supplies
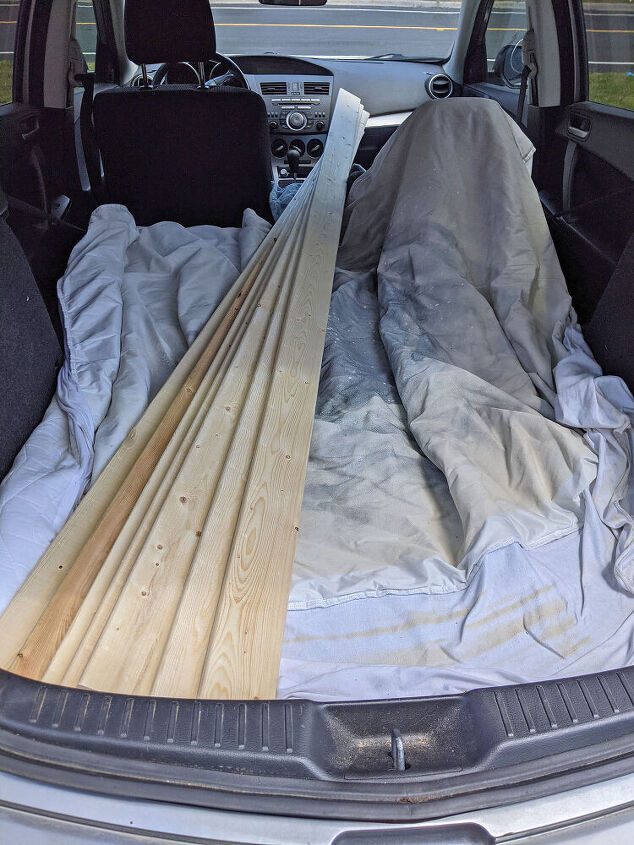
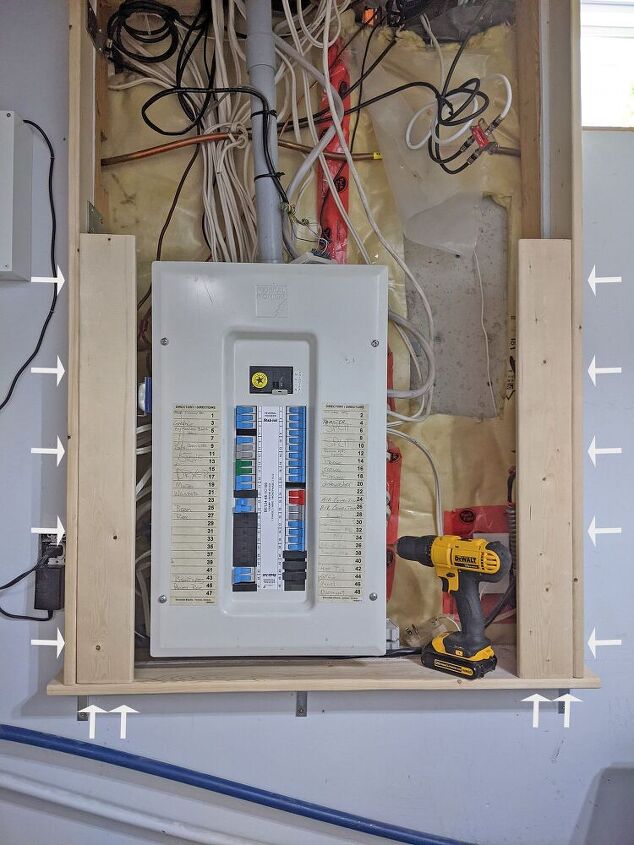
I measured the space around the panel, as well as how far out the panel protruded in front of the surrounding drywall. It stuck out about 3”, so I purchased a few spruce boards at 1” x 4” x 8 feet for my frame.
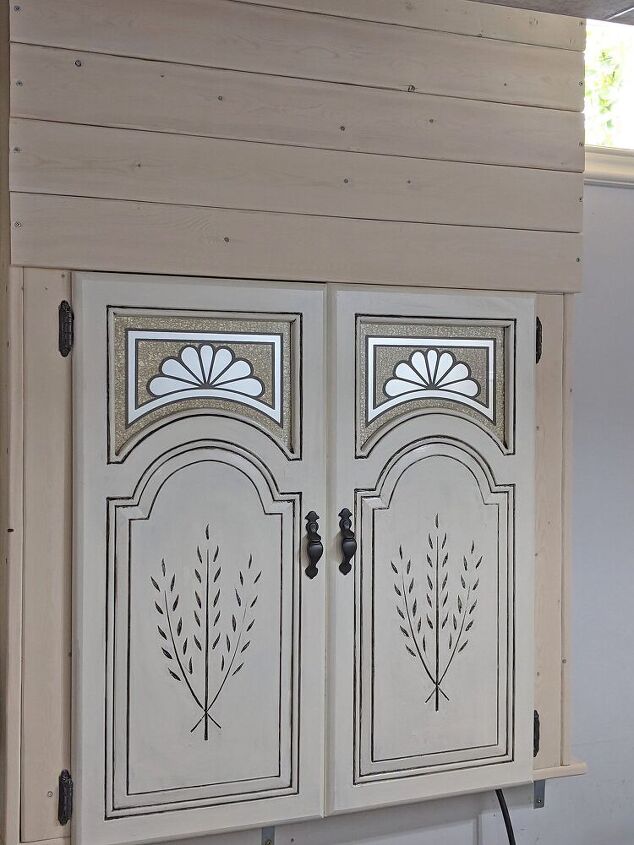
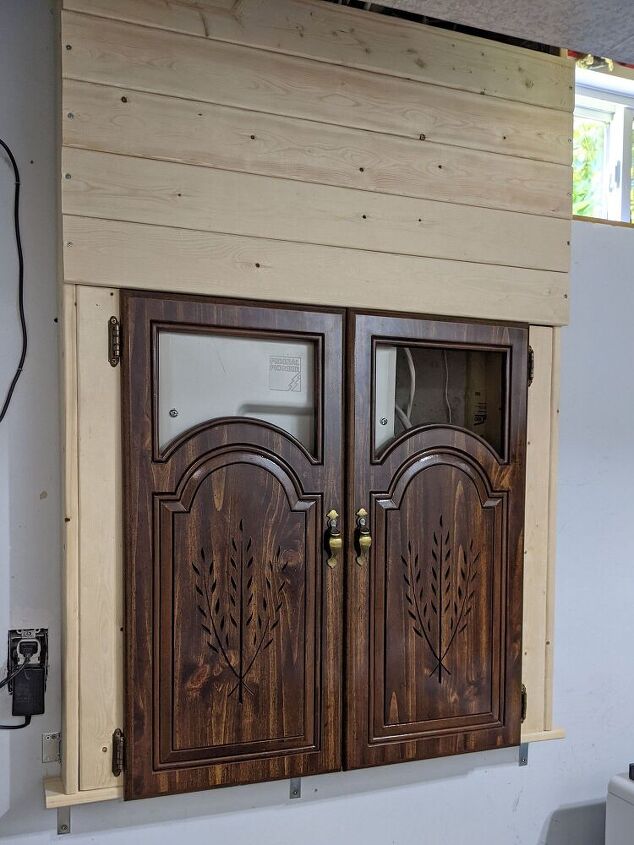
I had recently picked up a free cabinet on marketplace. It was in rougher shape than I’d hoped, and not solid wood, so I ended up using it as extra garage storage. But I loved the doors on the cabinet and used those for this project. If I hadn’t had those doors to pilfer, I would have gotten some at Restore for a couple of bucks.
Attaching the frame to the wall
I cut my boards to line up with the studs on both sides and the bottom of the opening. I considered building my frame first and attaching it to the wall as a unit, but I thought that might be a little heavy for me to hold up and attach at the same time. I’d definitely need a third arm to pull that off. So I installed them piece by piece.
I started with the bottom and used my laser level to indicate ¾” down (the thickness of the board) and attached three L brackets to the studs. Then I attached my bottom board to the brackets.
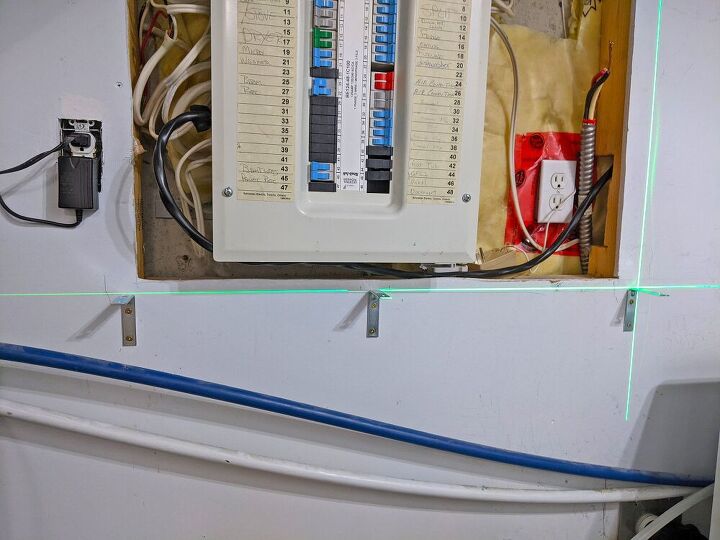
Next I installed the left board. I used heavy duty flat brackets and screwed the board to the stud.
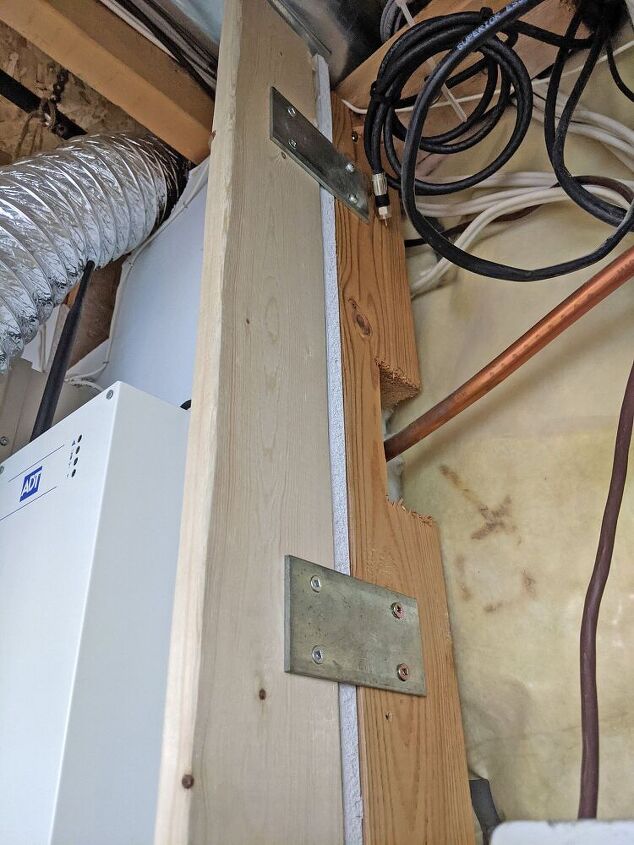
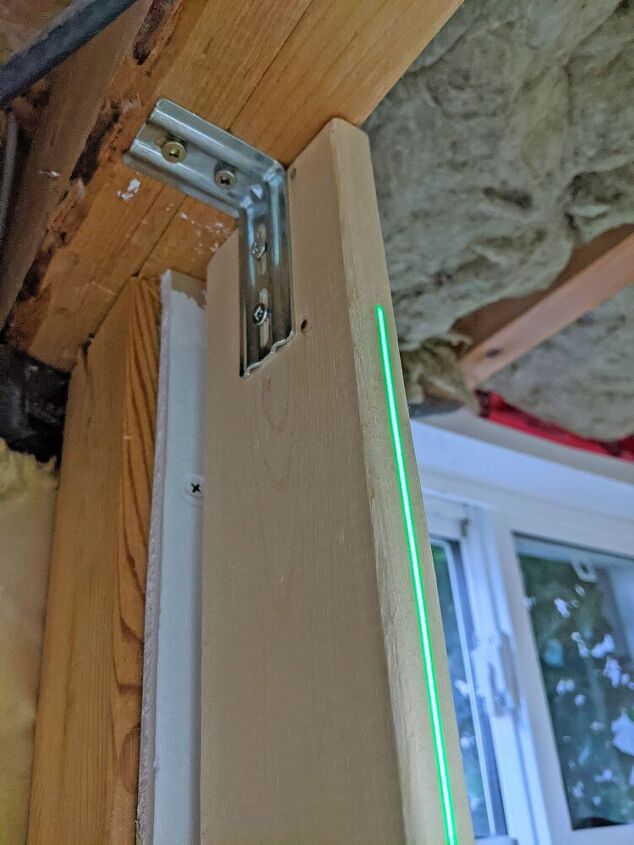
My plan was to do the same on the right. But I couldn’t get my laser level to line up with the stud. Of course, I blamed the laser. In my head "Piece of junk!! I'm throwing this unreliable tool away! What a waste of time!" After some fiddling, I discovered it was not the laser at all…it was the stud!! It was not straight. (Sorry awesome laser tool!)
I considered following the slanted stud, but decided that would be a poor choice. So I attached the flat bracket to the bottom end, and attached an L bracket to the top of the board and attached it to the studs in the ceiling, so I had a perfect 90 degrees. I yanked the board as hard as I could and it was solid! So fine, whatever works!
I didn’t put a board at the top because that’s where the wiring enters the house. And no doubt it will need to be accessed again at some point.
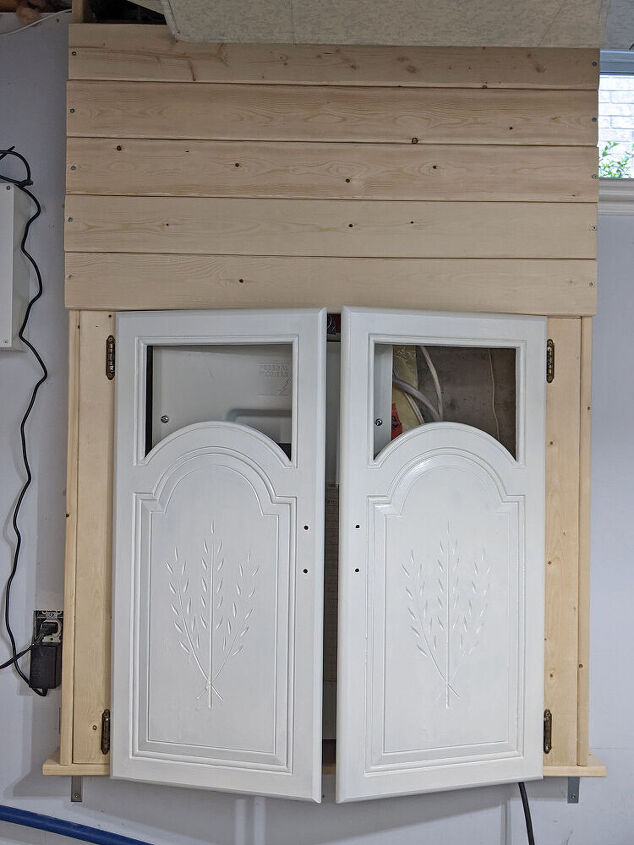
Next was to install side panels, so I would have somewhere to attach the doors. I cut my boards the height of the doors, minus 3/4” (the thickness of the bottom board) so the doors would line up with the bottom of the frame. I screwed the boards from the outside-in and from bottom-up.
Attaching the access doors
I attached the doors using their existing hinges and screws. This was a bit of a challenge, getting them straight and meeting in the middle. One of those times a third arm would have been super useful.

Filling in the gap
I cut five pieces of wood, the width of the frame, and screwed them on. I only used one screw on each end, so they can be easily removed if required. Because the screws are so close to the ends I pre-drilled holes to avoid splitting the wood.
Because the outlet for my wash machine is now inside the box, I cut a hole for the cord to come up through the bottom, using a hole saw drill bit.

Painting
I painted the doors white, three coats. I also spray painted the handles black.
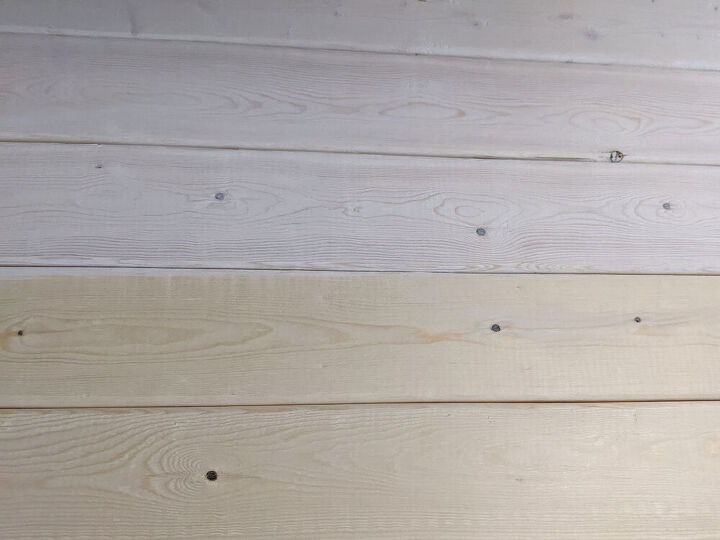
The wood looked a little too amber against the white doors, so I gave them a whitewash. I mixed two TBSP white paint with two TBSP water and applied it with a chip brush.
Glaze
I glazed the doors to make the details pop.
I sealed them with fusion clear tough coat first because I didn’t want the white to look 'dirty' from the glaze. I just wanted the details to stand out. I mixed glazing medium with charcoal paint, brushed it into the details, and immediately wiped back off.
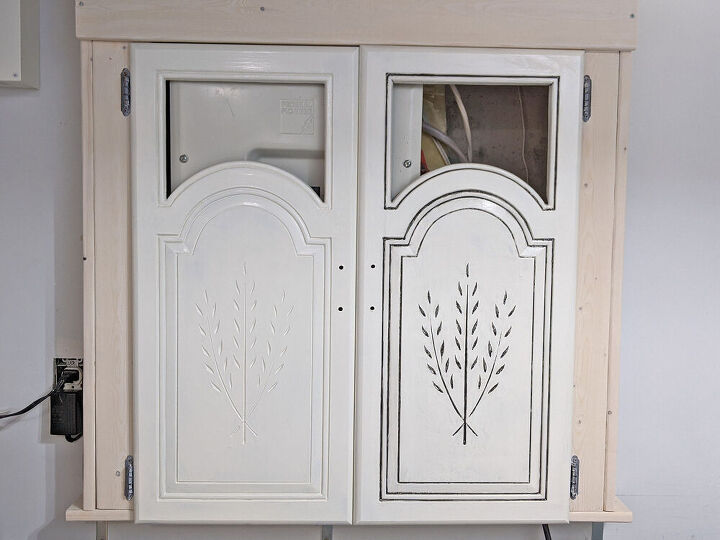
I re-attached the handles and put the mirrors back in place and done!
While my laundry room is still nothing special, I feel like the panel cover is a huge improvement! The only tools I needed to build it was a saw and a drill. And of course I used a laser level, but that could have just as easily been done with a regular old school level.
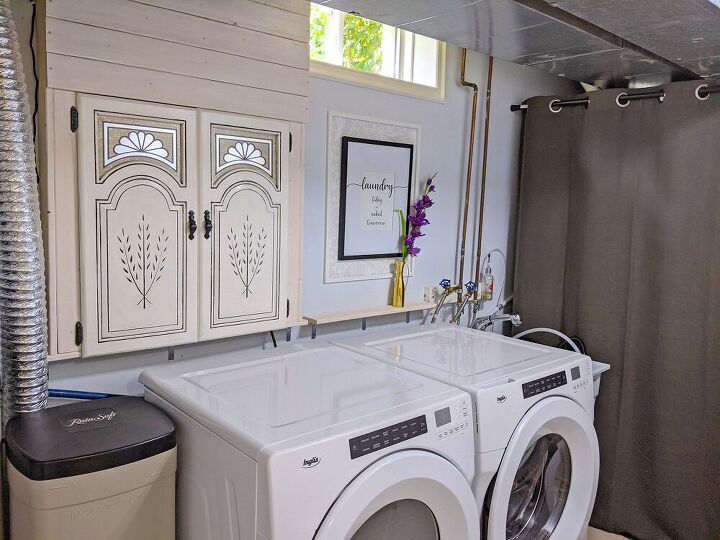
I did a few other small upgrades while I was at it. I used a leftover board from the panel project to make a little shelf and created a large-scale laundry sign using stuff I found around the house. If you’re interested in finding out how I created that, check back soon. I plan to post a step-by-step on how I did that for $0. 😊

Resources for this project:
See all materials


Comments
Join the conversation
-
Awesome job!!! Tyfs
-
Nice. I have some old cupboards that I think would work perfectly. Thanks for the ideas.


Frequently asked questions
Have a question about this project?
What did you use for the top portion of the doors?