


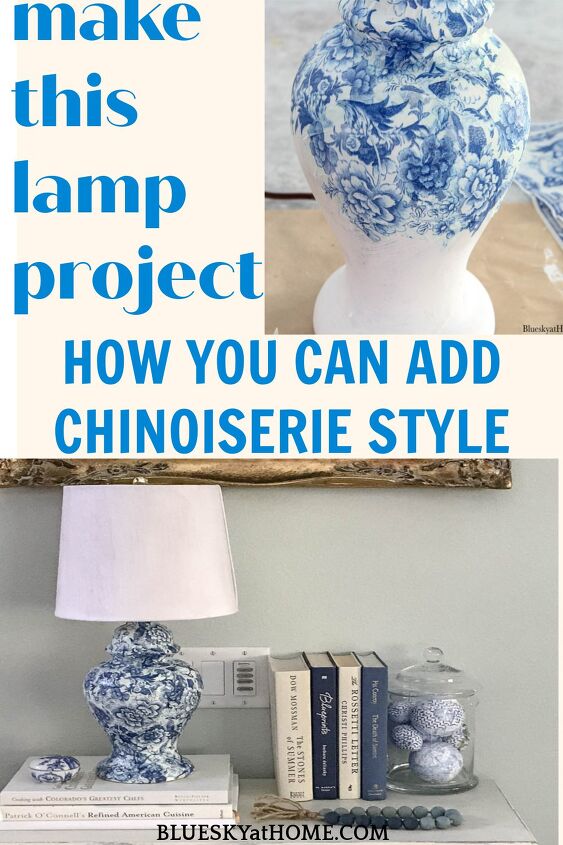
How to Make a Chinoiserie Style Lamp With Decoupage

I’ve gone a little decoupage crazy. My latest decoupage project is another You have to see how to make a chinoiserie style lamp with decoupage.
I’ve mentioned that I’ve become a bit addicted to decoupage. It’s such a fun and easy craft. The hardest part is choosing from tons of options and how to customize your chosen object.
I love it when I have a great project already in mind. All I needed was the right thing to work on. And then I found it. Accidentally. Out in the garage. Again.
So grab a glass of your favorite beverage (mine is sweet iced tea) and follow along as I share how I made this chinoiserie~style lamp with decoupage.
MAKEOVER A LAMP IN CHINOISERIE~STYLE WITH DECOUPAGE
This post contains links to products used in the creation of this project that I highly recommend. If you should order any product from this site, I may receive compensation but you do not pay a penny more.
I didn’t find this object at a flea market. I found it in our garage. Again.
You might remember the discarded planters that I found in the garage and revived with paint and gold leaf. Those turned out to be one of my favorite DIY projects in recent memory.
Then last week, as I was rummaging through the garage, I found this ginger jar lamp sitting on the floor. It was another one of those forgotten items that I had changed up years ago.
In this case, it started off shiny white and I painted it a matte charcoal grey. I even made a fabric~covered shade for it ~ that I didn’t find.
You can see all the scratches from being moved around. I’m surprised it didn’t break from neglect.
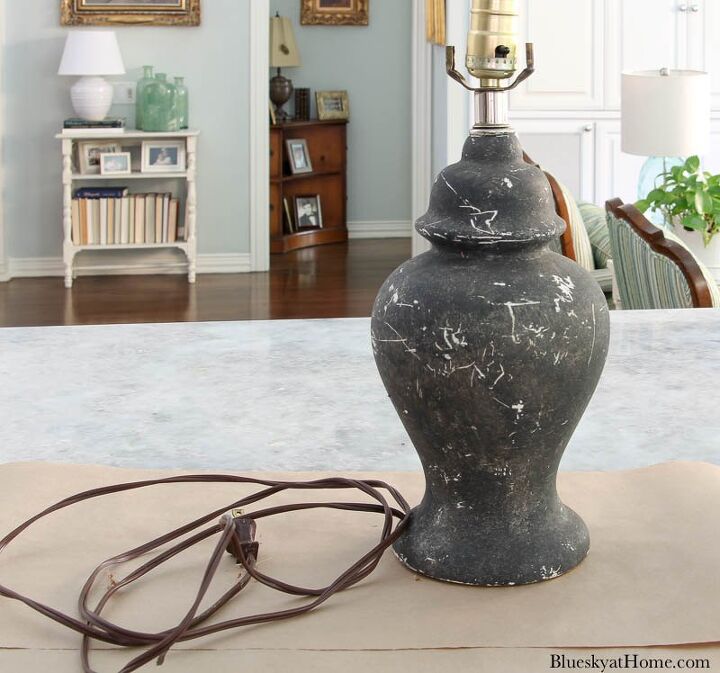
NOTE: I did check first to make sure that the lamp still worked! Do you remember this lamp project from our winter bedroom? Well, my $7 estate lamp bit the dust!!
The old ginger jar lamp was perfect for the project that I had in mind.
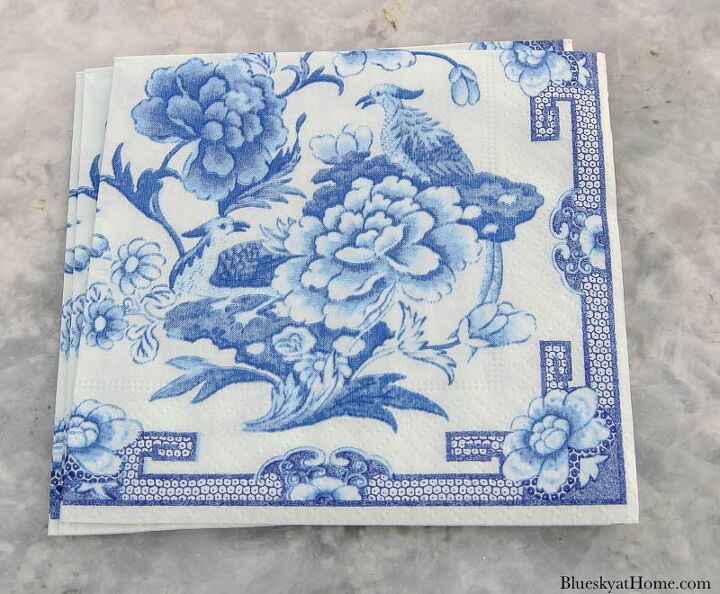
For a few weeks, I have been ordering blue napkins online in patterns I thought would be good candidates for decoupage items.
I loved these blue napkins which reminded me of a chinoiserie~style vase. I was just waiting for the right item. Now, with the discovered lamp, I had my item.
First, what is chinoiserie? I looked it up.
chinoiserie /ˌSHēnˌwäzəˈrē,ˌSHēnˈwäz(ə)rē/ ~ the imitation or evocation of Chinese motifs and techniques in Western art, furniture, and architecture, especially in the 18th century.
Notice the word “imitation”? My plan was to imitate and interpret my vision of a chinoiserie style vase as a lamp.
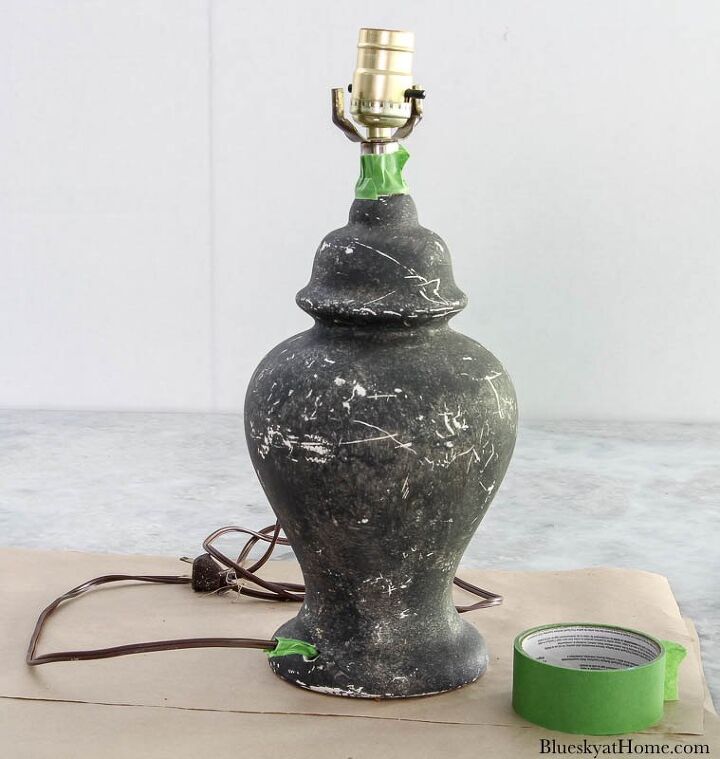
PAINTING MY CHINOISERIE~STYLE LAMP ~ STEP 1
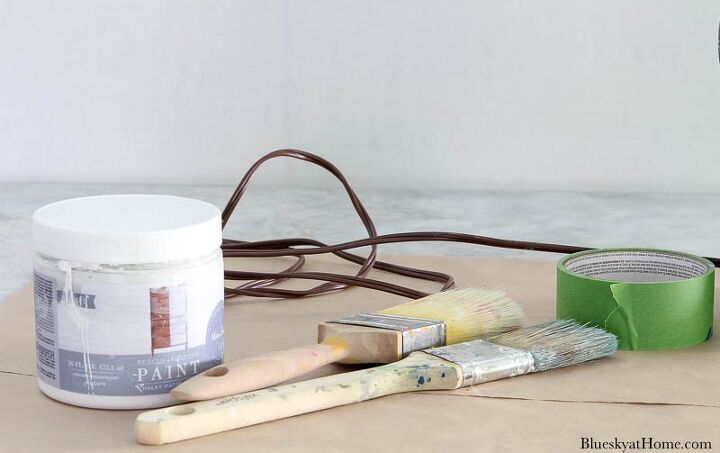
Besides the lamp and the napkins, I needed:
- craft paper to cover my work surface
- white paint to cover the lamp ~ I used Rescue Restore in Blessed from A Makers’ Studio ~ my favorite chalk paint
- painter’s tape
- brushes
I wrapped the painter’s tape around the top of the lamp mechanism and around the cord.
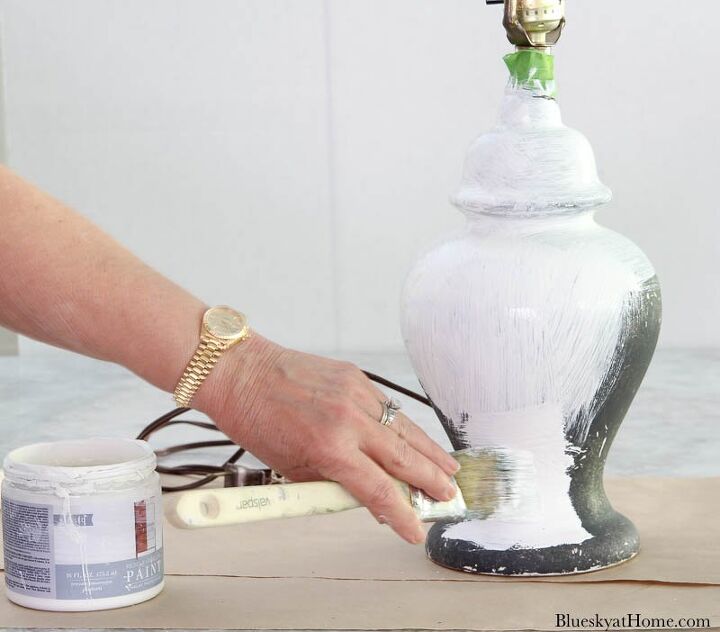
Next, using a 3~inch paintbrush, I painted the entire surface of the lamp. This took about 6 minutes. I let it dry for about 30 minutes.
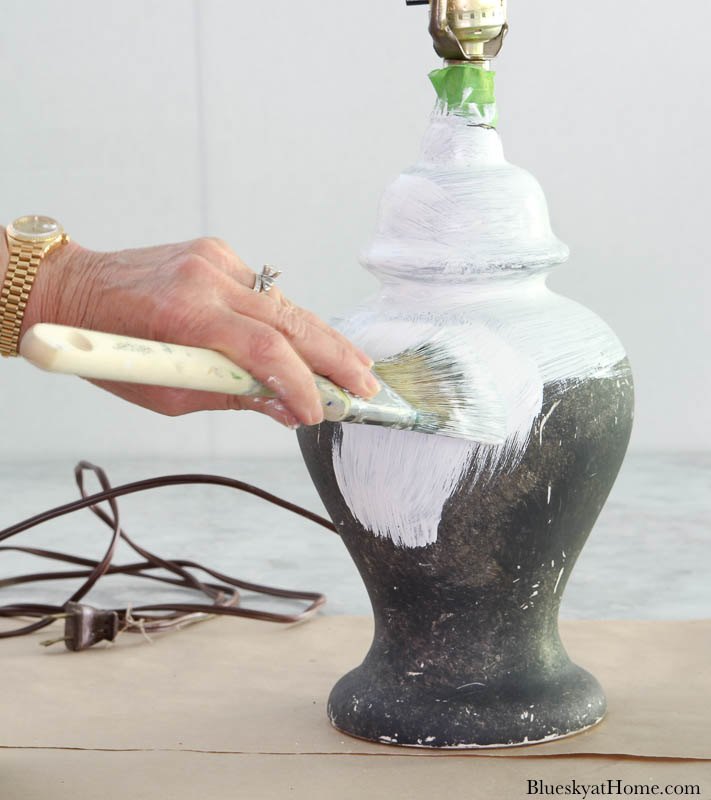
Since the lamp would be covered in Mod Podge and napkins, I just gave it one coat of paint.
DECOUPAGING THE LAMP ~ STEP 2
Now the fun really begins.
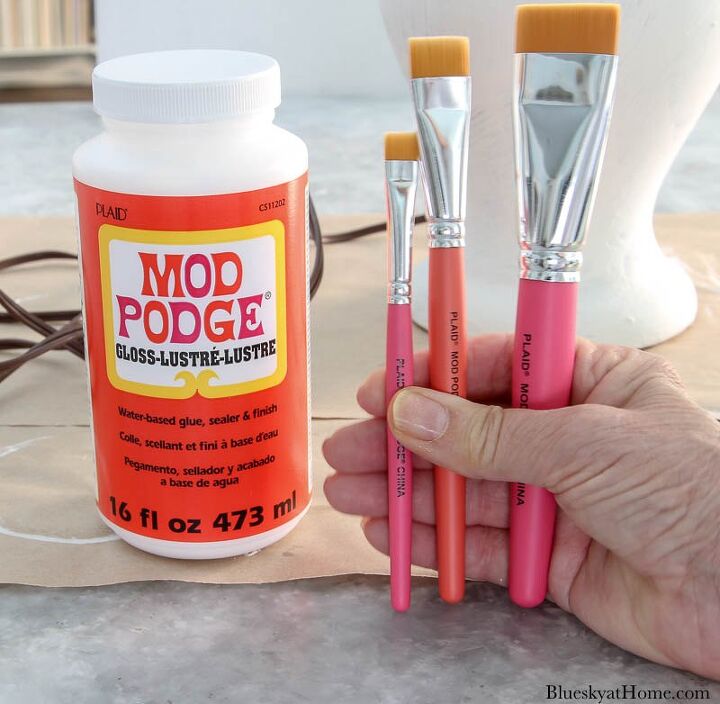
Supplies:
- Mod Podge in Gloss; ultra gloss would work too
- Mod Podge brushes; I decided to try these brushes. They definitely were better than using foam brushes.
- Napkins of choice ~ I love these blue~flower motif napkins
- scissors for cutting out motifs from the napkins
I estimated I would need 4 napkins. I unfolded them and removed the front layer from the back layer. You can discard the white back layer.
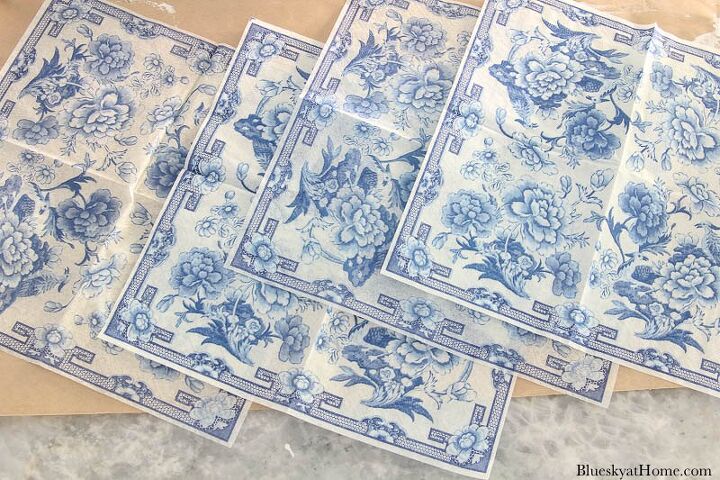
I wanted to have the large flower motifs on the lamp so I cut around the 4 distinct sections on each napkin.

Since my last decoupage project, I read that you should also apply Mod Podge to the paper as well as the surface that you are covering. That worked very well.
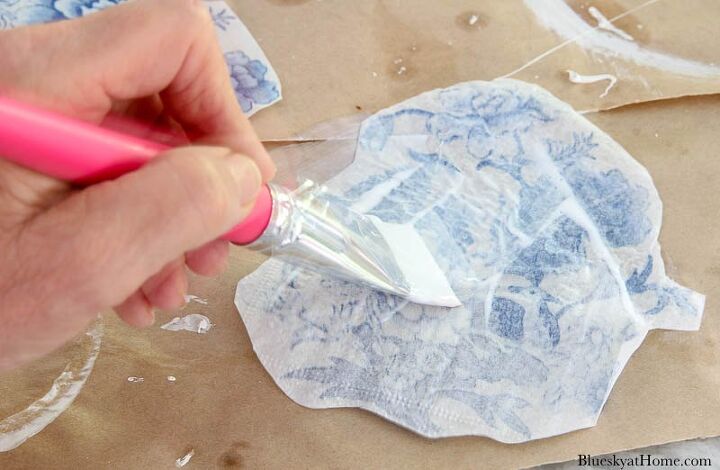
I brushed the Mod Podge in sections on the lamp, starting at the top. Applying the napkin pieces with Mod Podge worked great.
I worked my way down the lamp, slightly overlap the napkin pieces as I went.
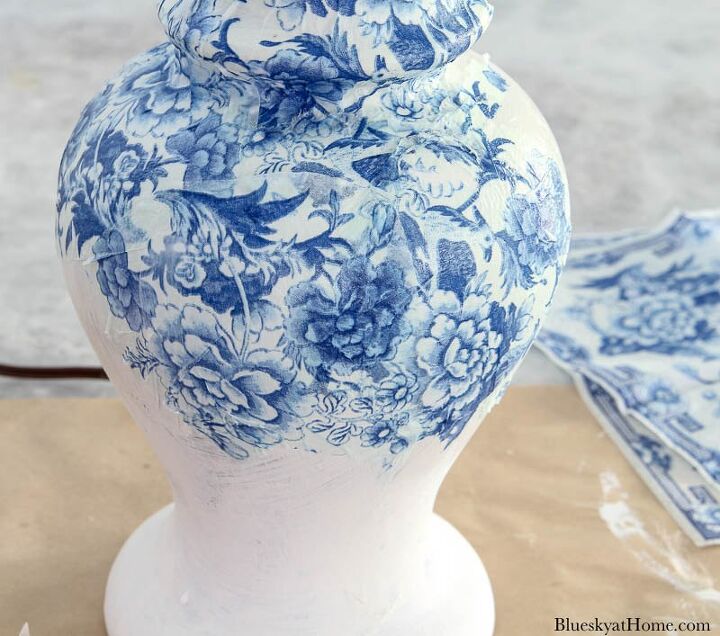
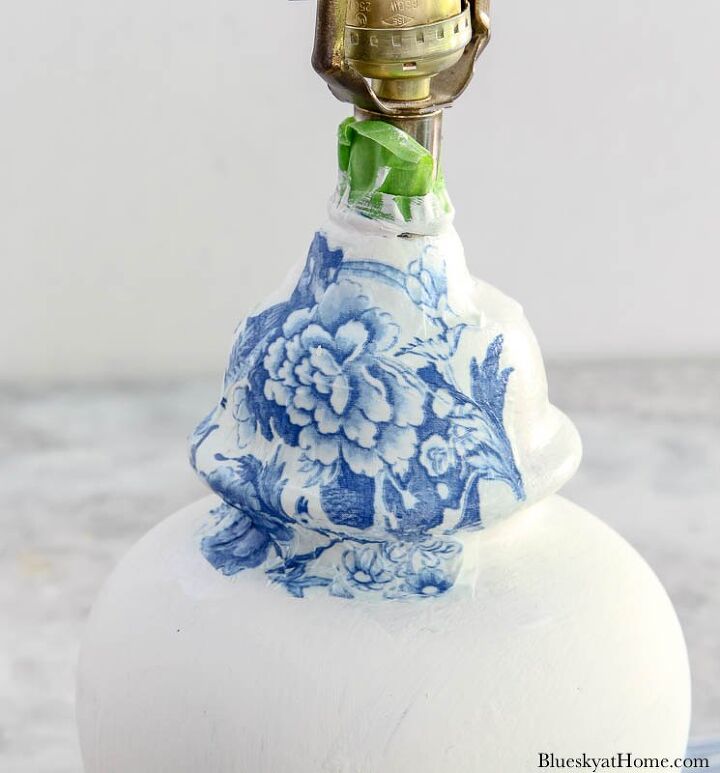
When I had covered 90% of the lamp, I cut out small pieces of a 5th napkin to fill in the small places that were not covered.
Finally, I went over the lamp with more Mod Podge, smoothing out places that were wrinkled.
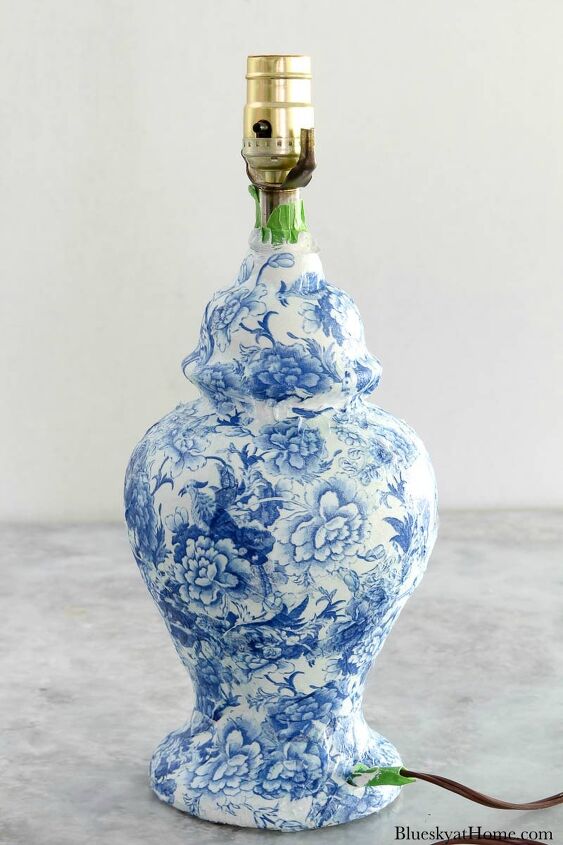
SEALING THE LAMP ~ STEP 3
I let the lamp dry completely overnight: it was about a total of 36 hours. I wanted the lamp to have a shiny finish ~ as a real ceramic lamp would. I bought Mod Podge Ultra~Gloss Spray Sealer.
Next, I wrapped the lamp switch with plastic wrap to protect it.

As well as the cord.
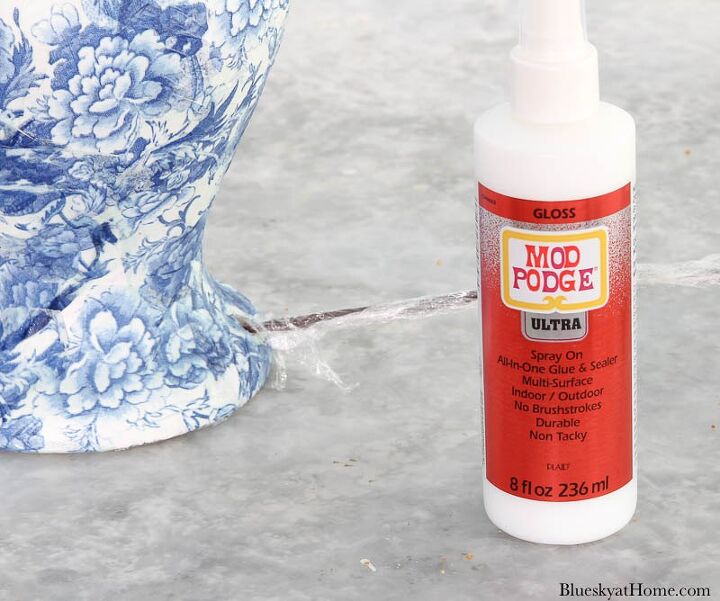
Fortunately, the day was sunny, but not windy. I took the lamp outside on our driveway and placed it on a newspaper.
Then I gave it a good coverage of the Ultra Spray. This product isn’t like spray paint. It feels more like you are spritzing with water. Unfortunately, I didn’t take a picture of that process.
I brought the lamp back in the house and let it dry overnight. It now had the shiny finish I wanted.
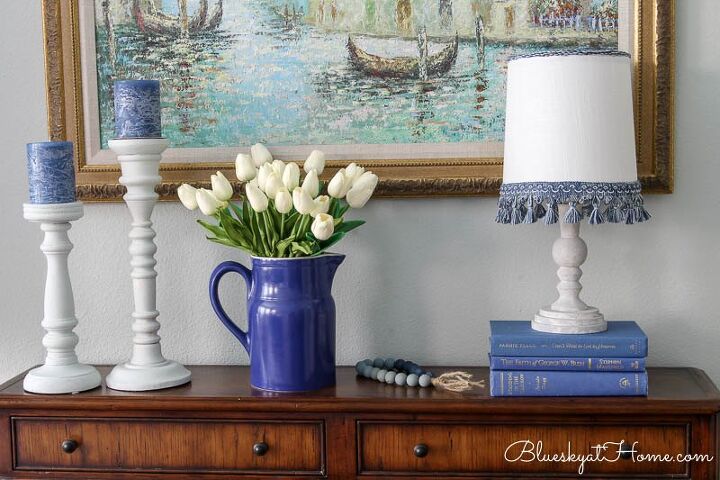
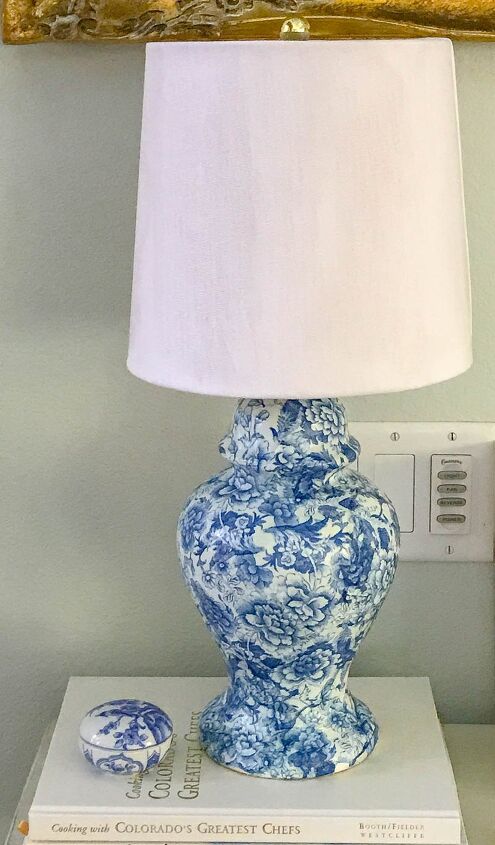
I loved the results. Even Sweet Shark thought the lamp was awesome. It needed one more thing ~ a lampshade. Guess what? That’s another project for another post! But here is a peek of the finished chinoiserie~style lamp with decoupage.
ALL THE SUPPLIES YOU NEED FOR THIS PROJECT
Pretty enough to PIN? I hope this chinoiserie~style lamp with a decoupage project inspires you to try decoupage or gives you a new idea for your decoupage projects.
Resources for this project:
See all materials


Comments
Join the conversation
-
I think I am actually inspired. Pretty.
-
That’s great, Patty. That’s what I aim for.


Frequently asked questions
Have a question about this project?