


PVC Pipe Lamp!

Building a pipe lamp is the best way to show people how awesome you are....no, that's a bad opener. Hold on.
Building a pipe lamp makes you smarter and...run faster..dang. Give me a second.
Adding a touch of industrial style is the perfect accent to any area of your home. A pipe lamp for example, is charming and building one grants you the ability to talk to animals....jeez! I can't do it folks. It's a pipe lamp. They look dope and weird and you either love them or hate them. I love them and this is how I made one.
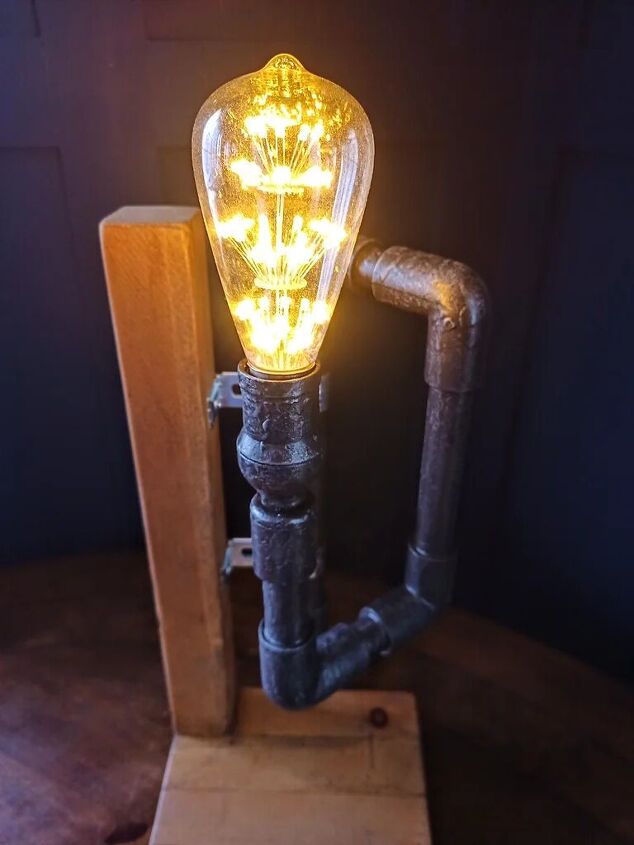
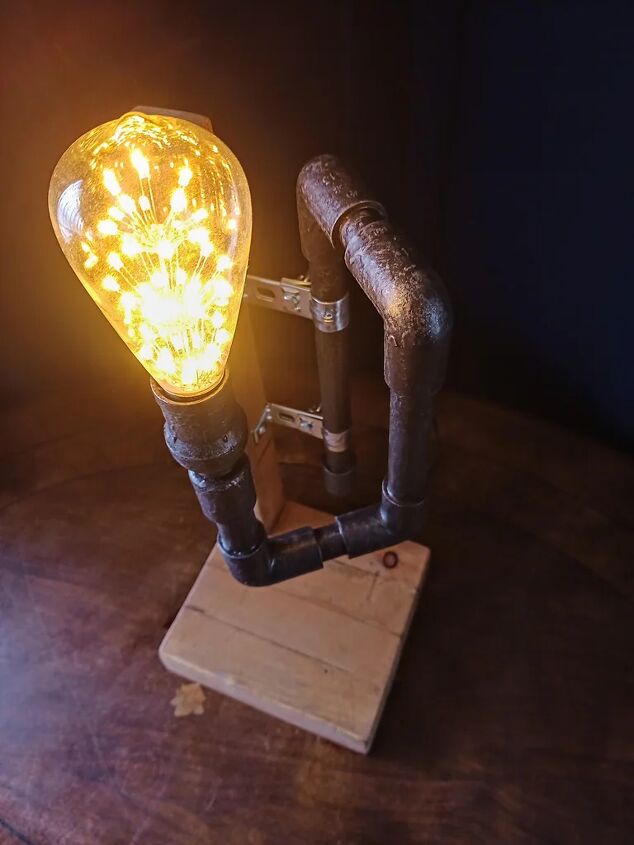
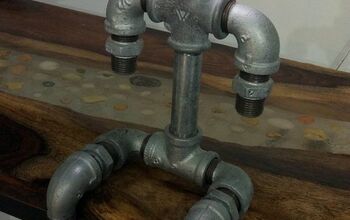
The finished lamp! I already had everything I used in the workshop, so I didn't need to buy anything. I also live in Japan and all of the materials were purchased locally.
Here's the list:
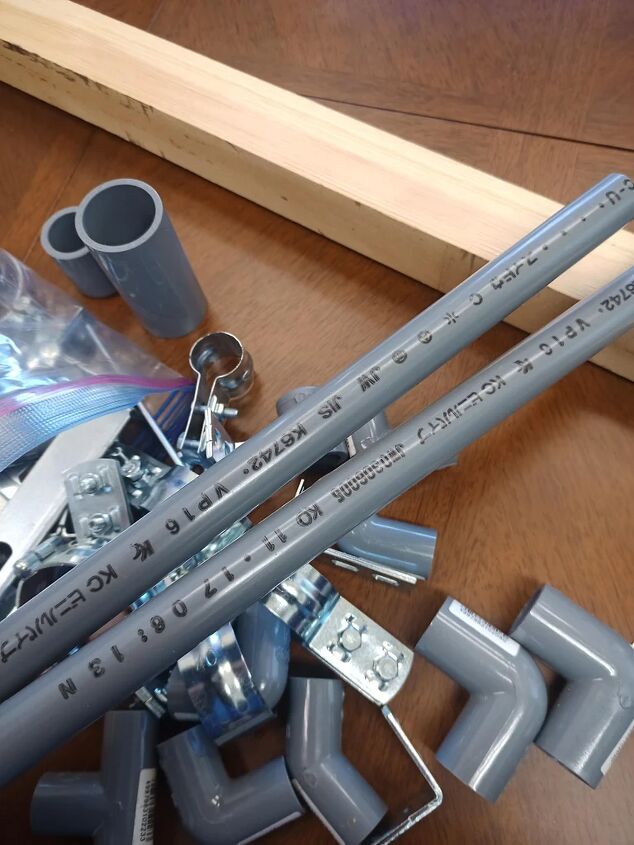
Pipe stuff
-60cm of 16mm PVC water pipe
-3x16mm elbow fittings
-2x16mm end caps
-2x16mm metal pipe clamps
-2x65mm long pipe supports
-PVC cement (glue)
-PVC pipe saw
Wood stand
-120cm of a 45x45 wooden post
-Cemedine Super XG*
*This is old multipurpose super glue I wanted to use up. Any wood glue will work.
-One 4.2x75mm wood screw
-Auger bit to make the hole for the screw used on the vertical piece of wood
-WATCO Oil stain
-Stain brush
-Random orbit sander
-Sandpaper
Electric stuff
-4m of SPT-2/18AWG lamp cord
-needle nose pliers
-E26 screw in light socket
-2 threaded cable grips
-Gorilla super glue for threads
-Panasonic plug
Painting the pipes
I found this German paint in Japan and it is awesome!!
It's a quick drying film that can be sanded to an iron sheen. If it's unavailable in your area, try Rust-Oleum specialty paints for plastic.
The start! I had no real plan or design going in.
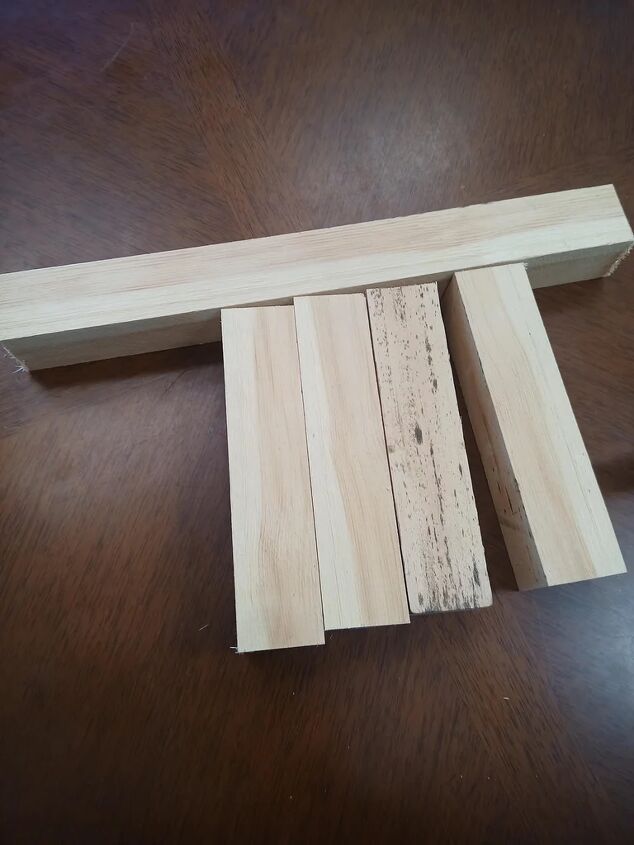
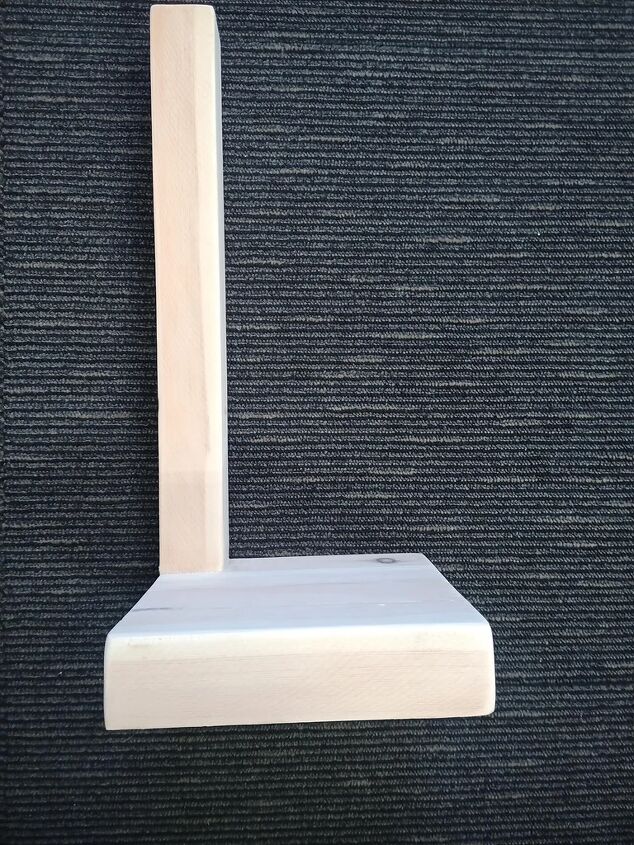
I had a 120cm/45x45 wooden post leftover from my Halloween projects. I cut it into five lengths.
The base is four lengths of 19.5cm and the vertical piece holding the pipe lamp is 40cm.
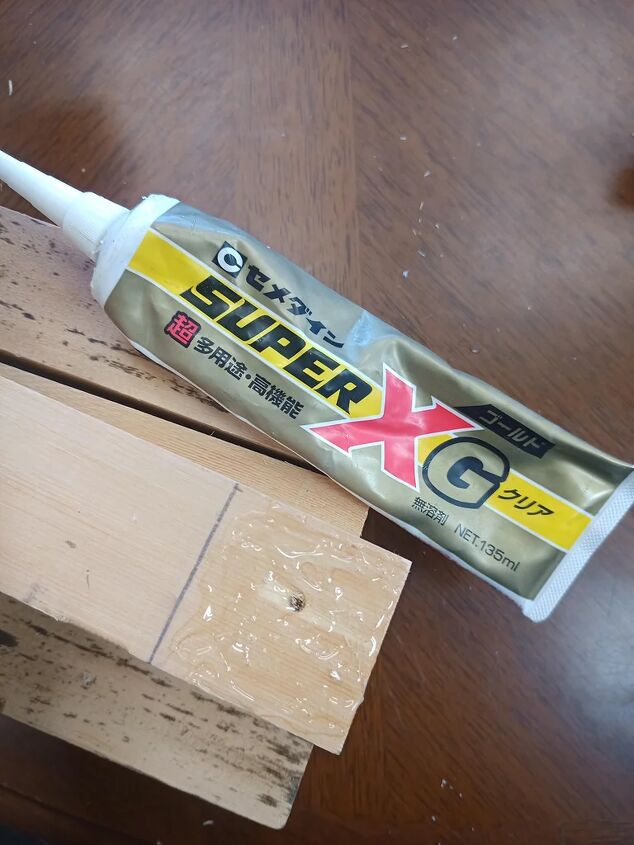
I had half of tube of Cemedine Super XG glue leftover from a ceiling project I did last year and it doesn't keep well, so I wanted to use it up. I used an augur bit to make a hole to sink the 4.2x75mm wood screw. I glued all of the base lengths together followed by the vertical piece and finally the screw.
*Cemedine Super XG is a one-part solventless, fast curing, highly durable super glue. It acts as contact cement on plastic too.
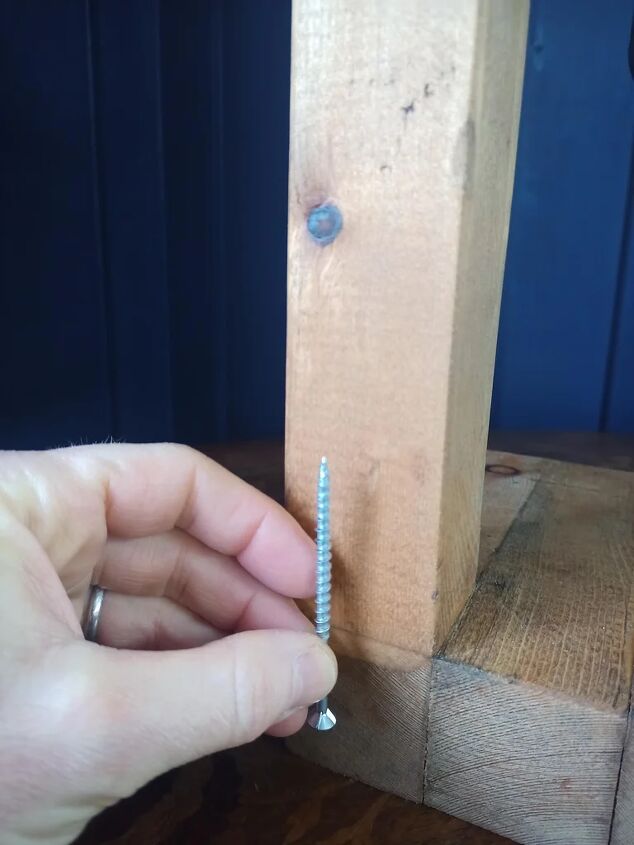
What the screw looks like for those of you who don't have x-ray vision.

I sanded the base using a random orbit sander starting with sandpaper and finishing with 320
So smooooooth!
Exactly as smooth as that Santana song.
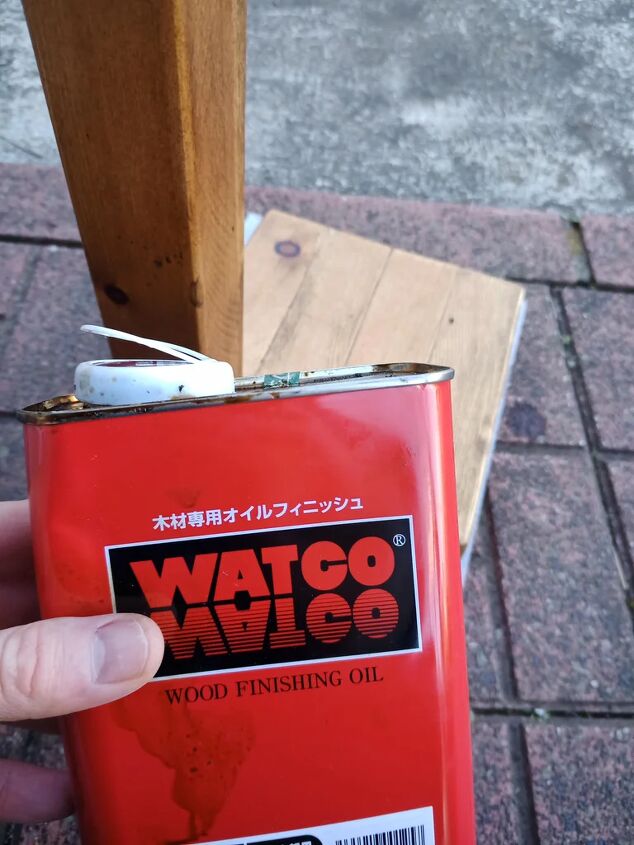
I stained with WATCO medium walnut oil stain.
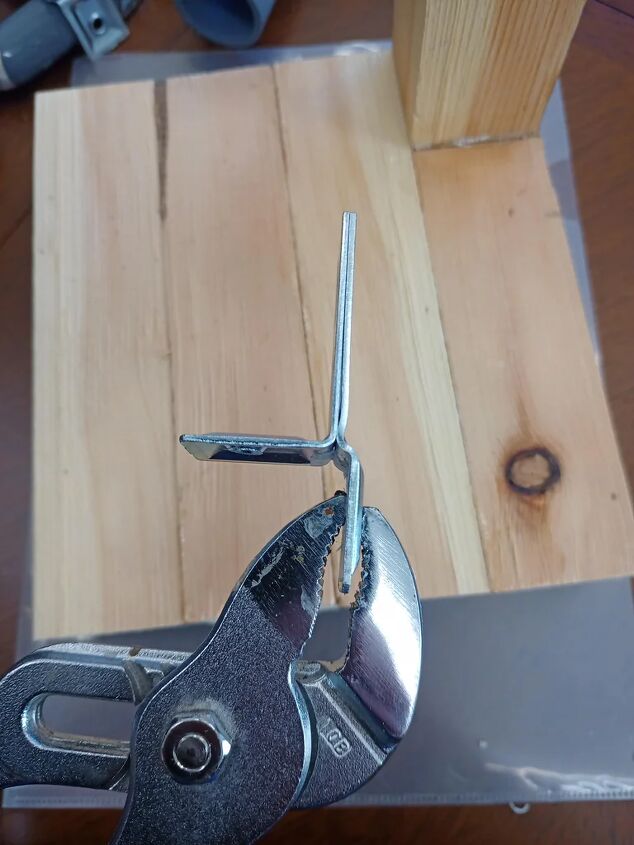
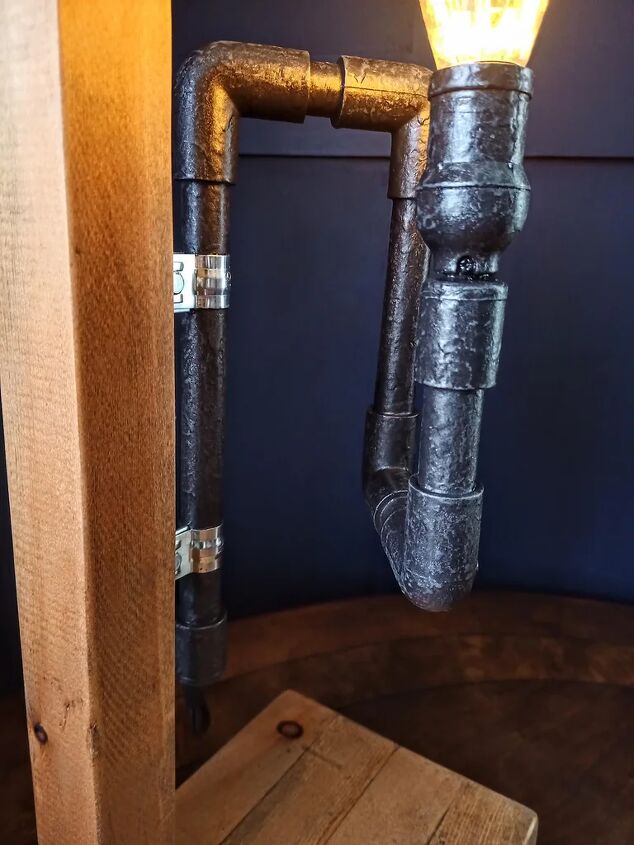
I attached the pipes to the wood using two 65mm pipe supports. I used my mind to bend the ends to create 90 degree angles.
You can use pliers.
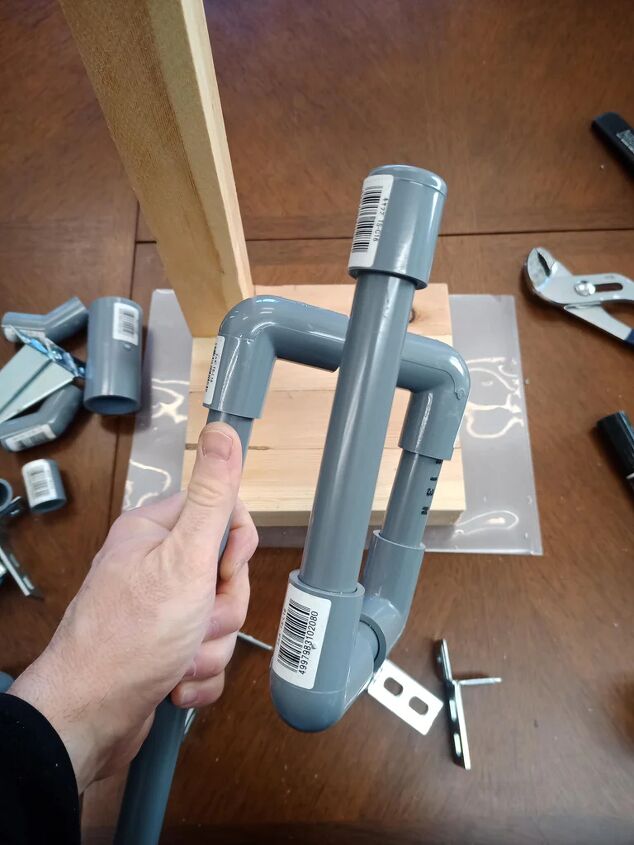
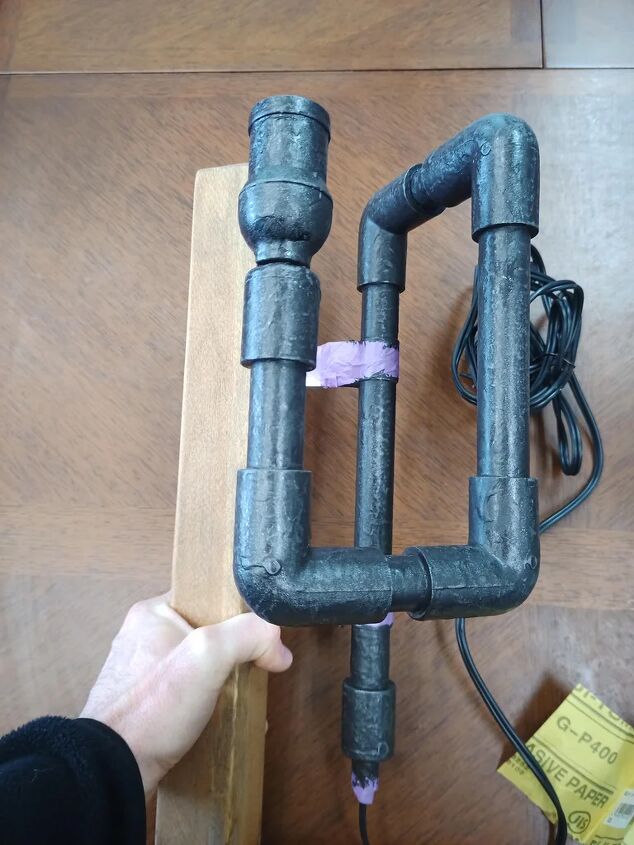
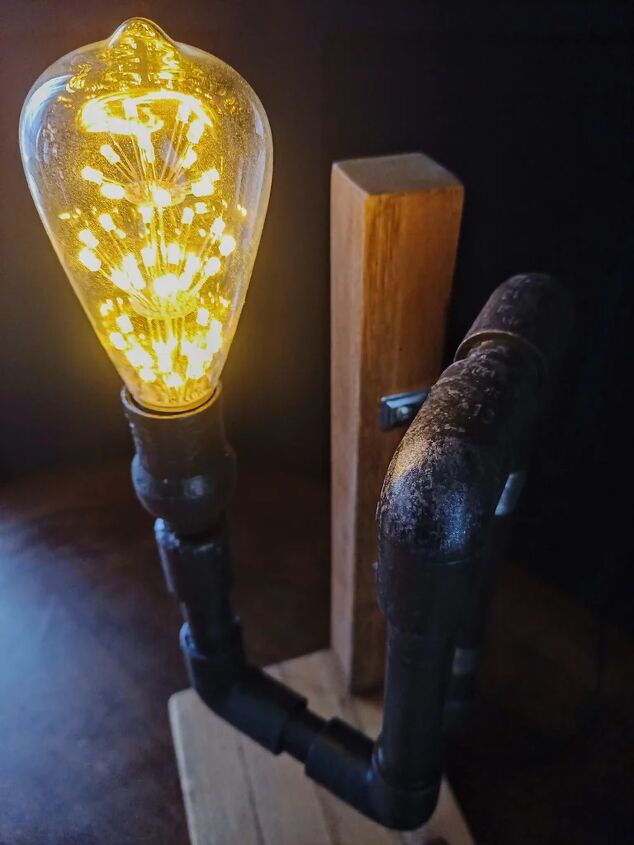
There it is! I had three elbows and two end caps and this is what I came up with. What would you have created?
It goes without being said, but:
Electrical work should only be carried out by a competent person.
*Someone who has the necessary skills. knowledge and experience*
I had the lamp cord, light socket, cable grips and plug in the workshop already, all leftover from other projects.
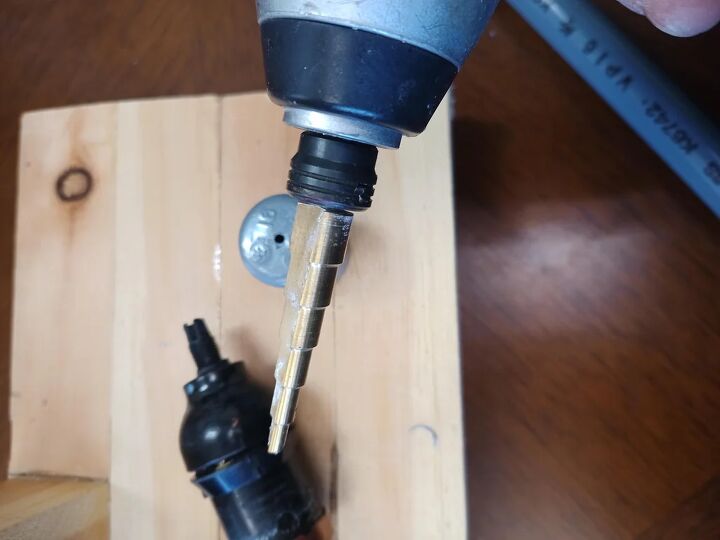
I started by making a guide hole with a regular bit for the stepped bit. I made the hole just big enough to screw in the cable grips and added a drop of Gorilla super glue to the threads. The cable grips have a screw on cap and you'll need needle nose pliers to tighten the cap inside the PVC end cap on the end the socket is installed.
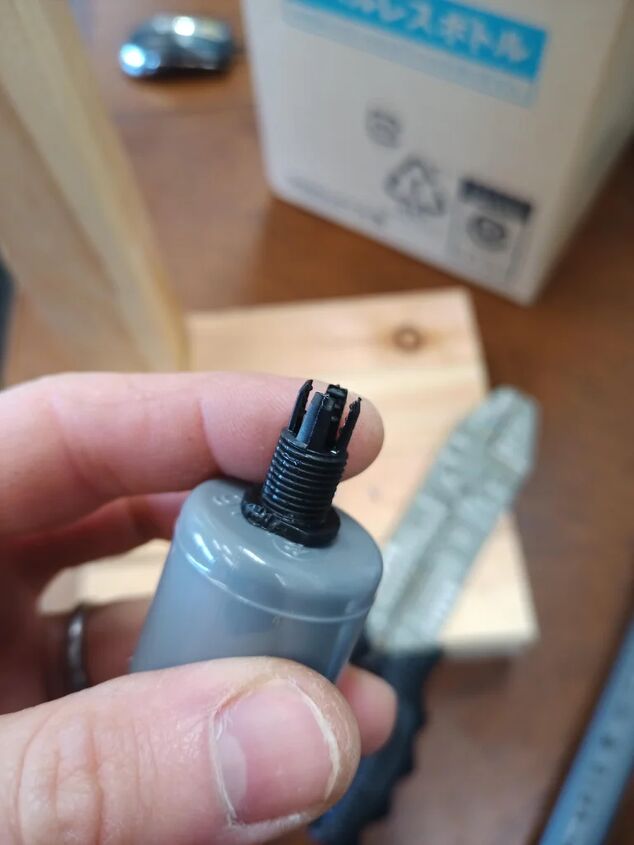
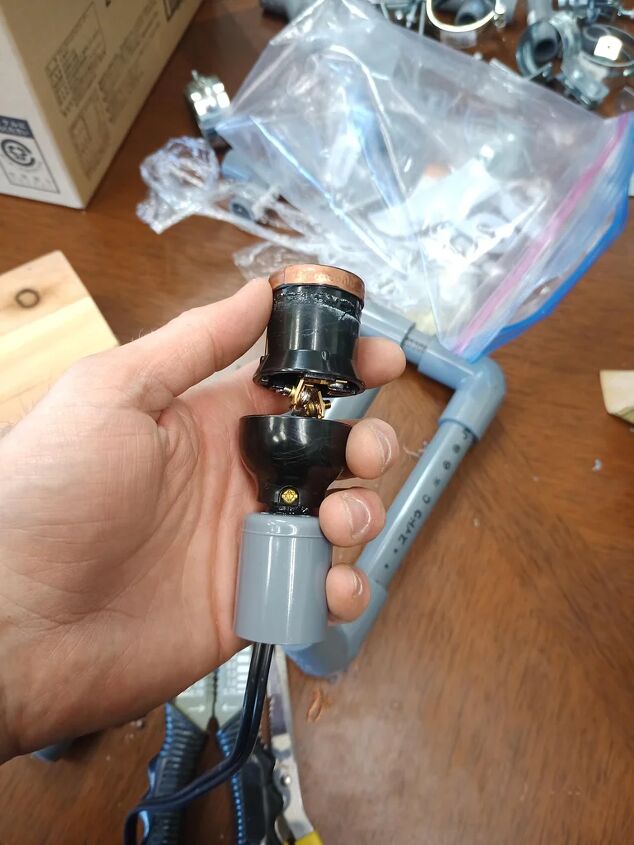
This is the bottom cap, where the plug end leaves the lamp.
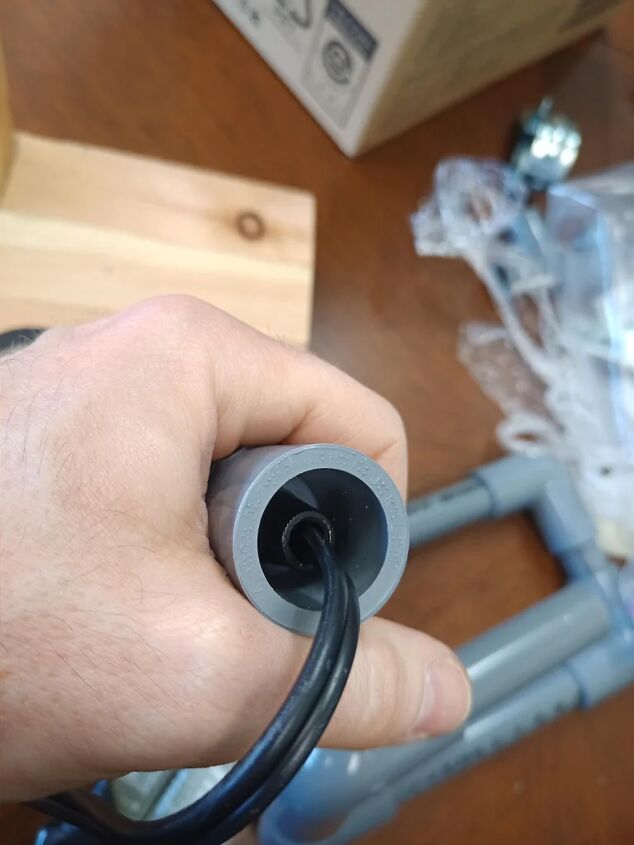
Inside the end cap that attaches to the socket.
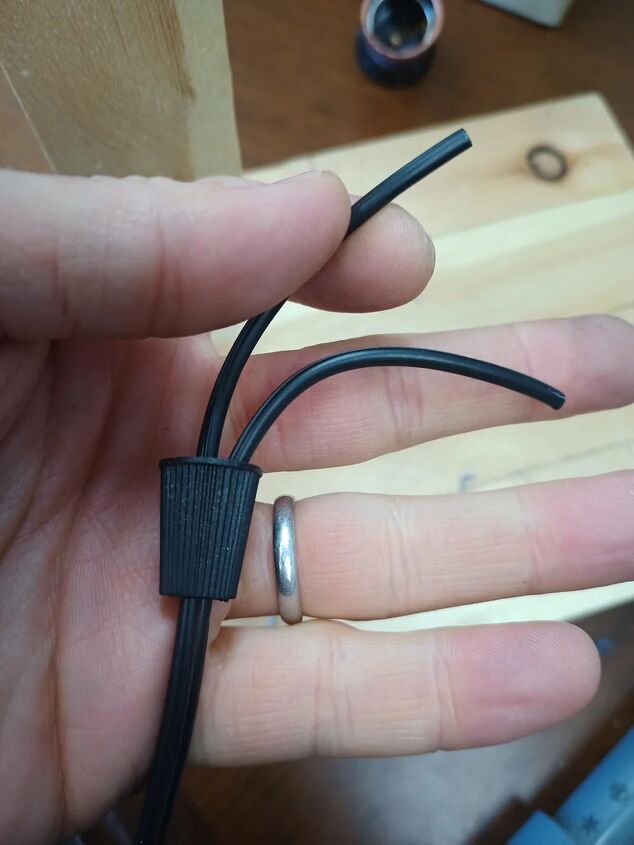
Cable grips stop the lamp wire from yanking out. If you drill the holes for the cable grips too big, don't worry. There's not enough room in the pipes to make a knot, so use a heavy duty zip-tie on the cord as a stopper inside the PVC end caps.
Once the light socket is on, feed the lamp cord through the pipes, cementing the pipes together as you work.
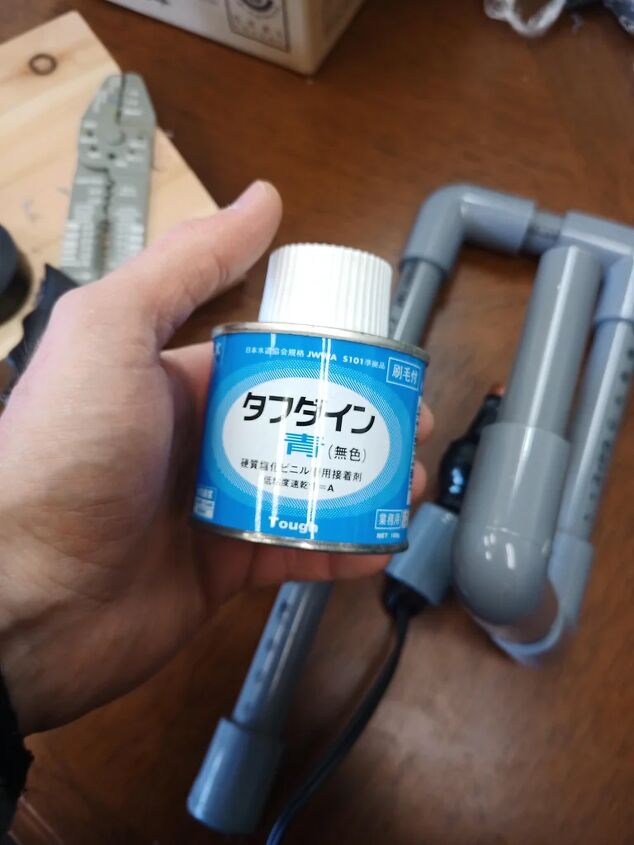
PVC pipe cement.
*I added the plug at the end of the project.

Progress.

The lamp attached to the base.
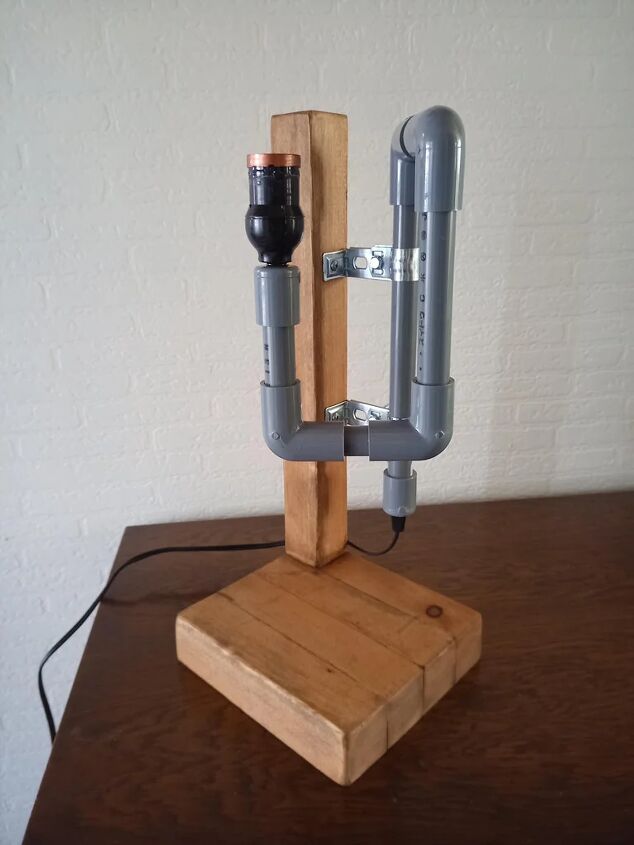
It's looking good!

On goes the plug.
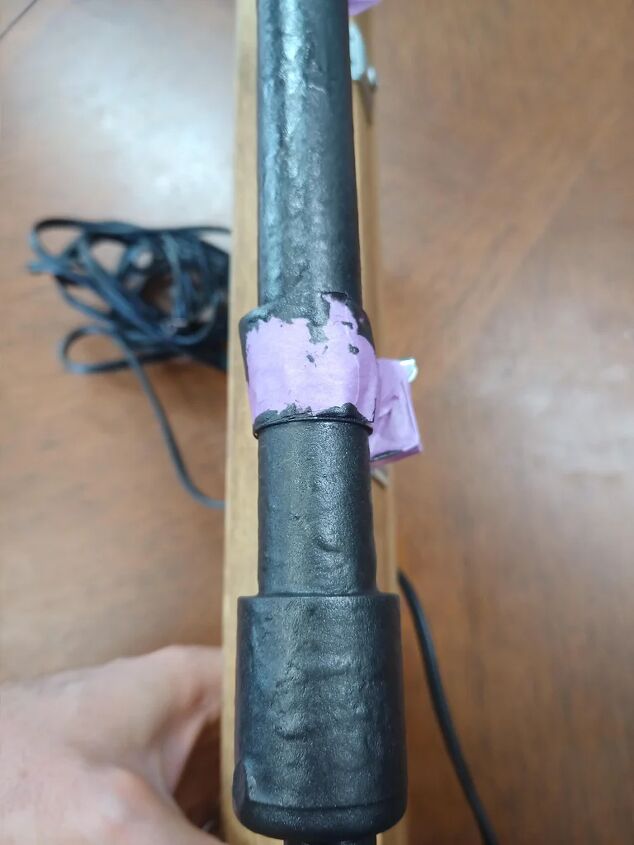
The first coat! This paint has a heavy texture, so I was worried I wouldn't be able to fit the clamps on if I painted first. As you can see, I covered the clamps with painters tape and painted around them.
Second coat!
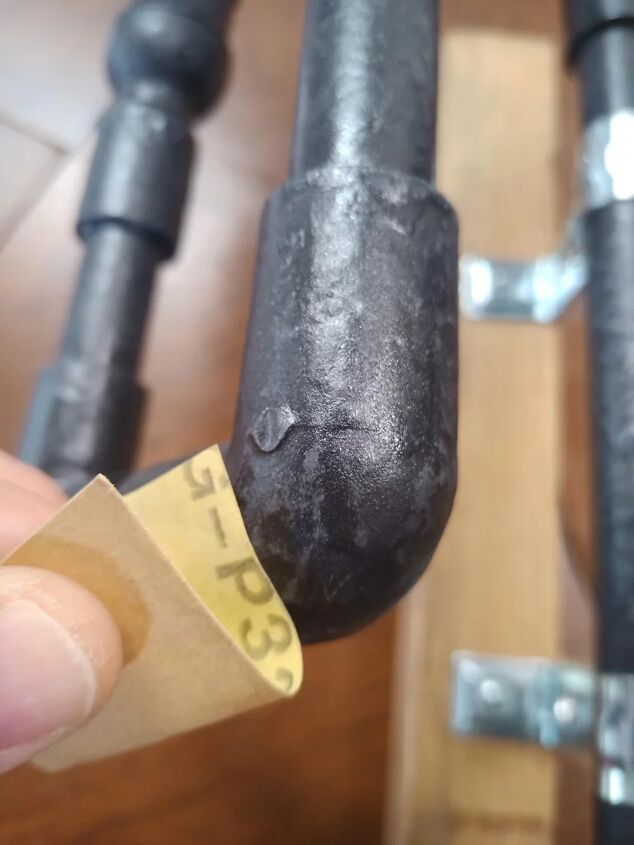
So, it took two coats of paint to build up a nice heavy texture. This paint can be sanded to an iron sheen, so I took sandpaper and lightly sanded the entire thing. This paint is awesome!!
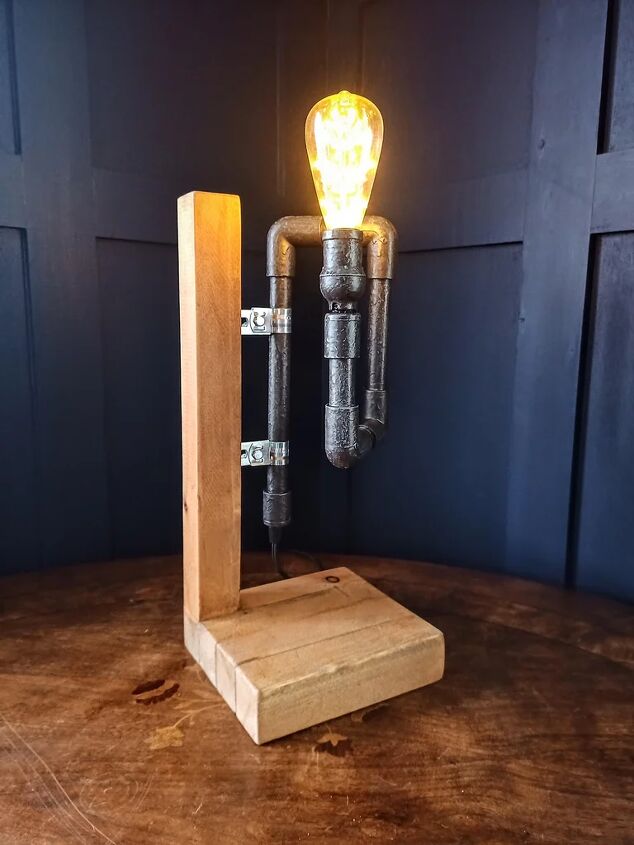
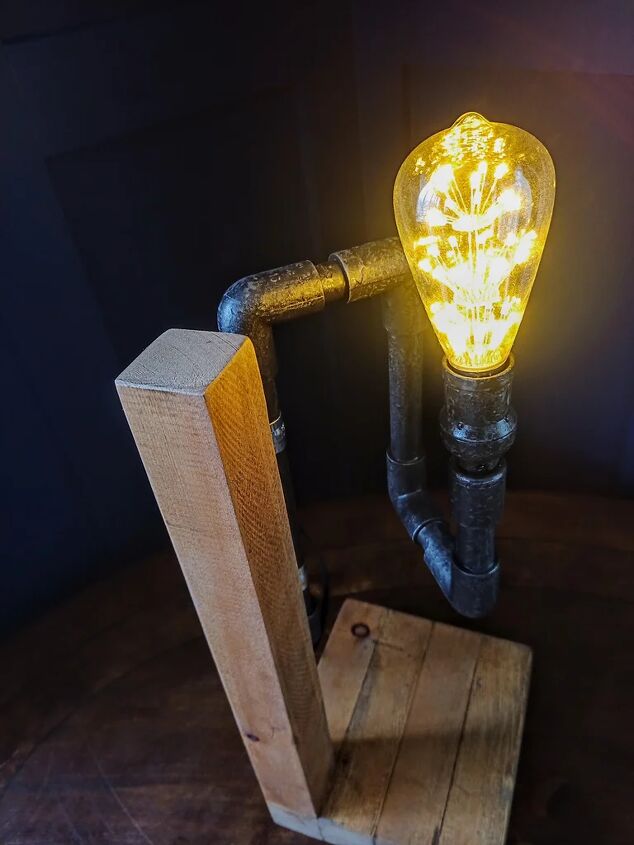
Finished!

Wow!
Holy moly!

...more pics?
We get it Bryan..
This better be the last one.
...
Resources for this project:
See all materials


Comments
Join the conversation
-
I liked the project, I loved the humor : )
-
This is so cool. Love it. You are funny.


Frequently asked questions
Have a question about this project?
What kind of paint did you use? I love how it turned out.